
Finally, its done.....
 06-29-10, 06:22 AM
#1

UPDATED SUEDE PICS ARE IN POST # 99
As a lot of you know i started gathering parts back in like 2008,well, im done (98%) and this is the COMPLETE list of parts
3 boxes of 10465 Bulk Dynamat
50 feet of 0 gauge and bout 30 feet of 4 gauge wiring
Gen 4 Nav Ecu
Custom Made Prestigious Society Nav Override Unit (To Enter Directions On The Fly)
Nav Tool EE0246 (bought from a group buy on here months ago 10/28/08 to be exact) https://www.clublexus.com/forums/clu...interface.html
KCA-SC100 Sirius Tuner
Stinger SPD5621 Power Distribution Block
Stinger SPD5202 Inline Fuse Holder
Stinger SPI6317 6 Channel Stereo Interconnect RCA's
Stinger SPD514 Power Distribution Block
Stinger SPT53303 Negative Battery Terminal
Stinger SPT53103 Positive Battery Terminal
Stinger SHDA1 Inline Fuse Holder (added Precaution on my alternator BIG 3)
Stinger SHDA1 Inline Fuse Holder (for rear battery)
Exonic EXR300 Rear View Camera (Installed in Keyhole)
Alpine VPA-B222 Vehicle Hub Pro (used to interface everything through the factory screen)
Peripheral Peswiakjc Steering Wheel Control Interface
Diamond Audio D662 Front Components
Diamond Audio D662 Rear Components
Diamond Audio DTK Aux Tweeter Kit (upgraded to the D662 tweeter and used in the ML in dash speaker)
RE Audio XXX 12" Sub
Fatboxusa.com Custom Box
Orion HCCA25001 Amp (Powering The Sub)
Orion HCCA10004 Amp (Powering The Components)
Kinetik HC2400 Battery (In The Trunk)
Kinetik HC1800 Battery (Under The Hood)
Kinetik KMS-24 Battery Sleeve
Kinetik KHC-TP Power Top Posts
Iraggi 320 Amp Alternator
BIG 3 O Gauge Grounding Kit (With Extra Grounding Wires Cause I Had Extra Wires)
Power Acoustic PADVD-450 1/2 Din DVD Player
KCE-4221 Ipod-ALP-B Ipod Cable
CD-1B100 Pioneer Ipod Adaptor
my prestigious society remote and my bass controller are in the ashtray
remote for the alpine was cut into the armrest and the armrest was re-upholstered
The actual build started when my factory NAV ecu crashed on me and i updated to a gen 4 unit

i started tearing down my car in early feb of 2009 as i had gathered up a fair amount of parts and i thought this would be a quick build....boy was i wrong.I broke a supra TT differential and I got hurt at work and was on light duty for several months in the middle of this and that put a dampener on this then so i started gathering up parts again. had the sub and everything designed/setup already and then decided to change subs after seeing a member on here with a white gs with 2 banging *** RE subs. i sold my old pioneer shallow mount and bought a RE AUDIO XXX 12" sub
out with the old


and in with the new


well since the rear interior was already out (i had cut the 12" pioneer shallow mount to fit)

i decided to start dynamatting my car and went WELL overboard on this, even removing the sunroof and ALL my interior except the dash to do this


i was also trying to do SEVERAL projects during this time so everything was moving slowly.some went fine, some were disasters
WIN
https://www.clublexus.com/forums/gs-...vo-motors.html
https://www.clublexus.com/forums/gs-...mp-sensor.html
https://www.clublexus.com/forums/gs-...over-done.html
https://www.clublexus.com/forums/gs-...and-radio.html
Actually just picked up a spare ML radio and will finish this one soon
https://www.clublexus.com/forums/gs-...ator-bulb.html
i didnt start this one but i did it also
https://www.clublexus.com/forums/gs-...el-filter.html
FAIL
https://www.clublexus.com/forums/gs-...ast-night.html
https://www.clublexus.com/forums/gs-...-i-failed.html
so in the middle of this build i also bought my greddy exhaust, my TTE lip, my TTE Grill

yada yada. bought and sold my gen 1 S&S headers and my 18" G-spyders before even installing them.my greddy exhaust i got from a member on here.....i found out when getting it someone cut and extended the tips (Op I bought it from says it wasnt him but who knows) since they stick out to far and the welds looked awful i decided temporarily to paint the welds black and polish the cans up so when they were installed it wasnt really noticeable


i will soon cut them and shorten them after i mount and dyno these
https://www.clublexus.com/forums/per...abricator.html
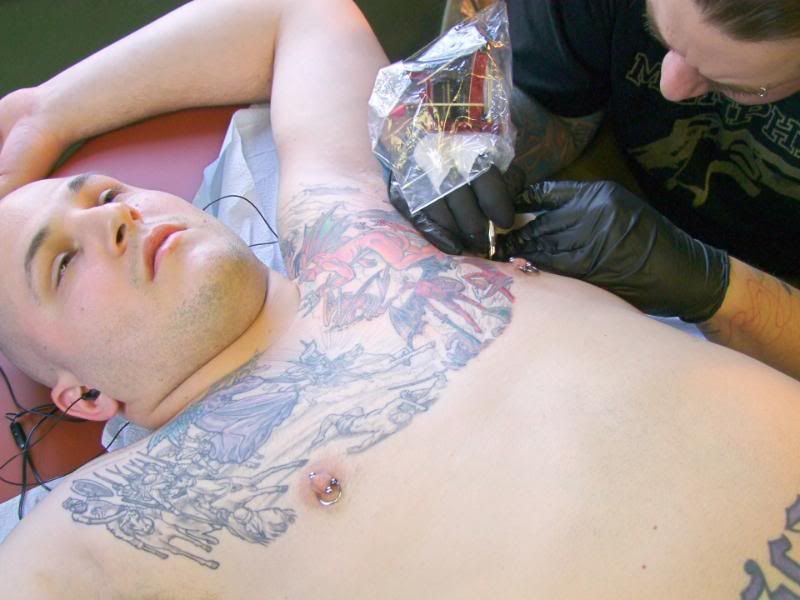
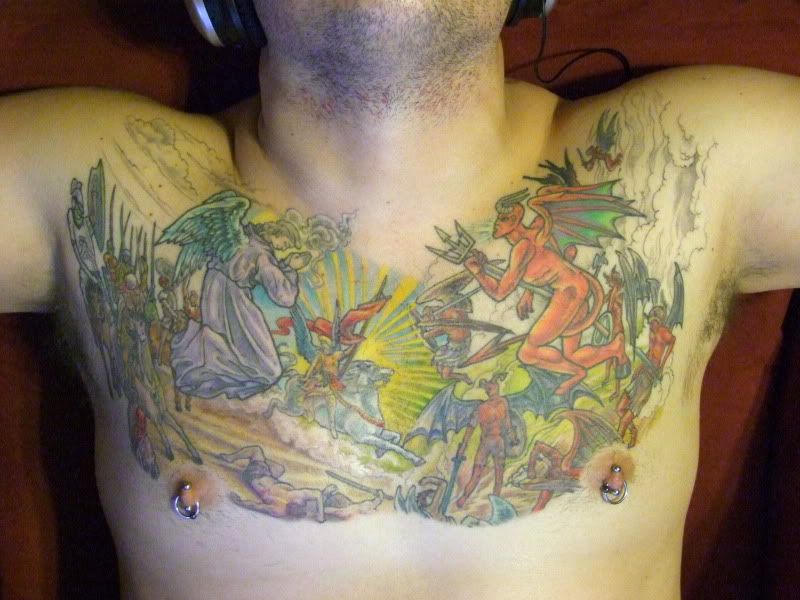
anyways in the middle of this build i also took some time (ie money) of to work on my chest piece......i got my 7th and 8th session of work done on my chest (each session is about 3-4 hours)
i have about 1-2 sessions left. still have to do color on the left side top and then color on the right side top

As a lot of you know i started gathering parts back in like 2008,well, im done (98%) and this is the COMPLETE list of parts
3 boxes of 10465 Bulk Dynamat
50 feet of 0 gauge and bout 30 feet of 4 gauge wiring
Gen 4 Nav Ecu
Custom Made Prestigious Society Nav Override Unit (To Enter Directions On The Fly)
Nav Tool EE0246 (bought from a group buy on here months ago 10/28/08 to be exact) https://www.clublexus.com/forums/clu...interface.html
KCA-SC100 Sirius Tuner
Stinger SPD5621 Power Distribution Block
Stinger SPD5202 Inline Fuse Holder
Stinger SPI6317 6 Channel Stereo Interconnect RCA's
Stinger SPD514 Power Distribution Block
Stinger SPT53303 Negative Battery Terminal
Stinger SPT53103 Positive Battery Terminal
Stinger SHDA1 Inline Fuse Holder (added Precaution on my alternator BIG 3)
Stinger SHDA1 Inline Fuse Holder (for rear battery)
Exonic EXR300 Rear View Camera (Installed in Keyhole)
Alpine VPA-B222 Vehicle Hub Pro (used to interface everything through the factory screen)
Peripheral Peswiakjc Steering Wheel Control Interface
Diamond Audio D662 Front Components
Diamond Audio D662 Rear Components
Diamond Audio DTK Aux Tweeter Kit (upgraded to the D662 tweeter and used in the ML in dash speaker)
RE Audio XXX 12" Sub
Fatboxusa.com Custom Box
Orion HCCA25001 Amp (Powering The Sub)
Orion HCCA10004 Amp (Powering The Components)
Kinetik HC2400 Battery (In The Trunk)
Kinetik HC1800 Battery (Under The Hood)
Kinetik KMS-24 Battery Sleeve
Kinetik KHC-TP Power Top Posts
Iraggi 320 Amp Alternator
BIG 3 O Gauge Grounding Kit (With Extra Grounding Wires Cause I Had Extra Wires)
Power Acoustic PADVD-450 1/2 Din DVD Player
KCE-4221 Ipod-ALP-B Ipod Cable
CD-1B100 Pioneer Ipod Adaptor
my prestigious society remote and my bass controller are in the ashtray
remote for the alpine was cut into the armrest and the armrest was re-upholstered
The actual build started when my factory NAV ecu crashed on me and i updated to a gen 4 unit
i started tearing down my car in early feb of 2009 as i had gathered up a fair amount of parts and i thought this would be a quick build....boy was i wrong.I broke a supra TT differential and I got hurt at work and was on light duty for several months in the middle of this and that put a dampener on this then so i started gathering up parts again. had the sub and everything designed/setup already and then decided to change subs after seeing a member on here with a white gs with 2 banging *** RE subs. i sold my old pioneer shallow mount and bought a RE AUDIO XXX 12" sub
out with the old
and in with the new
well since the rear interior was already out (i had cut the 12" pioneer shallow mount to fit)
i decided to start dynamatting my car and went WELL overboard on this, even removing the sunroof and ALL my interior except the dash to do this
i was also trying to do SEVERAL projects during this time so everything was moving slowly.some went fine, some were disasters
WIN
https://www.clublexus.com/forums/gs-...vo-motors.html
https://www.clublexus.com/forums/gs-...mp-sensor.html
https://www.clublexus.com/forums/gs-...over-done.html
https://www.clublexus.com/forums/gs-...and-radio.html
Actually just picked up a spare ML radio and will finish this one soon
https://www.clublexus.com/forums/gs-...ator-bulb.html
i didnt start this one but i did it also
https://www.clublexus.com/forums/gs-...el-filter.html
FAIL
https://www.clublexus.com/forums/gs-...ast-night.html
https://www.clublexus.com/forums/gs-...-i-failed.html
so in the middle of this build i also bought my greddy exhaust, my TTE lip, my TTE Grill
yada yada. bought and sold my gen 1 S&S headers and my 18" G-spyders before even installing them.my greddy exhaust i got from a member on here.....i found out when getting it someone cut and extended the tips (Op I bought it from says it wasnt him but who knows) since they stick out to far and the welds looked awful i decided temporarily to paint the welds black and polish the cans up so when they were installed it wasnt really noticeable
i will soon cut them and shorten them after i mount and dyno these
https://www.clublexus.com/forums/per...abricator.html
anyways in the middle of this build i also took some time (ie money) of to work on my chest piece......i got my 7th and 8th session of work done on my chest (each session is about 3-4 hours)
i have about 1-2 sessions left. still have to do color on the left side top and then color on the right side top
Last edited by sakataj; 10-11-11 at 03:02 PM.
 06-29-10, 06:23 AM
#2

Right before i drop it off at the shop, i have a member from here (who im calling out) hook me up with Prestigious Society and they made me a custom override box for my Gen 4 NAV
https://www.clublexus.com/forums/gs-...ification.html
so i finally get the car into the shop and i REALLY decide to step it up, changed and sold BOTH the amps i had and bought two major ORION amps....and sat down with my installer to get some ideas rolling around...well, we finally decided on everything and started working
my parts and interior laying around


the 3 major guys working on my car (From L To R) Alex (the genius behind the majority of the build), Paul, And Mike


Box Design

Kinetik Battery Tray Mounted

And Then Scrapped For A Custom One

Re-soldering And Wiring In The Nav Bypass Tool


Wiring Being Run


Components Mounted

Next Up Was The Mock Up Of The Trunk


While The Car Was In The Shop, I Finally Got A Few Things In Like My 320 Amp Iraggi Alternator. i drove up to La Vergne to see Dominique from Iraggi to install this alternator he built and a built while he was at it. i think the belt was smaller....and the #'s are K060876 or 6Pk2224


Before They Wrapped Up Everything, They Cut A Hole Into My Rear Deck For The Port

Last edited by sakataj; 07-19-10 at 10:55 AM.
06-29-10, 06:23 AM
#3
So FINALLY Here You Go Guys.....The Completed Pics
Alpine VPA Hub Remote Control Cut Into Armrest And Re-Upholstered


Amp Racks (Orion HCCA25001 Sub Amp On The Left, Orion HCCA10004 Component Amp On The Right)

Sub Mounted


Components Installed


Battery And Fuse Holders Mounted


Rear View Camera


DVD/CD Player In Glovebox


Knocked Up In Full Screen

The Goonies In Wide Screen


Screen Showing All The Components

Sirius Tuner On

There Still Are A Few Things Im Working On....
Im gonna pull the wood around the amps and run one solid LED around the amp openings so they light up evenly, the alternator should be installed by the 9th, and im making a piece to go in the ashtray that will hold the Orion bass controller AND the Prestigious Society Remote....
keep in mind guys this is unfinished, im working on this one as we speak. so in these pics it still needs some more filler to smooth and fill the lines, more sanding,a final spray and some clearcoat but this gives you a general idea of what it will look like (the tape is still around the buttons so it def looks odd and all the wood grain is off until im done working on this)


Alpine VPA Hub Remote Control Cut Into Armrest And Re-Upholstered
Amp Racks (Orion HCCA25001 Sub Amp On The Left, Orion HCCA10004 Component Amp On The Right)
Sub Mounted
Components Installed
Battery And Fuse Holders Mounted
Rear View Camera
DVD/CD Player In Glovebox
Knocked Up In Full Screen
The Goonies In Wide Screen
Screen Showing All The Components
Sirius Tuner On
There Still Are A Few Things Im Working On....
Im gonna pull the wood around the amps and run one solid LED around the amp openings so they light up evenly, the alternator should be installed by the 9th, and im making a piece to go in the ashtray that will hold the Orion bass controller AND the Prestigious Society Remote....
keep in mind guys this is unfinished, im working on this one as we speak. so in these pics it still needs some more filler to smooth and fill the lines, more sanding,a final spray and some clearcoat but this gives you a general idea of what it will look like (the tape is still around the buttons so it def looks odd and all the wood grain is off until im done working on this)


