My retrofit experience
 08-10-11, 06:54 PM
#1

Hello all,
I wanted to share my retrofit experience and reviews on some of the products I used.
I've been unhappy with my GS driving visibility at night for the longest time. I didn't want to go the PNP hid kit route that would blind oncoming traffic. I have the luck of owning a S2000 too, and shes' got a real proper cut-off. I couldn't have my GS out done, so my lust for a retrofit began.
After researching different methods, I wanted the easiest retrofit possible with the added bi-xenon capability. My search led me to the FX-R and luxury mod bracket combo. No cutting required, minimal effort, and for a some-what affordable price. I was sold.
From the Retro fit source (TRS), I ordered:
Morimoto 35w ballasts w/ D2S 35w 5k bulbs
Morimoto FX-R's
E55 shrouds
From Luxury Mods (LM), I ordered:
Luxury Mod retrofit brackets
I received the luxury mod brackets first and had good initial impressions. Nice thickness and material should hold up over time/heat.
Since my projectors were arriving a few days later, I went ahead and started taking the car apart in anticipation. Took my headlights out and baked them apart (250 for 10mins). Removed the chrome bezel and took out the reflector bowl. The dismantling of the headlights wasn't as bad as I had originally thought. I was intimidated with destroying or disfiguring my headlights, but after I opened up the first one, the next was a breeze.
My first problem was transferring the adjustment/retaining clips from the bowl to the LM bracket. There is one retaining clip ( attaches to a metal ball ) that wouldn't fit. The LM clip hole was a tad small and I also noticed it was tapered. After muscling that problematic clip into place, the other two ( ones that attach to the lateral / medial adjustments) went in no problem.
Second problem was the exact same for the other side. The bottom clip which attaches to the metal ball would not fit. Since these brackets are mirror images of one another, the tapered side of the hole was now against me. I sanded the clip, I tried to sand away at the hole, but the clip would never lock into place. It would stay wedged in very tight, but just imagining if I hit a hard bump the clip would just pop out.
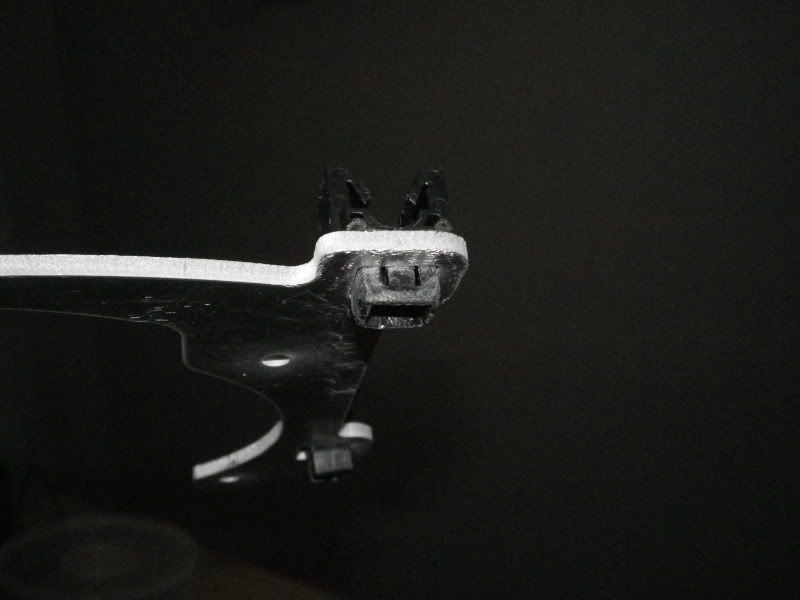
Picture of my mangled clip, notice how it isn't locked in.
So I contacted LM, and told them my situation. They replied that I must have received a one-off bracket. With my projectors arriving in a day or so, I decided to just man up and epoxy that clip in place. Hopefully no one will experience this problem and knowing my bad luck, it was just a one-off.
TRS package arrives, and I go into beast mode. I rip the boxes to shreds just wanting to get to the meat, my projectors. Open the first few boxes to reveal the ballasts and bulbs, the next to show me some shrouds, and lastly the projectors.
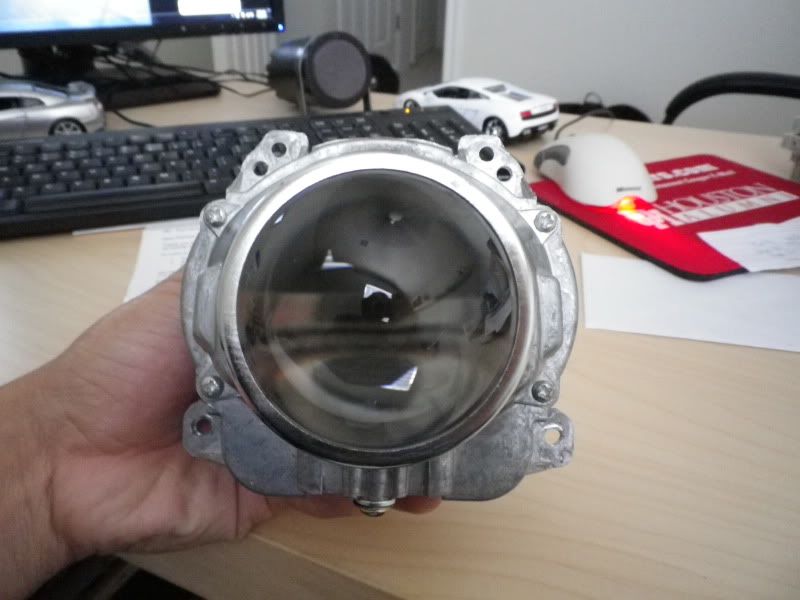
First thing I do is grab the LM brackets to see if they match up, and guess what? THEY DON'T!!!! I put my tetris skills to the max, and got fed up. I looked at the projector and remembered they didn't look anything like the stock photos on TRS's website. Contacted TRS, and they said they haven't had a chance to put up photos of the newer version ( 2.0 ) which I received.
For reference, this is what you do NOT want if you are using the LM bracket.
It seemed my options were to ship back the new FX-R versions for the older ones at my expense, just buy the old FX-R version, or just don't use the bracket.
My car was apart, I'm pissed, and didn't want to have my car down any longer than it had to be. I searched and found a local guy who sells these projectors for a cheaper price. My main concern was that they were not the same older version that TRS sells, so I brought my LM brackets along to do a test fit.
Pigs must have flown, Hell must have frozen over, because this local vendor carried the projector that fit the LM bracket AND for a cheaper price. He said he didn't have a website up but left me with his email. project.ors.order@gmail.com
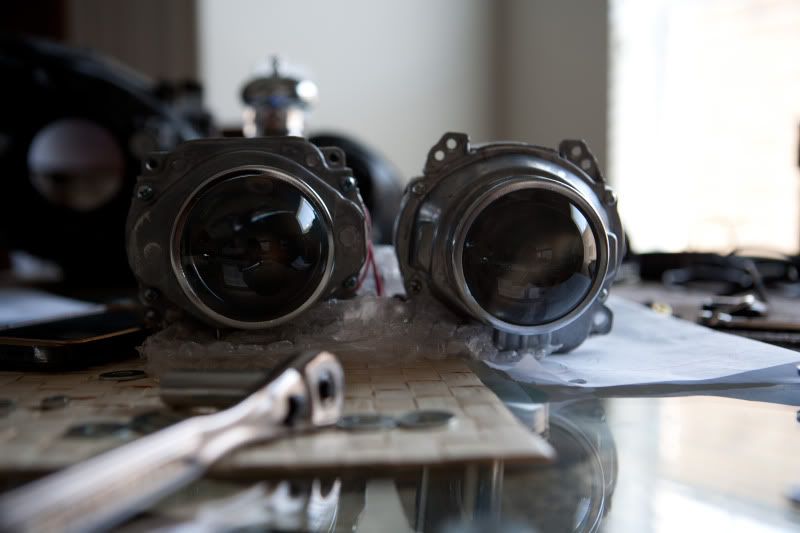
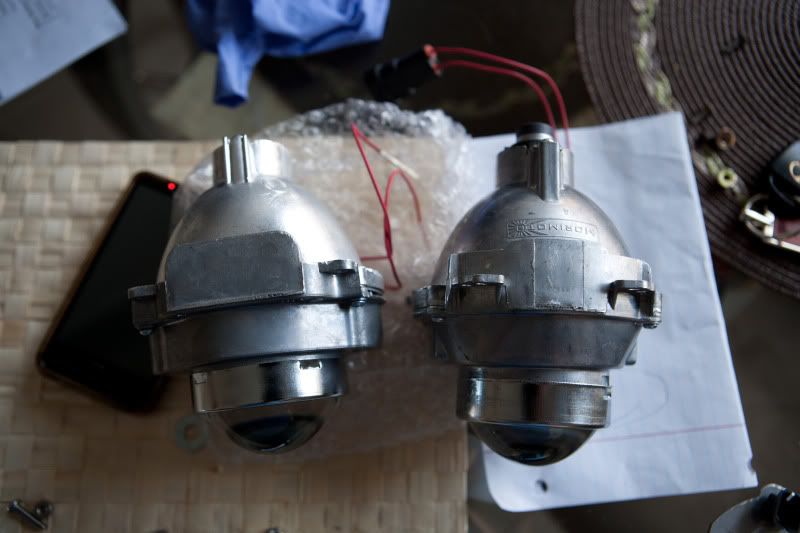
Pictures of side by side comparison (project.ors on the left):
Top down comparison:
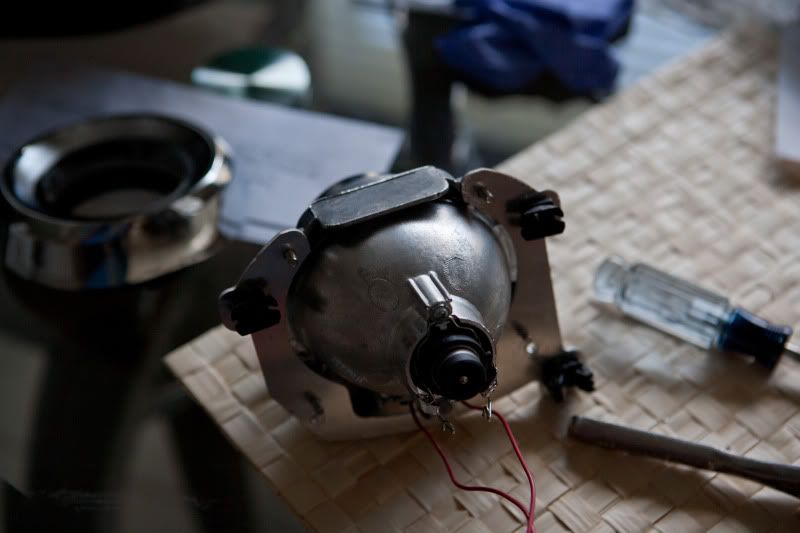
LM bracket on project.ors FX-R:
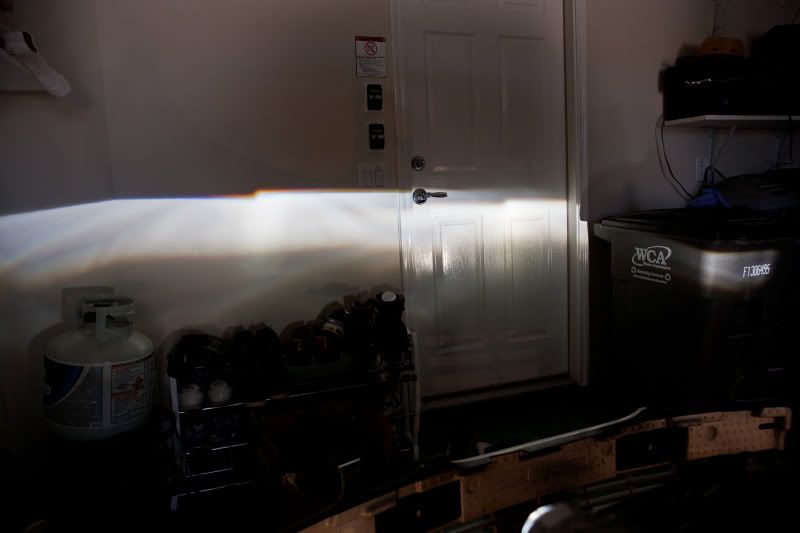
Beam pattern comparison (project.ors on the left and TRS on the right):
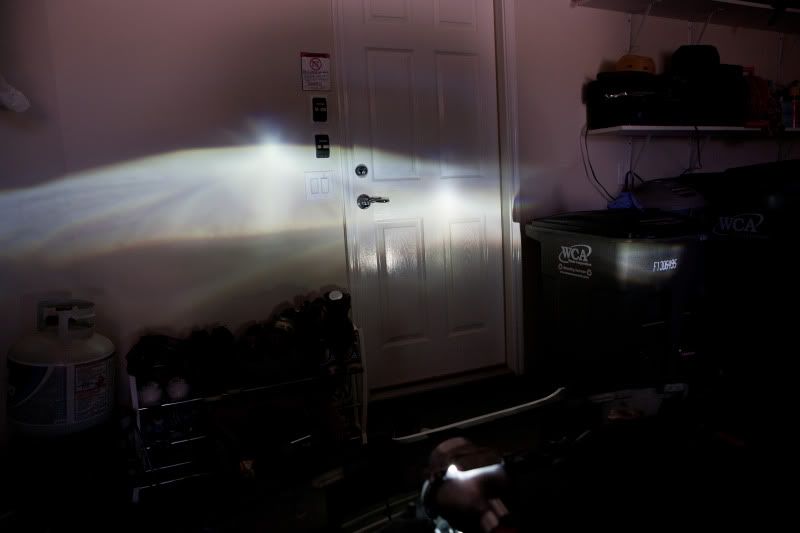
High beam comparison (project.ors on the left and TRS on the right):
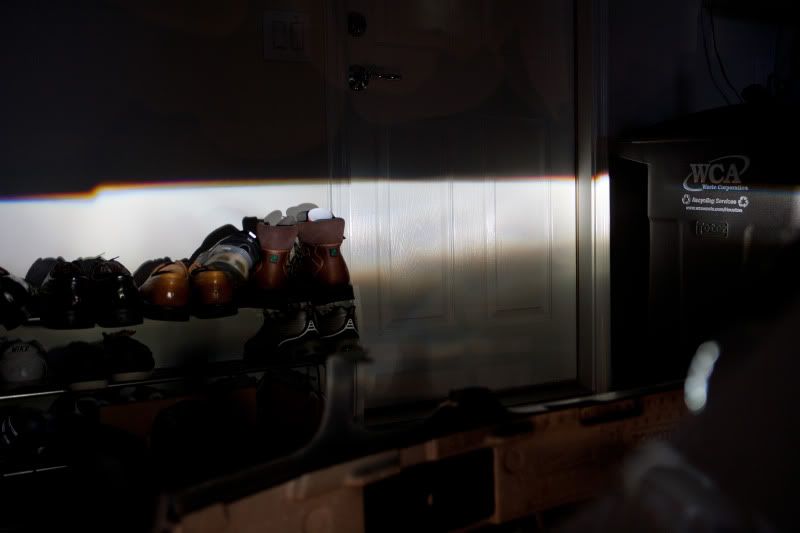
After having everything I needed in front of me. I mounted the projectors into the headlights and started to tweak alignment. The LM brackets held the projectors very level, but angled the projectors upwards. I had to use a series of washers on the top mounting holes to negate the upward angle (sorry no pictures). Took about 1/2 an hour to get the bugs out and I was left with this.
The morimoto HID's fired up quick and ballasts seem solid. They are not super slim, but it's okay. There's a lot of room to mount.
I need to take some photos of the car and further out pictures of the cut-off but well worth the trouble I had to endure. I've fallen back in love with the car, and now plan on retrofitting my other car, a SC300 with some morimoto mini's I've bought from project.ors.
Sorry for the long story. I thought I'd share my experience and encourage the people that are on the fence about upgrading their headlights.
I wanted to share my retrofit experience and reviews on some of the products I used.
I've been unhappy with my GS driving visibility at night for the longest time. I didn't want to go the PNP hid kit route that would blind oncoming traffic. I have the luck of owning a S2000 too, and shes' got a real proper cut-off. I couldn't have my GS out done, so my lust for a retrofit began.
After researching different methods, I wanted the easiest retrofit possible with the added bi-xenon capability. My search led me to the FX-R and luxury mod bracket combo. No cutting required, minimal effort, and for a some-what affordable price. I was sold.
From the Retro fit source (TRS), I ordered:
Morimoto 35w ballasts w/ D2S 35w 5k bulbs
Morimoto FX-R's
E55 shrouds
From Luxury Mods (LM), I ordered:
Luxury Mod retrofit brackets
I received the luxury mod brackets first and had good initial impressions. Nice thickness and material should hold up over time/heat.
Since my projectors were arriving a few days later, I went ahead and started taking the car apart in anticipation. Took my headlights out and baked them apart (250 for 10mins). Removed the chrome bezel and took out the reflector bowl. The dismantling of the headlights wasn't as bad as I had originally thought. I was intimidated with destroying or disfiguring my headlights, but after I opened up the first one, the next was a breeze.
My first problem was transferring the adjustment/retaining clips from the bowl to the LM bracket. There is one retaining clip ( attaches to a metal ball ) that wouldn't fit. The LM clip hole was a tad small and I also noticed it was tapered. After muscling that problematic clip into place, the other two ( ones that attach to the lateral / medial adjustments) went in no problem.
Second problem was the exact same for the other side. The bottom clip which attaches to the metal ball would not fit. Since these brackets are mirror images of one another, the tapered side of the hole was now against me. I sanded the clip, I tried to sand away at the hole, but the clip would never lock into place. It would stay wedged in very tight, but just imagining if I hit a hard bump the clip would just pop out.
Picture of my mangled clip, notice how it isn't locked in.
So I contacted LM, and told them my situation. They replied that I must have received a one-off bracket. With my projectors arriving in a day or so, I decided to just man up and epoxy that clip in place. Hopefully no one will experience this problem and knowing my bad luck, it was just a one-off.
TRS package arrives, and I go into beast mode. I rip the boxes to shreds just wanting to get to the meat, my projectors. Open the first few boxes to reveal the ballasts and bulbs, the next to show me some shrouds, and lastly the projectors.
First thing I do is grab the LM brackets to see if they match up, and guess what? THEY DON'T!!!! I put my tetris skills to the max, and got fed up. I looked at the projector and remembered they didn't look anything like the stock photos on TRS's website. Contacted TRS, and they said they haven't had a chance to put up photos of the newer version ( 2.0 ) which I received.
For reference, this is what you do NOT want if you are using the LM bracket.
It seemed my options were to ship back the new FX-R versions for the older ones at my expense, just buy the old FX-R version, or just don't use the bracket.
My car was apart, I'm pissed, and didn't want to have my car down any longer than it had to be. I searched and found a local guy who sells these projectors for a cheaper price. My main concern was that they were not the same older version that TRS sells, so I brought my LM brackets along to do a test fit.
Pigs must have flown, Hell must have frozen over, because this local vendor carried the projector that fit the LM bracket AND for a cheaper price. He said he didn't have a website up but left me with his email. project.ors.order@gmail.com
Pictures of side by side comparison (project.ors on the left):
Top down comparison:
LM bracket on project.ors FX-R:
Beam pattern comparison (project.ors on the left and TRS on the right):
High beam comparison (project.ors on the left and TRS on the right):
After having everything I needed in front of me. I mounted the projectors into the headlights and started to tweak alignment. The LM brackets held the projectors very level, but angled the projectors upwards. I had to use a series of washers on the top mounting holes to negate the upward angle (sorry no pictures). Took about 1/2 an hour to get the bugs out and I was left with this.
The morimoto HID's fired up quick and ballasts seem solid. They are not super slim, but it's okay. There's a lot of room to mount.
I need to take some photos of the car and further out pictures of the cut-off but well worth the trouble I had to endure. I've fallen back in love with the car, and now plan on retrofitting my other car, a SC300 with some morimoto mini's I've bought from project.ors.
Sorry for the long story. I thought I'd share my experience and encourage the people that are on the fence about upgrading their headlights.
Last edited by 01gs3; 08-10-11 at 07:38 PM.


Trending Topics


 08-11-11, 08:24 AM
#13

really good info. I wish my retrofit will be that easy but from the looks of my parts it wont be  ... least with the LM Bracket it takes a nice chunk off the work! Ide say its a must have part if youre going to retro... mainly cuz you dont have to the the cut and clue method anymore.
i had a little issue with the adjustment points going in the bracket. its a SUPER snug fit. but its good to go.
... least with the LM Bracket it takes a nice chunk off the work! Ide say its a must have part if youre going to retro... mainly cuz you dont have to the the cut and clue method anymore. i had a little issue with the adjustment points going in the bracket. its a SUPER snug fit. but its good to go.