When you click on links to various merchants on this site and make a purchase, this can result in this site earning a commission. Affiliate programs and affiliations include, but are not limited to, the eBay Partner Network.
Figured I would add a bit of info to the DIY Spark Plug page. I just changed mine out today after purchasing my 2010 GX460 Premium this weekend. Below are high res pics if you want an idea of of what 10-year old, 106k mile spark plugs look like.
.
2010 GX460 Premium
02/2010 Build Date (10 years 2 months on plugs)
106,000 Miles
Plugs are in order as they would appear in the engine
May I ask how in the world were you able to access the 2 Passenger plugs with the wireharness in the way? I'm stuck at this 2 plugs. Thanks in advance!
I finally got the last 2 plugs replaced with a little bit of ingenuity.
Originally Posted by BobbyAbuel
May I ask how in the world were you able to access the 2 Passenger plugs with the wireharness in the way? I'm stuck at this 2 plugs. Thanks in advance!
Finally got the last 2 plugs replaced on the passenger side closest to firewall? What a PITA!
This gx460 is the hardest to change the spark plugs on that I've ever done.
May I ask how in the world were you able to access the 2 Passenger plugs with the wireharness in the way? I'm stuck at this 2 plugs. Thanks in advance!
2011 GX460 107k . So I was just replacing my spark plugs and saw oil on every spark plug metal threads and even in some tubes except the one by the firewall. What will happen if I dont change the spark plug seals and valve cover gasket etc. (implying I ignore this issue).
I did not see any oil on the electrode or the ceramic. It was completely dry. Car drives perfectly, no CEL or any codes. I just had an itch to replace the plugs (because I wanted to check for this very issue after reading some where) but was not seeing any issues. Infact I was surprised to see how good shape the original spark plugs were (except that they had oil on them).
After changing the plugs , I observed slightly more smoke immediately after starting. I took it out on a test drive and then the smoke cleared and car drove just fine. So I am debating whether I leave it as it or fix it asap. Not sure how urgent it is, again there is no CEL and it drives fine.
Any way , here are pictures that would help some one out with this job. Few lessons learned:
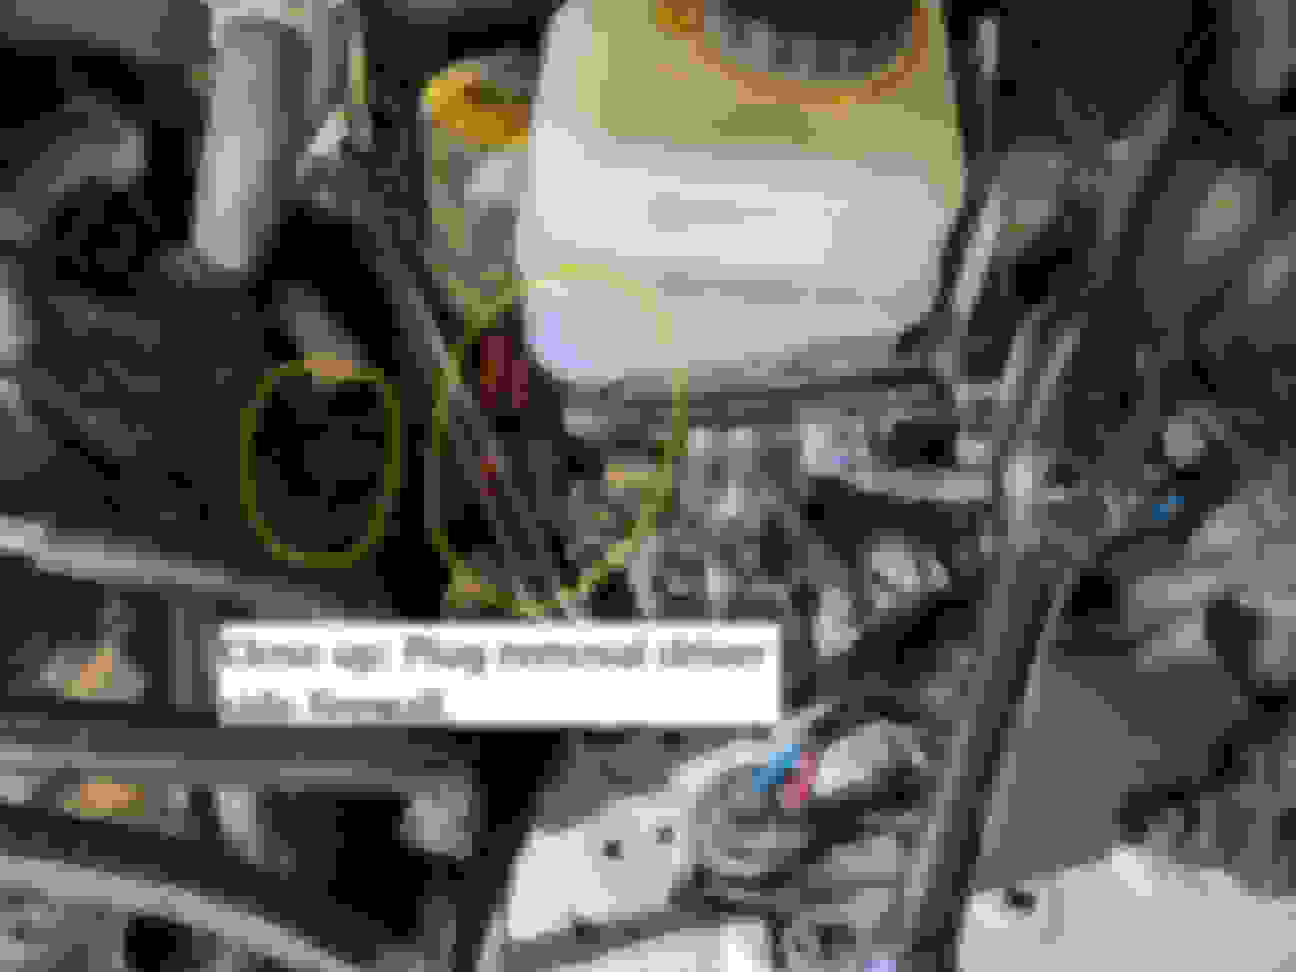
1. You dont need to remove brackets, you can easily remove the harness from the bracket pulling outward and simultaneously lifting harness tabs as shown in picture below. Unplug the coils as well as other sensors prior to manipulating the harness, this is to minimize breaking wires accidentally.
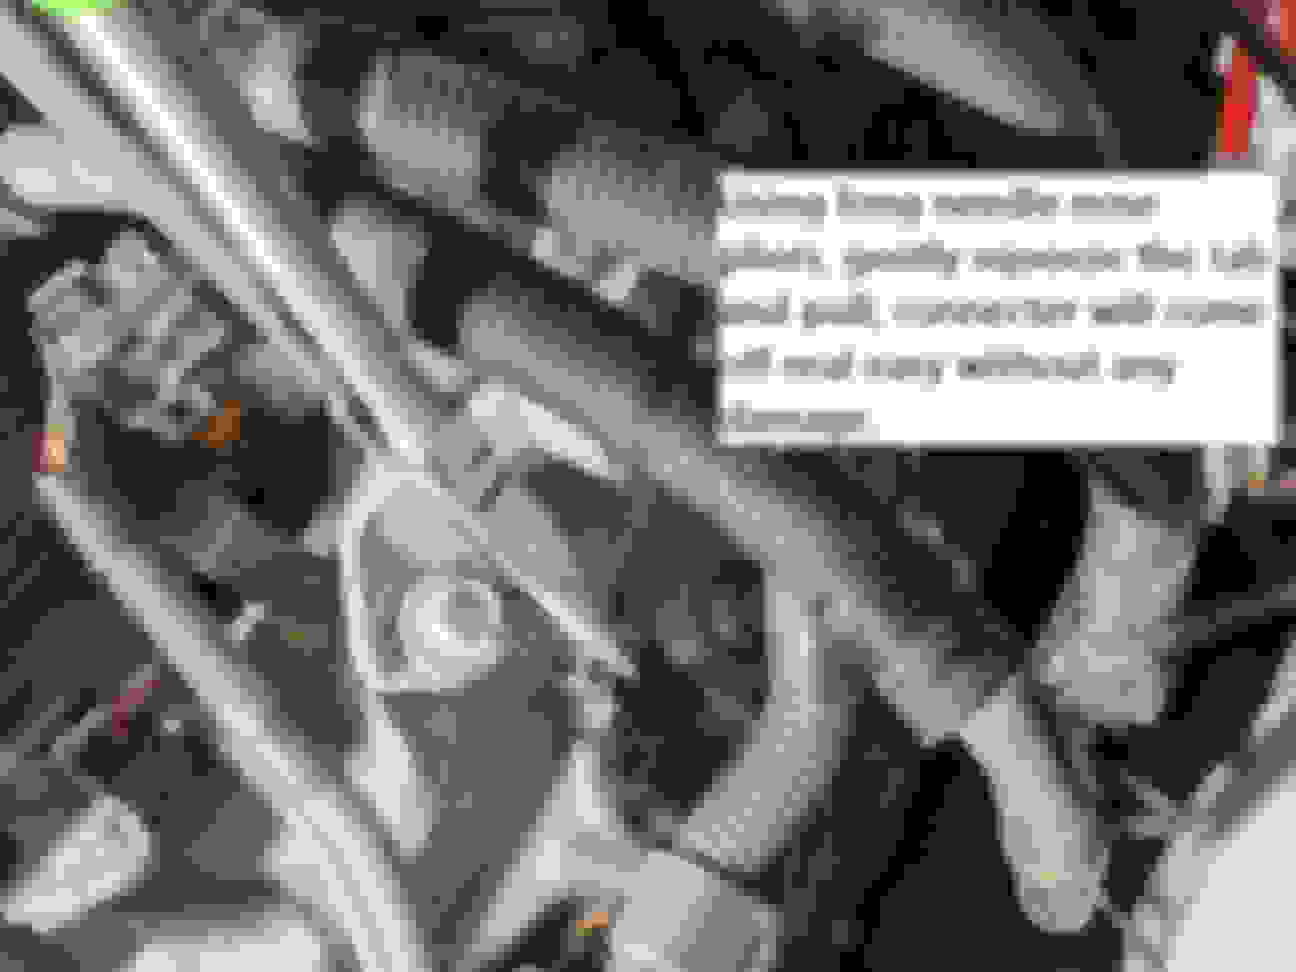
2. The firewall coil was not coming out all the way , so I had to wiggle the tubes and breaker cylinder slightly , it will come out, just be patient with it.
3. For passenger side, I remove only one bracket and use the technique in item 1 above.
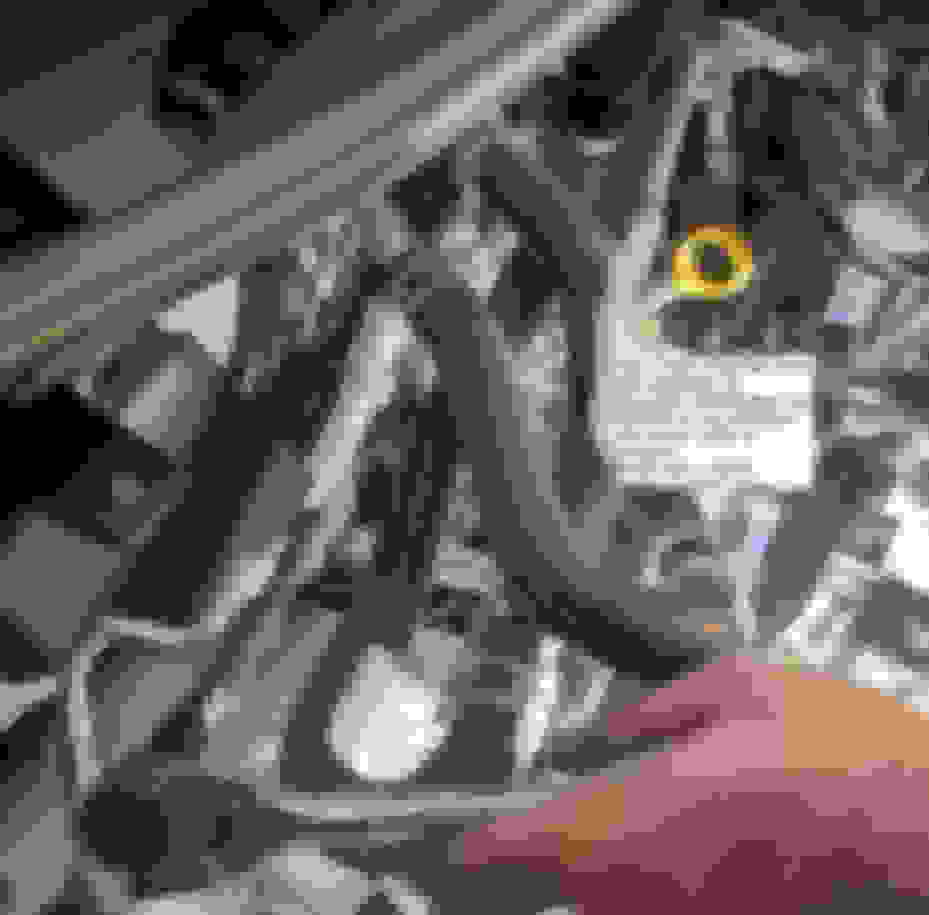
4. Make sure the rubber grommet inside the 5/8 plug socket not loose or you will have to make multiple attempts to retrieve it from the plug after it is tightened . I even had to pull a plug back to retrieve the rubber sleeve. After this, when putting the new plug, I gently slid the pug in tube (you have to be careful here or you can damage the plug or affect the gap)
5. Dont forget to reconnect all the MAF and vacuum lines/hoses etc.
6. This is a good opportunity to clean your MAF and throttle body at this time too.
Dont get pugs off of Amazon or Ebay,, most of them are fake. I bought the same plugs that came out from RockAuto at very reasonable price. I dont mess with changing plugs with something fancy, stick with OEM plugs. I checked them to the best I can via visual and scratch test and they appeared genuine Denso. Good luck
Nicely done and too bad it wasn't as easy as my 2005 Tacoma which only takes 45 minutes. That said, I always use anti-seize on my Tacoma plugs as the last thing I'd want is a stuck plug.
I use anti seize on plugs, I just got a little Mazda for my son to drive and When I removed the spark plugs all of them snapped at the metal nut, leaving the threaded portion in the engine!
Dry threads and overtorque. These were NGK plugs. Luckily I was able to use a bolt extractor to crank them out. I'll still use antiseize after that little experience. Never had an issue on many cars in the past.
Thank you for the write up. Provided some confidence going into the project.
In the middle of this project myself. 150k miles on original plugs. Passenger side done and they didn't look too bad. Word of caution is before you start trying to get the wiring harness out of the way to unfasten or remove coil packs - unplug the cam sensor as well as the coils. Perhaps is my old man strength but I pulled the wires out of the cam sensor plug and had to get a replacement.
As others have stated, anti seize is good policy. I use on almost every fastener as I may be the guy removing it.

 04-11-20 | 07:53 PM