When you click on links to various merchants on this site and make a purchase, this can result in this site earning a commission. Affiliate programs and affiliations include, but are not limited to, the eBay Partner Network.
Will do.. I will also try to assess if there is any chance with even special tools to adjust sensitivity with just the padded trim above glove box pulled out but not completely removed as the module is on the far right side of dashboard.
Does the padded trip just pop out with plastic clips?
Originally Posted by Acrad35751
Will do.. I will also try to assess if there is any chance with even special tools to adjust sensitivity with just the padded trim above glove box pulled out but not completely removed as the module is on the far right side of dashboard.
I removed the padded trim piece but it doesn't have access to the module behind it. It looks like the whole glovebox needs to be dropped to gain access.
@Acrad, make sure you test the sensitivity before snap everything together.
LOL...haha ok I will move the manual to the garage. That freaking thing really takes up alot of space. I normally keep the manual in all my cars but the other are much smaller. This one could be used as a ramp in an emergency.
Originally Posted by tecman
You actually keep that bloated Manuel in there...No wonder you posted recently about all the crap you have in the console
From the diagram you posted, it looks like that piece could be removed, it was just snap in. But when I tried it, I couldn’t get the tool to wedge into it. I may go back and try again. Is there an opening behind it next to the vent?
A big install fail for me on this. I can't get it to go off even on 11. Not sure if this shows up in Techstream. I will look later. No way to tell if problem is the ECU or the microphone or I am not hitting the glass hard enough. Anyone have a proven phone app that will also set it off?
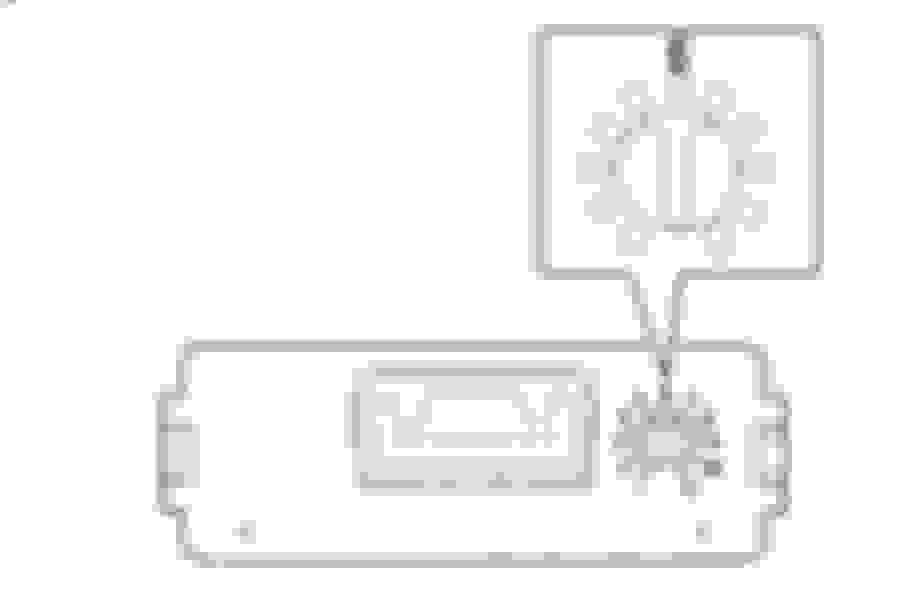
I will try the YouTube video that tecman posted above. I did find an easy way to adjust sensitivity that requires minimal removal of components. You need a really small slotted screwdriver .... jewelers type. I haven't adjusted it this way but as you can see below on one at bottom. That is the sensitivity dial on the GBS ECU. It lines up with that screw hole.
Thanks. I got your msg yesterday but busy shooting a wedding to reply. I will try it out. So that slot is within the glovebox and you just need to open one of the slot to access?
Got it working. Sensitivity dial must not have been making contact or something... I went out and re-adjusted through that small screw hole. Yes it can be done but keep a bright LED flashlight with you to get your bearings. I can't see the numbers through hole but remember orientation of numbers. I rotated all the way down to 1 and all the way back to 11 and then it started working. It worked with a simple click of a key on passenger window. I then dialed back to probably the 8-9 range and you have to tap it a few times for it to go off. No idea what is going to cause it to false alarm so gonna keep a few extra tools with me if I need to adjust in the field.
One could deactivate (if temporarily needed because too sensitive) by dropping that underside cover below the glove box. It is only held in by one screw and then you could simply unplug the microphone.
Happy with this mod and pleased with how it works so far. Flashing the HIDs makes me cringe but if legitimate alarm small price to pay.
In my post above all you have to do is just pop off that plastic cover and remove the 10mm screw and then you should be able to adjust sensitivity. No nightmare of having to remove all those pieces to just adjust sensitivity. Unless ECU was installed at a different orientation but the way the bracket it is it should make it line up with that screw hole.
I think mine is around 8 but likely 9
If it doesn't work on 11 do what I did and take it all the way back down to 1 and then back to 11 to see if you can get it to work.
Originally Posted by bbqsoup
Thanks. I got your msg yesterday but busy shooting a wedding to reply. I will try it out. So that slot is within the glovebox and you just need to open one of the slot to access?
 02-08-19, 03:34 PM