When you click on links to various merchants on this site and make a purchase, this can result in this site earning a commission. Affiliate programs and affiliations include, but are not limited to, the eBay Partner Network.
EDIT: This is more than likely the same setup going into the 2020+ GX 460 with off-road package. This has also long been available since 2010 in Canadian high trim models. As of 2019 this cooler is part of the Executive Package in Canada.
EDIT2: 460 - Do US model 460s have a automatic transmission cooler? They utilize a small liquid cooled unit built into the radiator. Canadian top tier models have a supplemental air cooler mounted on the front driver side of radiator below the horns.
I decided to go ahead with installing the OEM cooler. If it proves inadequate I will look toward a 3rd party unit. I will add more to this thread including the instructions (posted elsewhere here on forum) but got my big bunch of parts aside from cooler unit today. Many of the lines have a braded sleeving for protection.
Parts list. I believe to be accurate. Will confirm as I get closer to install.
EDIT: DO NOT ORDER THIS PART. Not needed.32943-35040 QTY:1 (NO. 4 OIL COOLER INLET HOSE) NOTE: Not needed as stock inlet hose can just stay in place.
90119-06336 QTY:4 (On install steps bolts used on step one to attach all pieces but item listed as #1)
90080-11589 QTY:2 (On install steps bolts used to attach #1 on step one and step 2 NO. 3 OIL COOLER TUBE SUB-ASSEMBLY. This subassembly bolts to the cooler bracket)
90466-16004 QTY:8 (Hose clamps) Old QTY 10 but since one hose not needed QTY: 8
32948-60020 QTY:1 (Foam Seal for NO. 3 OIL COOLER TUBE SUB-ASSEMBLY)
32913-60260 QTY:1 (Driver side attached bracket to cooler)
32913-60270 QTY:1 (Lower attached bracket to cooler)
Washed rig this morning then thought I would tackle at least the staging piece of the AT cooler install.
The reason for my little shout out on F-Sport grill thread before I figured it out.. Installing the AT cooler is easiest with grill out of the way.
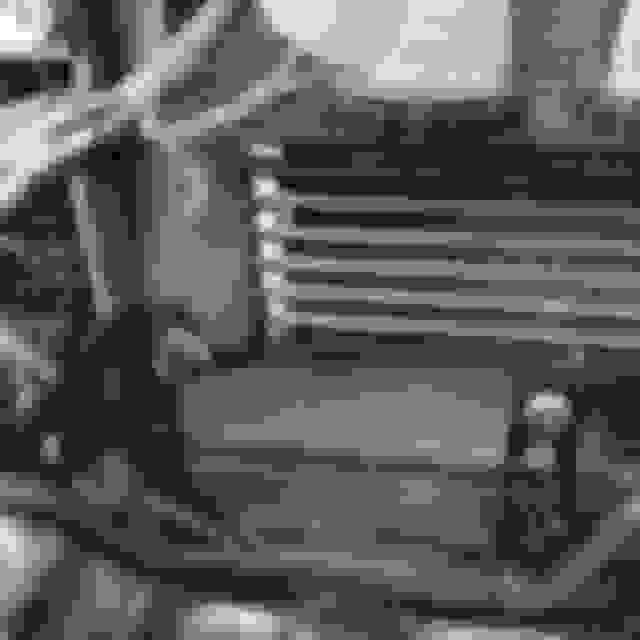
This was just getting the cooler mounted in front of radiator, installing the pass through connector, connecting hoses from cooler to pass through and putting some covers on the internal connectors that are not connected on the inside of engine area.
Some observations:
• I may have bought one too many hoses. The existing hose from AT to the top connection of AT cooler in radiator will probably just stay in place.
• Not sure that foam piece is actually needed. I assume it goes on the inside but didn't fit very well. I might look tomorrow and turn it around. The pass through is held in with a bolt so not sure it really does anything beneficial. You also remove the existing foam covers that cover that pass through area. I end up removing the top foam piece first and then realized my mistake that it was the bottom on that was needed for removal. Oh well.. a little extra cooling.
• I will most likely need to remove front skid to disconnect the AT return line which is replaced with this mode. In addition I think I will remove the battery to get my arms down in there to disconnect all the old hoses.
• What is left to do:
- Disconnect outlet of water cooler AT line and connect with new hose to pass through connector
- Connect new AT return line from pass through to connector at bottom of the radiator
- Account for additional fluid needed by cooler so will probably do one more drain and fill of AT fluid.
Overall best deal I could find on parts above was with Matt at OEMVehicleParts.com
Code: CLUBLEXUS code at checkout gave me 50% off shipping.
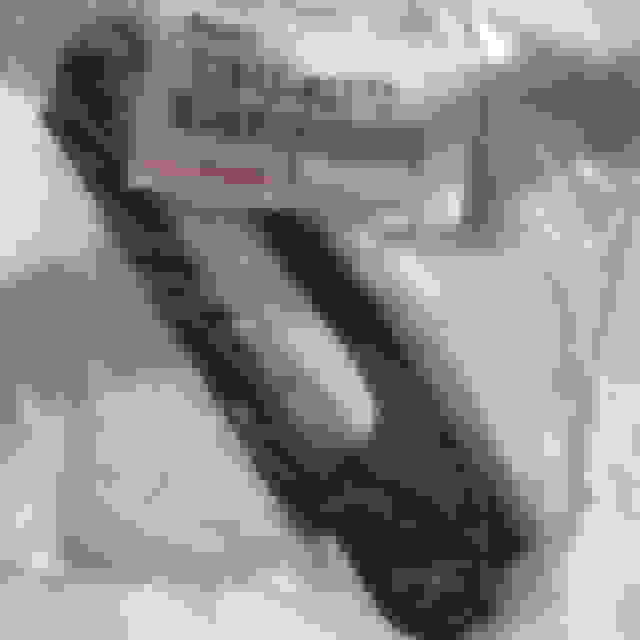
I ordered the actual cooler from Megazip as price was too far below what any US parts dealer could compete with. There is a 3rd party OEM unit I have seen for around $90-$100 option so that is an option as well.
For those under a warranty since this is all OEM gear this may allay concerns about warranty issues or I will say hassle. I am aware of Magnusson-Moss act.
Apologies as I typically skim over the related threads.
Acrad, I don�t recall any hard towing or extreme off-roading from you so just curious why the need or want for this?
First off...all in the name of saving money through proactive maintenance and lowering temps which are known to kill ATs. ..... as we know AT repairs/replacements aren't cheap. I may have PTSD from experiencing a AT failure during a "$$$ poor" teenager era. :-)
I've seen some elevated general towing temps as well during some light off-road slow and go that I hope to mitigate temp-wise with this mod.
Here is part of the dilemma I face... I think some out there are basing old school dino AT fluid temps well below 200 �F against modern synthetic AT fluid capabilities. I think the latter synthetics are more capable of withstanding the higher temps and ATs are designed for it but not certain. I'm not advocating that 300�F is a safe or good temp but I think 250�F or so below isn't some catastrophic issue. Perhaps change your fluid more often.
In the end I am uncertain so I am betting both ends I guess... change AT fluid and also putting in a cooler. It isn't like GX 460 ATs are dropping out of the sky in failure but we all here have seen a couple. I'm just trying to hedge my bets that both options will ensure reliability.
It won't be the end of the world if this formula doesn't work out. I will fix AT and still keep the GX. Not sure if I have given a rational response or not. :-)
Originally Posted by tecman
Apologies as I typically skim over the related threads.
Acrad, I don�t recall any hard towing or extreme off-roading from you so just curious why the need or want for this?
If someone from Canada is unsure they have it pull the cover off over the radiator area. If you don't see the cooler below horns you don't have the factory AT air cooler.
Top down picture horns are at the top from Canadian GXOR member.
=====================
Install steps from installation document are only steps:
Please try and get some temps before and after, maybe during a particular commute with similar weather if possible to see what kind of difference it makes!
I definitely will. I've been running my OBD Fusion/Link for a while so I have some pre-upgrade numbers already over various commutes I will be able to compare to.
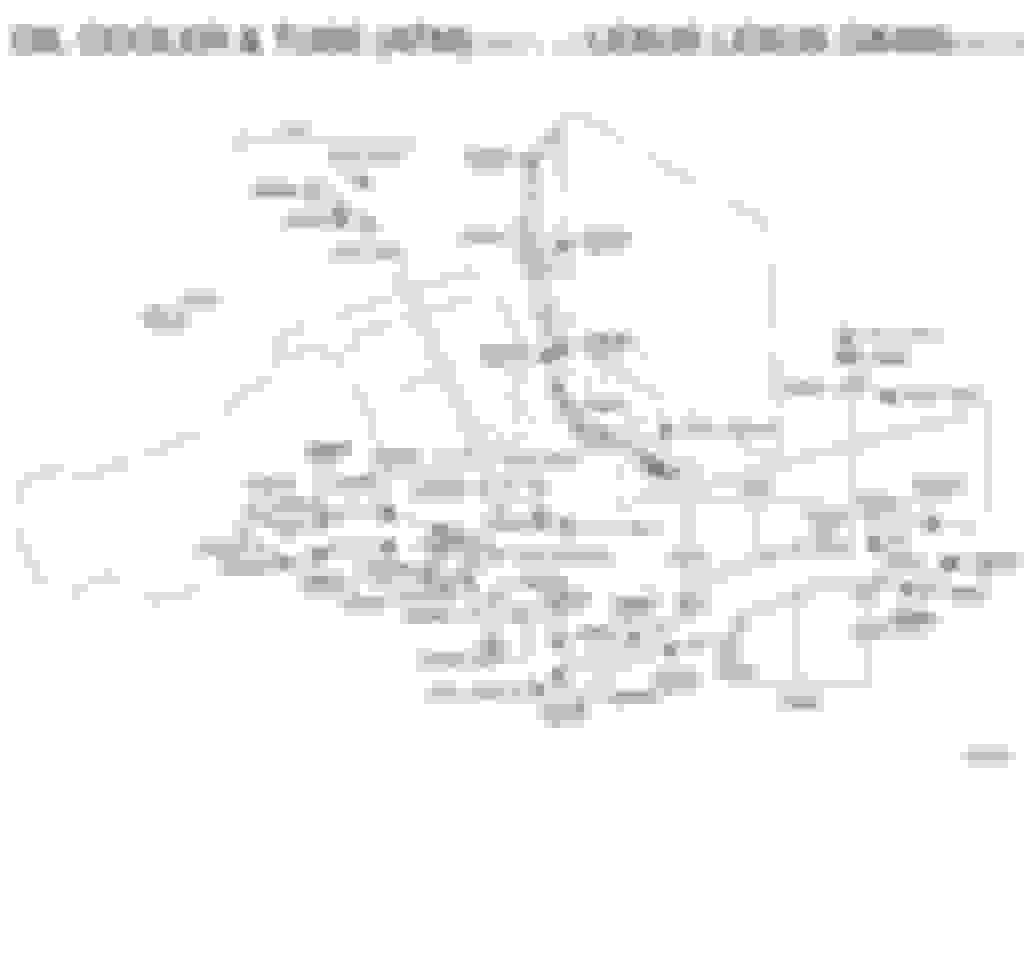
Here is a comparison between stock and with the air cooler. The only install pieces I will be dealing with are the connections from existing 32907C. Stock hose 32930 (inlet/outlet connected) goes into radiator cooler at the top and return is on the bottom. These two hoses are attached together IIRC and sold as one part as shown in the diagram.
[Install of air cooler]
- (NO. 1) is attached to 32907C and to the top connection of the built in AT liquid cooler in the radiator.
- (NO. 3) is attached to the former return line out of radiator on one end and 32907D on the other
- 32907D contains the metal tube lines & support that passes from behind radiator to the front. This piece also uses a foam piece and is also held down with a bolt
- (NO. 4) is connected to 32907D on one end and the inlet of the cooler on the other end
- (NO. 5) is connected to outlet of cooler on one end and return on 32907D on the other.
- (NO. 2) is connected to 32907D on one end and return line to AT 32907C.
[32907D]
Even if someone goes with a 3rd party cooler this is a nice piece for routing the hose lines to the front of the radiator.
Does this mod bypass the AT cooling through the radiator? IF it does, it might just be a worthwhile upgrade for older GX's that may experience milkshake if the radiator is old enough. Good stuff @Acrad35751
You could but I am gonna go inline on this install. This will give me lots of future options (if needed). I want to get some data on what affect this has from stock, cooler added and with/without thermostatic switch pinned open. I'm more concerned about the AT temps. I notice on generally flat land the temps stays in the 190 or so range but once you start pulling a mountain pass even locked up temperature then starts to match coolant which is around 203-208 degrees if not higher once you drop out of lockup.
The cooler zipped through customs this time in New York and made it to Seattle last night unlike the crawl switch which sat there for a while.
 05-22-19, 03:13 PM