When you click on links to various merchants on this site and make a purchase, this can result in this site earning a commission. Affiliate programs and affiliations include, but are not limited to, the eBay Partner Network.
2020+ Rear view mirror cover removal for 12v power
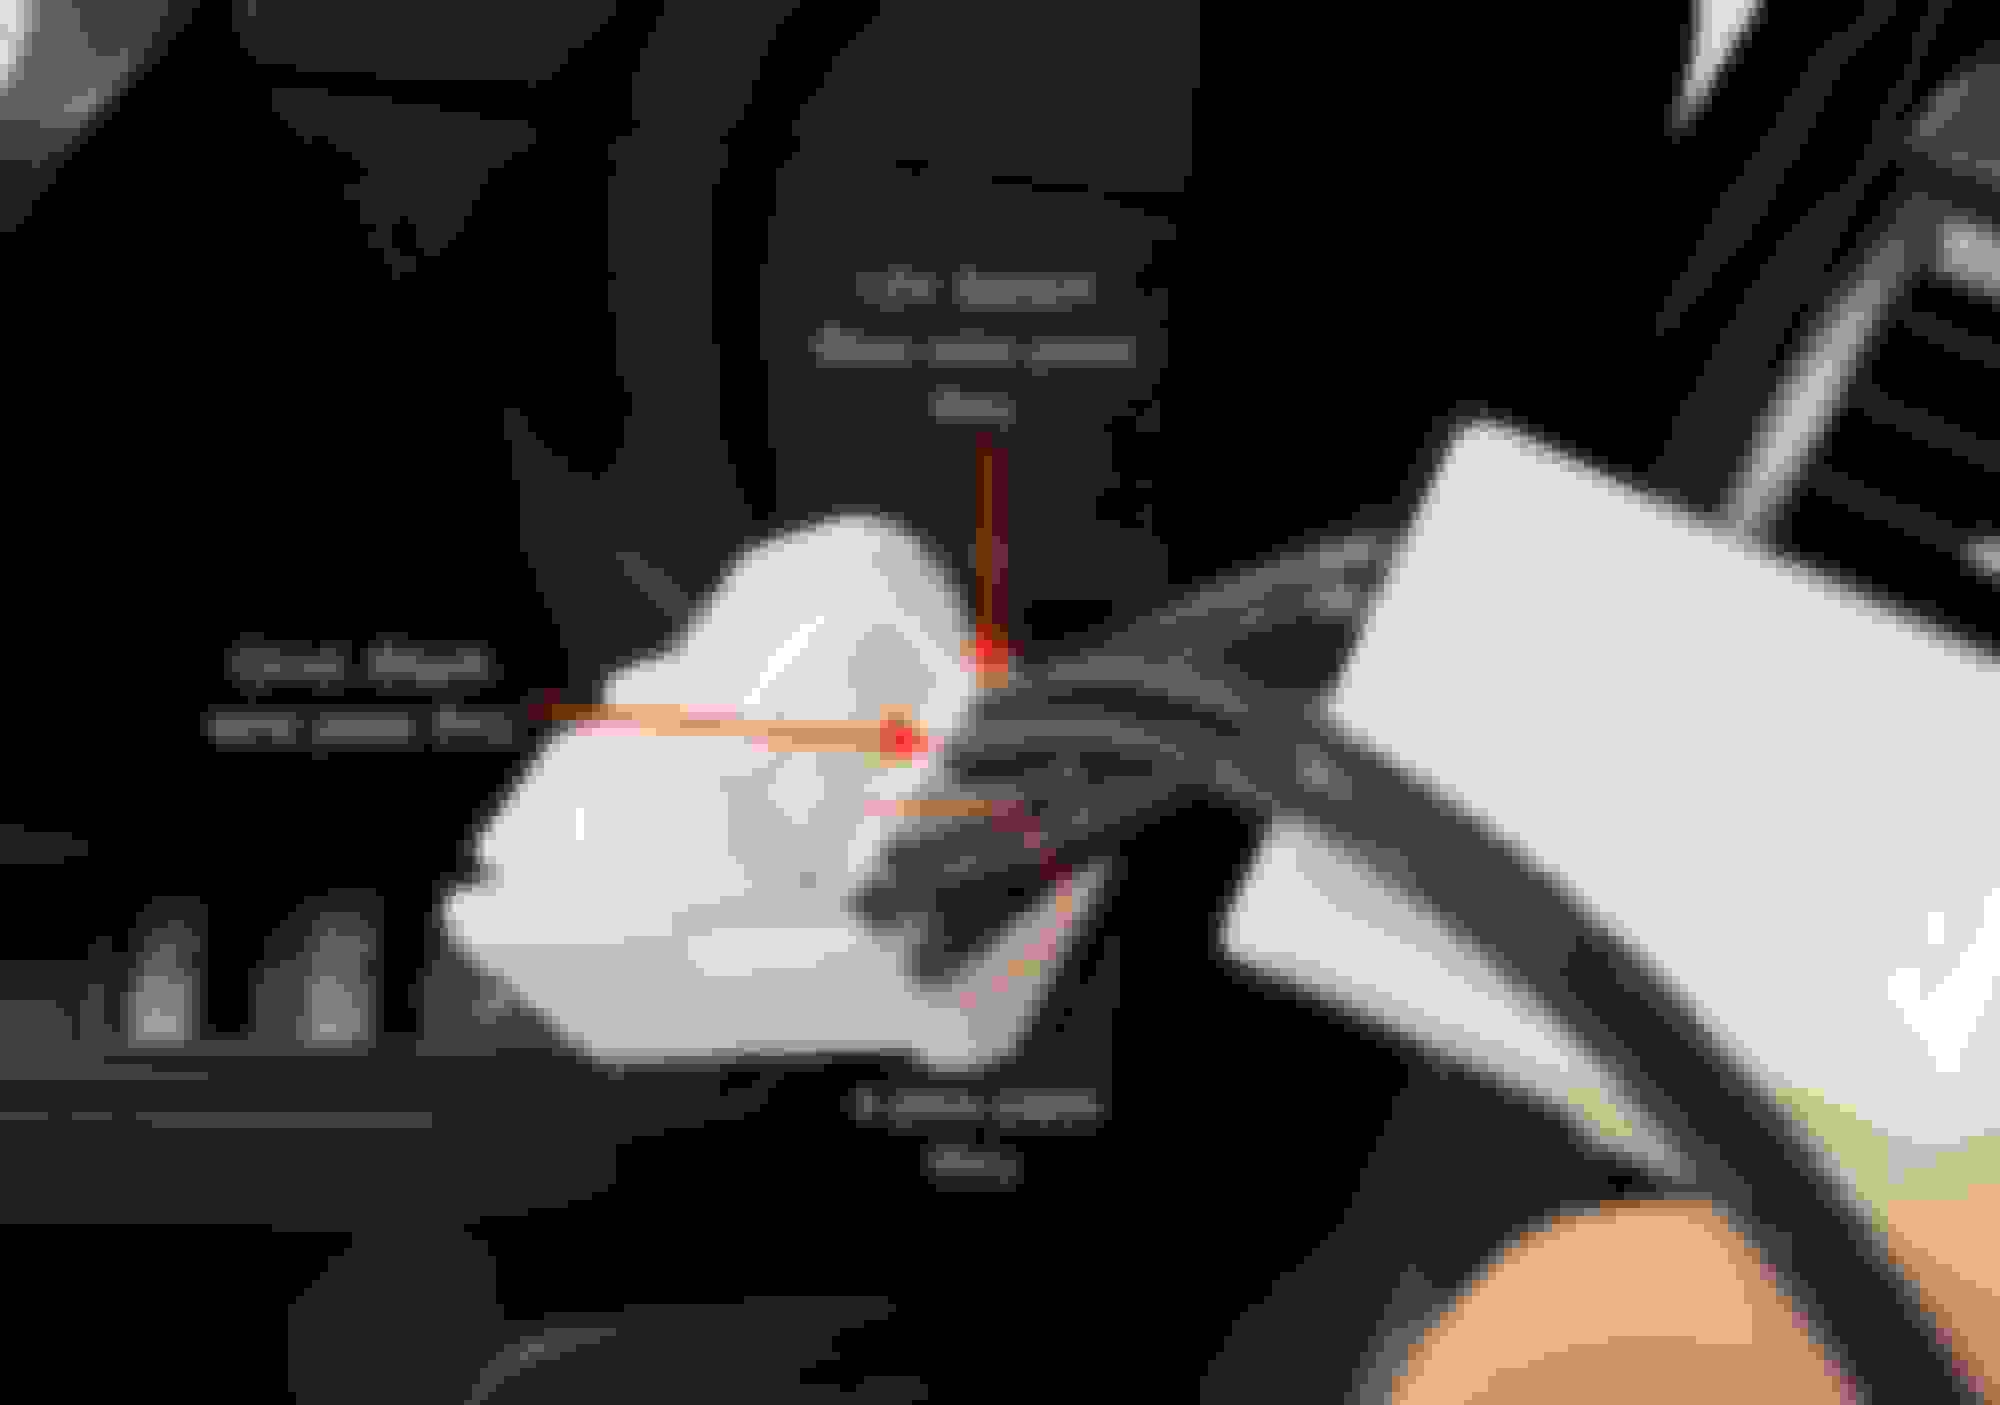
I believe the 2020 models are different with the new safety stuff standard? Correct me if I'm wrong. Took apart the plastic behind the mirror to tap in 12v for a camera. Here's some pics of that cover piece as I think it's different and could not find any pics of it.
So it was slide the whole thing down towards to hood, and fight with it.. the small tab piece on top has twp clips, but i did not know that I til it popped off. Yes I bent the bottom tab =(
I guess my plans are to tap Into the purple and blue at the connector.. for switched 12v power.. waiting for my pin taps to come from overseas..
Anyone know if there's 12v switched available on those two harnesses on the left?
Thanks @hzhao and @Alche for the pics and information. Plus @GX*BOB for the great video he posted on leveraging the Dongar adapter for his dash cam. Unfortunately, 2020+ (the below pics are from my 2022) models have have the camera setup and is a bit different... but same outcome .
I used all of your knowledge combined with the Dongar Adapter to provide power to my Garmin 67w dash cam in my 22 GX. Thank you!
Tip (at least for cold weather climate) use a heat gun to warm up the plastic before trying to pry off the little piece. Makes it much easier and risk of breaking a pin/clip is much lower.
Heat up this little piece of plastic and then use a pry tool pulling directly towards you.
Once this piece is removed, slide the remaining piece of plastic trim down following the contour of the windshield.
Picture of the trim piece so you can see the tabs.
The OEM plug uses a total of 5 pins/wires. The Dongar plug has a total of 7 pins/wires. They are straight pass thru so the additional pins on the Dongar adapter will not have any associated pins from the vehicle. The 5 pins/wires on the vehicle match up with the Dongar pins/wires (plus 2 unused pins).
At least on my 22 the 12v switched power is blue (not blue/white as posted above).
5 Total active pins/wires on the vehicle plug.
Dongar adapter. Wanted to show that the active pins on the vehicle plug are being passed through and the 12v/ground are pig tailed to the USB adapter.
And just a different angle so you can see all the wires on the adapter.
The highlighted pin below is connected to the white wire on the vehicle plug and passes it through to the same pin.
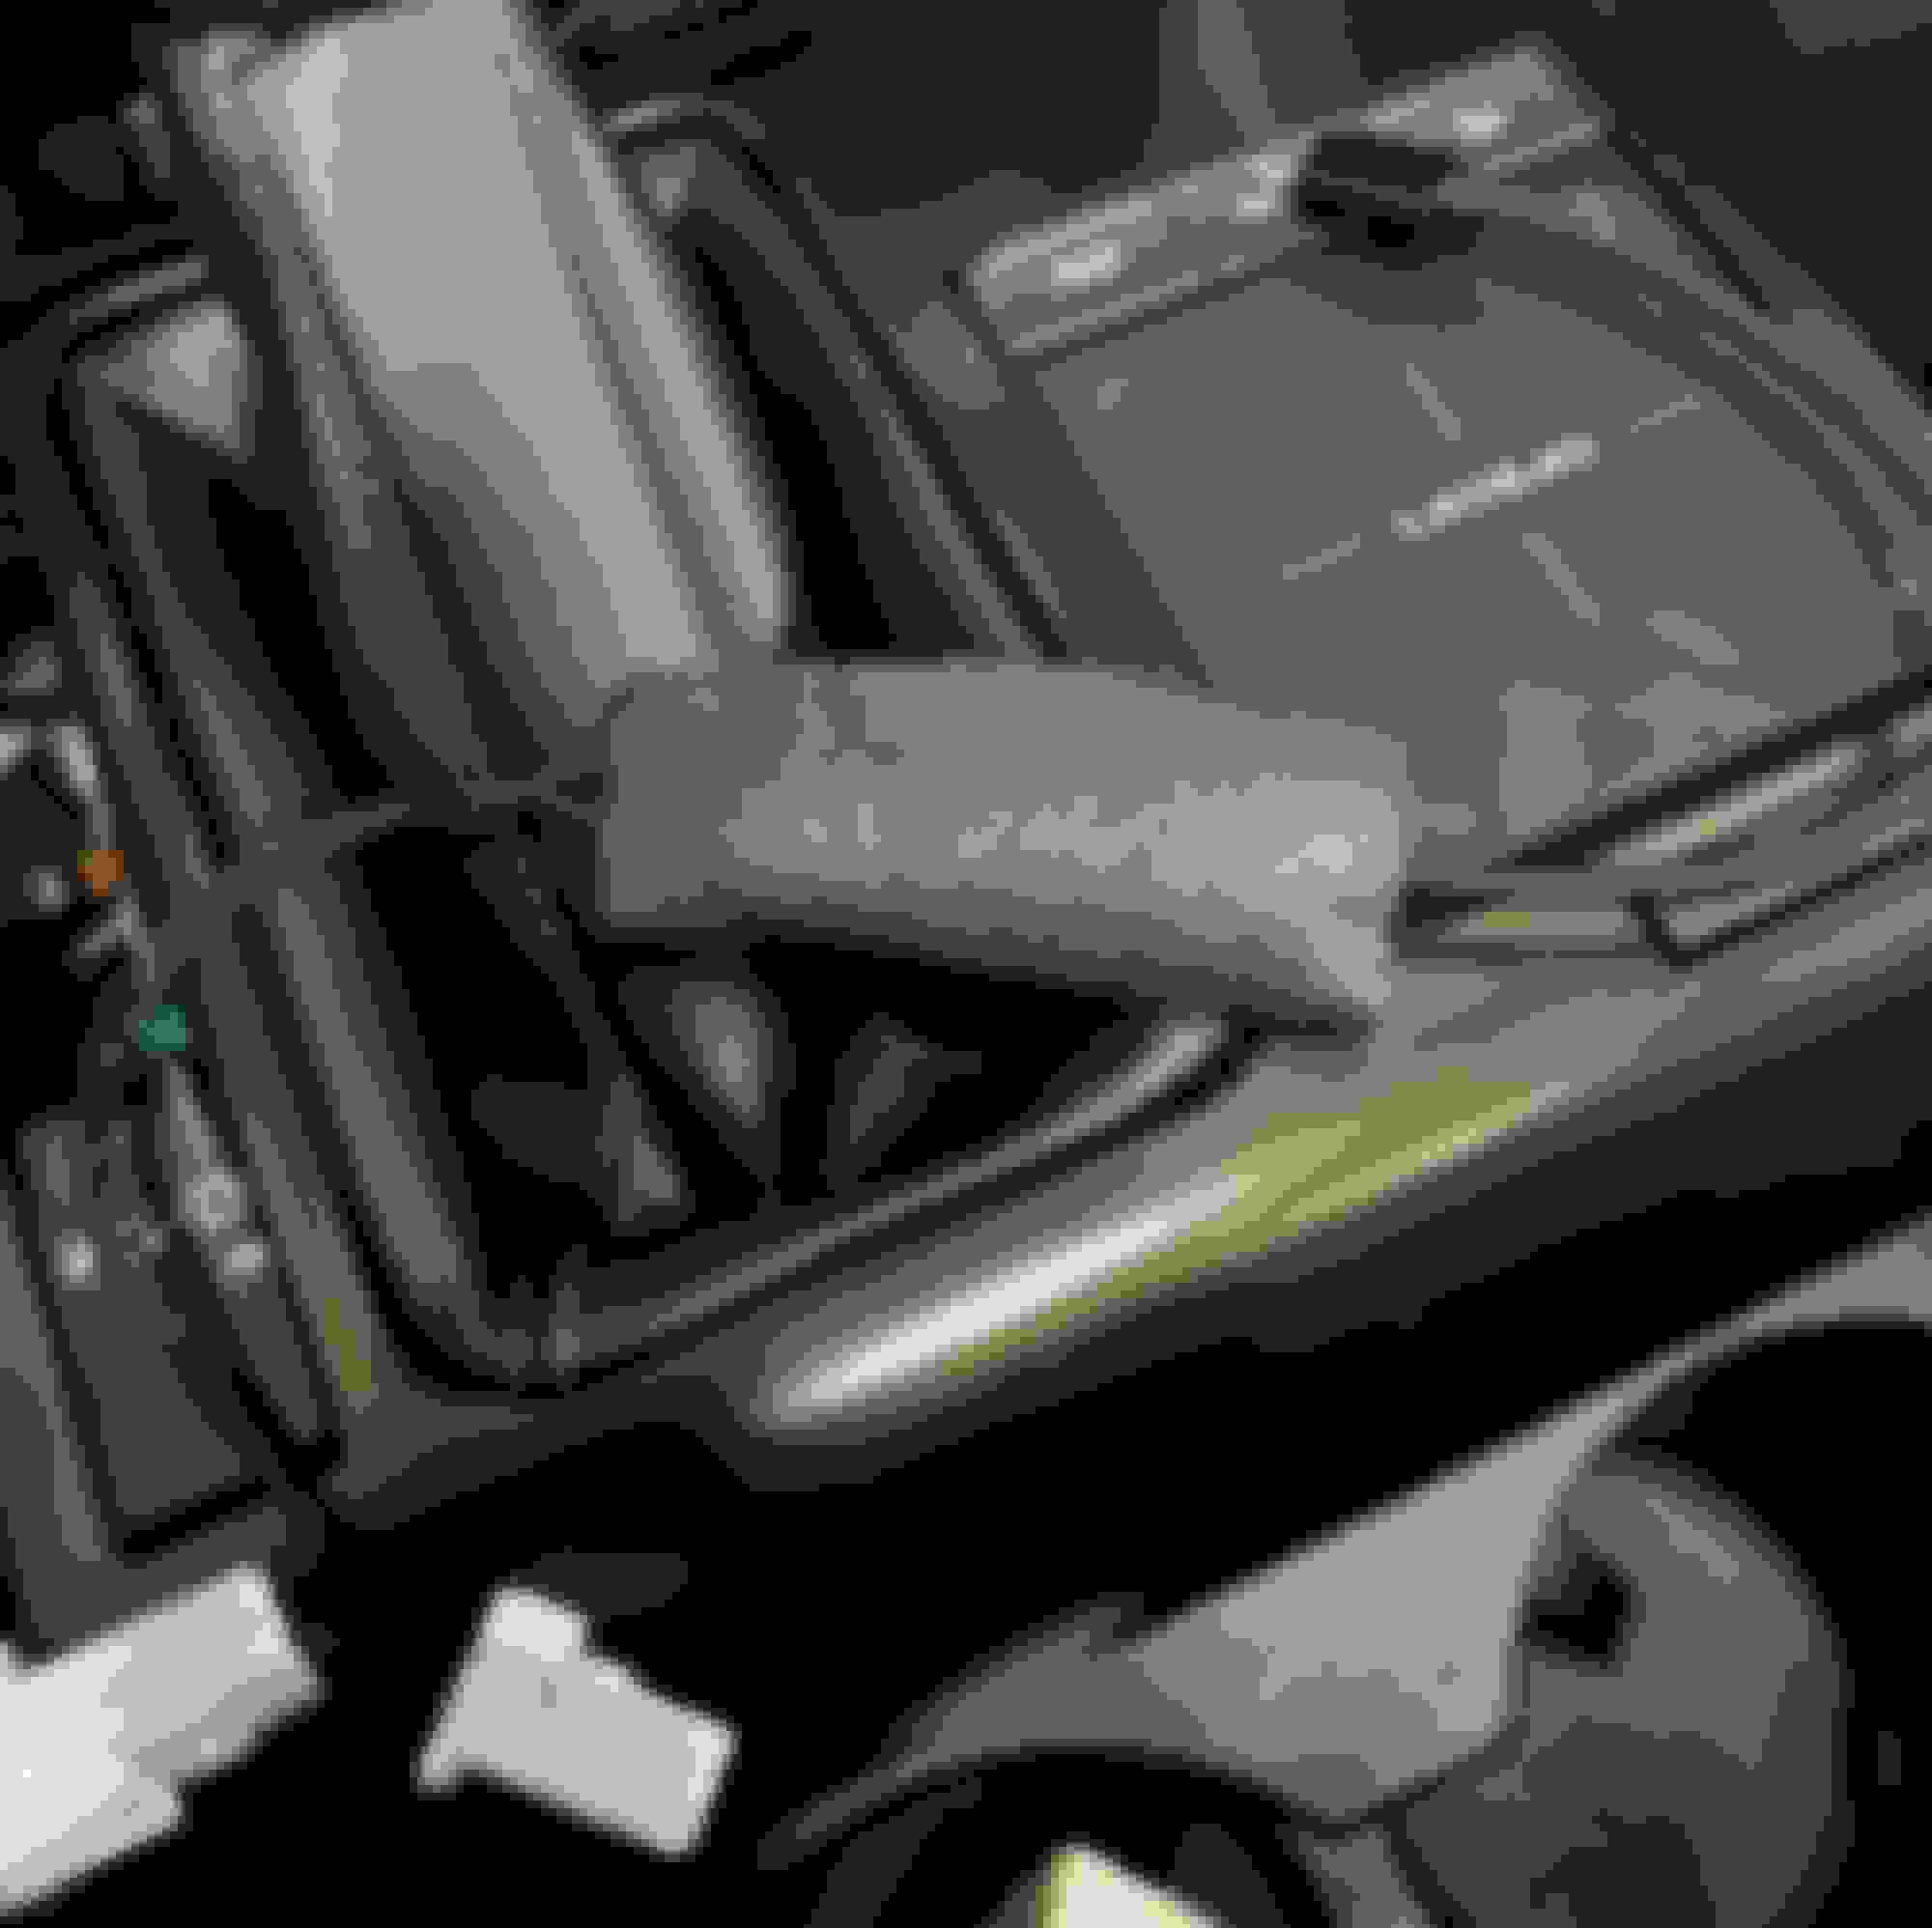
I used some sound deadening material around the Dongar adapter to eliminate any rattles.
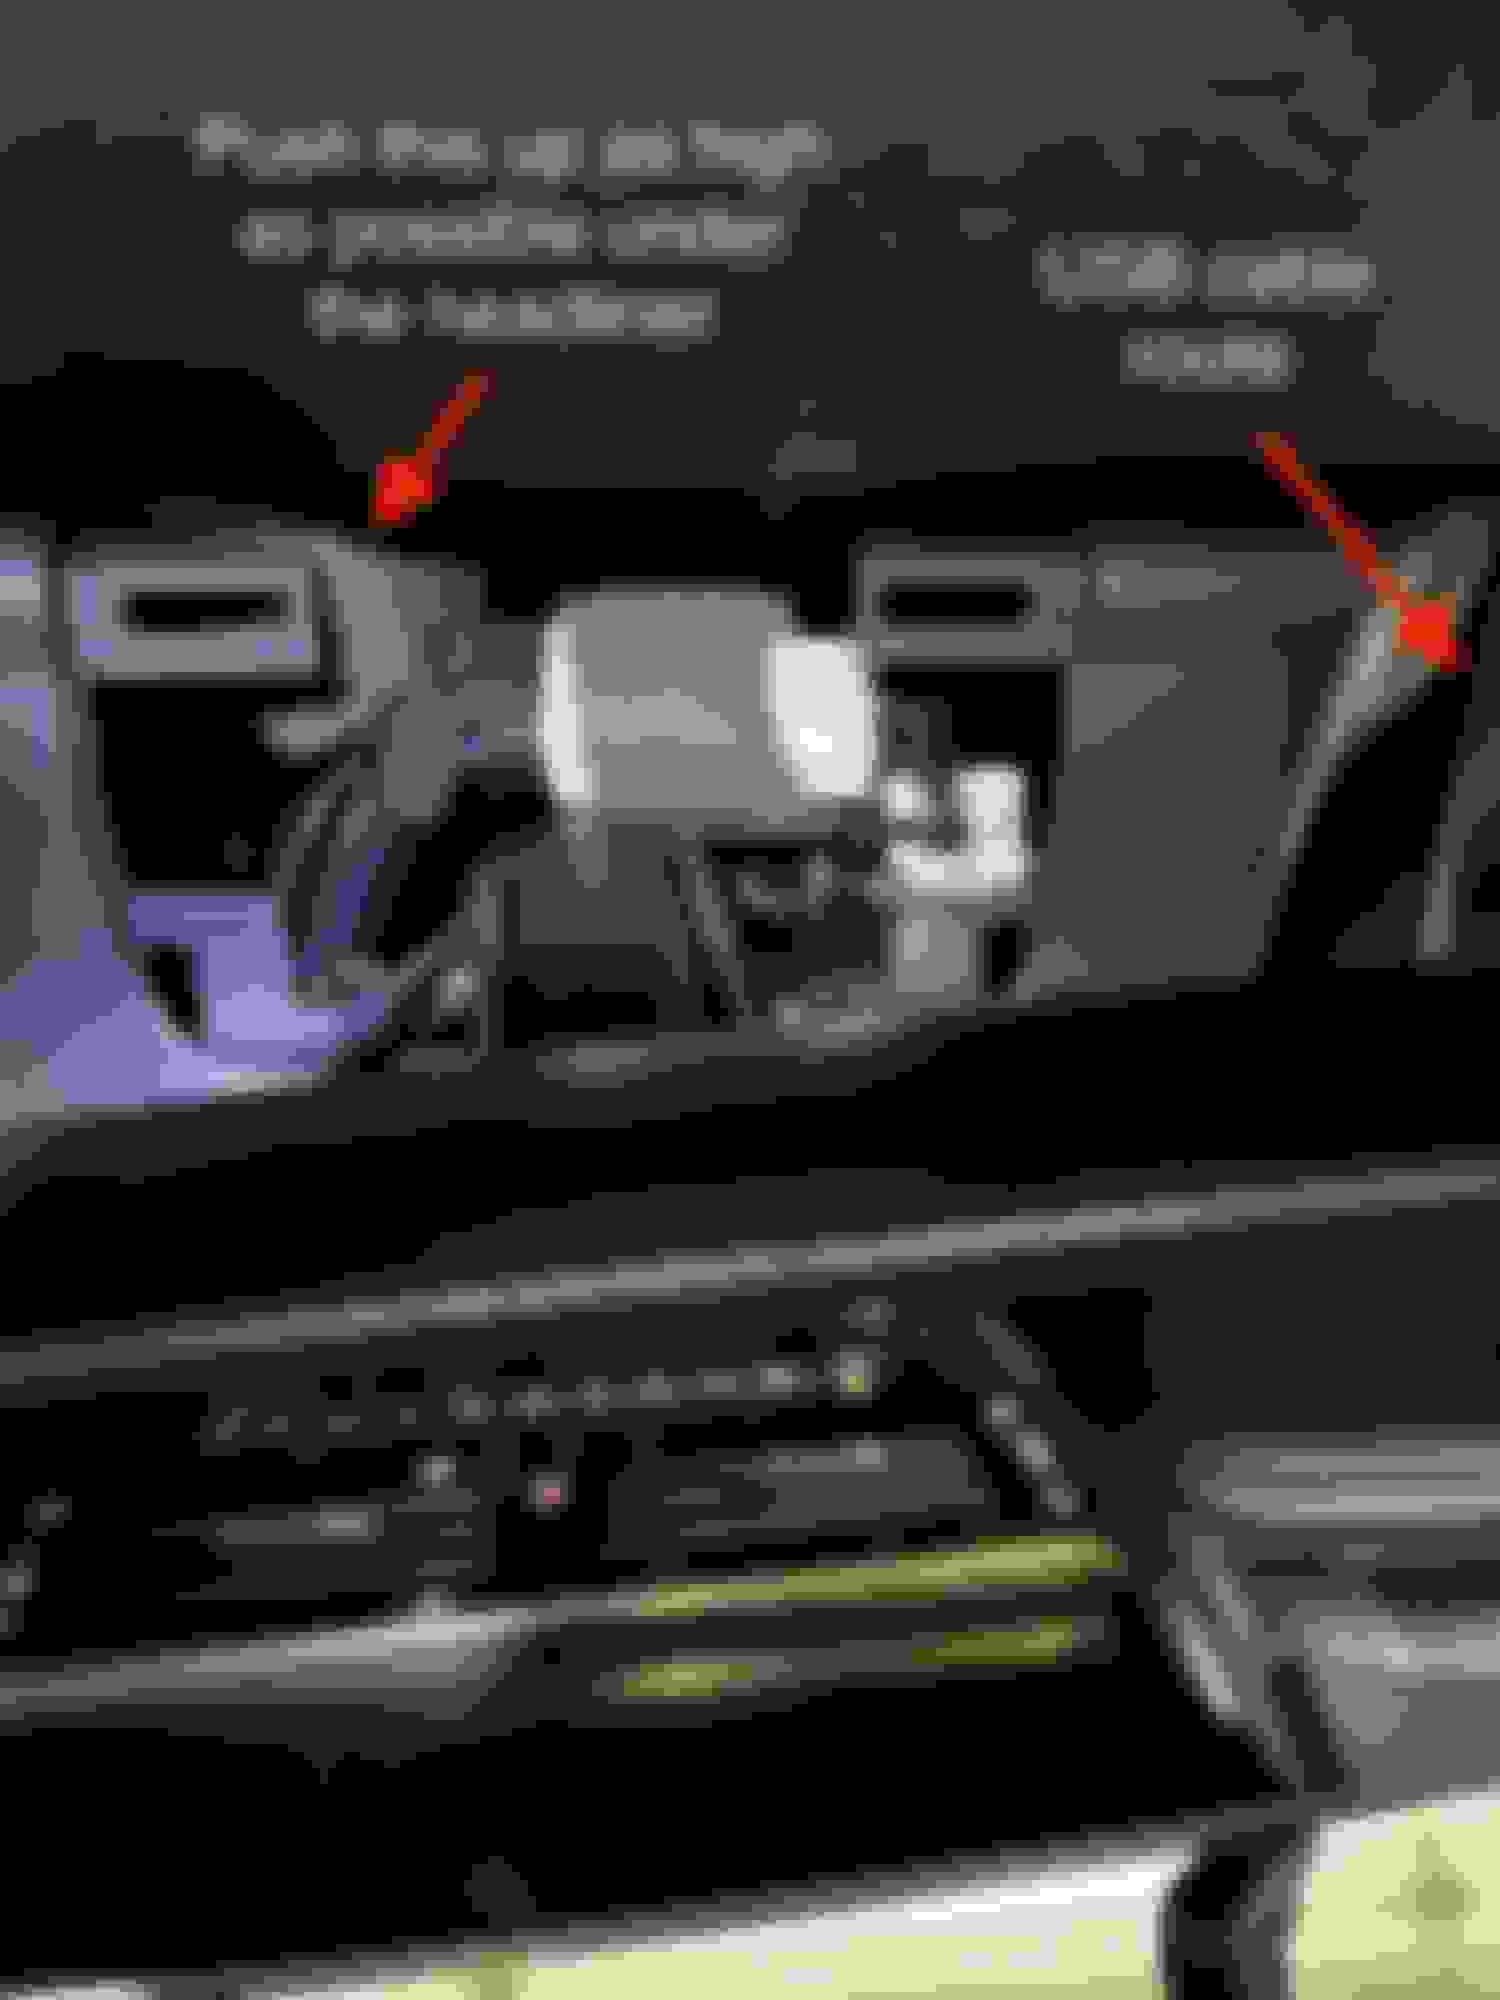
Time to plug the Dongar plug into the vehicle and plug the vehicle plug into the Dongar adapter. It's a bit tight in this area. If you can, I would push the adapter piece (the part I have enclosed with sound deadening material) totally up into the headliner. There is room... and I may go back and do this. The little trim piece that you took off first is just slightly pushed out from one side because I did not push this totally up into the headliner. Not a big deal... but just a heads up.
The location I chose to use is personal preference. When driving I only see about half inch of the camera below the review mirror. The main goal of this was to show how to supply 12v switched power using the Dongar adapter to what ever dash cam you decide to use w/o any cutting/tapping into existing wiring. Totally plug-n-play and can easily be removed and back to stock.
The 90 degree micro USB cable makes a clean look instead of the one Dongar supplies. Plus if you use the route I did for the wire you will need a little more length than what it is shipped with the adapter.
This will become a reference thread for 2020+ models in that area.
Unless another 2020 owner chimes in doing similar work it will take a TIS subscription at this point to see wiring diagrams in that area...or meter out the wires in question for switched power.
I believe the 2020 models are different with the new safety stuff standard? Correct me if I'm wrong. Took apart the plastic behind the mirror to tap in 12v for a camera. Here's some pics of that cover piece as I think it's different and could not find any pics of it.
So it was slide the whole thing down towards to hood, and fight with it.. the small tab piece on top has twp clips, but i did not know that I til it popped off. Yes I bent the bottom tab =(
I guess my plans are to tap Into the purple and blue at the connector.. for switched 12v power.. waiting for my pin taps to come from overseas..
Anyone know if there's 12v switched available on those two harnesses on the left?
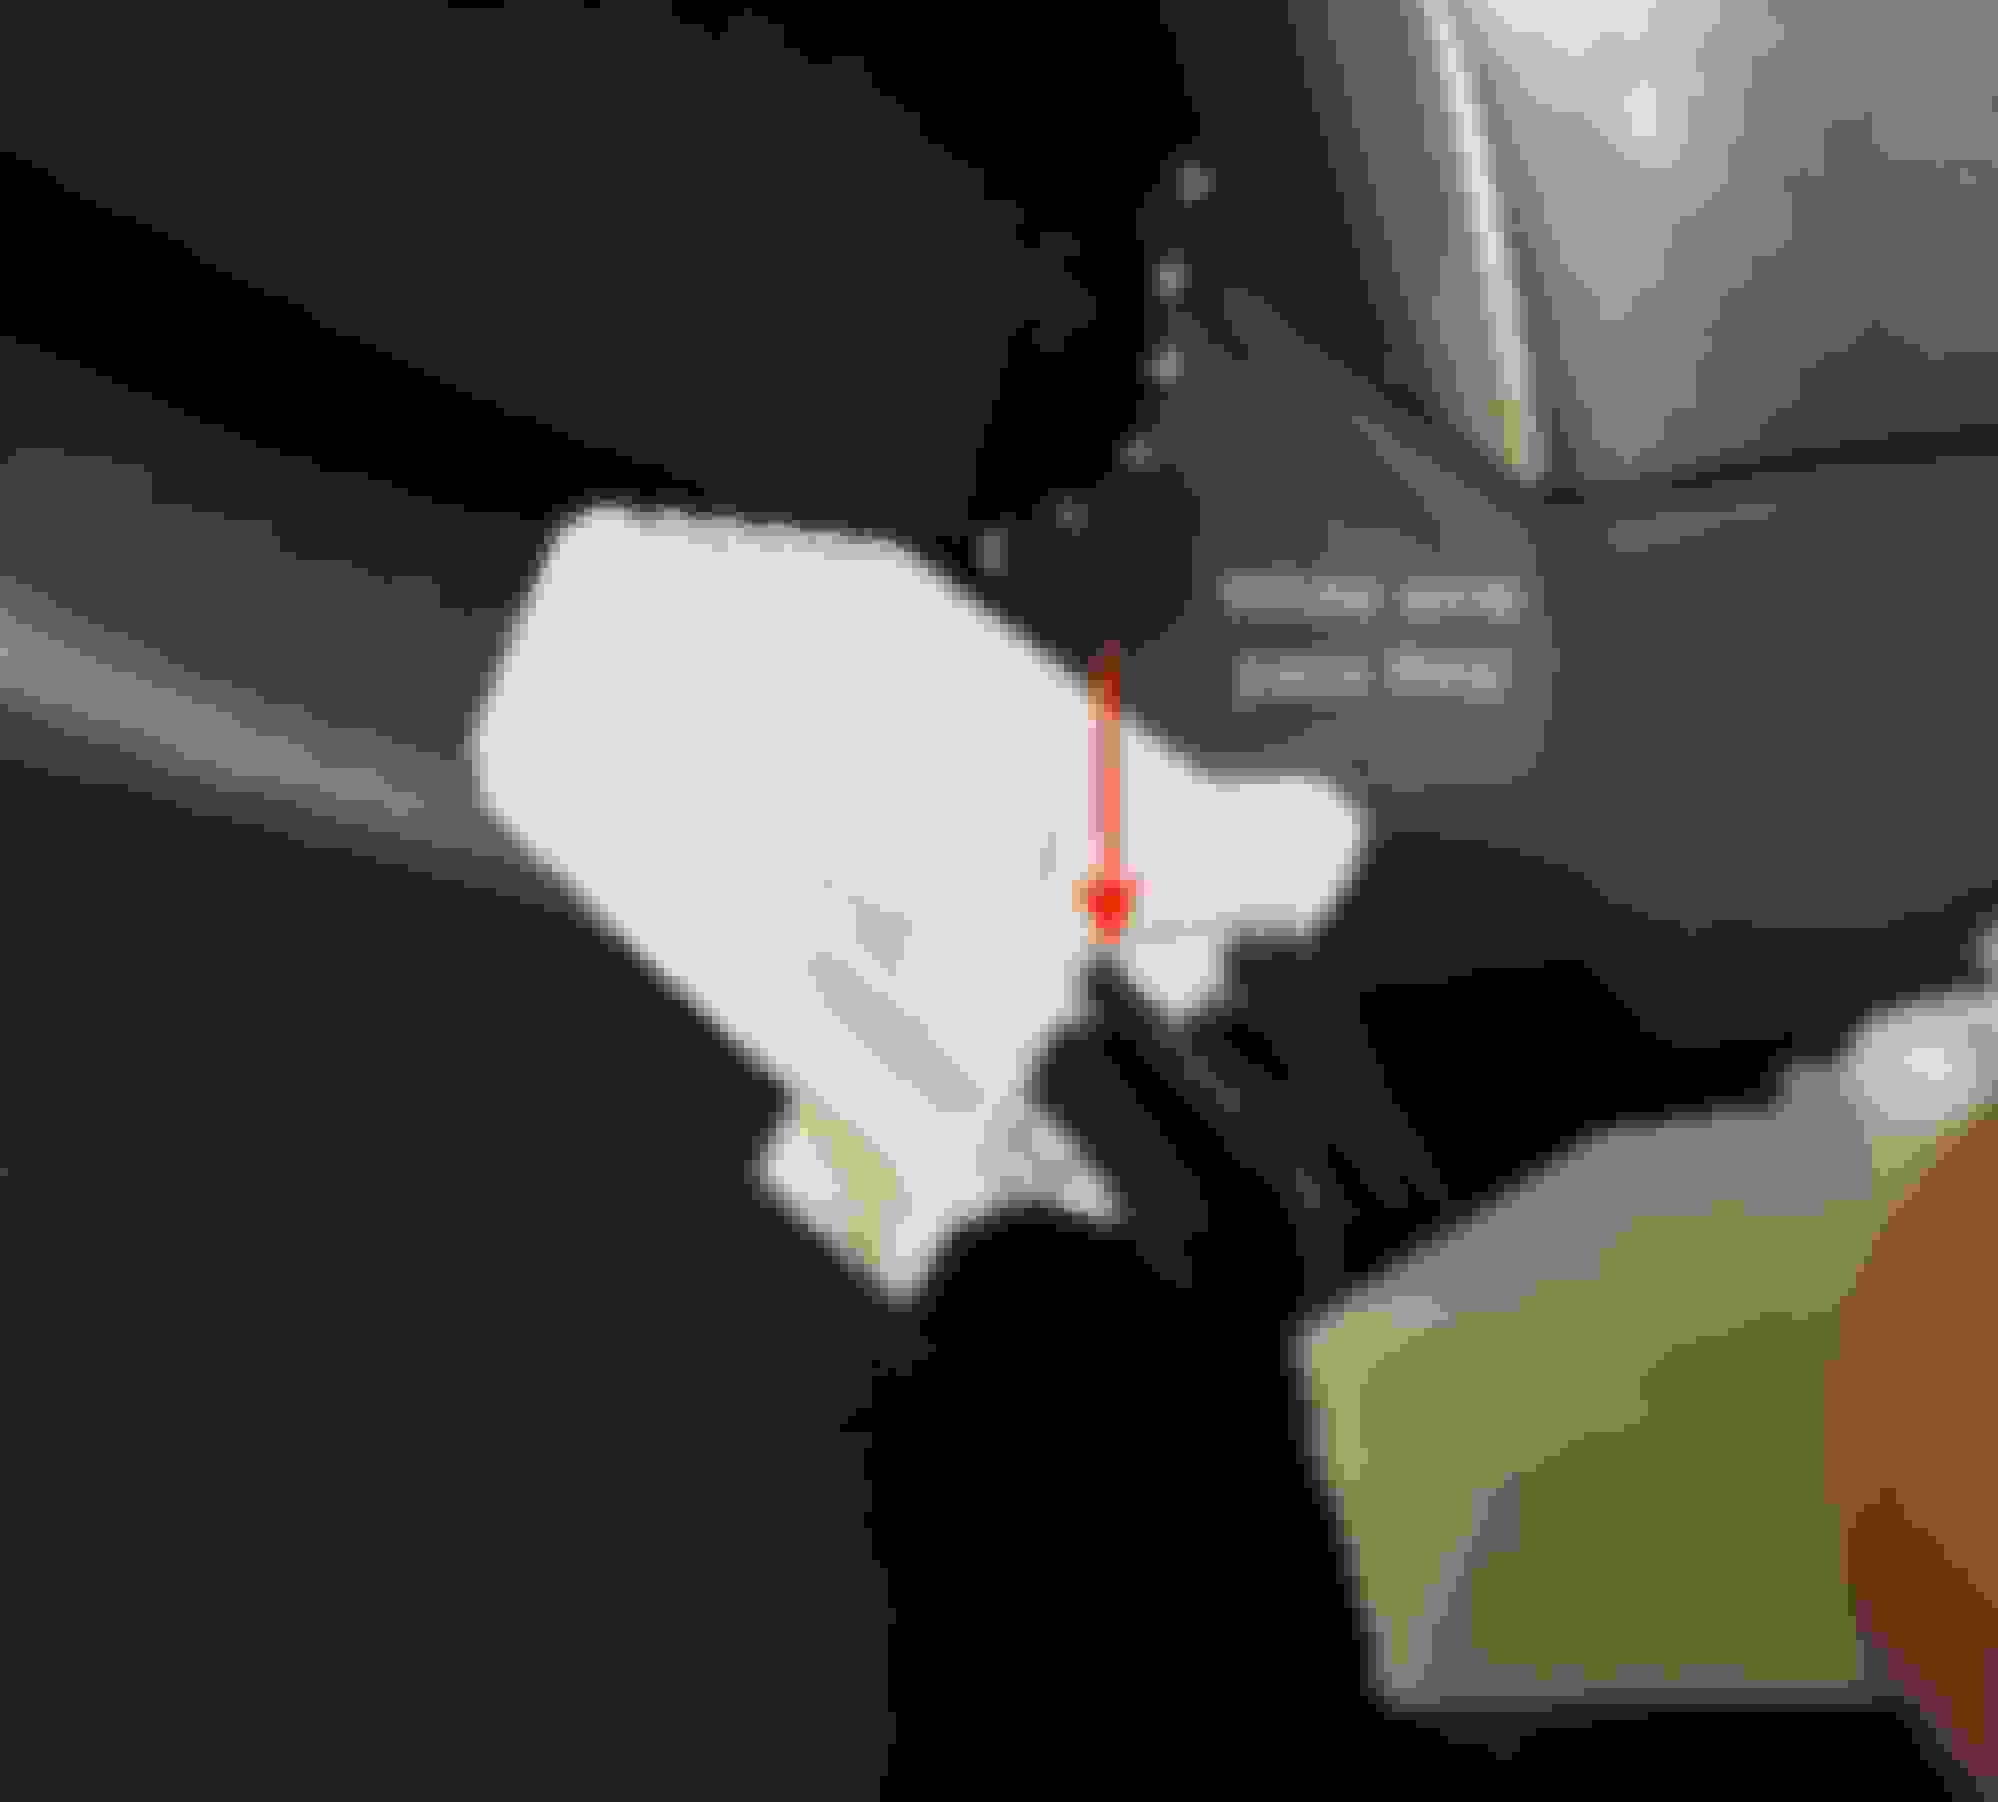
The proper way the take the cover off is 1) pull the top small piece towards you and pup it out first, 2) then push down wards the large piece to remove.
For the switched power, that is the connect on the right of the picture. The first pin which is the blue color with white strip, that is for switched 12 v. The very next one which is black, it is the ground wire.
Thanks @hzhao and @Alche for the pics and information. Plus @GX*BOB for the great video he posted on leveraging the Dongar adapter for his dash cam. Unfortunately, 2020+ (the below pics are from my 2022) models have have the camera setup and is a bit different... but same outcome .
I used all of your knowledge combined with the Dongar Adapter to provide power to my Garmin 67w dash cam in my 22 GX. Thank you!
Tip (at least for cold weather climate) use a heat gun to warm up the plastic before trying to pry off the little piece. Makes it much easier and risk of breaking a pin/clip is much lower.
Heat up this little piece of plastic and then use a pry tool pulling directly towards you.
Once this piece is removed, slide the remaining piece of plastic trim down following the contour of the windshield.
Picture of the trim piece so you can see the tabs.
The OEM plug uses a total of 5 pins/wires. The Dongar plug has a total of 7 pins/wires. They are straight pass thru so the additional pins on the Dongar adapter will not have any associated pins from the vehicle. The 5 pins/wires on the vehicle match up with the Dongar pins/wires (plus 2 unused pins).
At least on my 22 the 12v switched power is blue (not blue/white as posted above).
5 Total active pins/wires on the vehicle plug.
Dongar adapter. Wanted to show that the active pins on the vehicle plug are being passed through and the 12v/ground are pig tailed to the USB adapter.
And just a different angle so you can see all the wires on the adapter.
The highlighted pin below is connected to the white wire on the vehicle plug and passes it through to the same pin.
I used some sound deadening material around the Dongar adapter to eliminate any rattles.
Time to plug the Dongar plug into the vehicle and plug the vehicle plug into the Dongar adapter. It's a bit tight in this area. If you can, I would push the adapter piece (the part I have enclosed with sound deadening material) totally up into the headliner. There is room... and I may go back and do this. The little trim piece that you took off first is just slightly pushed out from one side because I did not push this totally up into the headliner. Not a big deal... but just a heads up.
The location I chose to use is personal preference. When driving I only see about half inch of the camera below the review mirror. The main goal of this was to show how to supply 12v switched power using the Dongar adapter to what ever dash cam you decide to use w/o any cutting/tapping into existing wiring. Totally plug-n-play and can easily be removed and back to stock.
The 90 degree micro USB cable makes a clean look instead of the one Dongar supplies. Plus if you use the route I did for the wire you will need a little more length than what it is shipped with the adapter.
I bought the Dongar Technologies thing and it doesn't work. Comparing to @bowhun2r 's pictures above, my pins are all wrong. The product I ordered from Amazon is correct. I confirmed my order and the box it came in. It says for Toyota/Lexus.
That's fine. I hope others who bought the Dongar Technologies adapter can chime in. As you can see in my picture, it looks nothing like @bowhun2r 's nor the Amazon product image. The two wires (+ and -) that taps onto the rearview mirror's 12v aren't allocated correctly. I'm not sure if they just put the wrong product in the Toyota/Lexus box and this is for a different Toyota vehicle or poor QC? I went from very excited to very disappointed.
I bought the Dongar Technologies thing and it doesn't work. Comparing to @bowhun2r 's pictures above, my pins are all wrong. The product I ordered from Amazon is correct. I confirmed my order and the box it came in. It says for Toyota/Lexus.
Here's a picture:
Here is the adapter I purchased directly from Dongar
I actually got the bundle with the Garmin included.
By chance... are you plugging the Dongar adapter into the correct location? Only reason I ask... I mistakenly unclipped the rain sensor initially instead of realizing I had to pull the large plastic contraption. Behind the rain sensor is an 8pin which obviously will not fit the 10pin adapter. Was pretty frustrated myself until I realized what I had done.
No, I'm 100% sure I connected to the right connector. There's only one that it will fit into and I read and re-read this thread a dozen times, memorizing each image AND referencing to it as I was installing --I'm paranoid not because I'm dumb with electronics, but because I break clips when removing panels all the time. Hahaha. Just bad luck with those, I guess. That's besides the point. I looked at your pictures and it's obvious the wires don't match up. Even if I compared my vehicle's wires in the female connector, to the pins in the Dongar Technologies adapter's female connector, it's obvious the wires are in the wrong pin outs (holes).
As soon as I plugged in the adapter, I noticed that the garage opener buttons didn't work. I disconnected and reconnected the OEM connector and it worked. So, I was sure it wasn't a blown fuse. Then I reconnected the adapter again to make sure I witnessed the *click*. Same thing, no joy. That was when I looked closer at your pictures (thank you so much, by the way!!!) and compared those with everything I had. Notice that in your post, the + and - are in adjacent holes but in my picture, they're not only completely on opposite ends but also across from the two rows?
I'm returning it for an exchange with Amazon, because it's the quickest way. I'll drop this off at a UPS without having to pack it for a quick and easy return, while the replacement is already on its way to me. If I still get the same wrong item, then I'll return it for a refund and contact/order directly from Dongar Technologies and let them know that if Amazon is fulfilling for them (I doubt it), I was getting the wrong ones.
Thanks for linking to the exact one you purchased. I looked at it and it's the same exact one that you linked to on Amazon that I bought. So, I am 99% certain they sent me the wrong product and 1% poor QC installing the pin outs into the connectors.
Got it. I blew up your pic showing the adapter and it's definitely wrong pin-out for power/ground. First two pins are the power/ground the others are simple straight pass-thru. Sorry you got hit with that.
Once you get the correct adapter it truly is plug-n-play.
 09-12-20, 02:02 PM


 .
.