When you click on links to various merchants on this site and make a purchase, this can result in this site earning a commission. Affiliate programs and affiliations include, but are not limited to, the eBay Partner Network.
I can take some photo's from under the axle of how it's tied up now, but as for installation, I had YotaMasters do all the suspension work. Unfortunately I can't shed any light on what was removed other than I know the linkage from the axle to the controller is missing.
If I get time today, I'll try to take a picture of it and post it.
Could you post the pictures of this. Also, could you describe the procedure of things you removed the make the install smooth? Did you have to disconnect the sway bar?
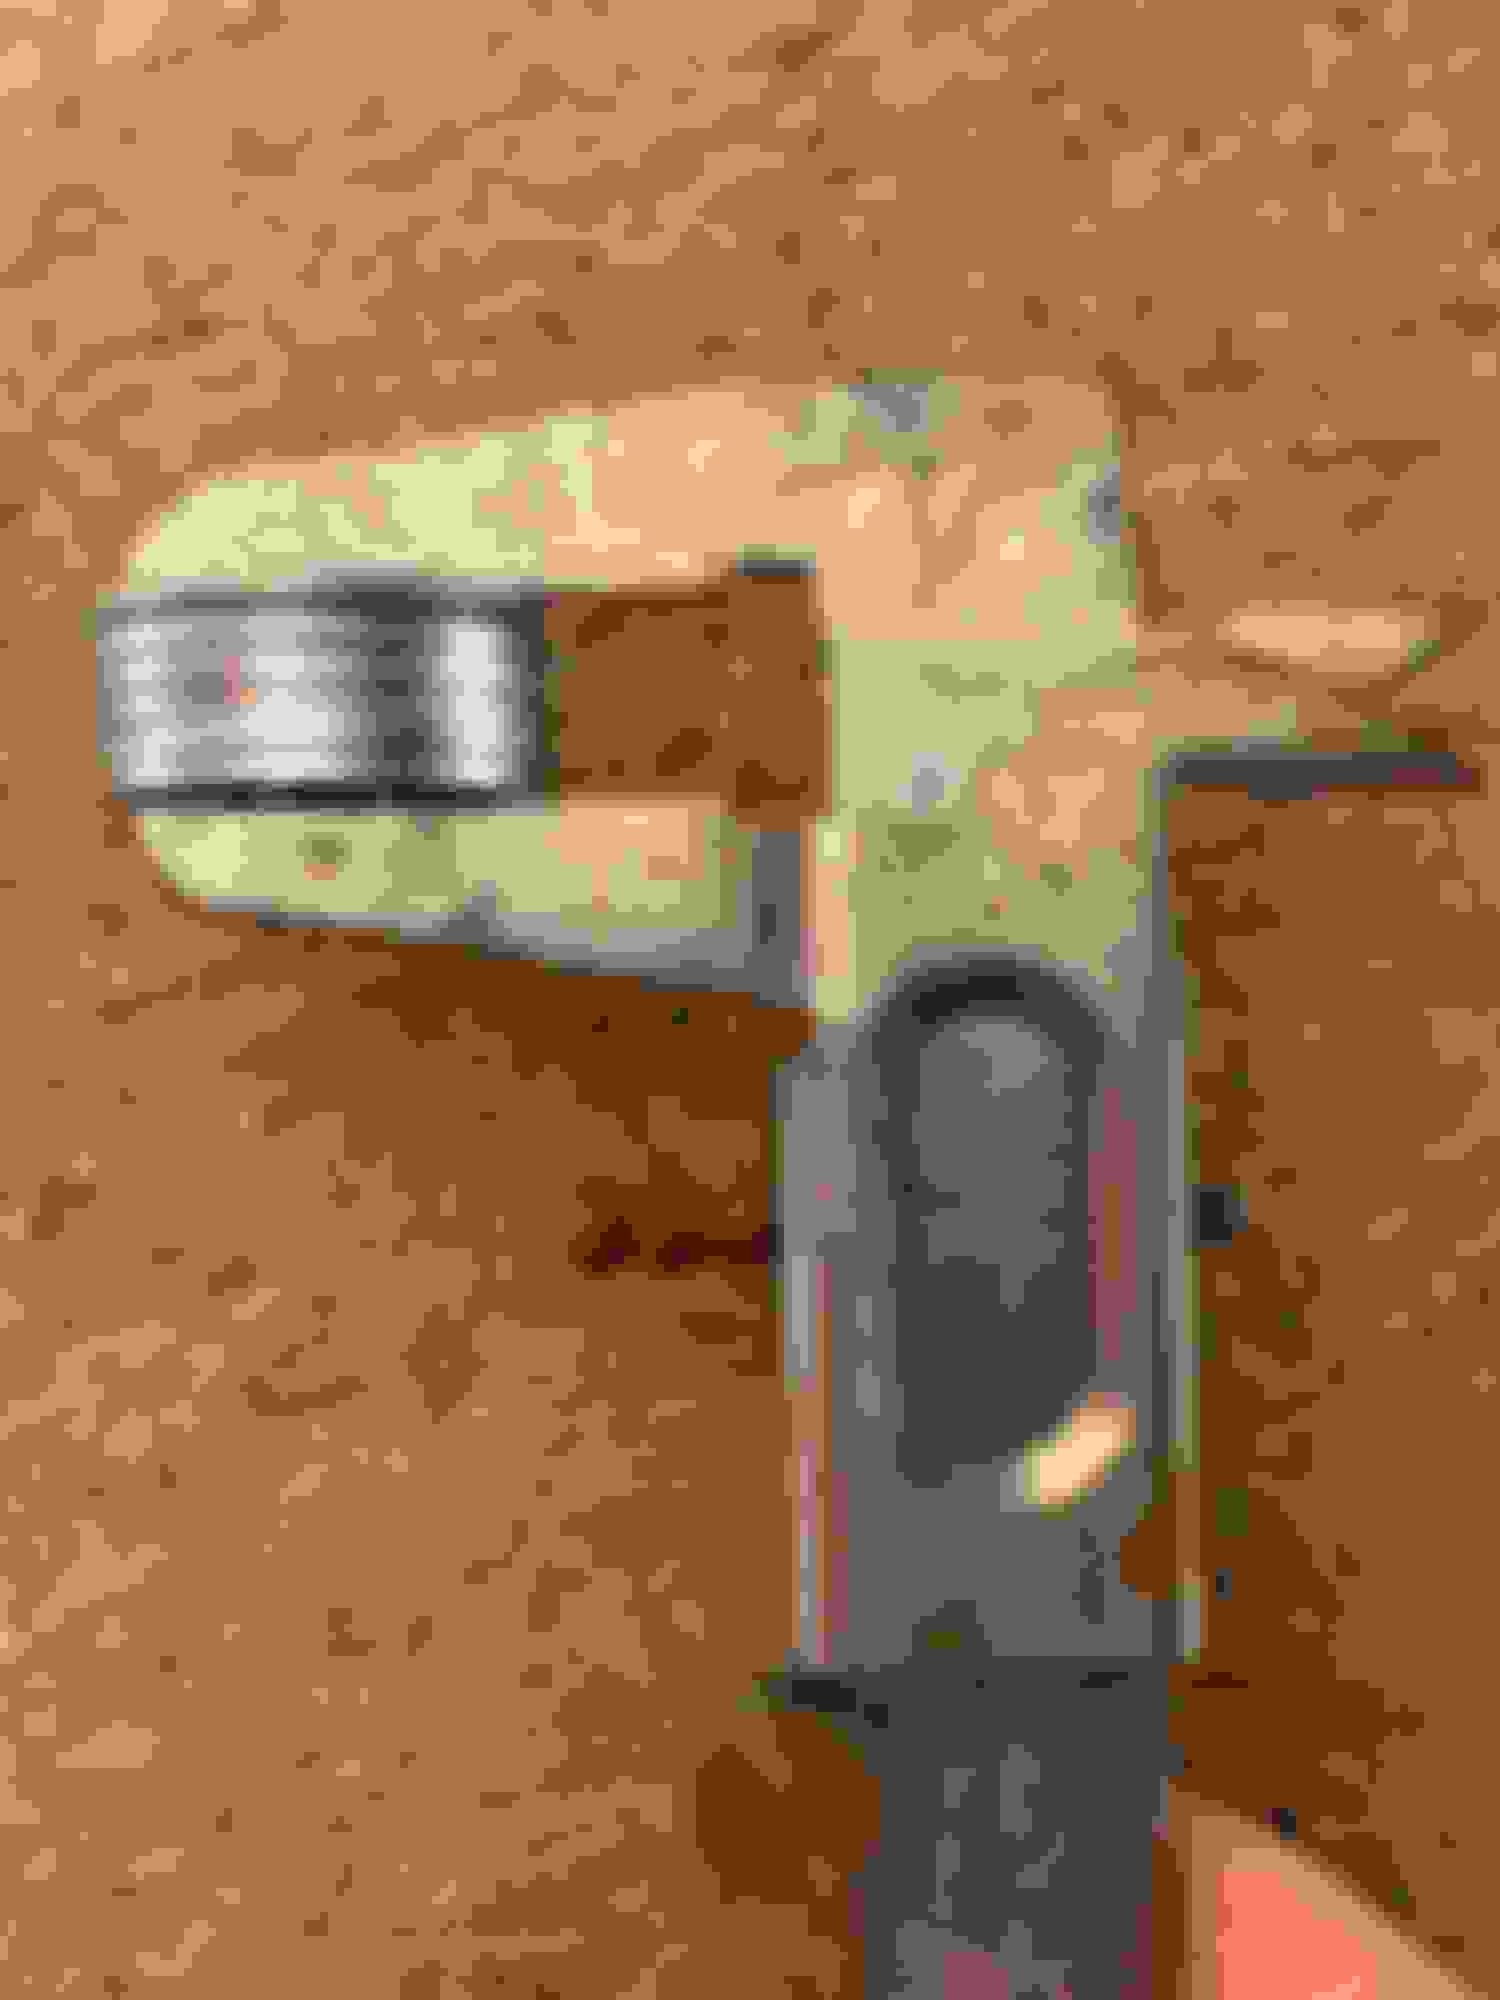
Here are the sensors before I installed the lift. I took these to note where the sensor was positioned so I could match that after the lift. I'll try to take some picture of the mounts with the washers installed tonight or tomorrow.
I followed a T4R.org article (pics don't work on the link) on a suspension install on a KDSS 4Runner. The biggest difference is that we have air bags. To remove those you just pull a clip at the top of the bag, pull the air hose out (it's just clipped in) of the top of the bag, then remove the one bolt on the bottom that secures it to the axle. To install the spring, I lifted up the opposite side of the axle with a floor jack, then used the factory bottle jack to push down on the side I was working on, slid the spring in with the spring conversion metal cup/perch already installed in the spring. Once in place I bolted the cup/perch (whatever they call it) in place. Pulled out the bottle jack, lowered the floor jack and started on the other side.
I only had to lower the swaybar down out of the KDSS piston and the link connected to the frame. When it was done I just used a floor jack to lift the swaybar back into place. very easy, especially compared to the front swaybar.
AFS/Air Bag sensor. Looking up AFS/Air Bag sensor. Looking from the side AFS/Air Bag sensor. Looking from opposite side.
Here you can see the swaybar dropped out of the chassis mounting points. Rear Icon springs and shocks installed.
Is your AFS still working okay? Meaning: not flashing and able to turn on and off from the steering wheel?
Did you have to lengthen the linkage for the AFS?
Please tell everything about what you did with the AFS if you could.
Mine is still flashing on my dash. It doesn't bother me too much but still like to clean that up.
thanks for the pictures. Do you have pictures of the headlight sensor with the washers?
I was busier than I though over the weekend. I'll try and get some pics of the mounts tonight after work and post them here.
Originally Posted by r2m
Is your AFS still working okay? Meaning: not flashing and able to turn on and off from the steering wheel?
Did you have to lengthen the linkage for the AFS?
Please tell everything about what you did with the AFS if you could.
Mine is still flashing on my dash. It doesn't bother me too much but still like to clean that up.
Nice job!
Thanks..
Yep, AFS works fine, I can even see the headlights move left and right as I turn at night. There are no flashing lights on the dash. I haven't tried turning them on and off on the steering wheel controls. I'll try that on my way home and report back. I did not lengthen the linkage, I moved the whole mount down negating the need to lengthen the links. I also read another post that there's not much additional length you can get with the stock links, this is why I chose to use washers as spacers. The only thing I did with the AFS was add the washers to move the ride height sensor down so the arm on the sensor itself was level again. That's it..
And for the air bags, I just removed the airbags themselves (and added the washers to the sensors) and nothing else. The compressor, computer, ride height sensors are all still in place. I have absolutely no errors on my dash.
Do you still have enough bite (threads) leading into the nut after loading up all those washers?
I don't remember how much thread was there, but I remember it being enough. I do recall thinking that one more washer might be just too much and would call for a longer bolt. I need to add another washer because my headlights are just a tad too high, and I don't want to blind oncoming traffic. When I go to add the next set of washers I'll take a quick measurement. The bolts that they use are the same 12mm that hold the factory skid plates on. This should give you an idea of the bolt length.
Here are some pictures of the washers before and after I added a 6th. 6 washers equals about 1cm. With 5 I'm comfortable with the amount of thread left, but with 6 it's borderline. I'll be getting new longer 12mm bolts to replace the factory bolts to be sure they don't work their way out. But for now there was enough thread to tighten them with the 6 washers installed.
Rear height sensor 5 washers before install Rear height sensor 6 washers before install 6 washers equals about 1cm
Thanks again for the pictures. I hope to get my suspension installed in June when I have the house to myself. Did you have to drill any holes into the frame for the reservoir mounts. I have to for my Radflos.
Thanks again for the pictures. I hope to get my suspension installed in June when I have the house to myself. Did you have to drill any holes into the frame for the reservoir mounts. I have to for my Radflos.
Yes, for the brackets in the front I needed to drill two holes on each side of the frame. You need to drill on the bottom of the frame next to the bolt holes where a non KDSS sway bar would have been attached, there's no welded in nut to support the brackets. And for the rear I needed to drill a single hole on each side. The only issue I ran into was the driver's side rear mounting. I can't mount it as far back as the passenger side because the compressor for the air suspension is in the way. I'm still debating on how to work around that. I can take more pics if you'd like.
It would be good to have pictures of your front and rear reservoir mount. I had to cut the tab off on the driver side near the KDSS piston. I accidentally cut into the KDSS hose and had to replace the hose. Sometimes, it is better anf cheaper to leave it to the Pros, LOL. Did you use self tapping screws.to attach the mounts to the frame?
It would be good to have pictures of your front and rear reservoir mount. I had to cut the tab off on the driver side near the KDSS piston. I accidentally cut into the KDSS hose and had to replace the hose. Sometimes, it is better anf cheaper to leave it to the Pros, LOL. Did you use self tapping screws.to attach the mounts to the frame?
I had to cut the tab off as well, the one that held the rubber fender liner away from the KDSS hoses. I did use the self tapping screws. Unfortunately Toyota didn't weld in the nuts for the standard sway-bar in the frame.
I have the drivers side reservoir mounted to one of those plastic caps on the frame (see the passenger side close up, the plastic cap stamped with the number 1) right now just to ensure that there was enough clearance with the tire, this is why I also have a zip tie around it. It won't fit back where it's meant to go because of the air compressor. I want to see if I can get in there and move the compressor around to make room for the reservoir one of these weekends.
Icon front reservoir mount using self tapping screws. Note there is no threads in the location for the standard sway-bar. Icon front reservoir mount using self tapping screws, tab (just below metal elbow of the reservoir hose) cut off with angle grinder. Location of rear Icon reservoir passenger side. Close up of mounting Icon reservoir rear passenger side Location of rear Icon reservoir drivers side. Mounted temporarily to conform fitment. Close up of mounting Icon reservoir rear drivers side.
 04-04-19, 08:39 AM