When you click on links to various merchants on this site and make a purchase, this can result in this site earning a commission. Affiliate programs and affiliations include, but are not limited to, the eBay Partner Network.
I backed into a mail box and cracked the fiberglass panel that the license plate attaches to on the rear Cargo Door. Does anyone know how to remove the Cargo Door lower interior trim panel so I can gain access to the broken panel so I can remove it.
I have removed the 4 door panels, center console parts and dash parts. The only time I came across screws was for the door panels due to the needed reinforcement with pulling the handle to close the door. I think the rear gate panel would be the typical Lexus trim clamps. Simply pry it off with your hands and if needed a plastic wedge. If there is a screw you should have a small cover to remove to gain access.
I am trying to remember how to do this since I did it a few weeks ago when I installed the rear camera for my dashcam. Alot of it was blurry since I literally had to tear apart the passenger side of the car to run the cable.
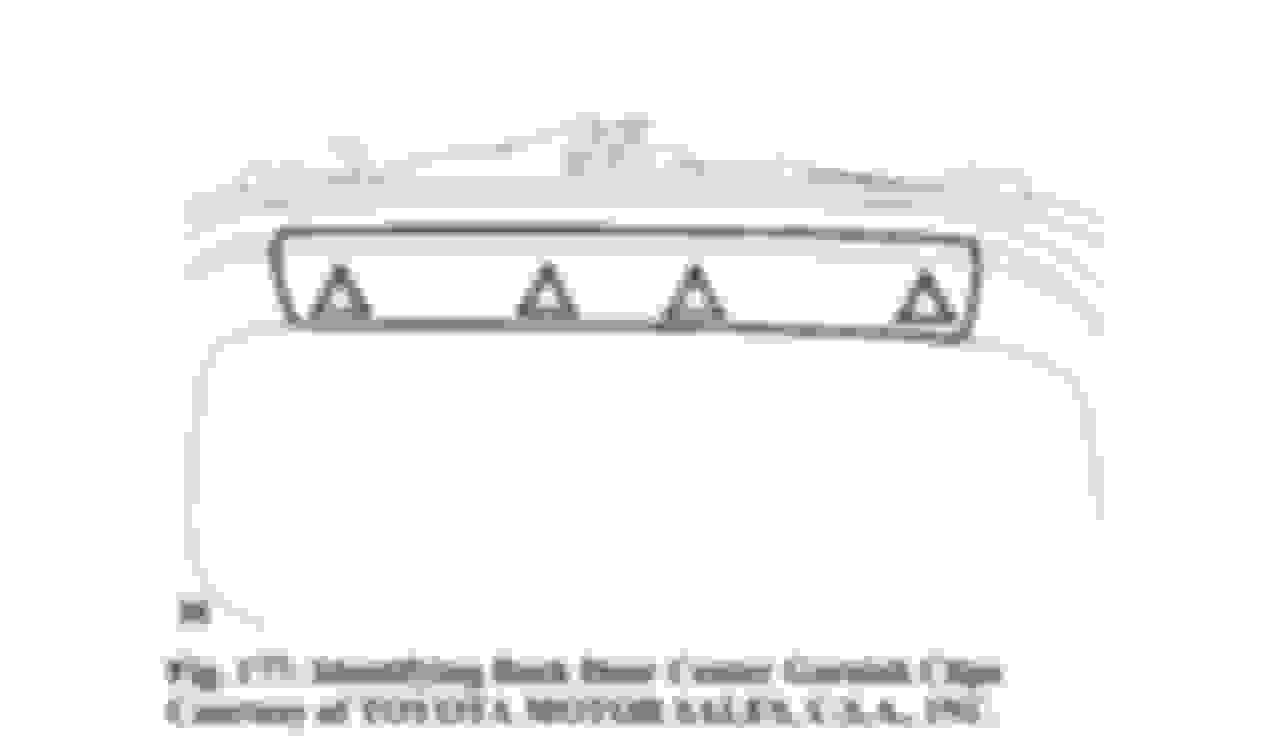
The trim for the top of the door has to come out first. Those are just held in by clips.
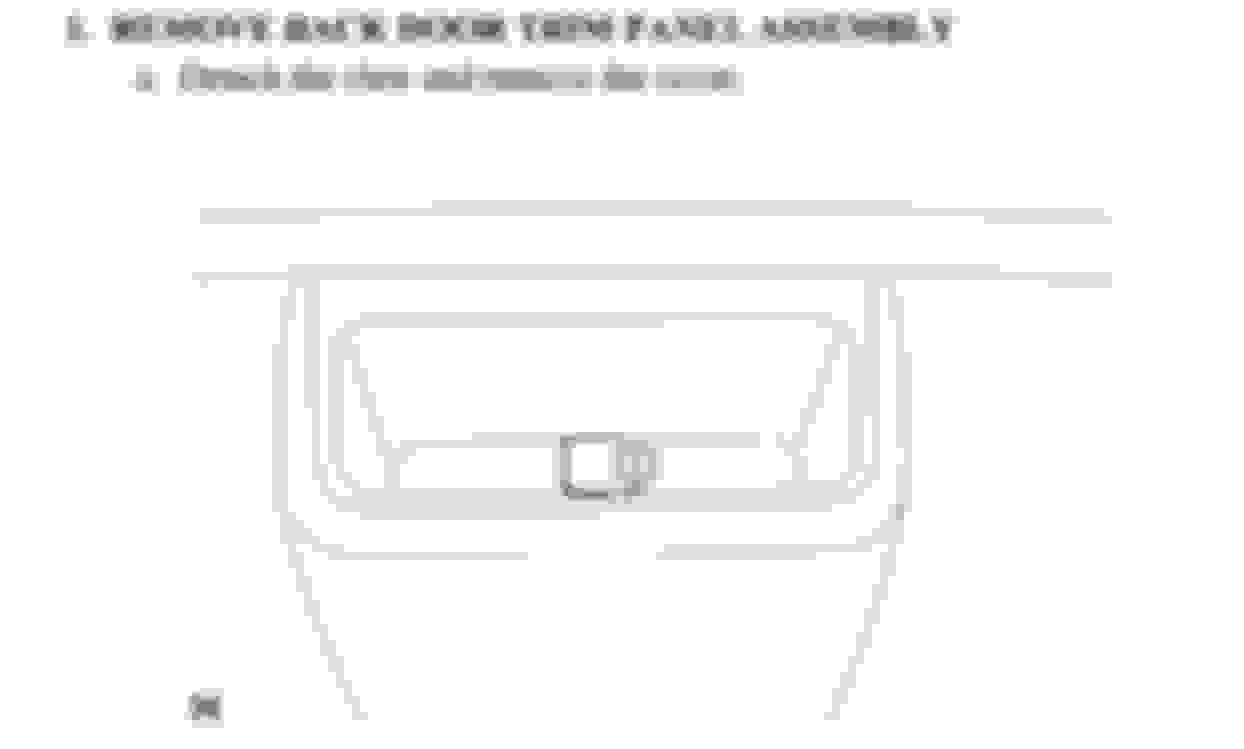
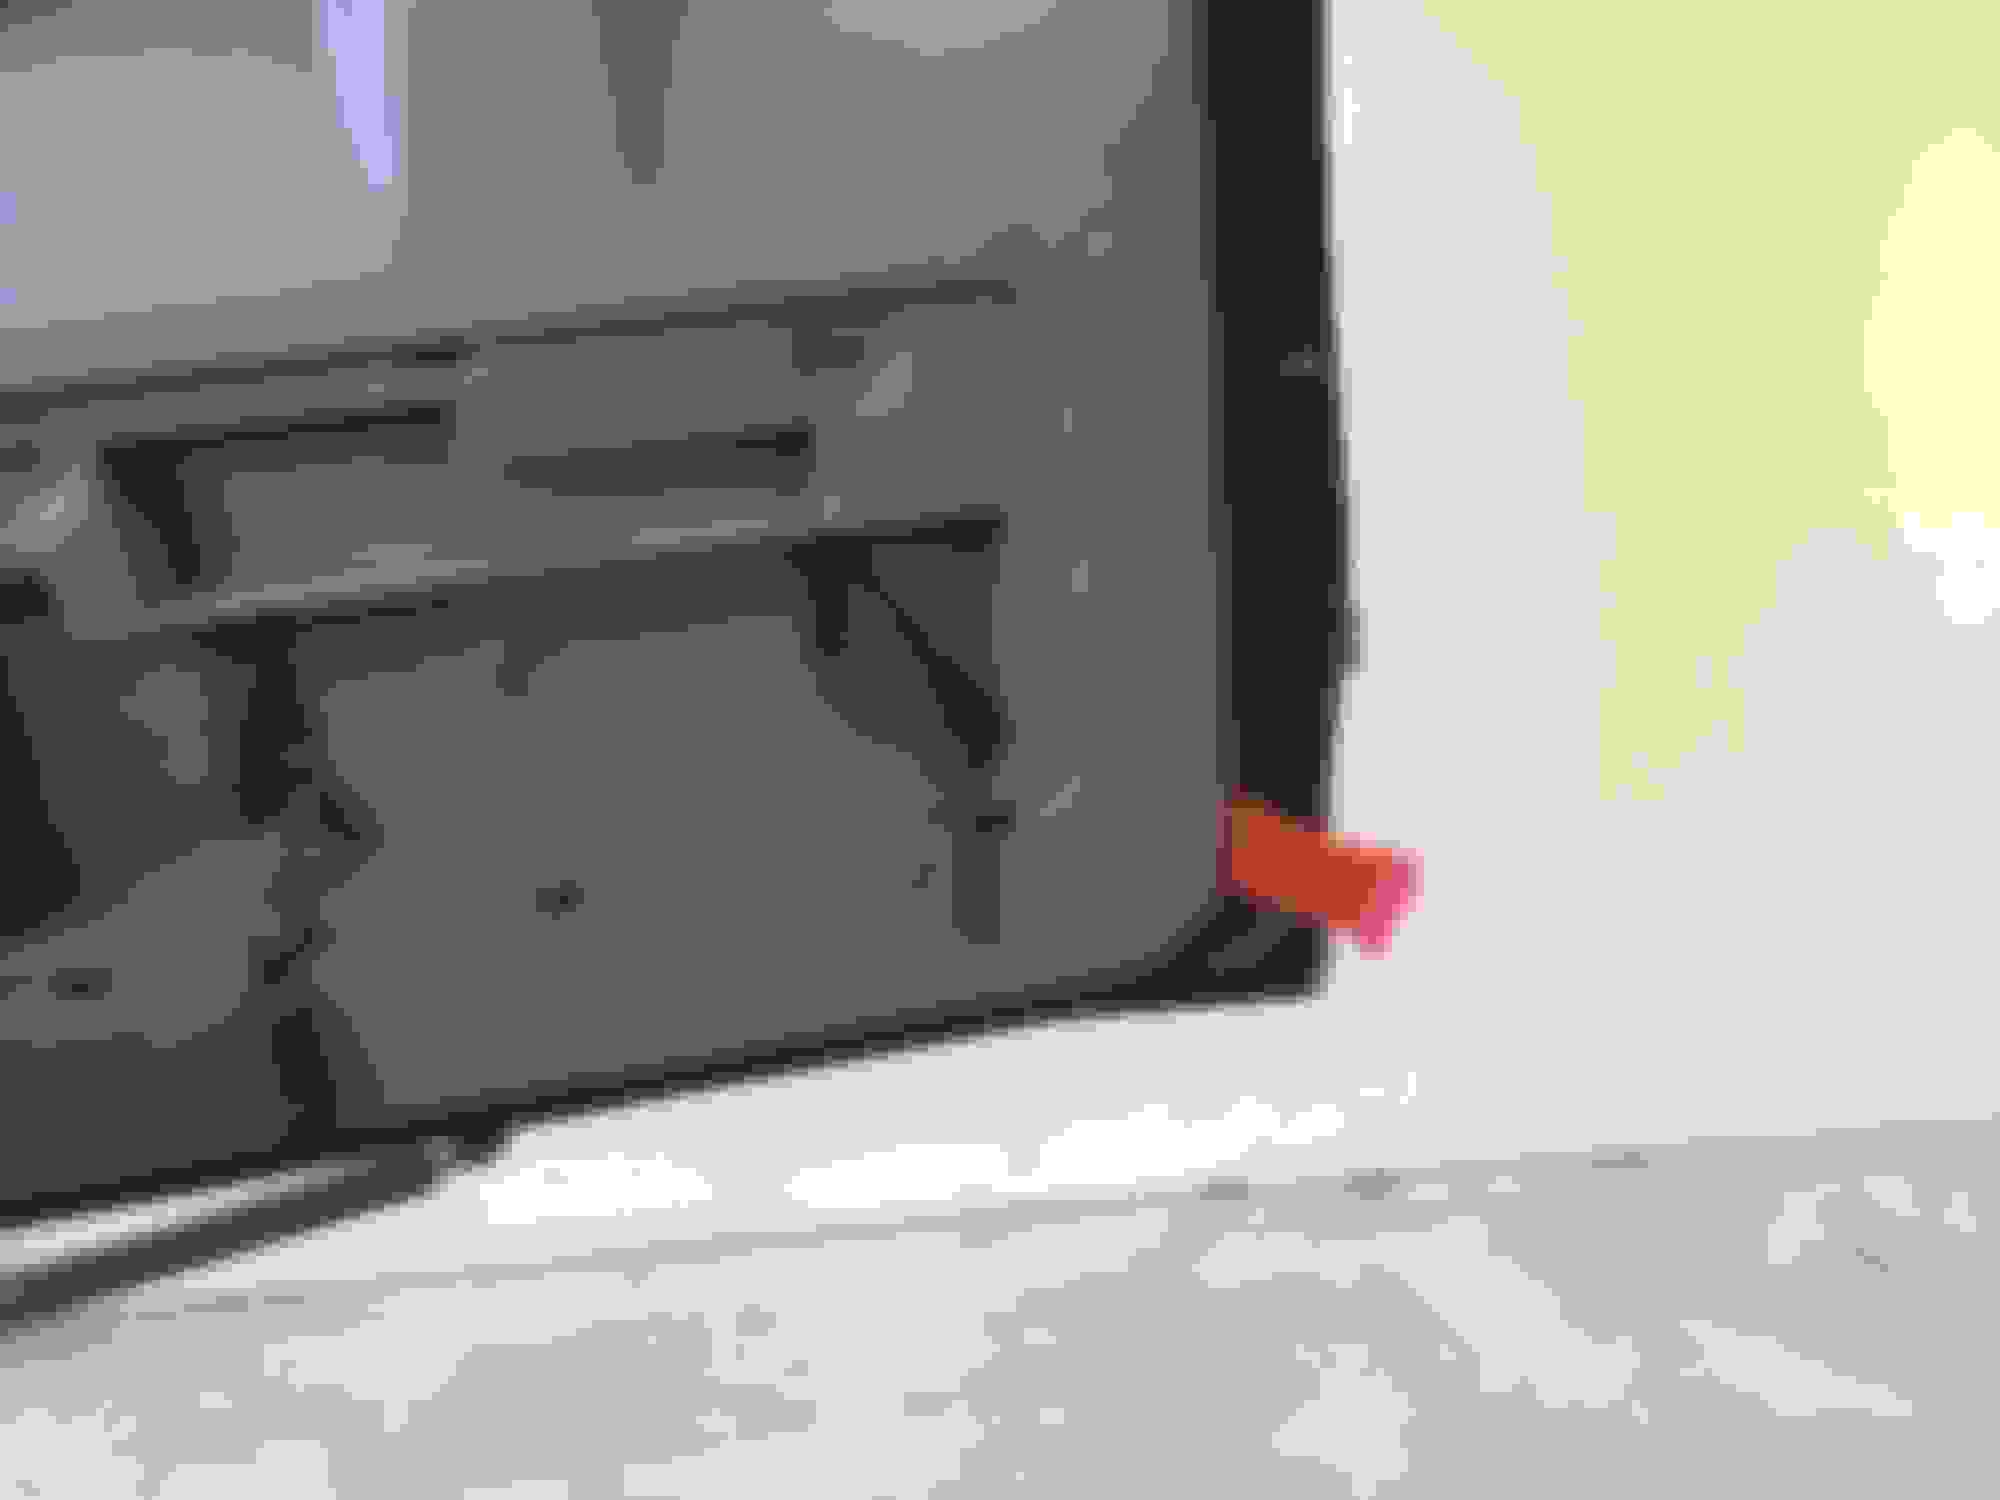
The access covers on the lower part of the door has to come out. Remove the tool kit, its just extra weight. On the other access panel, there is a bolt that holds the panel in.
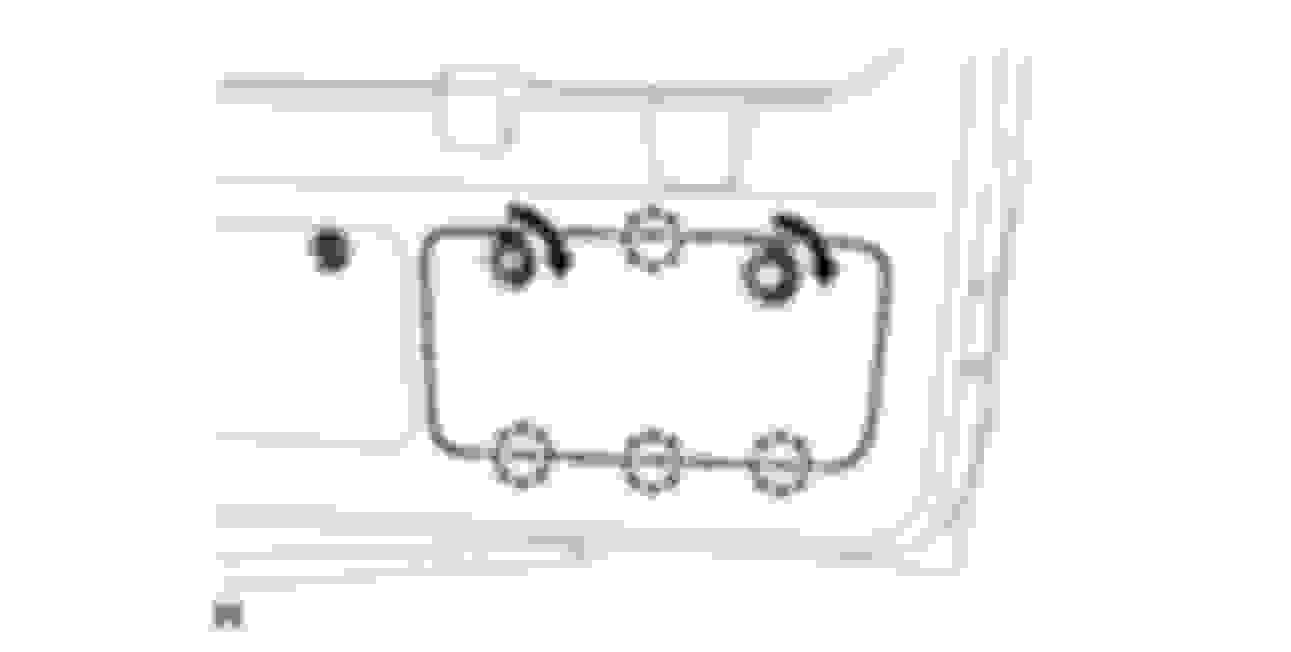
There are a bunch of clips that hold the door. There might be another screw, I totally forgot to be honest, but just start from one side and work your way to the other.
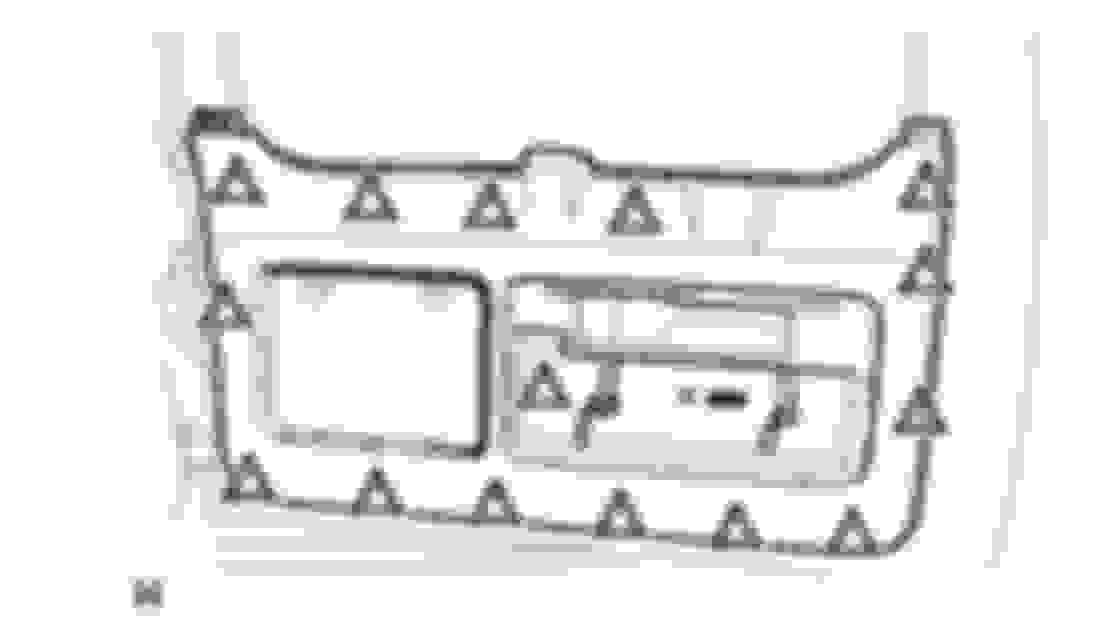
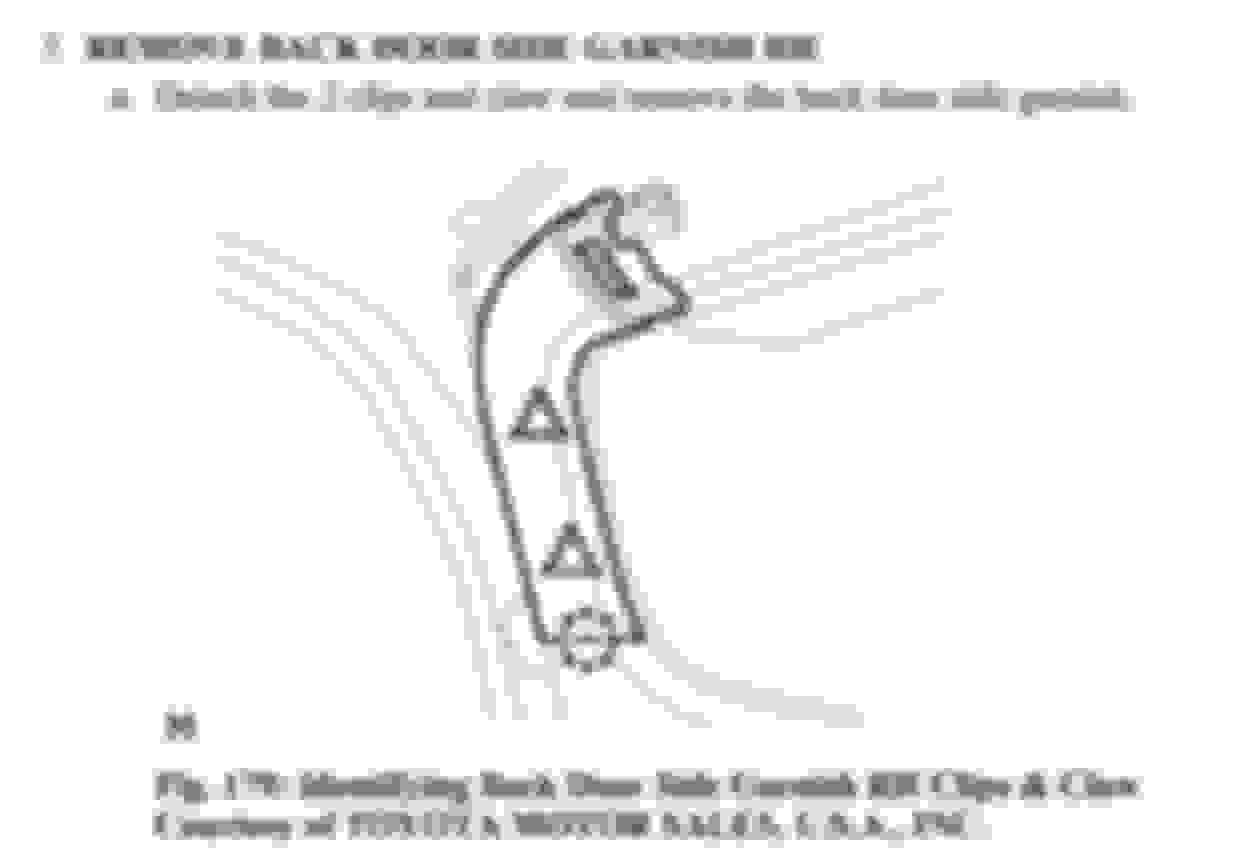
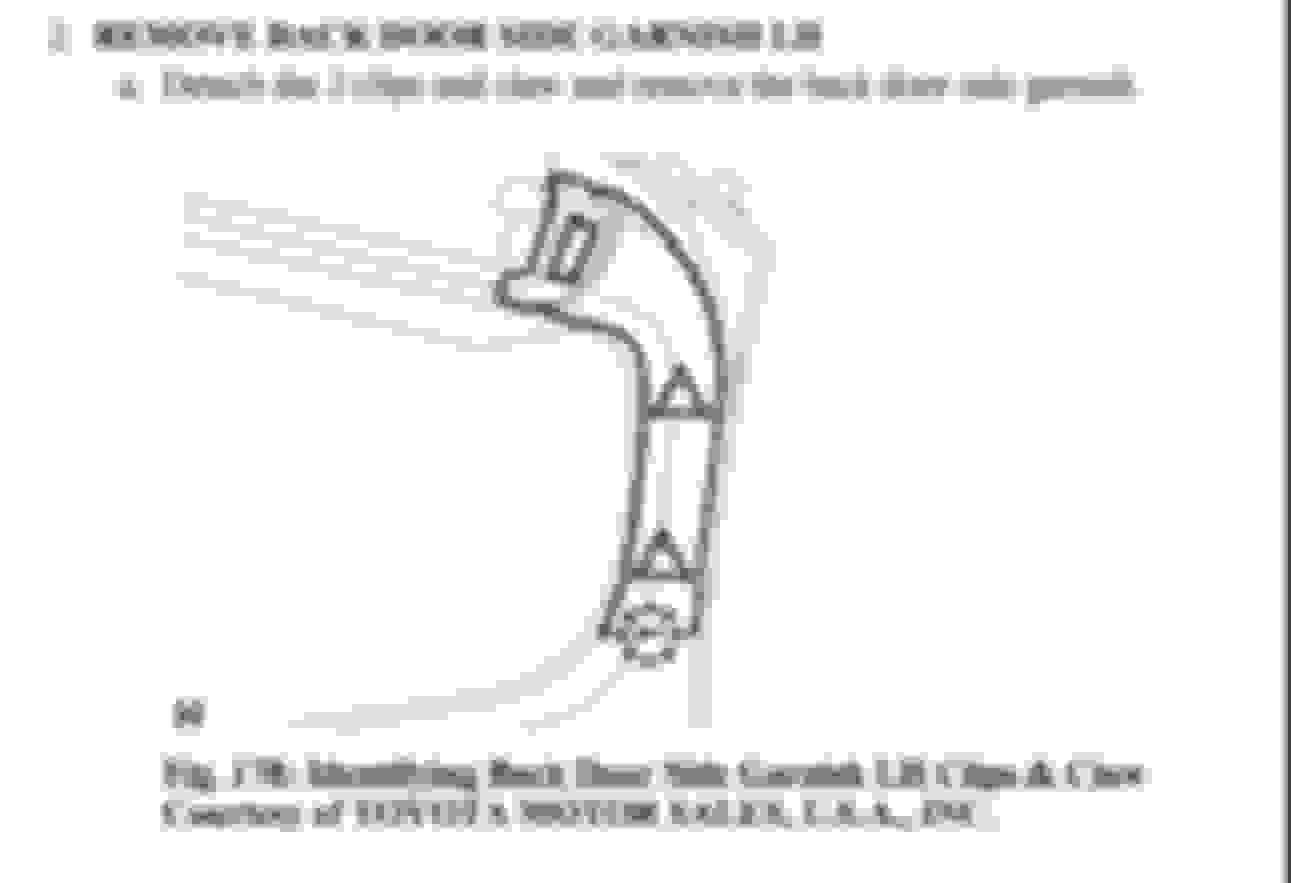
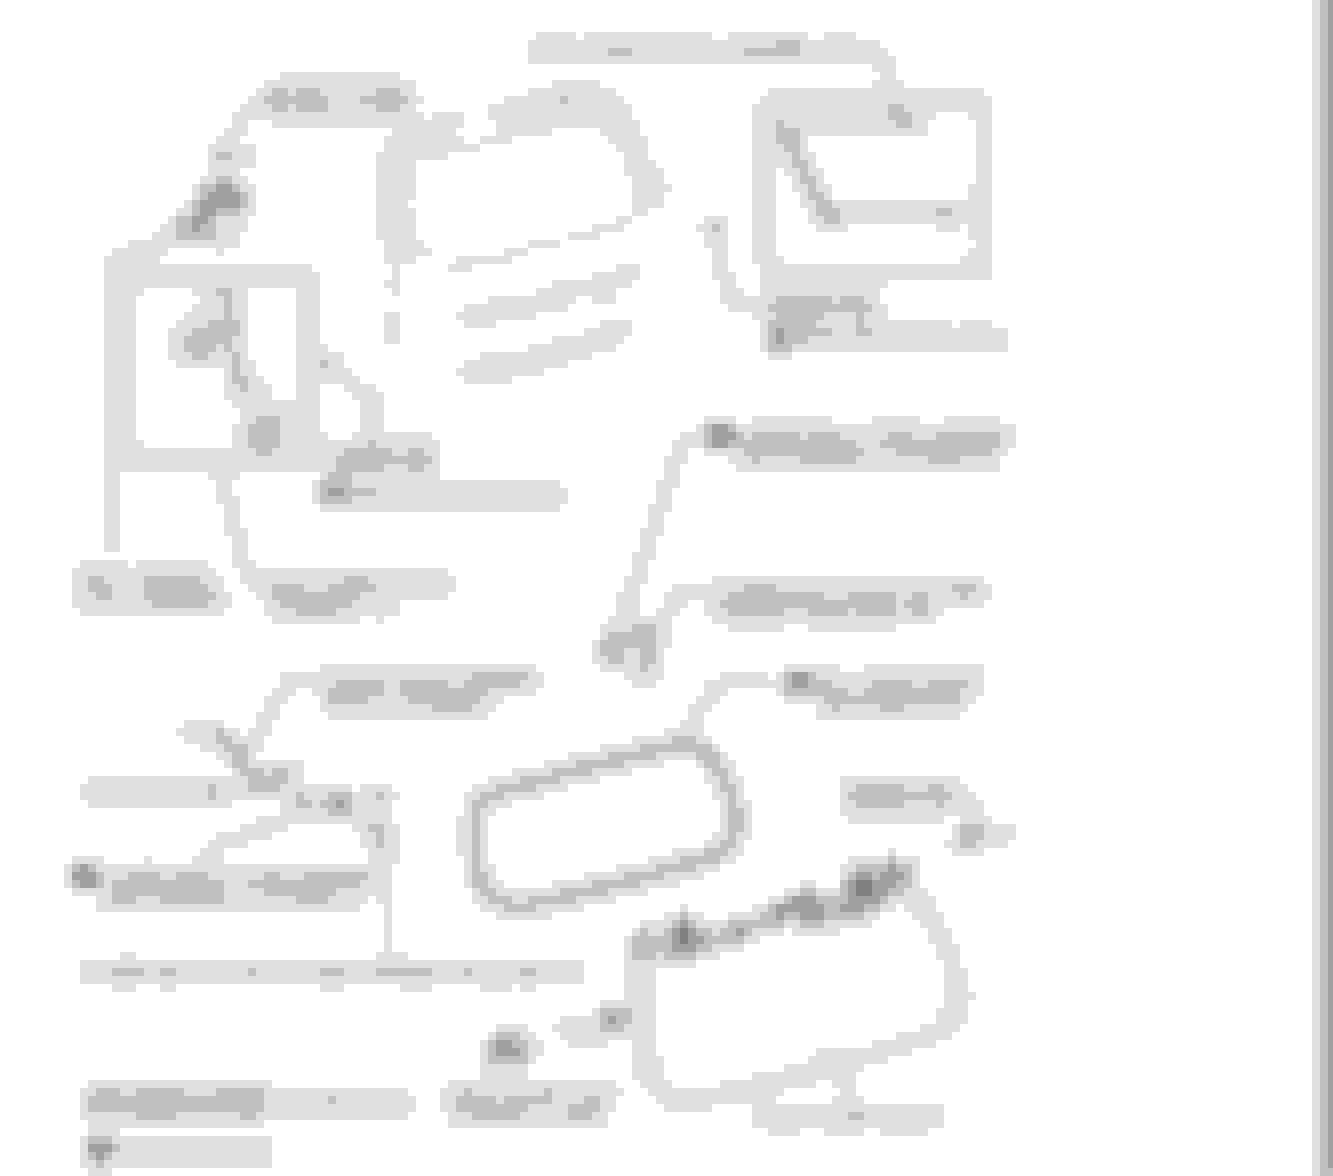
Here is a diagram from the parts catalog that show the clip locations for the lower part, I wish I had this when I did mine but I kinda just jumped into it.
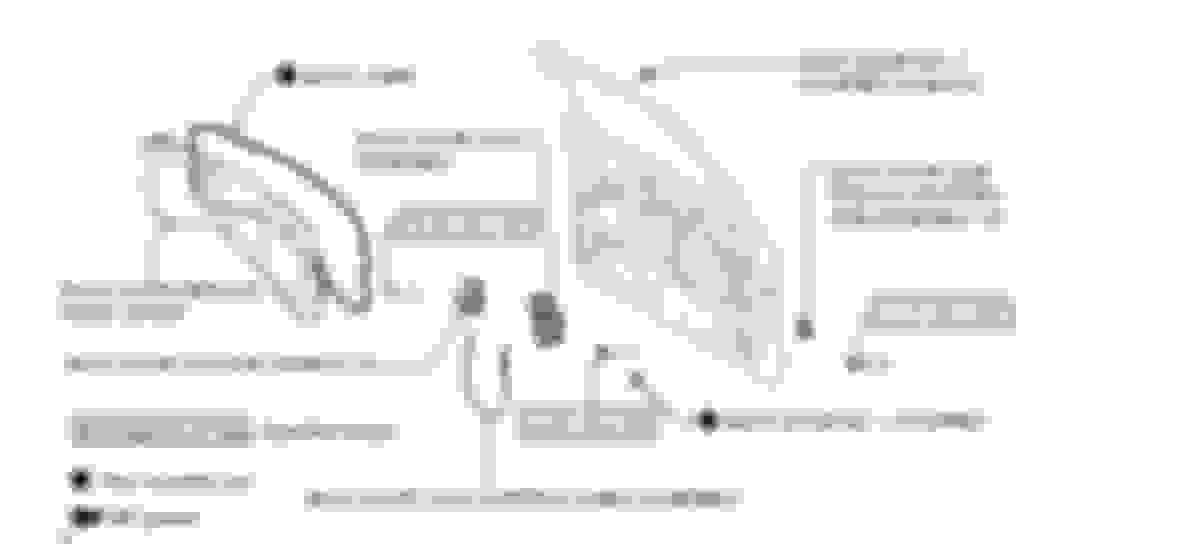
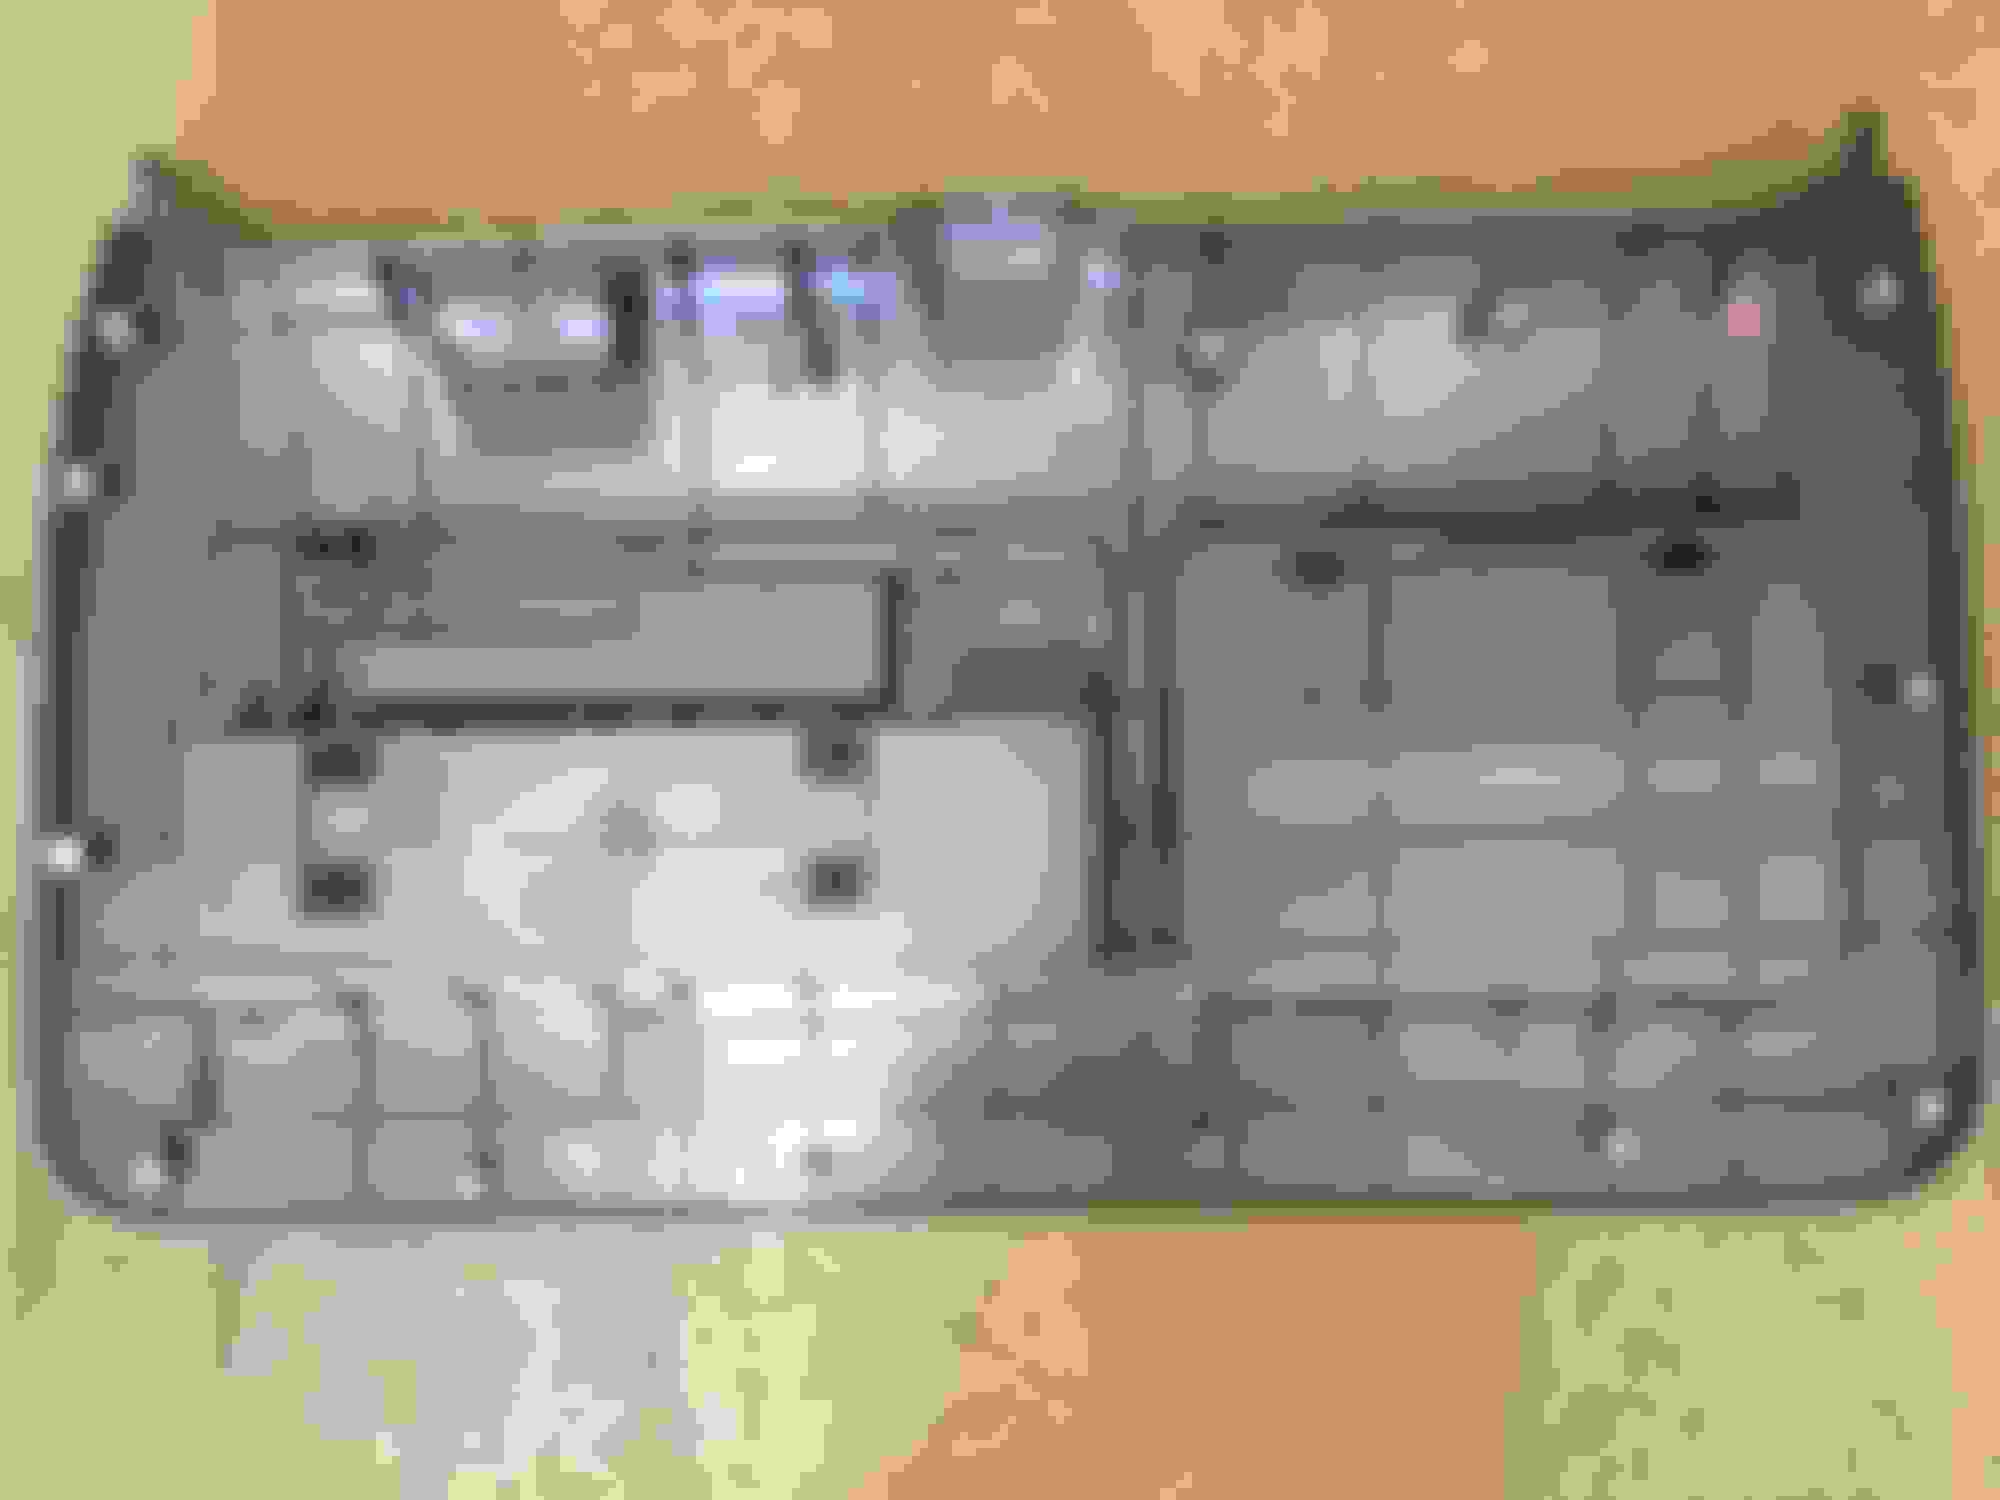
^Agreed. Not much more in this parts picture. Plastic clips surround the main panel, and it looks like there's a bolt on the top right, along with another one centered below it that's probably behind one of the storage boxes. The trim garnishes are all held on by clips.
If you have one of those plastic trim removers (flat piece of plastic to wedge behind the trim) it can be helpful, otherwise find a corner (away from the bolt locations) where you can get a decent grip and start to pry your fingers behind it. Pull away gently and firmly. Eventually the first one will pop free, and it's pretty easy from there. If you break one or two of the clips - no big deal. The dealer will have them for cheap.
I went in to fix my loose camera and lube the gate release that is known to get stuck.
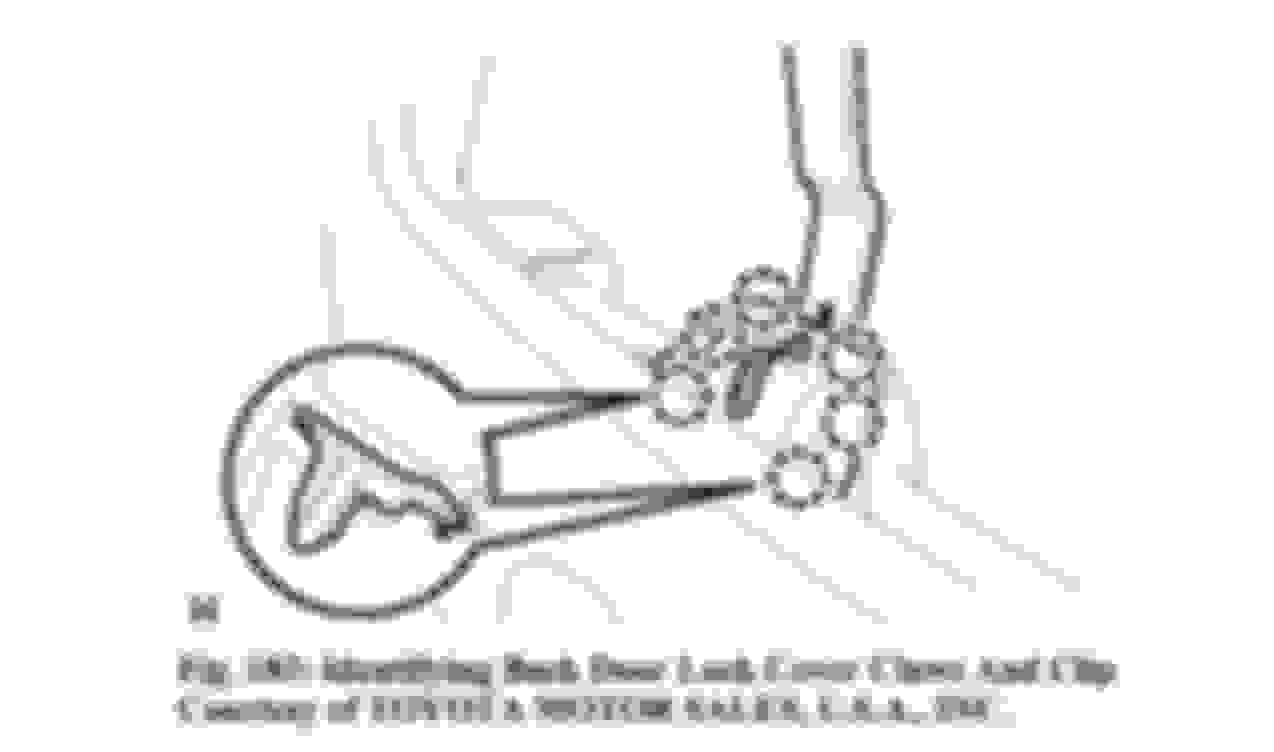
1 screw and 1 bolt, all clips after that. Start at the bottom. Pop the door garnish off I did this with the glass hatch closed and this piece stayed attached to the door. This needs to be attached to the panel for installation so I would say do this with the hatch open. piece mentioned above.
Thanks! I was just gonna ask you about that. Something I plan to do just out of maintenance. Long term...don't want to be one afflicted with a rear door latch mechanism that has seized.
EDIT: I might even do tomorrow as my Timbren install is delayed due to defective parts.
I recently removed the back panel so I could remove the camera and relocate it into the spare tire mounted on my Metal Tech bumper. I added a light and put in some additional power plugs for when I am in the back and need to get some juice.
I think this came up with rear table thread but I wonder what it would take to wiring in a 12V actuator that would be strong enough to pull on this part which is the other side of the door handle?
One wouldn't be able to unlock it from the inside without normal means but if you have a 3rd row passenger with one side up they could exit the rear of the vehicle (if desired) once the main locks were released by others with control. I'm thinking just a momentary push button with a linear solenoid?
Some of the Prado's do have the rear door handle but a lot of parts with expensive shipping that I think also includes a different door latch as well.
Decided to start the day with a fresh hot cup of coffee and to follow along with tecmans thread.
A few observations and experiences:
� On trim removal take off the top center piece first over the flip up rear window
� The trim pieces on the side of the popup window are removed inward and not back toward you. I snapped off one of the brackets inside of this mid piece but it seemed to pop back into a place mid trim. It doesn't seem to be harmed
� Those center trim pieces around window have some plastic retainers in the door that the part snaps into. I'd personally recommend pulling those out with some needle nose pliers and putting on the trim when you put those parts back on. Why? I ended up pushing one into the door frame. I got to take the rear panel off twice...fortunately it had just fallen to the bottom of the door.
� Noticed that bead of that black adhesive they uses on the plastic sheet was kinda thin on the top part so just used some of this flexible strip caulk. Seems to work well for the same sheets in the door and a box will last you for years.
I have noticed after lubricating the cable ends with silicone spray the latch mechanism seems more positive to open. Some may consider it not as smooth but I think before the cable might have started to gum up inside and while it felt smoother previously it may have been on it's way to stick on me in the near future.
Nice having a familiarity of this area now and will probably take off again in a few months as I put on bolts and nuts versus the screws that came with my KAON table or actually screw it into the sheetmetal of the rear door.
Mine didn't have the center grommet either so don't think you lost one.
First thing I'm doing is to add a dash and rear cam. This involves removing the Cargo door interior panels so that I can hide the wiring for a clean look.
Has anyone done this before? Got any photos, etc. to share? I took off a side trim on the Cargo Door and heard a clip a clip/screw fall into the crevices of the door so am wanting to be more cautious since I can't find the missing clip/ screw.
I looked around and came across some images for pre-2010 versions but nothing for newer 2017 - 2019 versions.
lmfao, saying a prayer for you as i just tackled this over the weekend. (currently taking a break due to frustration)
taking off the trim from the rear door is very easy, you start with the top center piece, pulling straight towards you. then the side pieces pulling them towards the rear glass. then the bottom black trim, theres in a screw hidden under the handle used to pull the door to you from the interior, and a bolt in the compartment next to the tool kit. then you just pull towards you.
running the wire from the front to the back is fairly easy as you just feed it into the trim between the headliner and pillar covers. the issues, heartaches and misery starts when you have to take apart the truck floor, quarter panel and feed the wire through the rubber grommets.
Yeah, in my first and only attempt right now, I definitely didn't remove the door trim in the correct order. I removed a side piece (didn't remove the top trim) and heard something fall into the bottom black trim. Not sure if I broke a screw/clip so I'm checking online right now to see if there's anything that shows me all the clips / screws in the side piece so I can order some replacements in advance!
Looking at your photo, it looks like it's going to be more than a couple hours job!
 03-18-17, 05:16 PM