When you click on links to various merchants on this site and make a purchase, this can result in this site earning a commission. Affiliate programs and affiliations include, but are not limited to, the eBay Partner Network.
i like 'tucked in'. keeps mud, rocks, etc from hitting the paint.
others who do this should remember that the alignment can be redone with the wheels pushed more towards the front or rear which can reduce rubbing. its not much, but then again the rubbing isnt much in most of the cases either.
i like 'tucked in'. keeps mud, rocks, etc from hitting the paint.
others who do this should remember that the alignment can be redone with the wheels pushed more towards the front or rear which can reduce rubbing. its not much, but then again the rubbing isnt much in most of the cases either.
With the steering wheel around 1/3-1/2 to the left or right is where the outside edge of the tire is closest to rubbing the rear of the inner fenderwell. It is just over 1" of clearance.
The front of the tire (front bumper-side) also has a little over 1" of space after the mod when turned halfway or so. So my current alignmentmay be in the sweet spot with front and rear fender liner clearance being equal.
.
I now think 275/70/18 (33.2" tall/11" wide) would rub on bumps, because the increased width and height both will reduce clearance to only about 1/2"-5/8". That might be too tight on turns with any suspension compression.
I would be more concerned with rubbing the UCA with a tire that tall and wide without some kind of wheel spacer or lift (people with smaller 265/70/18 & 275/65/18 report UCA rub sometimes).
Given that this tire size is also at least 10lbs heavier per tire than my current ones, the impact to acceleration doesn't make them very appealing to me.
My concern is confirmed. Some guy (stilespendleton) on another forum runs 275/70/18 bfg ko2 with ~1" lift (Bilstein 5100s set at 2nd notch 0.85" but getting 1.25" of lift) with base GX rims, and minor rubbing at full lock in reverse, but also some minor UCA rubbing at full lock and stuffed/flexed suspension. Testing spidertrax rubbed fender liner and body mount too much and was removed. The UCA rubbing is confirmed by others but some still use them...that seals it for me as a no-go unless a small wheel spacer (0.25" or 0.75" Bora) can clear UCA and not cause more rubbing elsewhere. For a trail rig, the rubbing may be acceptable, but not for a daily driver.
Front fender mod instructions to fit taller tires with no rub
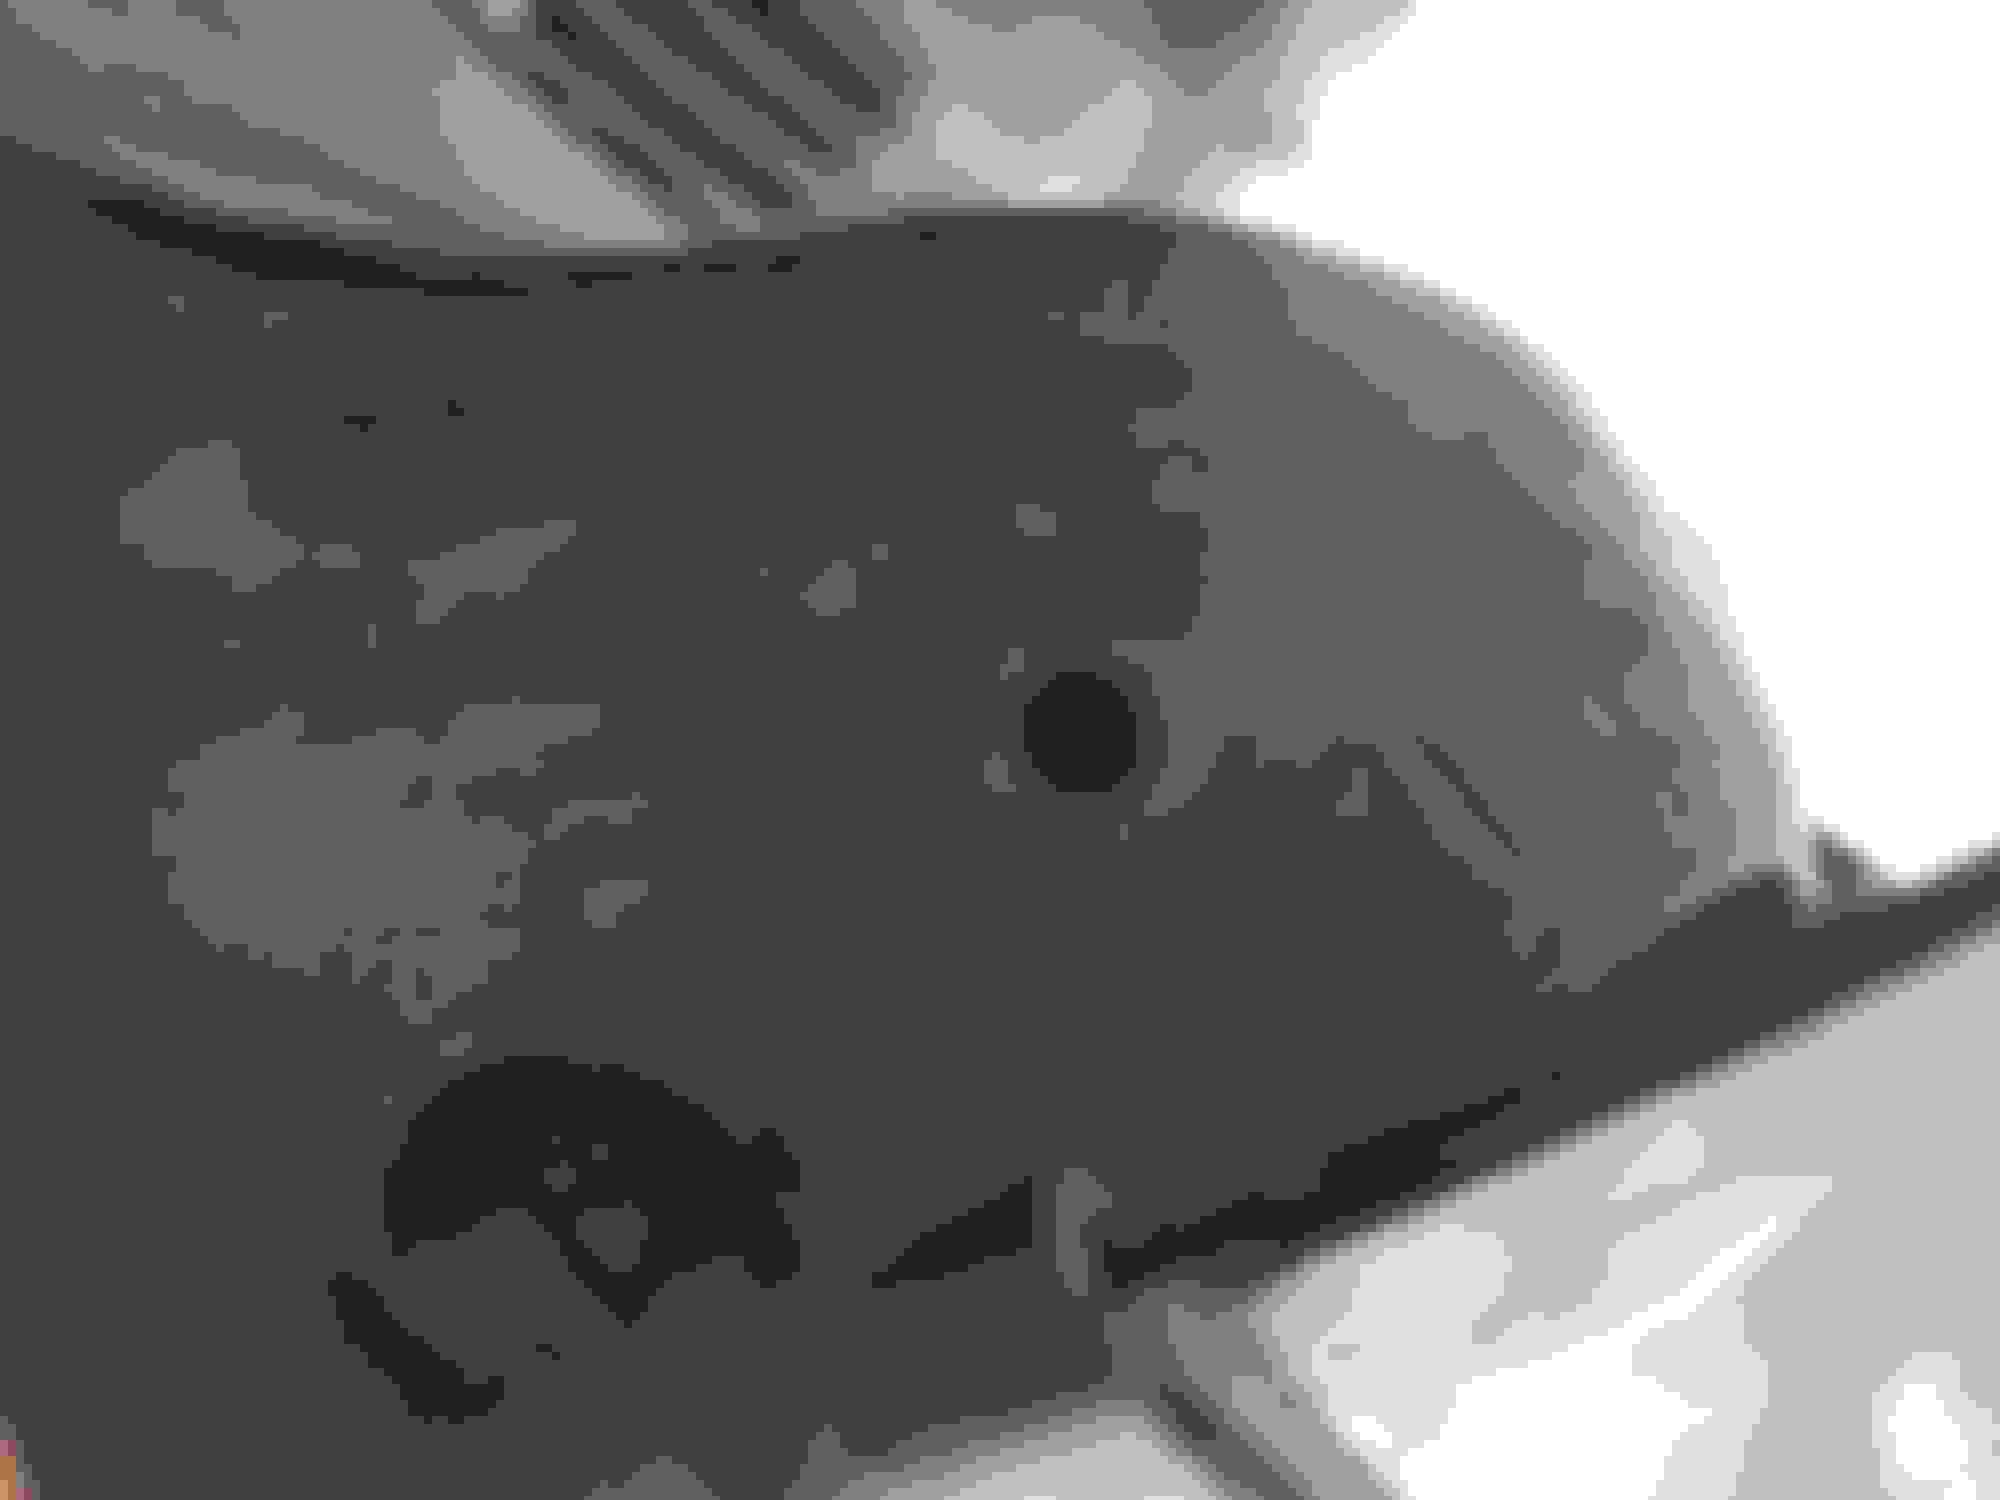
In the prior posts on this thread, one can see the 3 fasteners (2 screws and one bolt in the middle) at the underside of the front bumper that connect to the front fenderwell liner thar must come out.
Before mod. These are the 3 fittings that connect passenger front bumper to the front/inner fenderwell. Center one with thick rubber washer is a bolt, the other two are screws. The left one is the outermost, the right one is innermost and least visible. As seen from in front and beneath vehicle
Once you do that, push the inner fender liner forward. See how far it can go. Maybe a 1/2"-3/4" in places.
As you are pushing the plastic liner forward, mark new screw holes in the plastic liner. Marker or even a hole punch.
Note: start at the outermost screw hole as it has the tightest tolerances and its final position will affect where the other holes go to some degree. As long as you don't go to close to the edge with the hole in the fender liner and use my oic as a rough guide, you should be able to use the factory screw and s-clip. Once you have a spot lined up, pull the liner out of the way and use a 1/4" drill bit to make the hole. It should be about 1/2"-3/4" from the original hole and much smaller diameter. That is all you need.
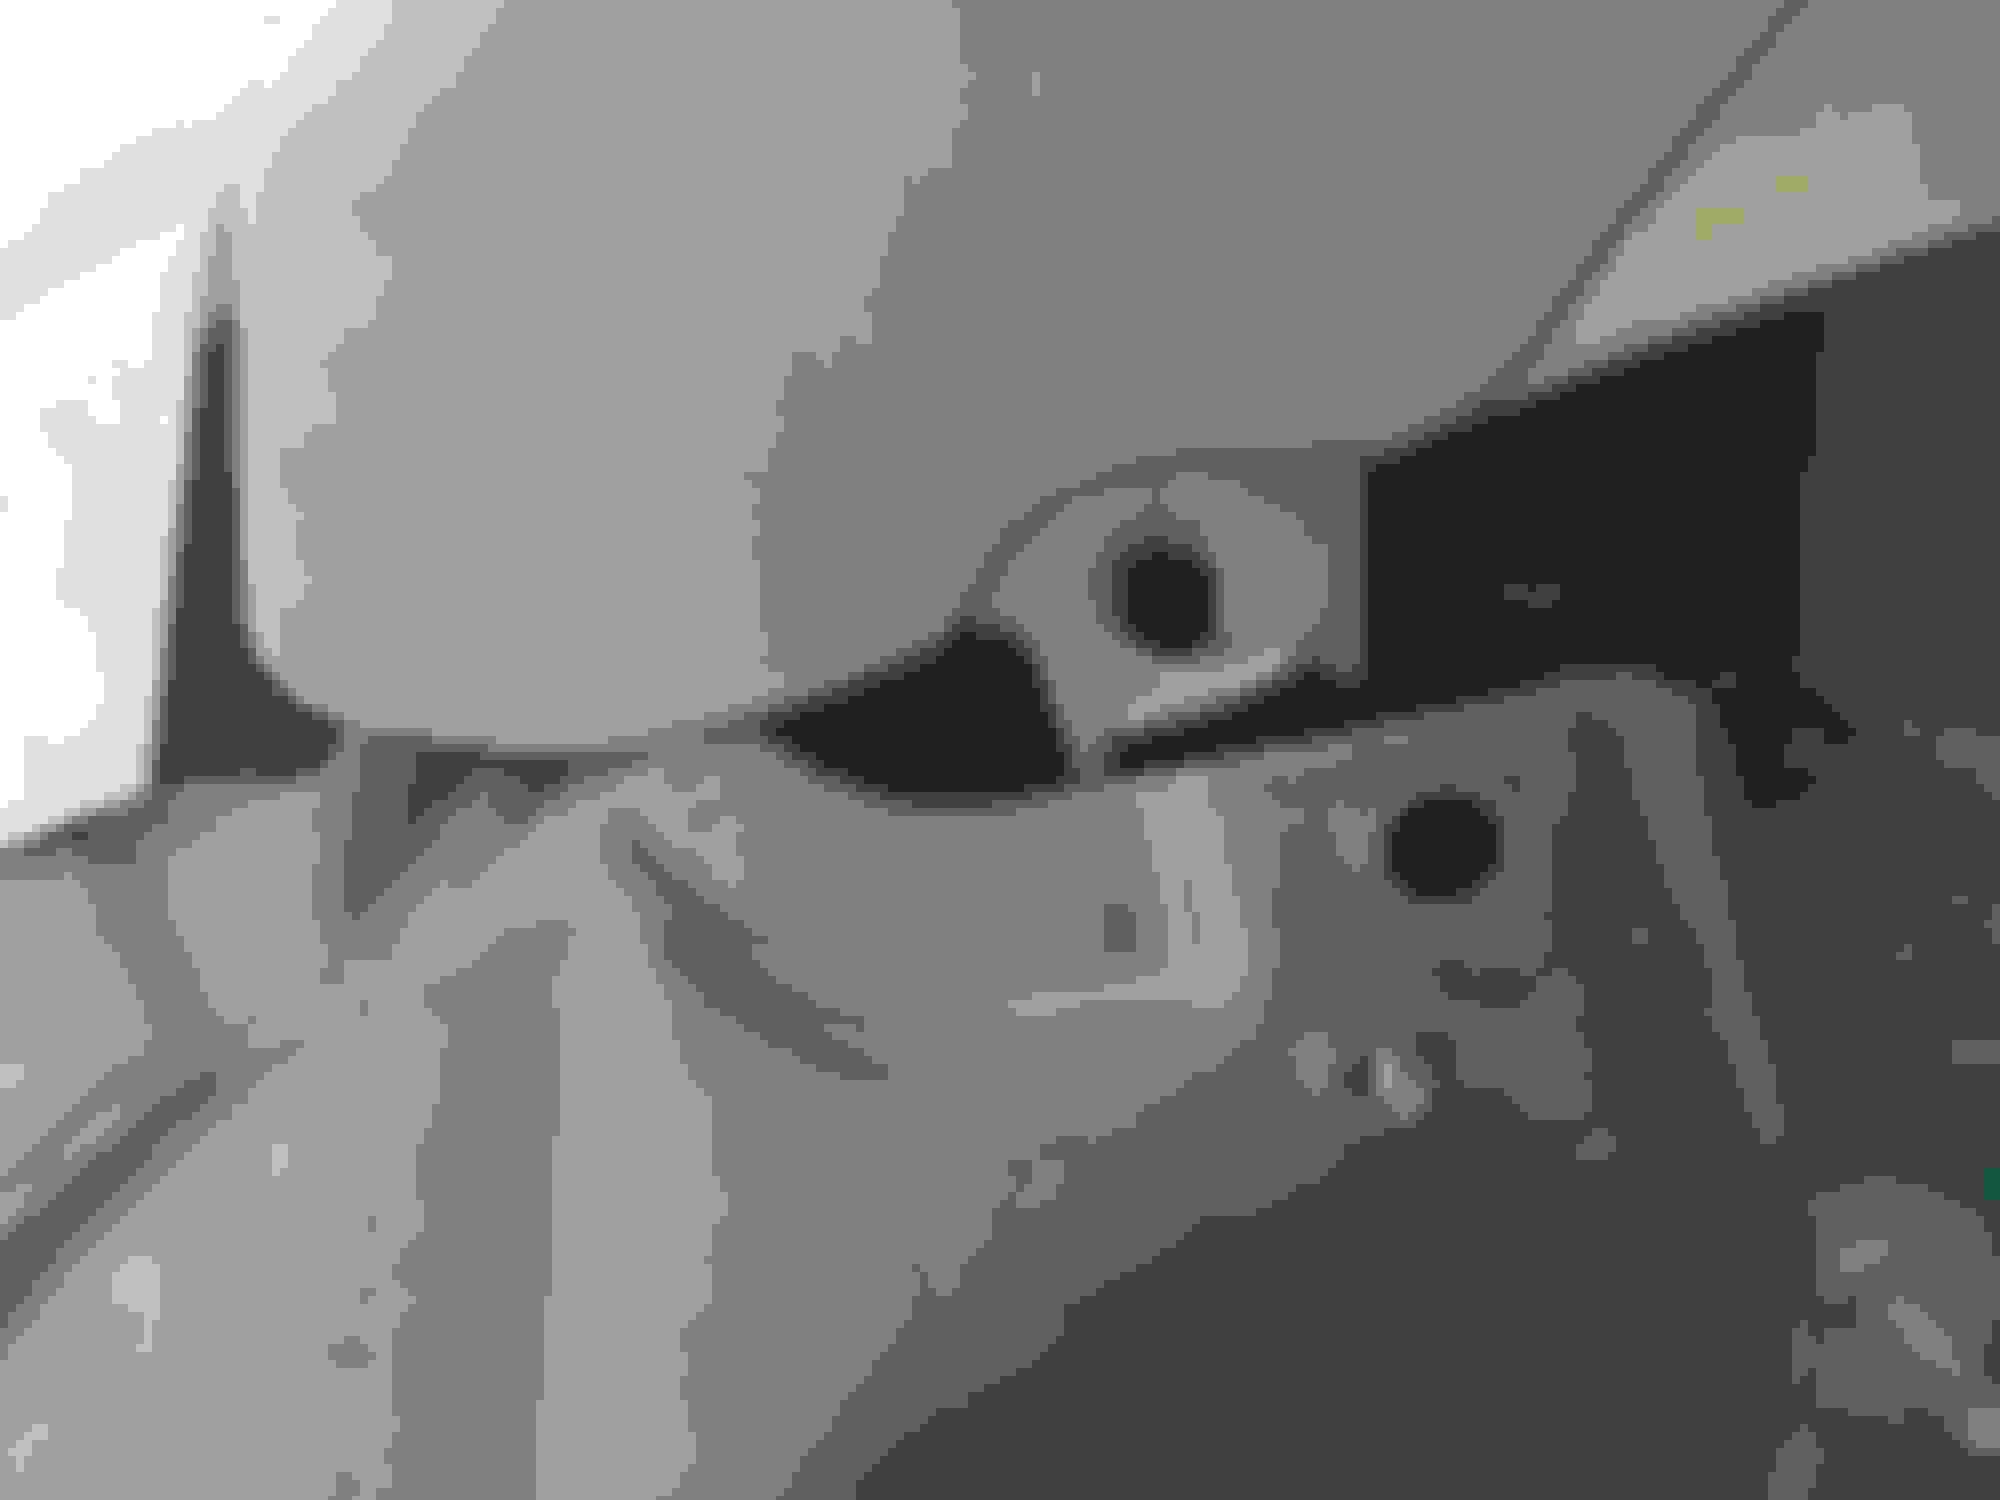
The big hole is factory in the inner fender liner, the smaller one closer to edge is new one I made once pushing liner forward.. This is the outermost, most lateral part of the fender liner. If you go further than this to the edge with the new hole, you might not be able to slip the factory s-clip back on which retains the screw.
Other view of outermost hole in fender liner. New hole is the small one. Factory S-clip with screw hole attached to bumper cover can be reused if you don't go closer to the edge more than this.
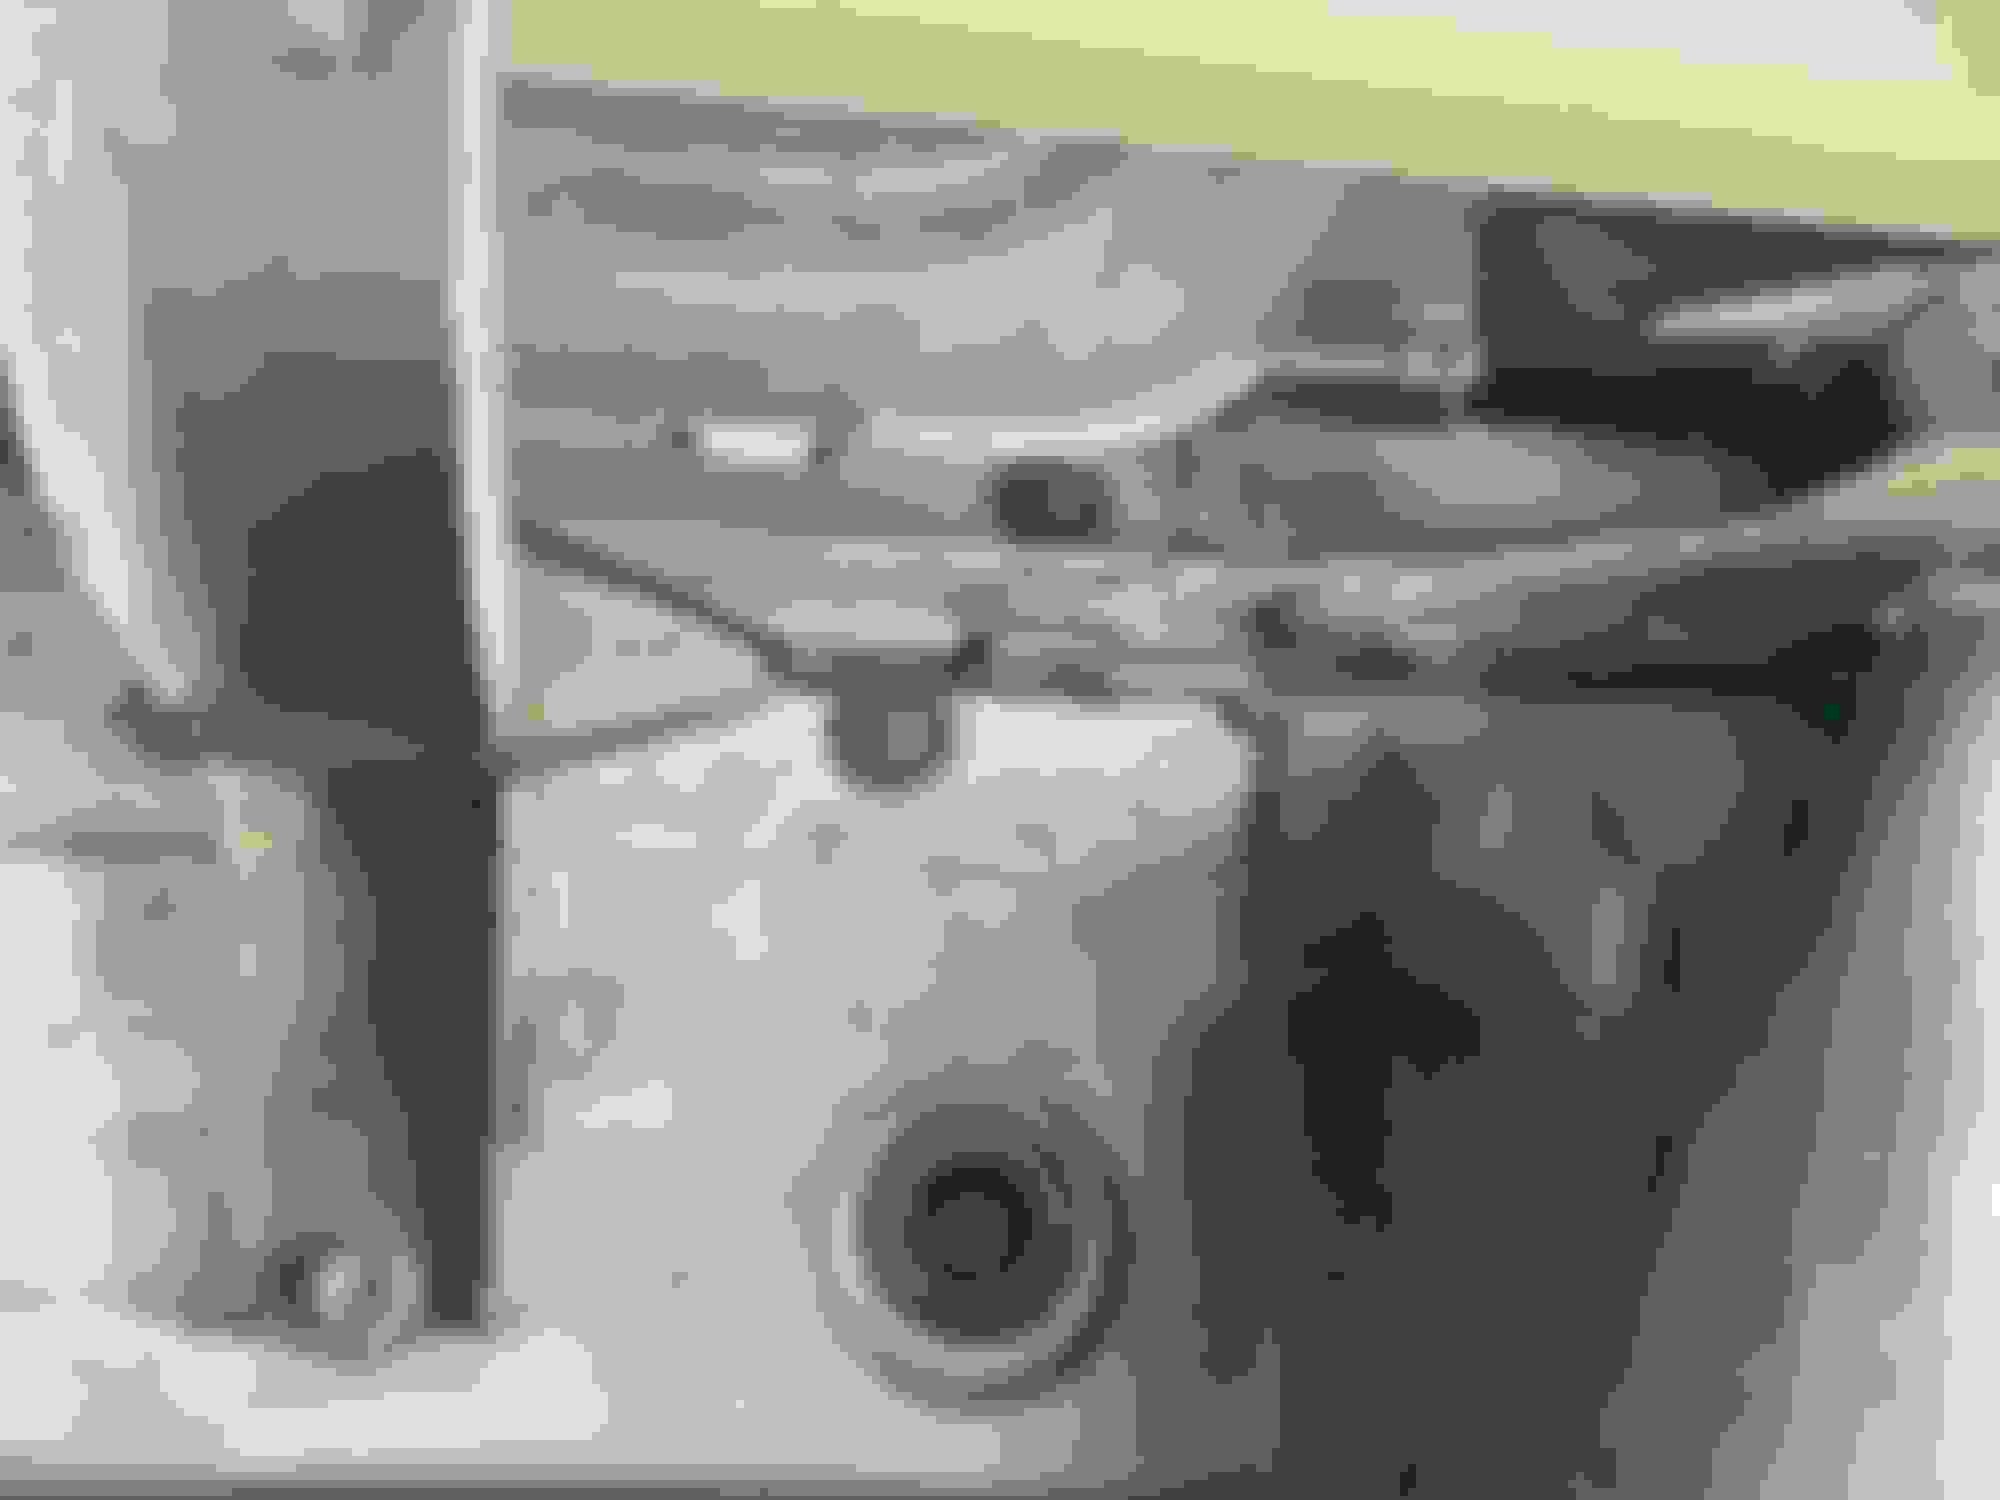
Then mark/hole punch for placement of the innermost hole. You cannot re-use the s-bracket and screw unless you cut the fender liner so I just used a 1-inch long bolt (1/4" diameter) with washers. Feel free to use nylock nut, crush washers or drop of loctite if you want to make sure it doesn't back out (only after completely satisfied with other hole locations. The last new hole to drill is for the center bolt to go back in.
Innermost fender liner screw holes. The small one on bottom is the one I did. You do this after doing the outermost hole and outting that one back together. It doesn't really push much farther on passenger front as the windshield washer tank prevents much more useful push. Factory s-clip and screw can't be re-used unless you trim the fender liner (and old hole). Instead of trimming, I wanted to make the mod reversible so I just used a nut, bolt and washers to fasten the bumper to fender liner at this position.
After mod on passenger side. Outermost re-used screw and s-clip only half visible on extreme left (not even fully screwed in yet) Middle bolt not yet screwed in so not seen (also reused). Innermost screw and s-clip replaced with silver bolt, washers and nut on right side. (I will change the hardware to more flushmount for this inner hole as this was just for mock-up purposes).
The before and after clearance can be seen in one of my earlier posts in this same thread. No rubbing at all with 265/70/18 (32.6" tall tires), no matter what condition (turning, bumps, reverse, high speed turns, etc.
This mod should also stop any rubbing for 275/65/18 (32.2" tall but slightly wider). No lift of any kind required.
Don't underestimate what 1/2"-3/4" of clearance can do on each side of the fenderwell. That can allow at least a 1"-1.5" larger tire that would otherwise rub. Just 1/4" can be the difference between rubbing and no rubbing (case in point is the screw head on rear of front fenderwell liner that resolves rubbing for many once removed).
With 265/70/18 tires (32.6" tall/10.7" wide), factory wheels, no lift, and just the minor plastic inner fenderwell mods, I have 1" UCA clearance with wheels straight, and when turning steering wheel all the way to either direction at full lock, then turning off car to check, I still get a solid 1/4" clearance. Not much but still enough for zero rubbing (and I checked the inside sidewall of the tires where they would have).
With my tires, I also have at least 1" clearance to both the front and rear fenderwell inner liner when turning the wheel about 1/3-1/2 the full amount in any direction (at 1/3-1/2 turn is when you the tire is closest to rub on either the front or back plastic inner fender well on front tire).
I can say that my setup will not be able to fit 275/70/18 (33.2" tall/11.0" wide) currently. The inner fenderwell liner spacing I made is fine for the slightly taller tire, but the UCA would gouge the inner sidewall of the tires. What could make it work is a wheel with 10-15mm less offset (about 1/2"), but also keeping the narrow 18x7.5 rim, maybe 18x8 at the most (rule of thumb is every 1" a wheel is wider, the tire section width increases 0.4"). F-sport rims are +20mm offset vs +25mm for factory rims, so I don't think that 5mm alone would be enough to clear the UCA for 275/70/18. A Bora 0.75" (19mm) spacer may work but also may be too much of a push out and may now risk rubbing the outside of the plastic inner fender well liner as it gets closer to the outer metal fender. I can see Spidertrax 1.25" will rub...I can see they will rub the back of the inner fender well near the body mount for sure (they might even rub with 265/70/18, I will soon find out).
I thought this info would be useful for people looking for bigger tires without having to deal with rubbing.
I mounted new tires this weekend and had a bit of rub on "the infamous screw."
I followed GXboat's zip tie method and it cleared things up 100%. Below are the parts from Home Depot for anyone wanting to get the right parts. (Note: Get the stainless steel)
You'll need a total of:
(2) 1/4"-20 x 1 1/4" Flat Head Phillips Machine Screws Stainless (1 Package) - $1.18
Use the method GXboat noted above, mounting a zip tie to the back washer, then "daisy chaining" additional zip ties until you reach the first mount for the running boards. Once you think you have things "tight," push with your hand on the head of the screw. The plastic fender will go back an additional 3/4-1", allowing you to tighten the zip ties a bit more.
You got it, man!! And the stainless nyloc (nylon insert) nuts and hardware you used are perfect for anyone worried things will back off.
It seems you only had to do the back of the fenderwell with that "infamous screw". That is usually the case but a couple of unlucky people have to do the front "fenderliner push" also (usually more common with people using different offset, aftermarket wheels).
I recommend to others your use of nylocs and recommended it in my original instructions also. I just didn't use nyloc nuts as I didn't even know how much all of this would help as I did it before I got my 265/70/18's put on and didn't want crazy rubbing from Day 1. With that said, I "still" haven't changed/upgraded any of the hardware I put on originally (even the zip ties ;-). It has been 9-10 months so far with no problems and ZERO rubbing. And the way this mod pushes back the inner fender liner, it makes it practically flush with body mount so it's going to give you the maximum space you are ever going to get anyway without major modification.
And it is completely reversible, looks clean, and does no damage (no cutting).
I just don't want my neighbors to do it so everyone gets a bad-*** looking GX with bigger tires.
For anyone putting on 265/70/18 or 275/65/18 tires on OEM rims, this eliminates any rubbing on the GX.
Sadly (or luckily), I never got to experience any rubbing because I did this mod when I still had my wore out original OEM BFG 265/60/18 (30.5") tires right before putting on 265/70/18's (32.6").
Originally Posted by mceagle555
I mounted Michelin LTX AT2 P275/65/18 tires this weekend and had a bit of rub on "the infamous screw."
I followed GXboat's zip tie method and it cleared things up 100%. Below are the parts from Home Depot for anyone wanting to get the right parts. (Note: Get the stainless steel)
You'll need a total of:
(2) 1/4"-20 x 1 1/4" Flat Head Phillips Machine Screws Stainless (1 Package) - $1.18
Use the method GXboat noted above, mounting a zip tie to the back washer, then "daisy chaining" additional zip ties until you reach the first mount for the running boards. Once you think you have things "tight," push with your hand on the head of the screw. The plastic fender will go back an additional 3/4-1", allowing you to tighten the zip ties a bit more.
Had my wheels out getting powder coated and was going to be putting on 265/70/18 Wildpeaks so figured I'd get this done beforehand. Got the exact hardware @mceagle555 recommended and installed it in maybe 15 min. Put the tires on and havent had any rubbing issues whatsoever.

 07-17-19 | 02:14 PM