When you click on links to various merchants on this site and make a purchase, this can result in this site earning a commission. Affiliate programs and affiliations include, but are not limited to, the eBay Partner Network.
I've been a ClubLexus member for quite sometime but have mostly been hanging out in the LS400 forums. Recently, I purchased a 2004 GX470 and had issues with both driver and passenger side mirrors adjusting horizontally (left or right). I've decided to contribute to this part of the forum as a new GX owner.
I heard these motors wear out and decided to pull apart and rebuild. After the rebuild, the motor does function in all directions (vertical and horizontal). However, the horizontal movements are slower compared to the vertical movements.
What I found out is that the motor is fully functional but the black plastic casing (pics below) has warped (maybe due to age) and causes the white plastic discs (pics below) to bind against the black casing resulting in slow or no movement. I found this out as I took apart the motor casing and found the motor working when removed from the black casing.
Below are directions to pull apart the motor casing to reveal the inner components.
Pull out the side mirror by using the links provided below. Courtesy of "Mister T" and YouTube. The links below are not for GX470s but are for Lexus vehicles. I used a screwdriver wrapped in tape and cloth for protection and pulled against the tabs. You can see it if you tilt the mirror all the way up. There are four tabs in total. There are also two harnesses that need to be removed. One was hidden and required some fiddling to remove.
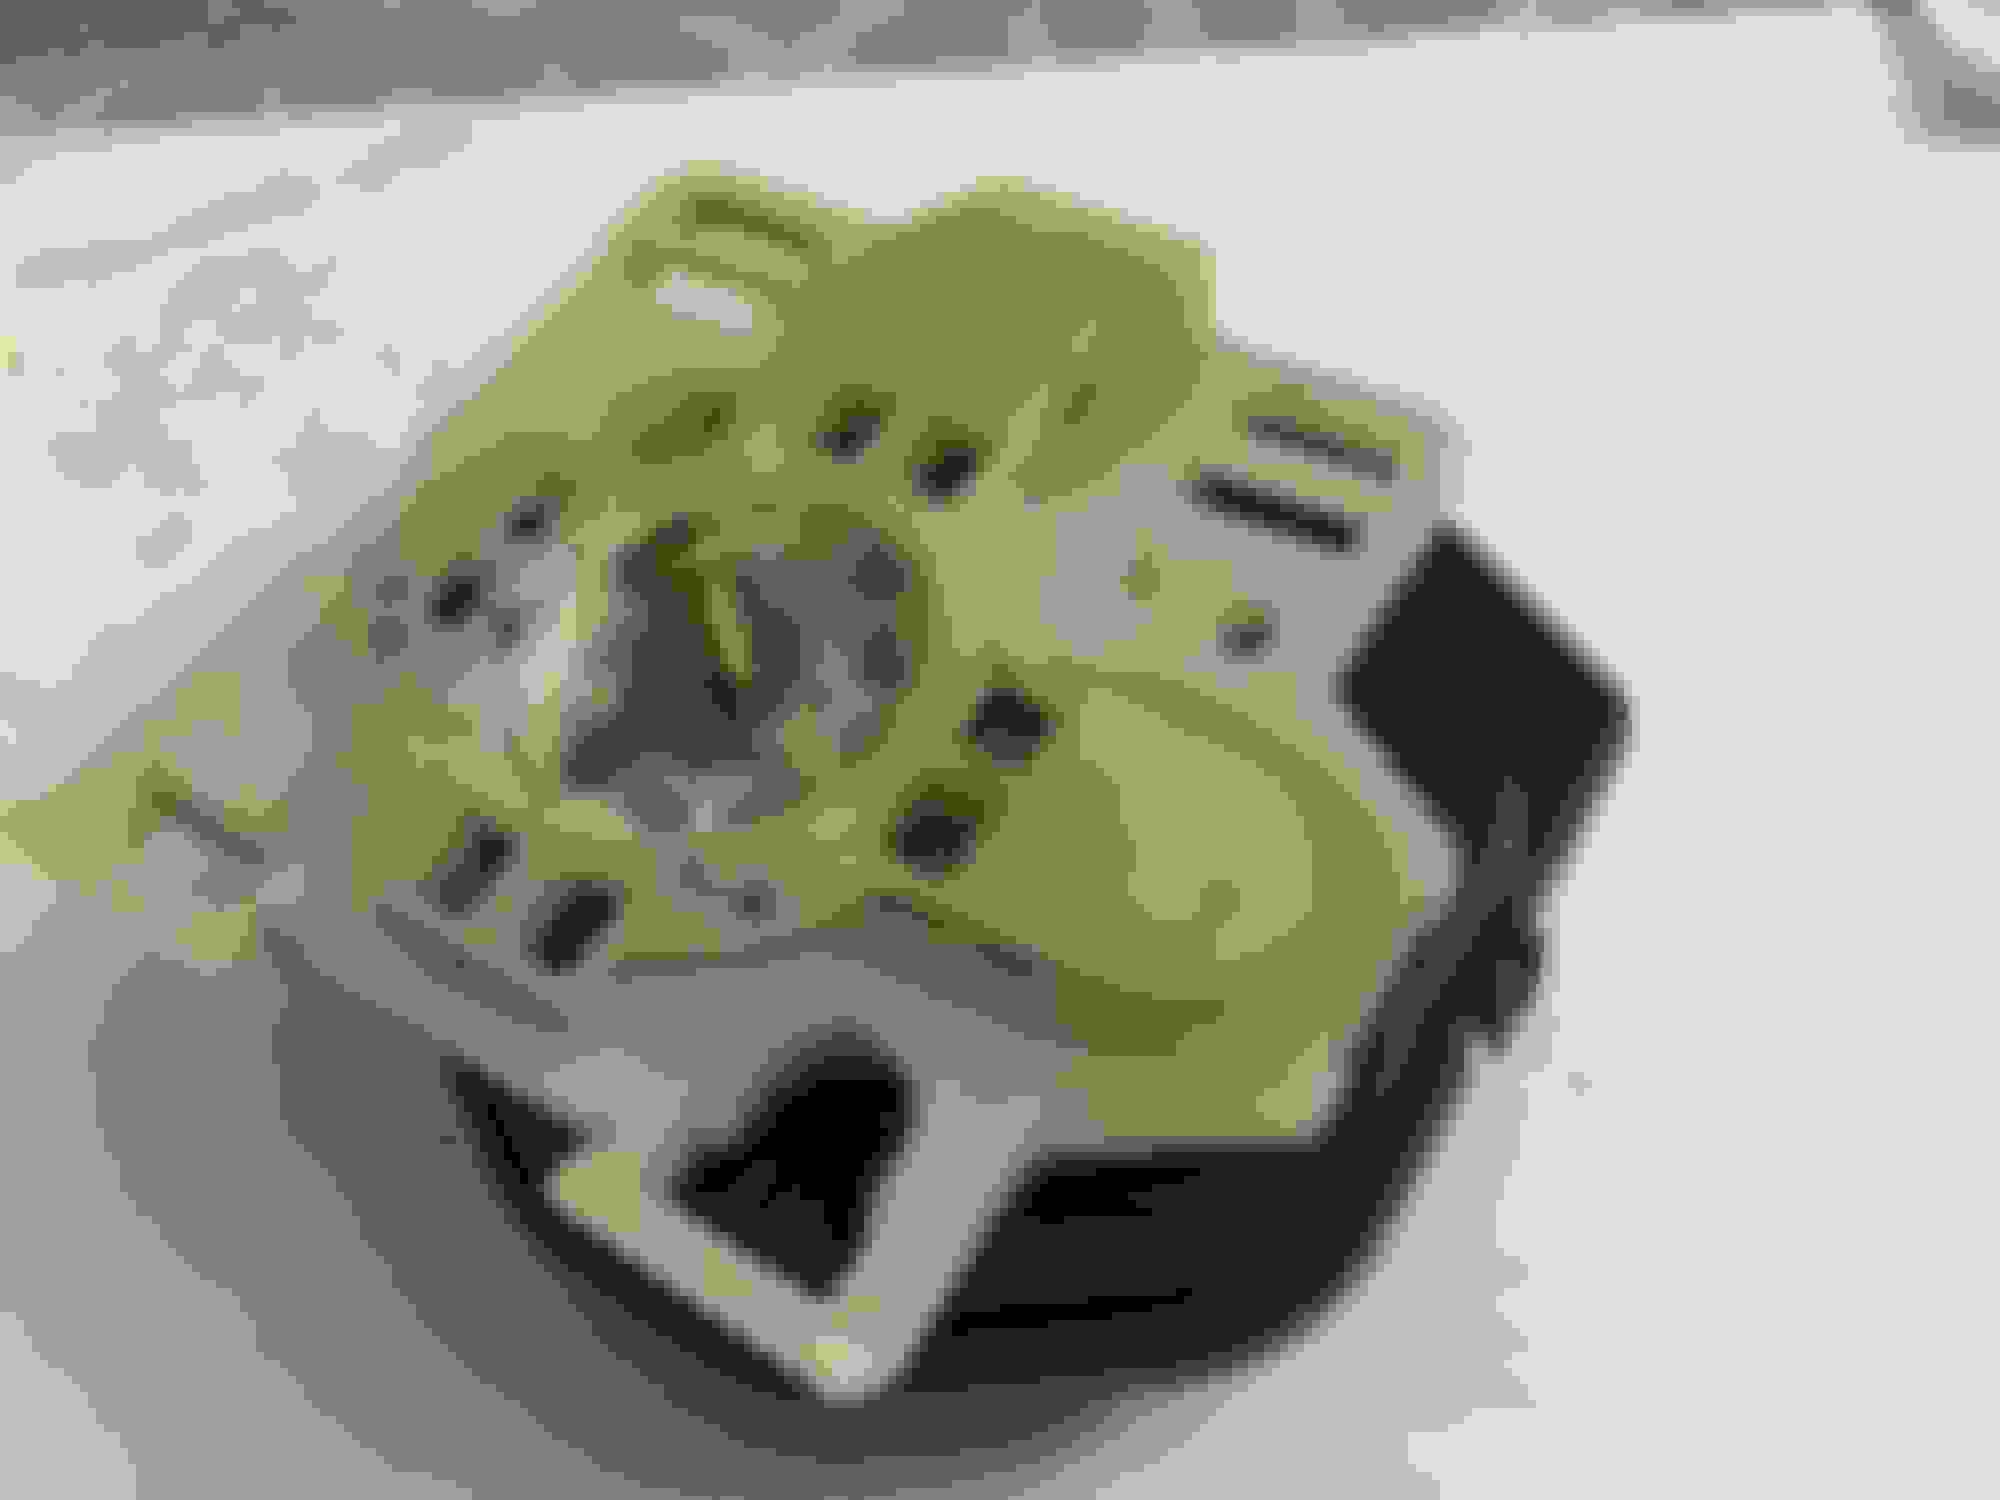
Once the black motor casing is removed, turn the casing to where the wire and contacts to the two motors are and remove the four phillips screws as shown below.
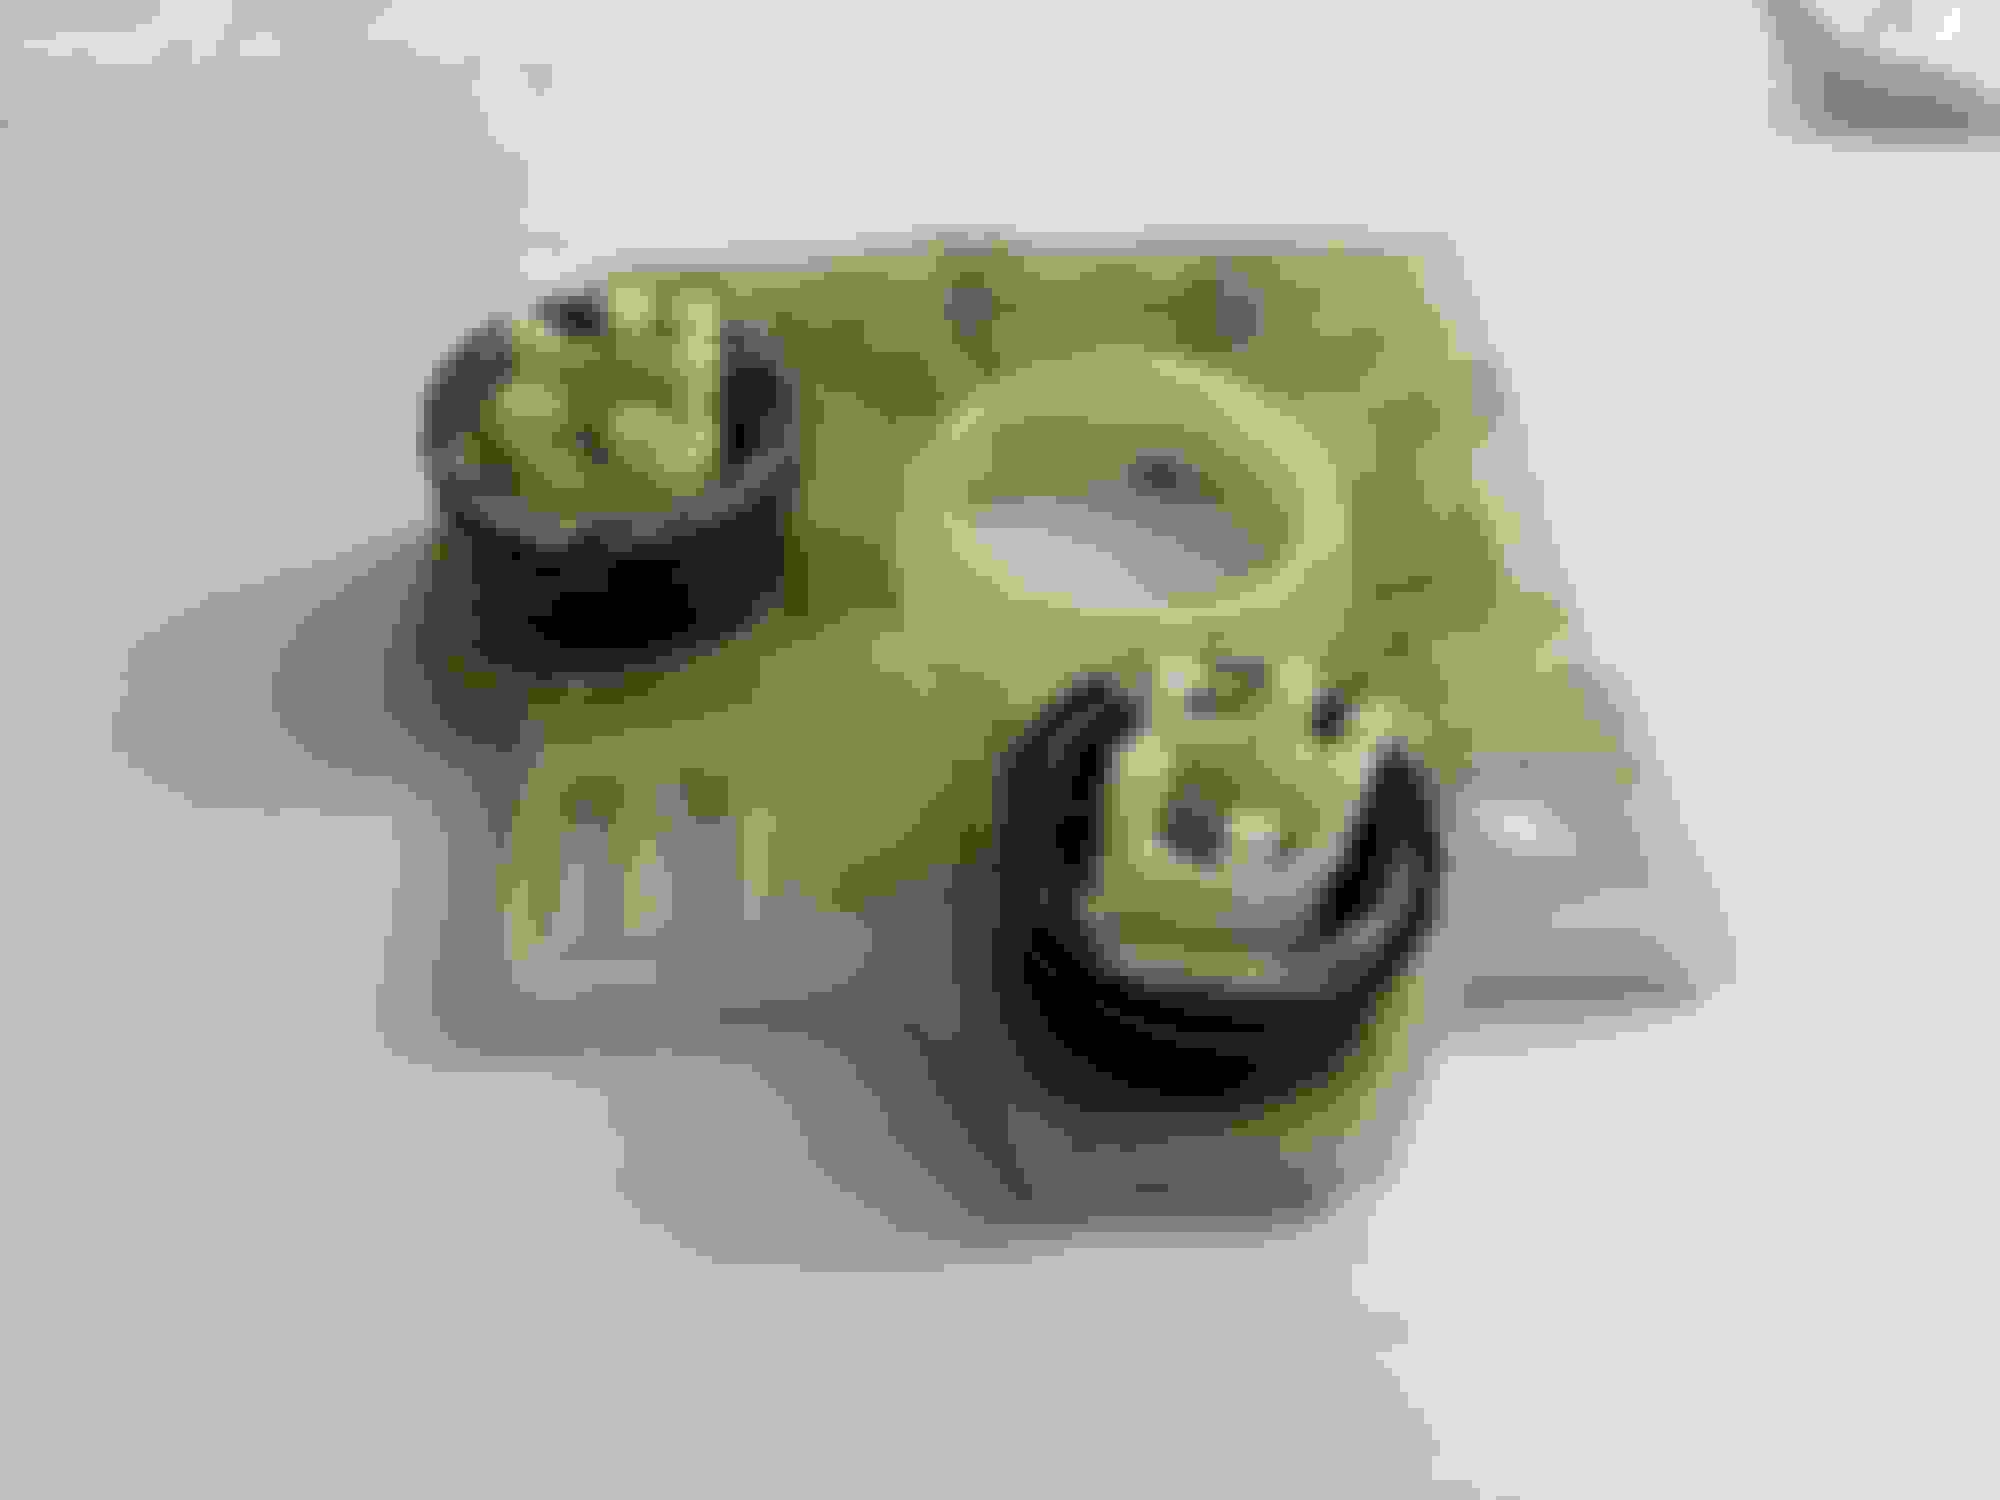
Pull the circuit board and the wire out of the black motor casing.
Now, turn the black motor casing over to unveal the white plastic mirror plate. This is where the mirror attaches. Remove the single phillips screw and pull on the white plate. You will hear clicking noises as you pull the plate. I pulled slowly to be cautious but it should not harm anything. The white plate is attached to two white discs as shown below thus the cause of the noise.
Remove the two springs where the wire contacts slide through.
Now, use a screwdriver and lightly pull on the two tabs (red arrows) below including a section of the casing (orange arrows) until the casing can be disassembled in half. This took some work pulling the two sections apart.
I forgot to take pics, but I basically took a small screwdriver and started shaving/scraping the area (red arrows) since the white discs were binding here. I found this out as I connected the wiring with the black motor casing (+ internal components i.e. discs & springs) half covered.
Just use a screwdriver and shave/scrape the diameter until the white disc spins freely. Only one/both discs have to be shaved/scraped depending on which movement (horizontal or vertical) you are having problems with. You can determine which motor turns which position by pressing the switches prior to disassembly. Sorry, I forgot to document when performing this DIY.
Clean out the old lithium grease. Place light dabs of new grease/vaseline around the white discs/plastic worn gear on the motor. Assemble the motor/casing in reverse order and connect the wiring to the vehicle. Test both horizontal and vertical positions and hear the strain on the motor. If the motor movements are slow, then disassemble the motor casing and shave/scrape more of the black plastic casing. I believe the more plastic you remove the better since I had to pull the casing apart three times until I was satisfied.
I suggest you check your electronics prior to attempting this DIY. I only performed this as I knew my motors were still functioning. I hope my directions are clear and helps someone out. Take care.
Awesome DIY! I have had the passenger side mirror get stuck and make a clicking sound while it aims down in reverse. This might be the fix for that issue.

 06-28-15, 10:33 PM