
window led swap
 12-09-10, 02:21 PM
#1
Driver School Candidate
Thread Starter

Join Date: Aug 2010
Location: sweden
Posts: 16
Likes: 0
Received 0 Likes
on
0 Posts
Led window swap how to
Tools needed
2 screwdrivers 1 flat and 1 star type
Soldering iron and solder
long nose pliers
2 t5 size led bulbs
Volt meter
Masking tape and pen
Sharp knife
No responsible is taken for you damaging your car. This is down to you.
First you will need to remove the switch unit using a small flat screwdriver
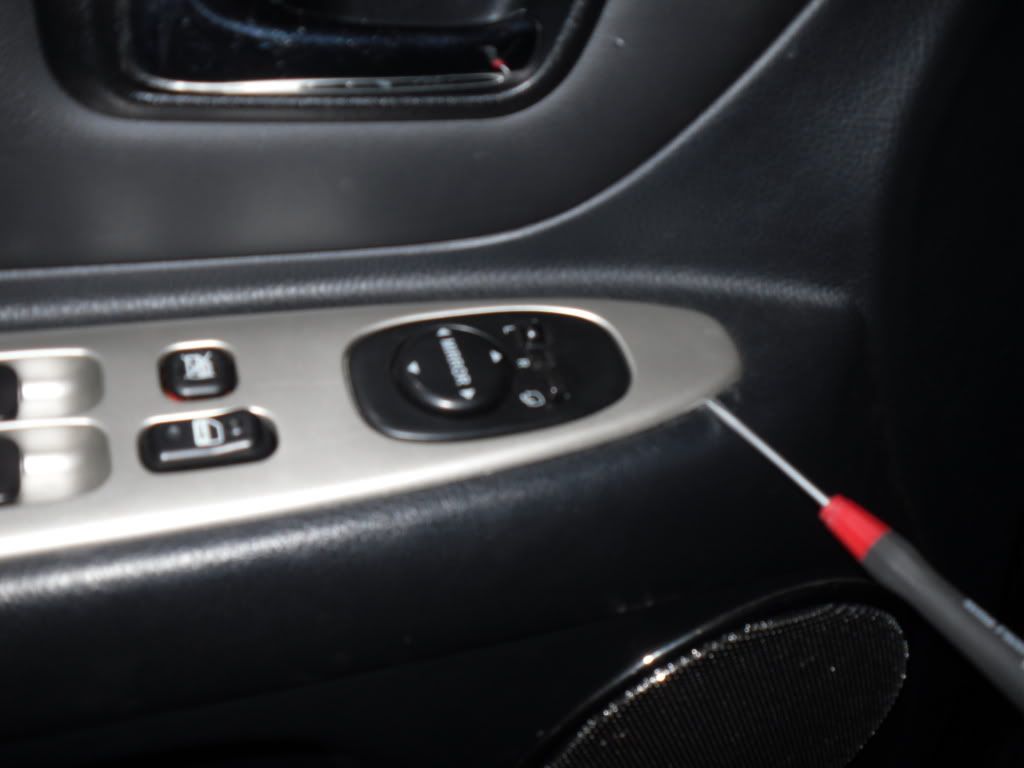
Then lift the rest of the unit up
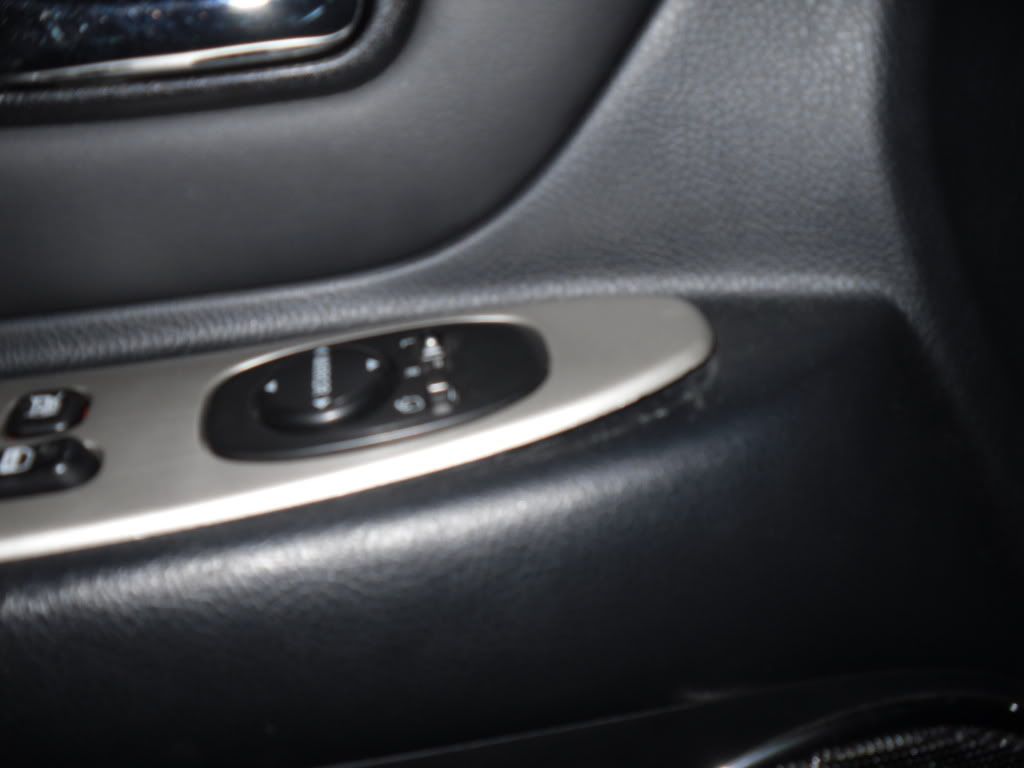
Then you will see at the end of the unit a plastic tab. To release this you must pull the unit forwards so it comes out
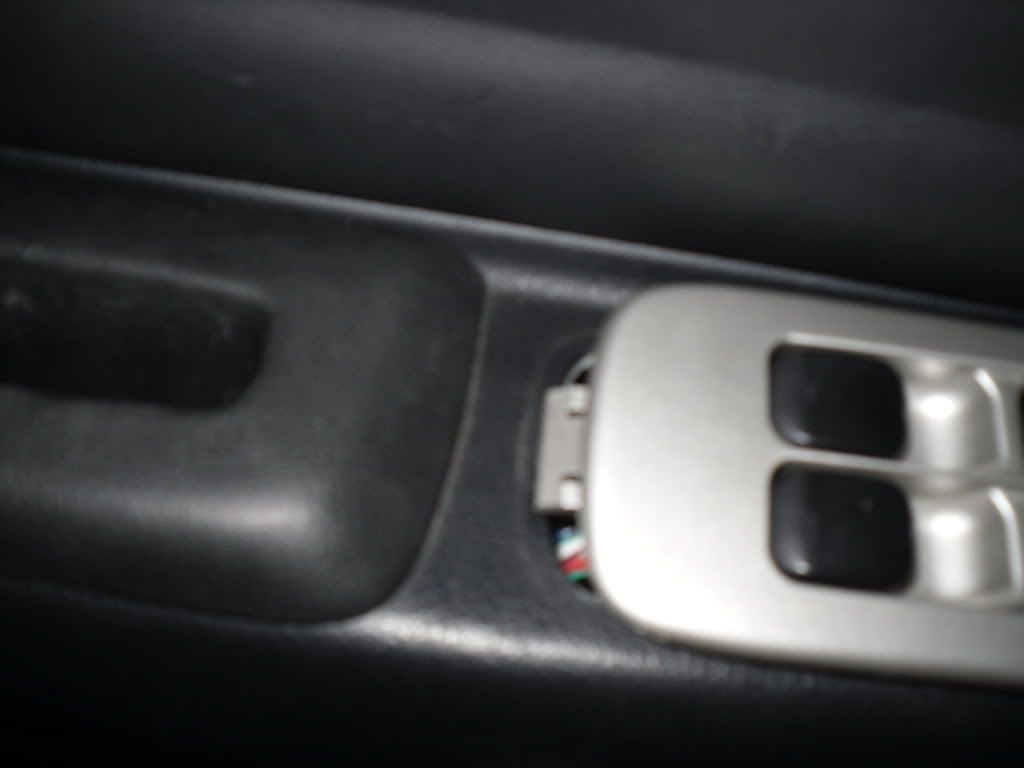
Once the unit is out you will need to remove the plugs to both the window unit and the mirror unit. These have a small lock in the middle that if you press and pull the will just slide out.
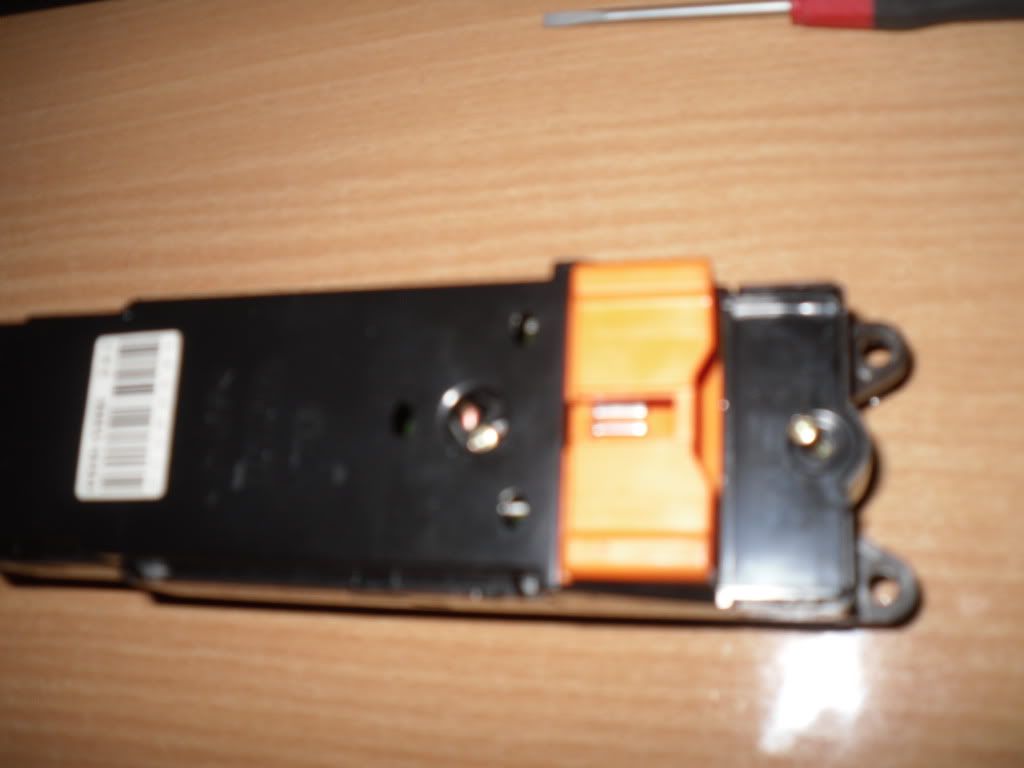
Now once you have the unit out to work on you will need to remove the 3 small screws on the back of the unit
Now that you have the 3 screws removed and in a safe place you need to remove the board from the unit. This is done by removing the back cover which is now locked in place by some small clips around the side. Look at them and you will need to put a flat screwdriver in there to release them.
Once this is removed you need to lift the board up from the plastic and place the other parts flat and safe for now.
Next connect the board into the plug again and turn on the car to see that the orange lights are working. Now take a inch of masking tape and stink it in the middle of the unit. With the lights on set you volt meter to v and 9v is good for this. Take the ends on your meter and place them each side of the orange lights to get a reading of them. What you need to find out is whats plus and minus. If you see a � sign then you will need to swap over the meter leads till it reads 1.6v or something like this.
Now you know which is + and � write on the tape so later you can use this as a reference for the bulbs.
Now you will need to take the board home for the soldering part.
Now you can see the 2 small led units on the board. Take a set of long nose pliers and grab hold of one of these leds and warm up the 2 sides with the soldering iron till it comes off. Do this with both of them. Now your ready to solder the t5 bulbs in place. First you need to make sure you have the plus and minus the right way around. And some bulbs have a resistor attached. This must be removed. Here in the photo you can see how i have attached them
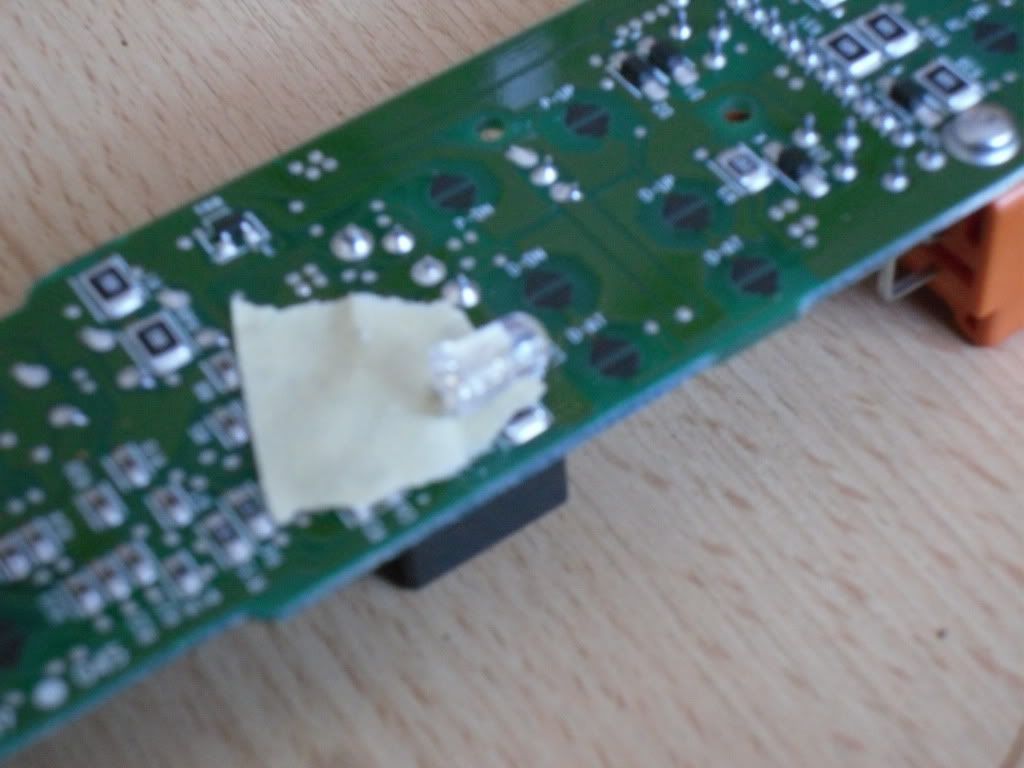
This one at the rear is long and the folded over to sit in the right place. I put tape under there so as not to touch the board with the metal from the led. The front one is shorter and sits straight up.
The next thing you will need to do is cut away the plastic membrane a bit were the leds are going to go.
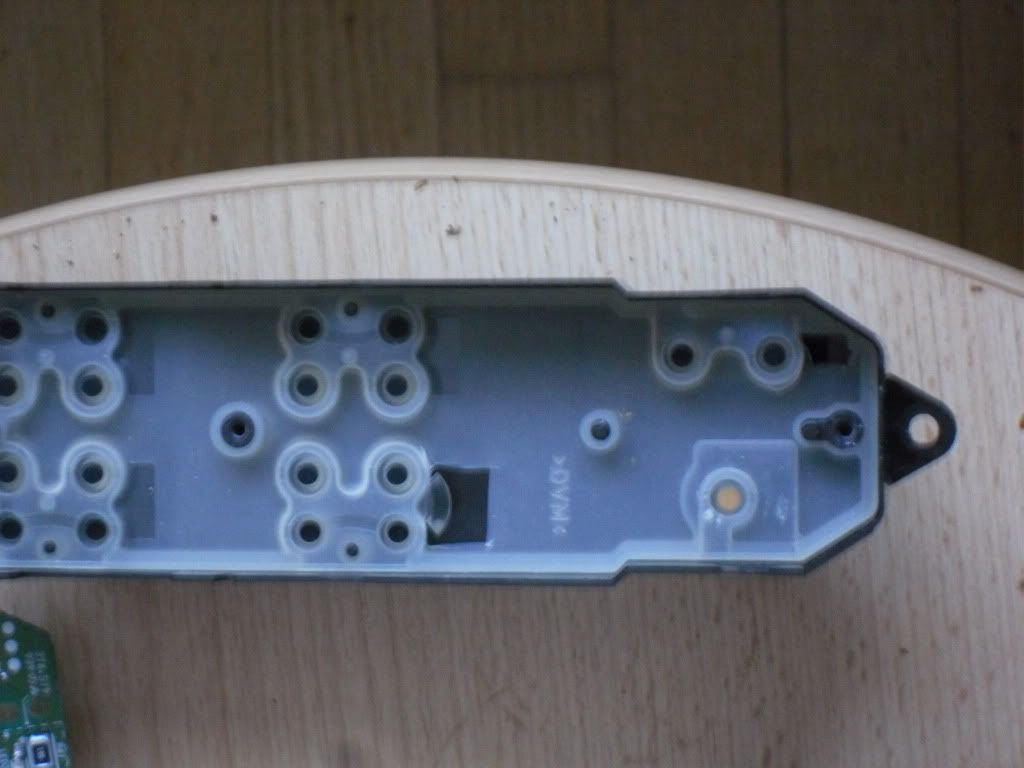
You can see were mine have been cut and show black under.
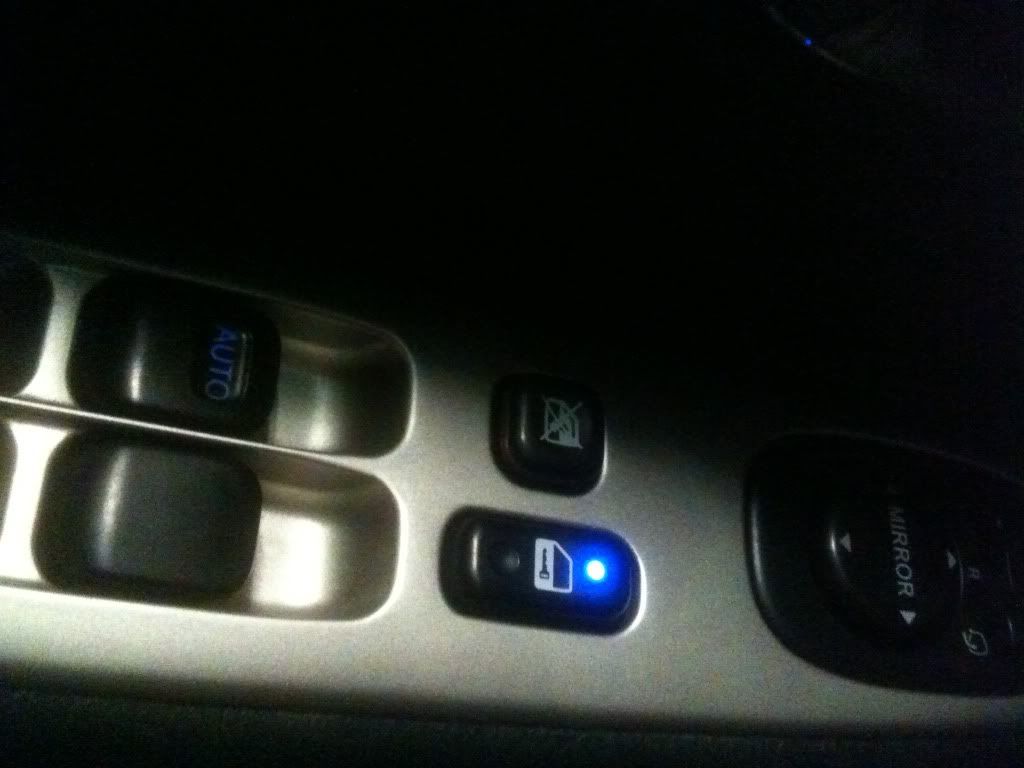
Then back to the car to test before fitting. It�s a good idea to make a test fit of the cover to make sure the bulbs are in the right place. After this go to the car and plug the unit back in and turn on the car to check the lights are working. If it�s all good try each switch and buttons to check they are all good. Then put it all back together and job done.
Tools needed
2 screwdrivers 1 flat and 1 star type
Soldering iron and solder
long nose pliers
2 t5 size led bulbs
Volt meter
Masking tape and pen
Sharp knife
No responsible is taken for you damaging your car. This is down to you.
First you will need to remove the switch unit using a small flat screwdriver
Then lift the rest of the unit up
Then you will see at the end of the unit a plastic tab. To release this you must pull the unit forwards so it comes out
Once the unit is out you will need to remove the plugs to both the window unit and the mirror unit. These have a small lock in the middle that if you press and pull the will just slide out.
Now once you have the unit out to work on you will need to remove the 3 small screws on the back of the unit
Now that you have the 3 screws removed and in a safe place you need to remove the board from the unit. This is done by removing the back cover which is now locked in place by some small clips around the side. Look at them and you will need to put a flat screwdriver in there to release them.
Once this is removed you need to lift the board up from the plastic and place the other parts flat and safe for now.
Next connect the board into the plug again and turn on the car to see that the orange lights are working. Now take a inch of masking tape and stink it in the middle of the unit. With the lights on set you volt meter to v and 9v is good for this. Take the ends on your meter and place them each side of the orange lights to get a reading of them. What you need to find out is whats plus and minus. If you see a � sign then you will need to swap over the meter leads till it reads 1.6v or something like this.
Now you know which is + and � write on the tape so later you can use this as a reference for the bulbs.
Now you will need to take the board home for the soldering part.
Now you can see the 2 small led units on the board. Take a set of long nose pliers and grab hold of one of these leds and warm up the 2 sides with the soldering iron till it comes off. Do this with both of them. Now your ready to solder the t5 bulbs in place. First you need to make sure you have the plus and minus the right way around. And some bulbs have a resistor attached. This must be removed. Here in the photo you can see how i have attached them
This one at the rear is long and the folded over to sit in the right place. I put tape under there so as not to touch the board with the metal from the led. The front one is shorter and sits straight up.
The next thing you will need to do is cut away the plastic membrane a bit were the leds are going to go.
You can see were mine have been cut and show black under.
Then back to the car to test before fitting. It�s a good idea to make a test fit of the cover to make sure the bulbs are in the right place. After this go to the car and plug the unit back in and turn on the car to check the lights are working. If it�s all good try each switch and buttons to check they are all good. Then put it all back together and job done.


Thread
Thread Starter
Forum
Replies
Last Post