
HowTo: Hardwired Valentine 1 or other radar detectors (merged threads-read full post)


 06-08-09, 05:52 PM
#168
I then ran the wire through the headliner down the OUTSIDE of the a-pillar then popped out the side panel and ran the rest of the wire down there, and voila!


BTW if you installed the ADD-A-CIRCUIT wrong just turn off the car and turn it around make sure you didnt put back all the panels before making sure it works! Enjoy!!!
BTW if you installed the ADD-A-CIRCUIT wrong just turn off the car and turn it around make sure you didnt put back all the panels before making sure it works! Enjoy!!!
08-19-09, 11:32 PM
#169
Lexus Test Driver
iTrader: (1)
Join Date: Jan 2008
Location: NJ
Posts: 1,175
Likes: 0
Received 0 Likes
on
0 Posts
I have the direct wire kit from valentine one and I am not sure what to do with the red wire with the blue connector. I have already wired the car down into the fuse box area but I am not sure what to do from this point on...
Can anyone guide me as to what I have to do with the red wire in the fusebox?
Can anyone guide me as to what I have to do with the red wire in the fusebox?
11-08-09, 08:26 AM
#170

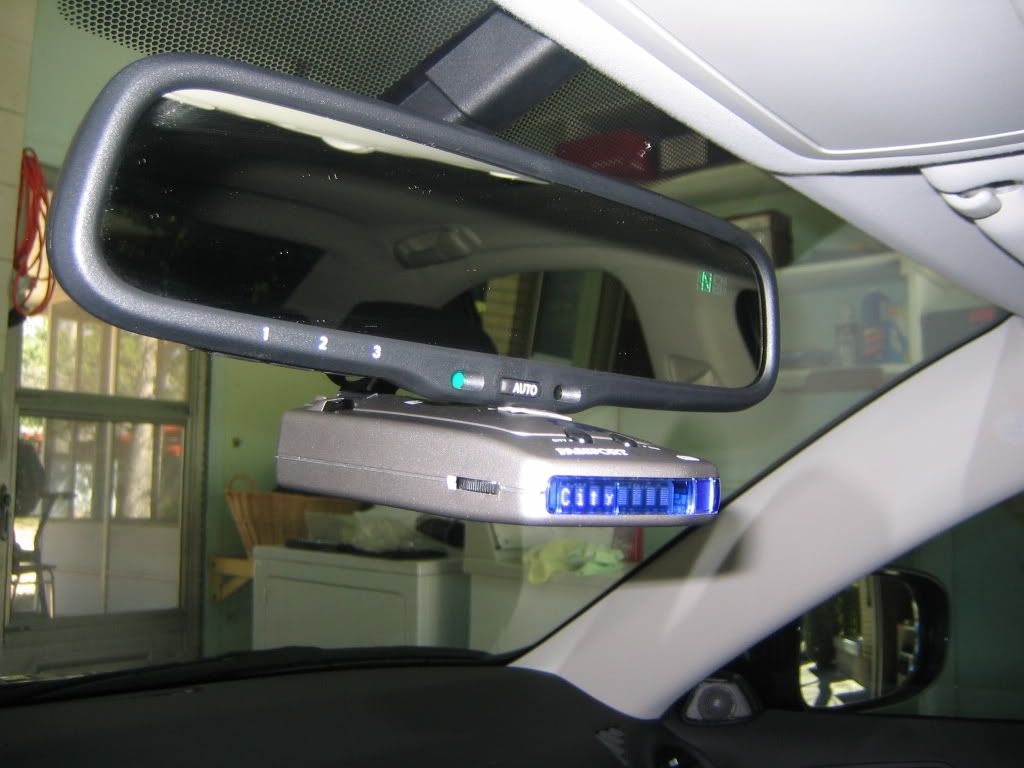
Well I just got a V1 and a Joy Country Craft mount (super Z 3/4"). Thanks to this DIY I was able to hardwire the V1 directly into the mirror for a clean install. Here are a couple of pics...
11-08-09, 09:46 AM
#172
11-08-09, 11:26 AM
#173
http://www.lexusfforum.com/forums/sh...ight=valentine
here is a true hardwire install. its pretty damn slick if you've never seen it before.
here is a true hardwire install. its pretty damn slick if you've never seen it before.
 or try to learn to etch glass my own RVM for the first time.
01-01-10, 10:28 AM
or try to learn to etch glass my own RVM for the first time.
01-01-10, 10:28 AM
#179
Driver School Candidate

Join Date: Jan 2010
Location: GA
Posts: 1
Likes: 0
Received 0 Likes
on
0 Posts
I just joined the forum and figured I'd share my easy tap into the power rearview mirror on my 07 LS460L. I did the same thing on my 08 ES350 and 98 LS400. This time I took pictures for everyone to see. I've appreciated all of the support on the forum over the years so here's my giving back.
1. Purchase phone cords and test with your car cigarette lighter adapter first to determine if the cord will power the V1. I tested 4 cords and only 2 worked. Of the two, one had wires that were interlaced with fibers and those wouldn't make a good contact. Make sure the phone wires are stranded copper.
2. You only need the red/green center wires of the phone cord. (stated many times above).
3. Remove the bolt holding the mirror to the windshield mount with a T20 Torx driver.
4. Remove the wiring cover behind the mirror by gently pulling it toward the windshield. It has clips that snap into the headliner assembly and it is about 8 inches wide at the very top.
5. Open the sunglasses compartment. Using a sharp awl, insert into the slot, push back and down and open the door. Remove the phillips head screw inside. Remove both screws in the compartment. [picture 1]
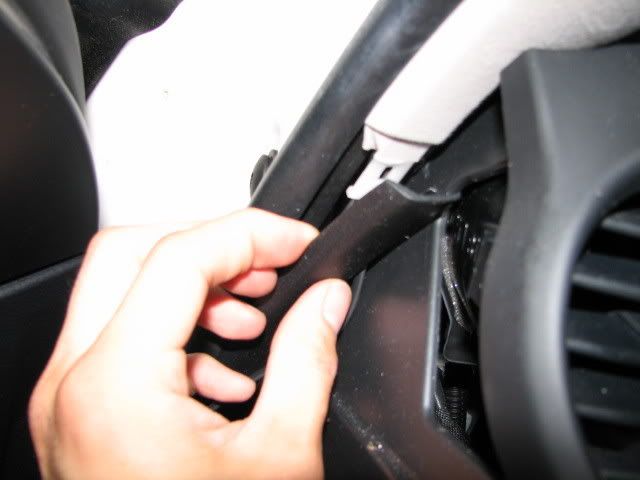
6. Using a rigid, thin, flat bladed paint scraper, insert the tool in the very front edge of the upper console closest to the sunroof. Using firm, even pressure, pull straight down. There are two button-style grommets that hold the front portion of the console in place. [picture 2]
7. The console should now be dangling by two bunches of wires on the L and R.
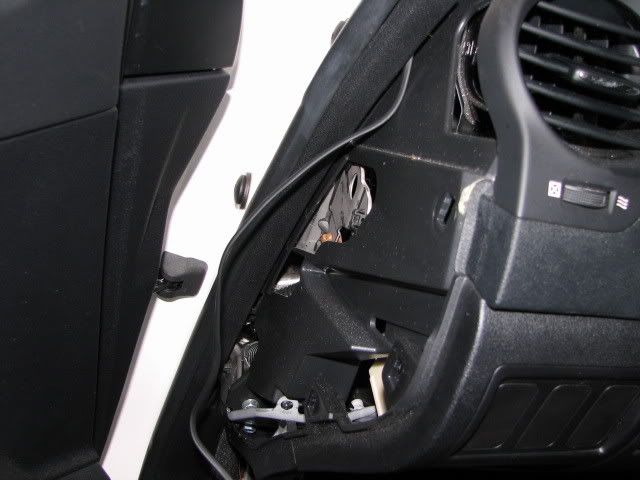
8. Remove the wiring plug on the L (working from driver's seat) to allow access to the cavity and the mirror's power plug. [picture 3]
9. Unplug the mirror power plug (wrapped in foam) located at the very front of the console cavity.
10. Measure appropriate phone cord length for desired Valentine placement by placing V1 in position, plugging in the phone cord and routing it back to the mirror's power plug.
11. Pull the wiring harness out through the hole in the headliner adjacent to the windshield. Remove mirror from windshield holder.
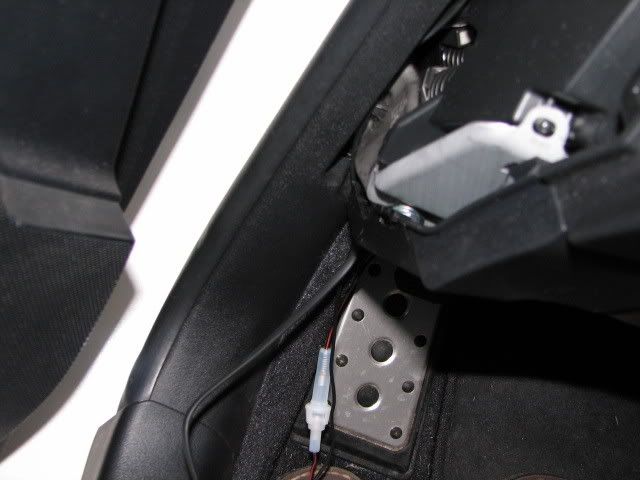
12. Splice wiring as shown. Center green phone wire to blue mirror wire; red phone wire to orange mirror wire. Use quality 3M electrical tape (cheap electrical tap will get very gooey in the headliner during hot summer months) [picture 4]
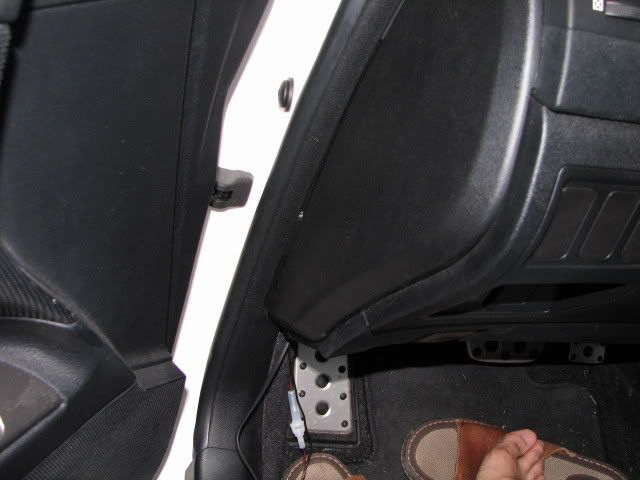
13. Replace wiring through slot in headliner and plug in to mirror power plug port. Plug in console L plug (supplies power to mirror power plug) and start car. Does the V1 light up? If not, check connections and wiring. [picture 5]
14. Reverse steps for replacing wiring cover for mirror, inserting upper console and replacing 2 screws in sunglasses compartment. Slide mirror onto mount and tighten the T20 Torx screw.
15. Enjoy! I have a few more pictures if you're interested.
1. Purchase phone cords and test with your car cigarette lighter adapter first to determine if the cord will power the V1. I tested 4 cords and only 2 worked. Of the two, one had wires that were interlaced with fibers and those wouldn't make a good contact. Make sure the phone wires are stranded copper.
2. You only need the red/green center wires of the phone cord. (stated many times above).
3. Remove the bolt holding the mirror to the windshield mount with a T20 Torx driver.
4. Remove the wiring cover behind the mirror by gently pulling it toward the windshield. It has clips that snap into the headliner assembly and it is about 8 inches wide at the very top.
5. Open the sunglasses compartment. Using a sharp awl, insert into the slot, push back and down and open the door. Remove the phillips head screw inside. Remove both screws in the compartment. [picture 1]
6. Using a rigid, thin, flat bladed paint scraper, insert the tool in the very front edge of the upper console closest to the sunroof. Using firm, even pressure, pull straight down. There are two button-style grommets that hold the front portion of the console in place. [picture 2]
7. The console should now be dangling by two bunches of wires on the L and R.
8. Remove the wiring plug on the L (working from driver's seat) to allow access to the cavity and the mirror's power plug. [picture 3]
9. Unplug the mirror power plug (wrapped in foam) located at the very front of the console cavity.
10. Measure appropriate phone cord length for desired Valentine placement by placing V1 in position, plugging in the phone cord and routing it back to the mirror's power plug.
11. Pull the wiring harness out through the hole in the headliner adjacent to the windshield. Remove mirror from windshield holder.
12. Splice wiring as shown. Center green phone wire to blue mirror wire; red phone wire to orange mirror wire. Use quality 3M electrical tape (cheap electrical tap will get very gooey in the headliner during hot summer months) [picture 4]
13. Replace wiring through slot in headliner and plug in to mirror power plug port. Plug in console L plug (supplies power to mirror power plug) and start car. Does the V1 light up? If not, check connections and wiring. [picture 5]
14. Reverse steps for replacing wiring cover for mirror, inserting upper console and replacing 2 screws in sunglasses compartment. Slide mirror onto mount and tighten the T20 Torx screw.
15. Enjoy! I have a few more pictures if you're interested.
01-02-10, 11:53 AM
#180
Driver School Candidate

Join Date: Jan 2010
Location: TX
Posts: 12
Likes: 0
Received 0 Likes
on
0 Posts
well guys the 2010 ISF has a bit different wiring. The mirror is different from what i can see in the pictures posted in the thread. Here is the connector: from left to right the wires are: black, white, red, beige and then on the top row left is a pink wire. How do i figure out which is switched power? (im assuming black is ground)
