HowTo: Hardwired Valentine 1 or other radar detectors (merged threads-read full post)
 08-12-07, 09:30 PM
#121
Pole Position

Join Date: Jul 2007
Location: CA
Posts: 236
Likes: 0
Received 0 Likes
on
0 Posts
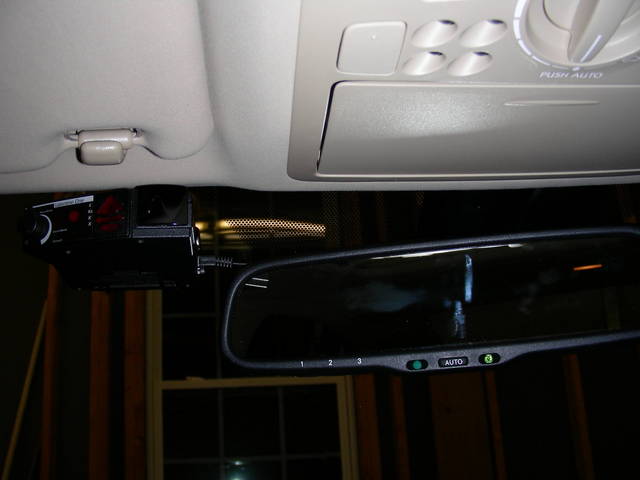
i just hard wired mine to the power in the auto dimming mirror, no fuses needed, wires run only about 12 inches, all i had to take out was the dome light, took me about 5 minutes to find the switched power to the mirror and T tap into that wire and telf tap a 1/4" screw into the metal that the dome light screws into for a ground.. the radar detector uses so little power the mirror circut won't even know its there.
simple.
simple.
 08-13-07, 07:47 AM
#122

As shown previously in this post, you don't even have to take out the dome light. Just undo small mirror trim pieces, unclip the rear view mirror wiring harness, take mirror to a table, solder in the phone cord for the detector, then re-clip the harness into the car, and replace small trim pieces. The wire to the detector can be nice and short <4 inches and then you are not screwing around with any dome lights or A pillar trim to a fuse box. When/if you sell the car just take off the soldered wire.

 12-25-07, 07:08 PM
#127
Rookie
iTrader: (1)

Join Date: Jun 2007
Location: Florida
Posts: 70
Likes: 0
Received 0 Likes
on
0 Posts
nothing like installing stuff while family is over for x-mas. Just got this V1 after wanting it for years and had to do the hard wire install before driving camping on thur. **** is sweeeeeeeet!!
12-29-07, 09:04 AM
#128
Driver School Candidate
Ordered a V1 using my Christmas money. It came yesterday as well as mount ordered. Took my time following this thread and I couldn't be happier. Now to go out and test it out. Mount is designed for a Corvette C6 but works great on my IS.
FYI the V1 wires need to be blue to red and green to orange, seen in post #32 or it will not fire up. I had reversed these at first and it did not come on. Switched to blue-red , green-orange and bingo.
FYI the V1 wires need to be blue to red and green to orange, seen in post #32 or it will not fire up. I had reversed these at first and it did not come on. Switched to blue-red , green-orange and bingo.
12-29-07, 10:20 AM
#129
Driver

Join Date: Nov 2005
Location: Dallas, Texas
Posts: 194
Likes: 0
Received 0 Likes
on
0 Posts
Ordered a V1 using my Christmas money. It came yesterday as well as mount ordered. Took my time following this thread and I couldn't be happier. Now to go out and test it out. Mount is designed for a Corvette C6 but works great on my IS.
FYI the V1 wires need to be blue to red and green to orange, seen in post #32 or it will not fire up. I had reversed these at first and it did not come on. Switched to blue-red , green-orange and bingo.
FYI the V1 wires need to be blue to red and green to orange, seen in post #32 or it will not fire up. I had reversed these at first and it did not come on. Switched to blue-red , green-orange and bingo.
12-29-07, 12:29 PM
#130
Driver School Candidate
What is the name of the mount?
http://www.greatlakestrophies.com/
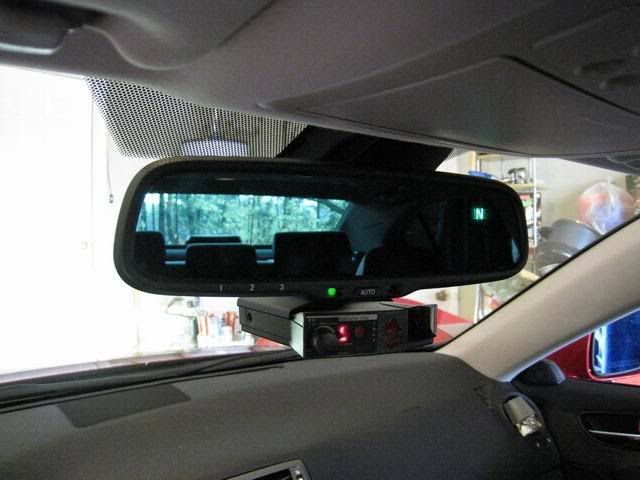
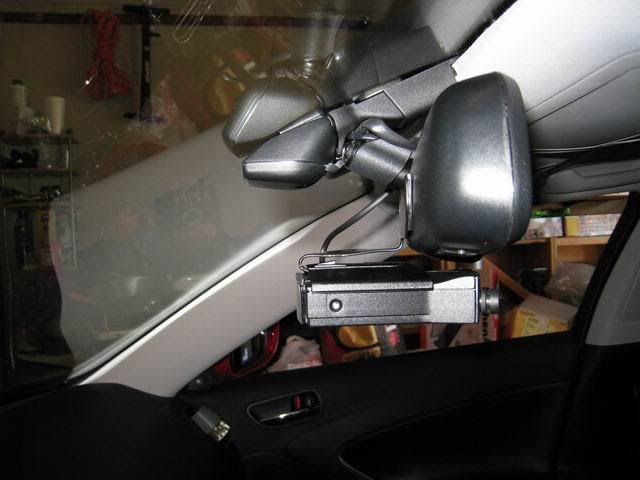
Follow the link for Corvette C5 & C6 parts then what I used is the "new" C6 mirror mount. When you look at the pictures there is no bend to the mount allowing for mirror adjustment, however you will get a mount that has a bend so when you adjust your mirror the V1 is straight ahead. I had to adjust the mount slightly to suit my liking.
Just got back from test drive worked like a charm. Now to figure out how to configure V1 for my local area.
 12-30-07, 07:30 AM
#131
Driver
Join Date: Nov 2005
Location: Dallas, Texas
Posts: 194
Likes: 0
Received 0 Likes
on
0 Posts
Go to this site:
http://www.greatlakestrophies.com/
Follow the link for Corvette C5 & C6 parts then what I used is the "new" C6 mirror mount. When you look at the pictures there is no bend to the mount allowing for mirror adjustment, however you will get a mount that has a bend so when you adjust your mirror the V1 is straight ahead. I had to adjust the mount slightly to suit my liking.
Just got back from test drive worked like a charm. Now to figure out how to configure V1 for my local area.
12-30-07, 11:53 AM
#132
Driver School Candidate
Join Date: Dec 2007
Location: Texas
Posts: 5
Likes: 0
Received 0 Likes
on
0 Posts
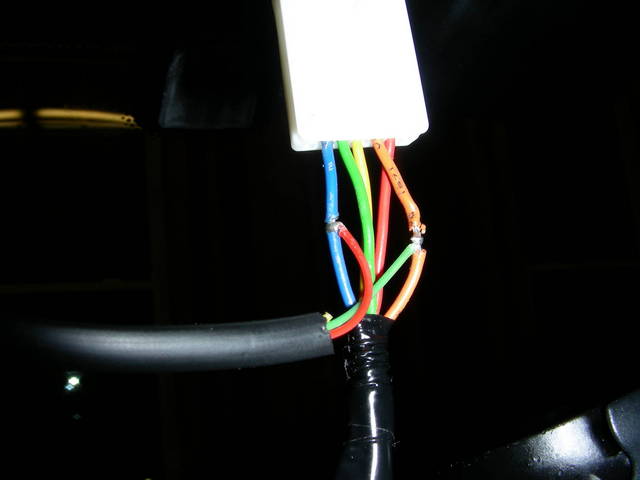
There is no need to remove the overhead J/B and risk breaking
the plastic clips or introducing rattles. The ignition power is
also available going to the rear view mirror.
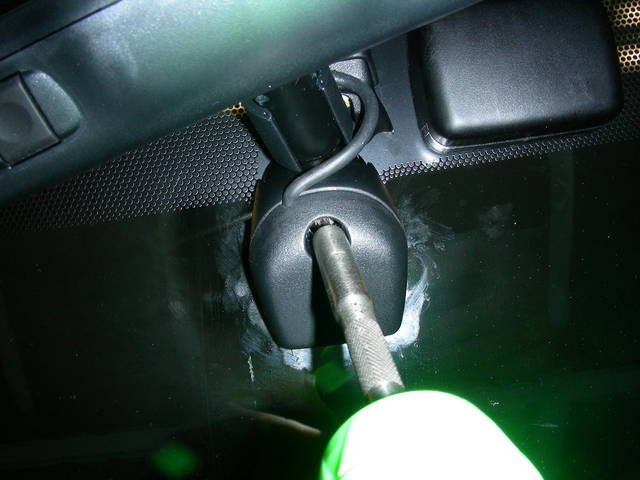
The rear view mirror is easily removed by loosening the T-20
torx screw securing it to the metal shoe glued to the windshield.
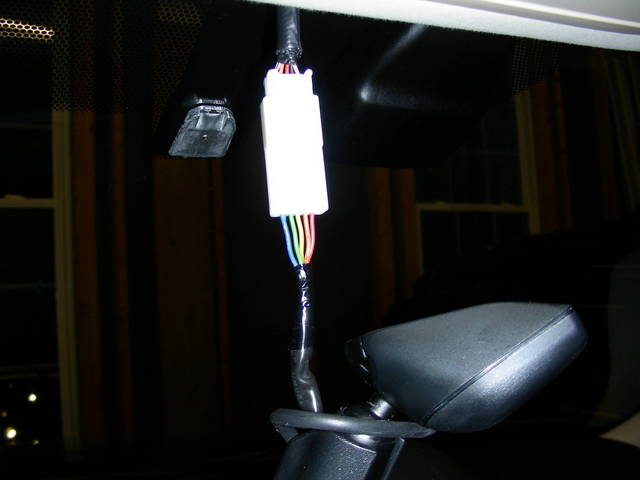
Lift up on the mirror and it will just lift off. There will be a connector
revealed behind the wire cover. The blue wire going to the mirror
is the negative and the orange wire is the positive ignition switched
wire. Carefully strip a small section of the mirror wires and
then wrap your Valentine One power wires around it. Soldering
the connection is recommended for a good reliable connection.
To finish the job, wrap each wire that you attached to with a
piece of electrical tape.
This is a real easy installation. You don't even have to worry about
getting the wires connected backwards because the Valentine
One unit is built to withstand reverse polarity in case of a misswire.

the plastic clips or introducing rattles. The ignition power is
also available going to the rear view mirror.
The rear view mirror is easily removed by loosening the T-20
torx screw securing it to the metal shoe glued to the windshield.
Lift up on the mirror and it will just lift off. There will be a connector
revealed behind the wire cover. The blue wire going to the mirror
is the negative and the orange wire is the positive ignition switched
wire. Carefully strip a small section of the mirror wires and
then wrap your Valentine One power wires around it. Soldering
the connection is recommended for a good reliable connection.
To finish the job, wrap each wire that you attached to with a
piece of electrical tape.
This is a real easy installation. You don't even have to worry about
getting the wires connected backwards because the Valentine
One unit is built to withstand reverse polarity in case of a misswire.
This is the method we chose to use on my '08 IS350. We didn't solder though...just inserted the wires directly into the connector box and secured them well. This way I can move my V1 to another car or completely remove it to keep it from getting stolen, and my car remains intact. Thanks Tuxlex!!
12-31-07, 07:03 AM
#133
Driver
Join Date: Nov 2005
Location: Dallas, Texas
Posts: 194
Likes: 0
Received 0 Likes
on
0 Posts
This is the method we chose to use on my '08 IS350. We didn't solder though...just inserted the wires directly into the connector box and secured them well. This way I can move my V1 to another car or completely remove it to keep it from getting stolen, and my car remains intact. Thanks Tuxlex!!
Fortunately as the rj11 plug broke the V1 landed in my seat instead of gouging the dash or wood console trim.
Good luck.
02-08-08, 11:37 AM
#135
