Aftermarket Sound System Owners Post Your Setup!
 03-05-07, 09:48 PM
#121
Driver School Candidate

Join Date: Feb 2007
Location: Ca
Posts: 38
Likes: 0
Received 0 Likes
on
0 Posts
No prob, if I get to doing the install by myself i'll post the install pics, at least you guys are giving me a start. For those that want to know you can get access to the back sub by removing three slide clips and two squeeze clips (sorry bad descriptions but till tommorrow its the best i can do). The top of the carpeting in the trunk is pretty easy to get off, they use a metal clip and velcro around the edges. I'll take my voltmeter and test the back to see if i can find anything that can be used as a remote back there...oh yeah this is for a 2006 is350.
 03-05-07, 11:10 PM
#122
Pole Position
Join Date: Feb 2007
Location: AZ
Posts: 229
Likes: 0
Received 0 Likes
on
0 Posts
i am working on my fiberglass box this week... so far here is how it sits in the corner. it really isn't much to look at.
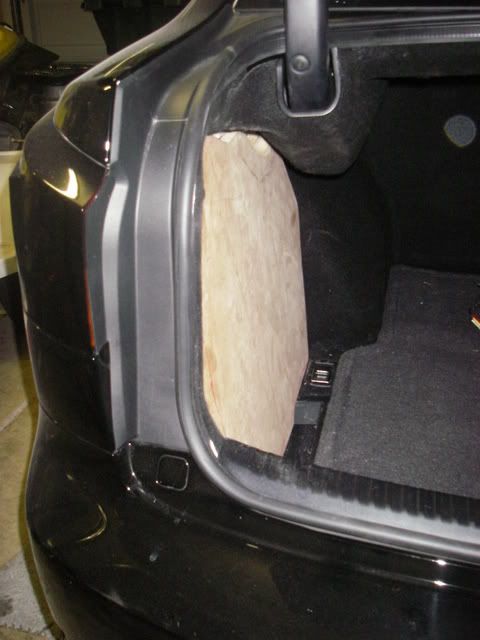
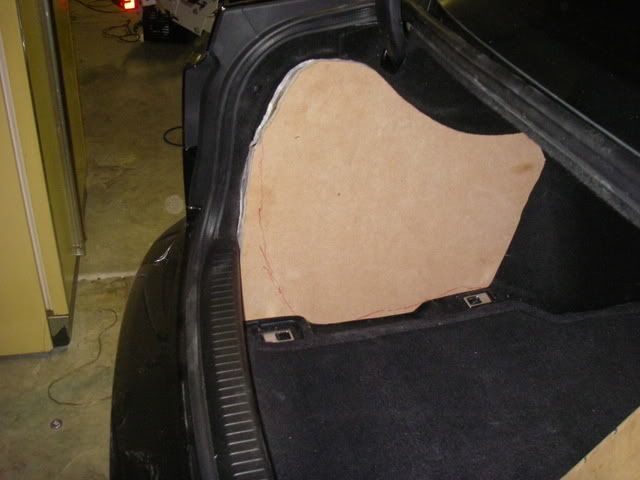
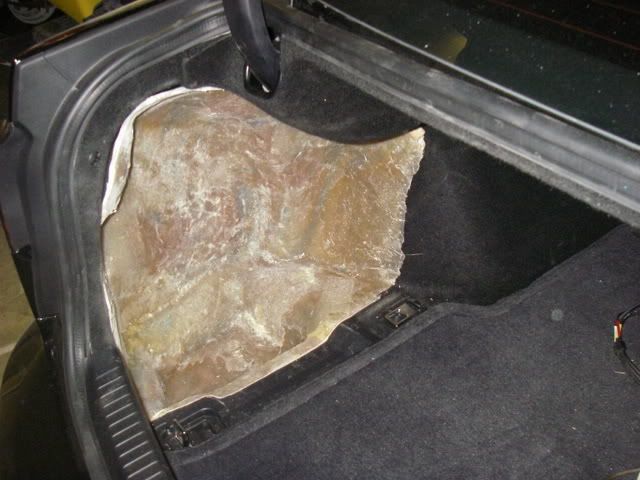
i still need to cut the hole for the sub and fiberglass the placement of the sub. i am going to completely hide my amp and all wiring, so all you see is this sub. the box will be matching carpet probably with a black chrome bezel around it. black chrome is my color. there will be a JL Audio 10w3v3 sub in it. i am going to power it with an old PPI Art Series A300 amp that i had laying around. I ran 4 awg wire from the battery through the passenger side of the vehicle. there is plenty of room all the way through the car for it. the only difficult part is getting the wire through the rear trunk wall. there is a hole for wires at the top passenger side of the trunk in that "rear firewall" to route the power wire. accessory (orange) wire is snagged from the factory amp as well as the high level inputs from the factory sub output at the amp. i left the factory amp wired, and will post more pics soon.
i still need to cut the hole for the sub and fiberglass the placement of the sub. i am going to completely hide my amp and all wiring, so all you see is this sub. the box will be matching carpet probably with a black chrome bezel around it. black chrome is my color. there will be a JL Audio 10w3v3 sub in it. i am going to power it with an old PPI Art Series A300 amp that i had laying around. I ran 4 awg wire from the battery through the passenger side of the vehicle. there is plenty of room all the way through the car for it. the only difficult part is getting the wire through the rear trunk wall. there is a hole for wires at the top passenger side of the trunk in that "rear firewall" to route the power wire. accessory (orange) wire is snagged from the factory amp as well as the high level inputs from the factory sub output at the amp. i left the factory amp wired, and will post more pics soon.
03-06-07, 05:57 AM
#125
Rookie
Join Date: Feb 2007
Location: FL
Posts: 51
Likes: 0
Received 0 Likes
on
0 Posts
I took some pictures of Soundstream's IS350 at 2007 CES, but I can't load the pictures to this site. Anyone can help?
I used a 4 mega pix camera. Unfortunetly, the pictures are not on the camera where I can downsize the image. I transfered them to CD due to the lack of space.
I used a 4 mega pix camera. Unfortunetly, the pictures are not on the camera where I can downsize the image. I transfered them to CD due to the lack of space.
Open them in paint and choose "image-stretch/skew" and select 25% or 33% for each horizonal and vertical. Rename the paint file. It will take a 4mb pic and make it about 1/10th or 1/20th the file size even thought the pic is still about 1/4 or 1/3 the size.
 03-13-07, 09:08 PM
#129

This is slightly off topic, but for those of you with ML, when you turn the DSP on (Surround on) Does your bass get like 10X louder? Mine does... I'm wondering why that happens...
Also, quick poll, do you guys listen to regular music (cds, mp3s, radio) with the dsp on or off? (i.e. - Surround on or off)
Also, quick poll, do you guys listen to regular music (cds, mp3s, radio) with the dsp on or off? (i.e. - Surround on or off)
04-20-07, 01:15 PM
#130
Rookie

Join Date: Apr 2007
Location: BC
Posts: 50
Likes: 0
Received 0 Likes
on
0 Posts
Everyone's setup in this thread is really quite nice and has given me a bunch of ideas on what to do with my car 
Getting the amp installed as we speak, and am now thinking about getting some custom fibreglass boxes installed like a couple of the setups that are posted here.
This should definitely be a sticky
Getting the amp installed as we speak, and am now thinking about getting some custom fibreglass boxes installed like a couple of the setups that are posted here.
This should definitely be a sticky
04-20-07, 03:17 PM
#131
Driver

Join Date: Mar 2007
Location: TX
Posts: 110
Likes: 0
Received 0 Likes
on
0 Posts
To run the power from battery to trunk..
1. remove front passenger scuff plate
2. remove molding running from scuff plate to dash
3. remove battery
4. i didn't know about the un-used grommet, so I use the large grommet with bunch of wires
5. take a metal hanger, cut it and straighten it out
6. tape the wire to one end and fish it through the grommet
7. have a friend in the car direct the hanger out
8. run the wire to the trunk by removing the rear seats
To run the remote wire, use the skinny orange wire running to the factory amp (the outside one furthest to the rear). I got an 18-22 gauge tap-in thingy from Fry's since the wire is so thin.
To get to the factory sub...
1. remove the rear seat cushion by pulling up (it is held by clips)
2. to remove the back seat, remove eight 10mm or bolts, pick up the seat UP and TOWARDS you (easier with 2 people)
3. remove the rear scuff plates
4. pull out the side molding running from the scuff plate to the piece that says "srs rear side air bag" (i think)
5. remove the peice that says "srs rear side air bag"
6. pull up the rear deck (it is held by clips)
7. voila!