
***LED DIY FINISHED! Update pg 3&5!***
 05-28-09, 05:50 PM
#76
Steering Wheel White LED vs Stock LEDs

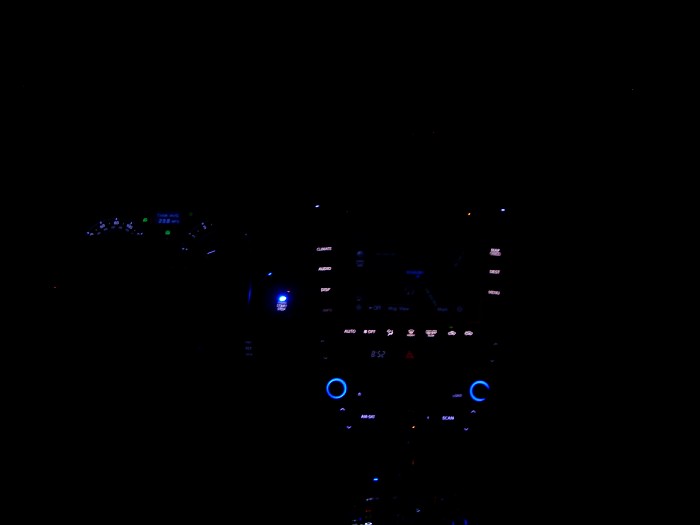
All White LEDs
Center Vent LED
I had to clip the legs with a fine nose clipper and solder the new LED over the old legs. The problem is there is a pinkish lens that beams the light 90 degrees that causes the color to look pink.


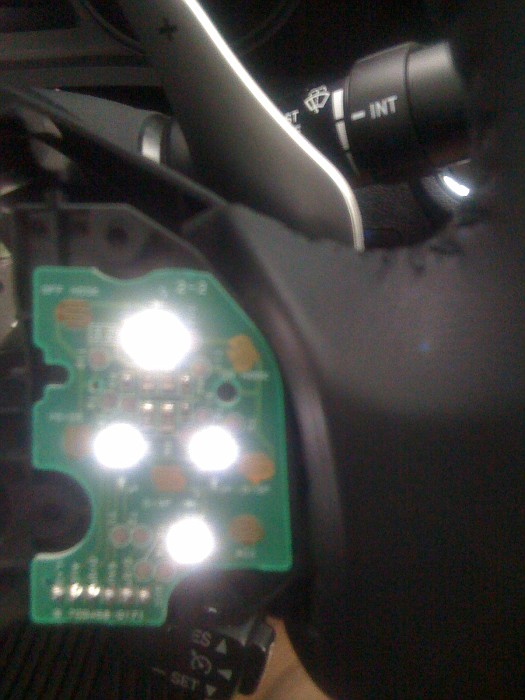
The three NEO lights for the Trac, PWR, and gas/trunk switch. The Trac and PWR buttons use a green rubber condom, you can probably remove that to get white light out of them.

All White LEDs
Center Vent LED
I had to clip the legs with a fine nose clipper and solder the new LED over the old legs. The problem is there is a pinkish lens that beams the light 90 degrees that causes the color to look pink.
The three NEO lights for the Trac, PWR, and gas/trunk switch. The Trac and PWR buttons use a green rubber condom, you can probably remove that to get white light out of them.
 05-28-09, 05:55 PM
#77
The Gas/Trunk uses one NEO3 but the ones from SuperbrightLED were a lil bit too big so I had to trim it a lil bit using a razor to fit and twist on.
I also had to remove the green diffuser behind the switch over so that the light would be white. you need to snap the switch cover off.


I also had to trim all the NEO twist I used because they were all a lil too big.
I also had to remove the green diffuser behind the switch over so that the light would be white. you need to snap the switch cover off.
I also had to trim all the NEO twist I used because they were all a lil too big.
05-28-09, 09:30 PM
#79
removing the seat warmer board.


you need to remove that clear part to change the bulb for the parking gate.


The Start Button board removed using the directions in the thread...just remember to desolder the two ANT spots on the corners first.

This radio shack tool makes desolder so much easier.

you need to remove that clear part to change the bulb for the parking gate.
The Start Button board removed using the directions in the thread...just remember to desolder the two ANT spots on the corners first.
This radio shack tool makes desolder so much easier.
 06-01-09, 06:48 PM
#82
Added another LED for my main cupholder using a 3mm LED and 1k resistor connected to the power for the PRND panel...it looks really cool at night with a full water bottle in there.


NAV unit taken out, there are four screws on each side 2 for the NAV and 2 for the Radio. The face should detach by unhooking some tabs.

Face, Radio, and NAV separated. Radio uses 603 LED

NAV panels use 1206 LEDs


For the center vents...there is a pink/amber angle diffuser that causes the white LED to look orange. I had to remove that diffuser and rig the LED and angle it to get white light.


NAV unit taken out, there are four screws on each side 2 for the NAV and 2 for the Radio. The face should detach by unhooking some tabs.
Face, Radio, and NAV separated. Radio uses 603 LED
NAV panels use 1206 LEDs
For the center vents...there is a pink/amber angle diffuser that causes the white LED to look orange. I had to remove that diffuser and rig the LED and angle it to get white light.
06-01-09, 06:53 PM
#83
So I didnt pay attention the the LED intensity and colors when I bought them. I just ordered random stuff on Ebay. The 1206 LED ended up being a lower color temp than the 603 LEDs. So they dont match. The intensity is also glarey.
I also ran out of 1206 LED because I thought the whole unit used 603s. I had to use some PLCC2 LED on the info button and Temp buttons. They are not as intense so they look dimmer in the pix. I still have to take it apart and replace the substitute PLCC2s and get other color 1206s for the climate signal lights.
If i get annoy I might change the LED one day to lower intensity. Took me 5 hours to do the unit.


My 3GS inner Door handle light upgrade, because the front door handles already have the slit for the LED. Its a bolt on mod only requires one wire into the interior under dash LED and one wire to 12V in the door. I still have another set of the lights if anyone is interested. I also have two sets of amber ones which I can change the LED to white for the IS.

I also ran out of 1206 LED because I thought the whole unit used 603s. I had to use some PLCC2 LED on the info button and Temp buttons. They are not as intense so they look dimmer in the pix. I still have to take it apart and replace the substitute PLCC2s and get other color 1206s for the climate signal lights.
If i get annoy I might change the LED one day to lower intensity. Took me 5 hours to do the unit.
My 3GS inner Door handle light upgrade, because the front door handles already have the slit for the LED. Its a bolt on mod only requires one wire into the interior under dash LED and one wire to 12V in the door. I still have another set of the lights if anyone is interested. I also have two sets of amber ones which I can change the LED to white for the IS.
Last edited by sinister2c; 06-01-09 at 07:01 PM.
06-02-09, 10:30 PM
#84
Driver School Candidate

Join Date: May 2009
Location: CA
Posts: 39
Likes: 0
Received 0 Likes
on
0 Posts
hey im working on my vents, and was wondering what did you use to get the 3mm lightbulb out? or do u know where i can get that whole unit with the resistors attached at.

 06-03-09, 09:07 PM
#88
I cut the legs off the old 3mm LED and just soldered over the area. You will need to take out that pink angle diffuser and just bend the new LED out. that pink diffusion will make white LEDs look pink/amber. dont know about blue or other colors though.
06-03-09, 09:09 PM
#89
