
 12-16-14, 10:58 AM
Last edit by: IB Advertising
See related guides and technical advice from our community experts:
Browse all: Lexus IS Lighting Guides
- Lexus: How to Black Out Your Headlights
Step by step instructions for do-it-yourself repairs
Browse all: Lexus IS Lighting Guides

How do I blackout my headlights?
10-28-09, 09:54 AM
#1
Lead Lap
Thread Starter
iTrader: (10)
Join Date: Aug 2009
Location: Sugar Land,Texas
Posts: 641
Likes: 0
Received 0 Likes
on
0 Posts
Is there at DIY post that shows me how to blackout my headlights? I have been wanting to do this for a while and I have decied to just go for it! But I need help on getting started, I don't want to mess anything up. If anyone can help I would definately appreciate it. :-) also, does anyone know where I can get yellow overlays on my fog lights? Also, where would I install the over lay, on the top of my fogs, or on the inside?
 10-28-09, 02:50 PM
#2

Taken from my writeup on my.is...
Instructions for y'all wanting to do this:
Sorry no pics, but the steps are here.
How to remove the front bumper: YouTube - How to remove the bumper from a Lexus IS250 / IS350 to install Lite-Eyes CCFL Halos / Angel Eyes
Alright, I just heated the oven to 200F and put the headlight in, wiring and all, for 15 minutes. Everyone freaks out about this, but you're not going to melt anything at 200F. This will barely even make the glue holding the housing pliable enough to pry the lenses off. Trust me, I've taken 3 sets of headlights apart - my old '97 Prelude that I did an HID retrofit on, my '94 Supra that I did an HID retrofit on, and finally these where I just blacked out the chrome piece.
So, get a flathead screwdriver you don't really care about because you're gonna get the goop that holds the two pieces together all over it. Do one light at a time in the oven - let sit in the oven for 15 minutes, take it out (use oven mitts, lol). Now, down towards the inner corner is where I started prying (the pointy part of the headlight that is near the grill.) It takes patience - don't go crazy on it jamming the screwdriver in between the plastic and lense because you'll warp the black plastic. Just work small areas at a time. It'll take a while to get a good 5-6" section kinda "loose", but when you do, use your kung-fu grip and start pulling the two apart. It'll be hard, I won't lie. These lights were some of the hardest to pry apart. Once you get 'em going though, be aware that the glue that holds them will be real stringy; just make sure it doesn't get on the chrome reflector as you're pulling it apart. Also, as you pull the two apart, be aware that there are little clips every few inches on the black housing. As you get to them, gently unclip them. I broke a couple on my first light because I wasn't patient. Just take it slow. As a sidenote, my headlight made a lot of noise, creaking, etc when it was coming apart. I thought I was breaking it, but there's nothing holding the two pieces together except the goop, so don't be afraid if the thing makes weird noises when you're pulling it apart.
Once the two pieces are apart, I'd go ahead and put the headlight back into the oven for another 15 minutes (the assembly, not the lense) and then take it back out, and run your screwdriver through the 'channel' that holds the goop. You will later re-seal the headlights using black silicone RTV (often called gasket sealer) - you can get it at AutoZone.
So now that the two pieces are apart, set the lense aside and you'll see the chrome assembly is attached to the lense. There are 3-4 (can't recall for sure) little bitty Phillips screws that hold it on to the clear lense. Unscrew them and it'll come free. Now don't touch it cause you don't want oils from your fingers on the chrome part. I personally did not sand them down before I painted - I just used small, light coats of flat black. Be patient. It'll take 5-6 coats, and space 'em out about 20 minutes. Again, just use enough paint to lightly coat, then stop. Otherwise you'll start getting runs, bubbles, etc.
Once they're how you want them, you just basically reverse the process. Get the housing screwed back in and then go ahead and fill the 'channels' with goop (don't be afraid to fill the thing with silicone. The more you use, the better seal you'll get). I then used woodworking clamps to actually hold the lense to the housing. You can get them at Lowe's or any Sears. I put about 3 on each light and let them sit for a full day. That silicone will need a long time to cure. I don't have any condensation issues and I think they're sealed better than stock.
10-28-09, 03:14 PM
#3
Nice DIY four o two. One of these days when I get around to it, I'll definitely follow this.
To the OP, Aerotect makes good vinyls and films for headlights and fogs.
http://www.aerotect.net/Auto.html
As for the overlays, they would go over the fogs. Its simply a vinyl that you apply with soap and water and squeegee the bubbles out
To the OP, Aerotect makes good vinyls and films for headlights and fogs.
http://www.aerotect.net/Auto.html
As for the overlays, they would go over the fogs. Its simply a vinyl that you apply with soap and water and squeegee the bubbles out
 on the advice guys
 im happy with them.. my 5th set i've done for the IS haha the outcome is this
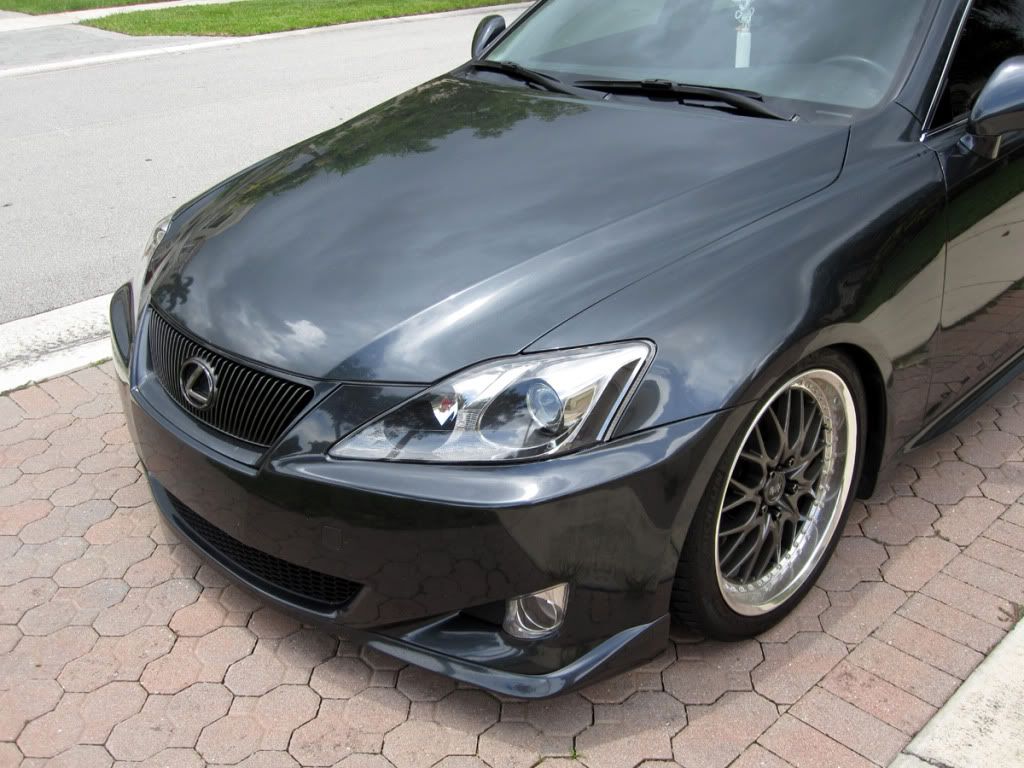
Trending Topics
10-28-09, 10:46 PM
#8
Lead Lap
Thread Starter
iTrader: (10)
Join Date: Aug 2009
Location: Sugar Land,Texas
Posts: 641
Likes: 0
Received 0 Likes
on
0 Posts
Im diggin those lights mistaboi, and lovin the SGM, it makes it easier to see if the lights would actually turn out good on my car since we have the same color. lol
10-29-09, 09:37 PM
#9
Pole Position

Join Date: Jun 2007
Location: Equator
Posts: 327
Likes: 0
Received 0 Likes
on
0 Posts
I've always wanted to black out my headlights but have had mixed feelings about them. Did you black out just the inner part or your headlights? Your fogs as well? Looks good man, got a full front view shot?
 11-18-10, 05:47 AM
#11


Thread
Thread Starter
Forum
Replies
Last Post
LasVegasGS
GS - 2nd Gen (1998-2005)
4
07-12-05 11:57 PM