DIY: LS460 door locks & door cup LEDs

 03-29-13, 10:27 AM
#183
Driver School Candidate

So I finally got around to installing two things I've been planning on forever - LS460 door locks and door cup LED's found in late GS and LS models. Since the LS, GS, and IS share the same interior door handle assemblies, the parts are interchangeable. I figured I would do them all at the same time and write up some instructions, so here's a brief overview of how to install these in your 2IS:
Parts list (I purchased all these parts from Luis at www.L-TunedParts.com)
Door locks, 4 total:
(2) 69741-50020-C0 (right side locks)
(2) 69742-50020-C0 (left side locks)
The door locks do not come with the orange lock indicator decals, so you'll need to order those too:
(2) 74531-0E010 (right side decals)
(2) 74531-0E020 (left side decals)
Door cup LEDs: You'll only need two sets of the LED's since the rear door cups do not have the slots or mounting points necessary to mount the LED.
(1) 81080-30050 (right side LED assembly)
(1) 81080-30060 (left side LED assembly)
1. Remove the door panel. There are plenty of posts outlining how to do this, so I won't detail that step in this DIY.
Please note that removing the interior door handle assembly is only required if you plan on installing the door cup LED's. If you are only upgrading your door locks, you can skip directly to step 6 below and remove and replace your locks without unbolting the assembly.
2. Use a phillips-head screwdriver to remove the three screws from the grey brace.
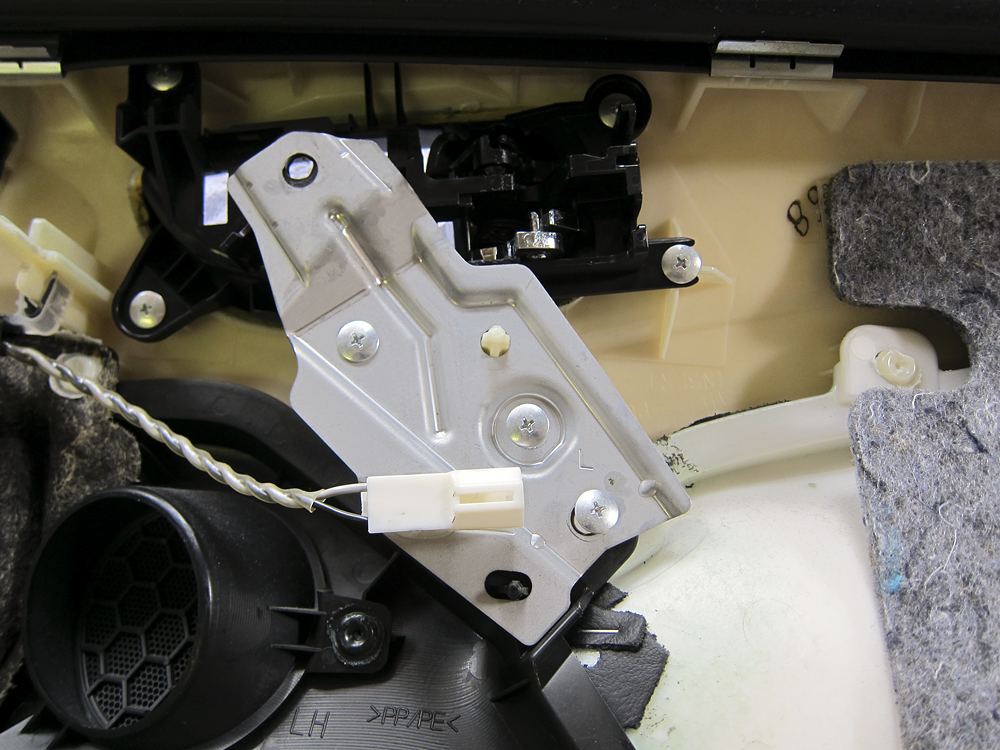
3. Once that's out of the way, remove the four screws that fasten the interior door handle assembly to the door panel.

4. You'll notice in the photo above that the upper left hand screw is blocked by the window trim. In order to access that screw, you'll have to release the tab located about an inch to the left of that screw, as seen below. You'll need a flat-head screwdriver to release that tab:
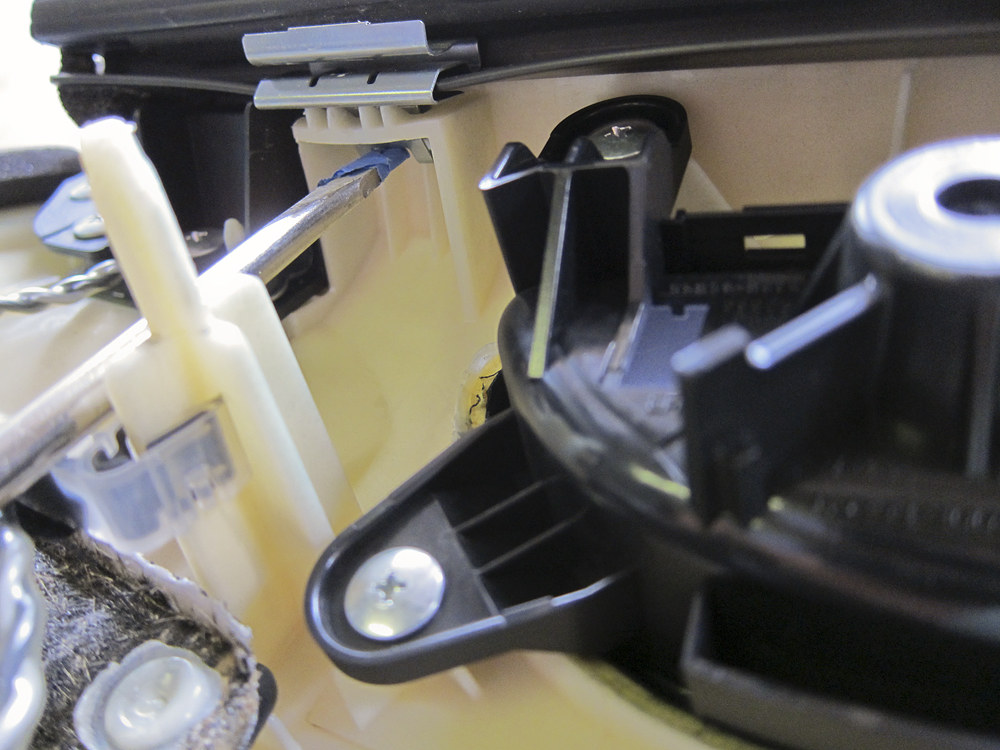

5. Once the interior door handle assembly is removed from the door panel, remove the original lock. It releases in two places. One is a tab above the lock that can be pressed with a flat-head screwdriver. Use the same flat-head screwdriver to push upward from underneath on the lock (while still holding the upper tab) and the lock will pop out. Installing the new lock is exactly the reverse of removal.
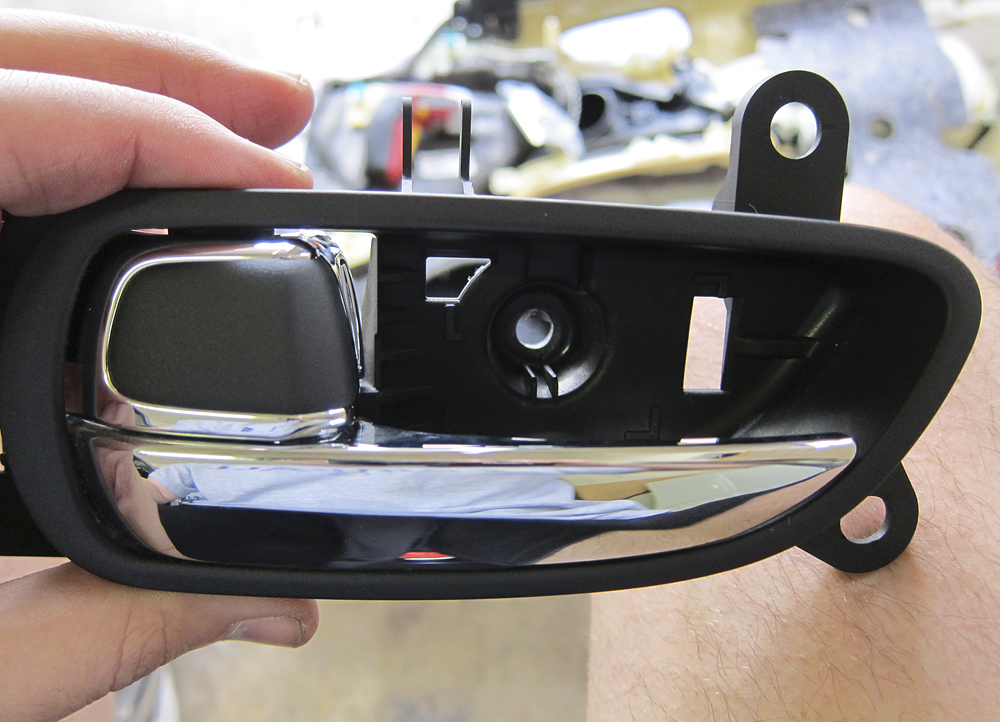
Here's the finished product:
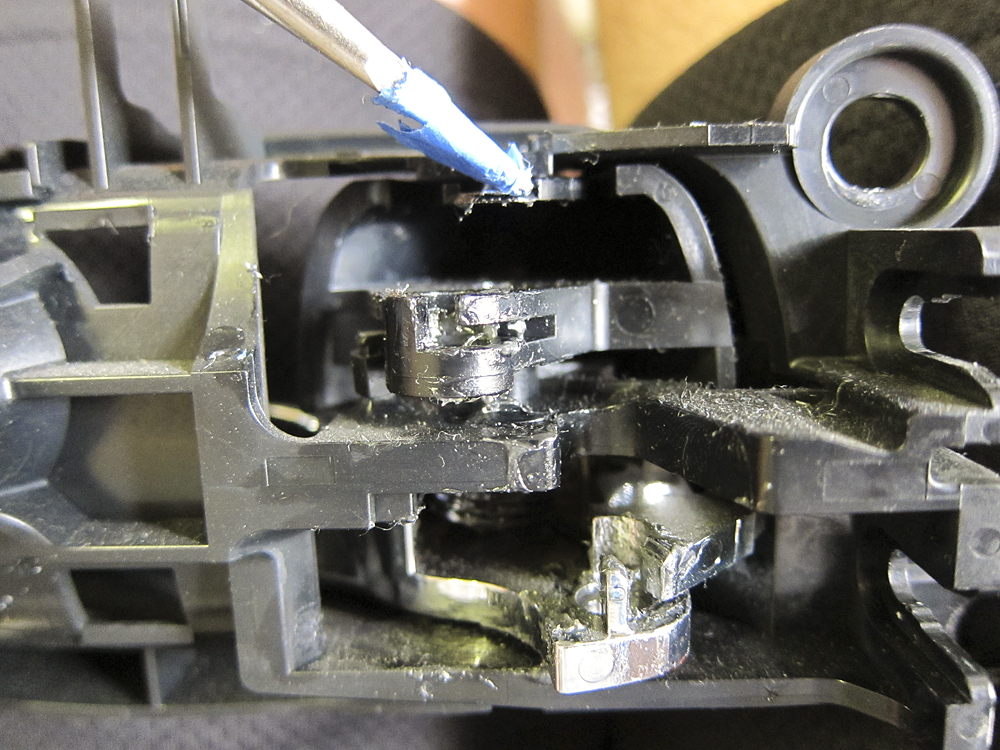
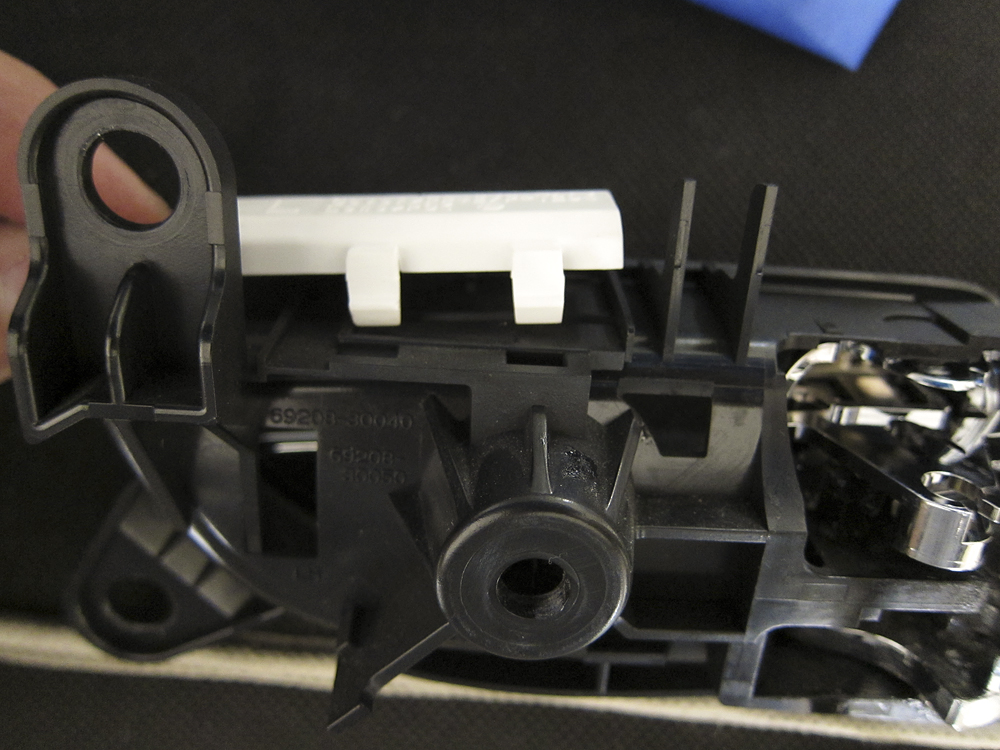
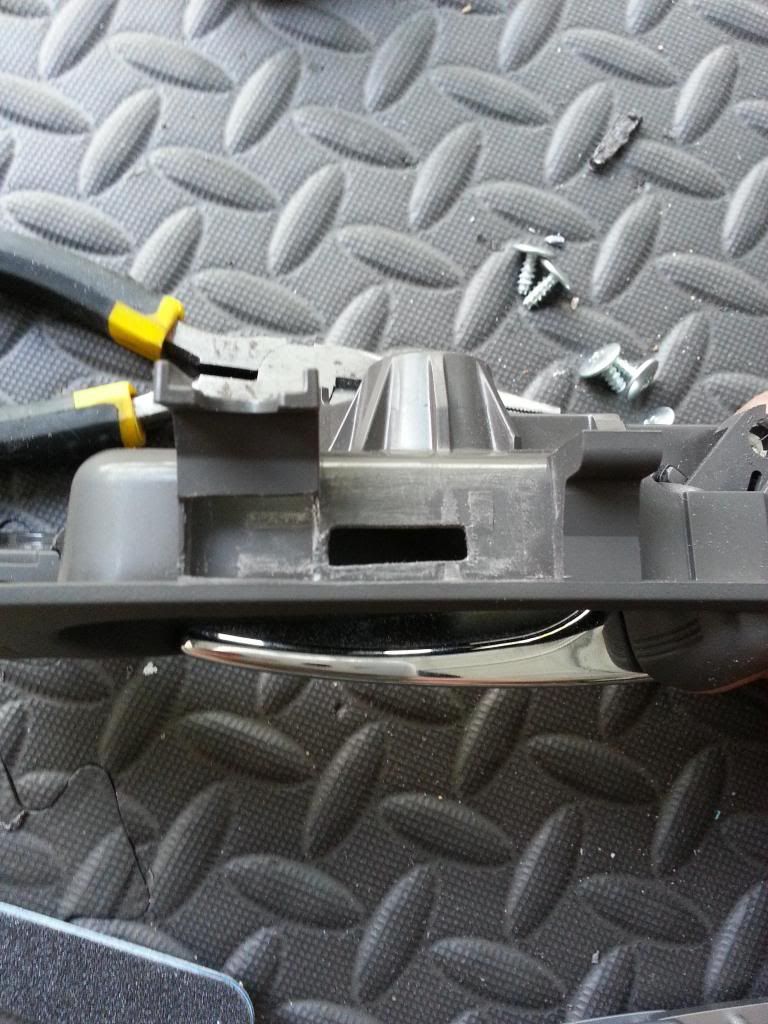
6. While you still have the interior door handle assembly separated from the door panel, you can install the door cup LED. It's pretty straight forward - the piece aligns into place using slots, and once aligned you then push down on the piece and snap the two retaining clips into place:

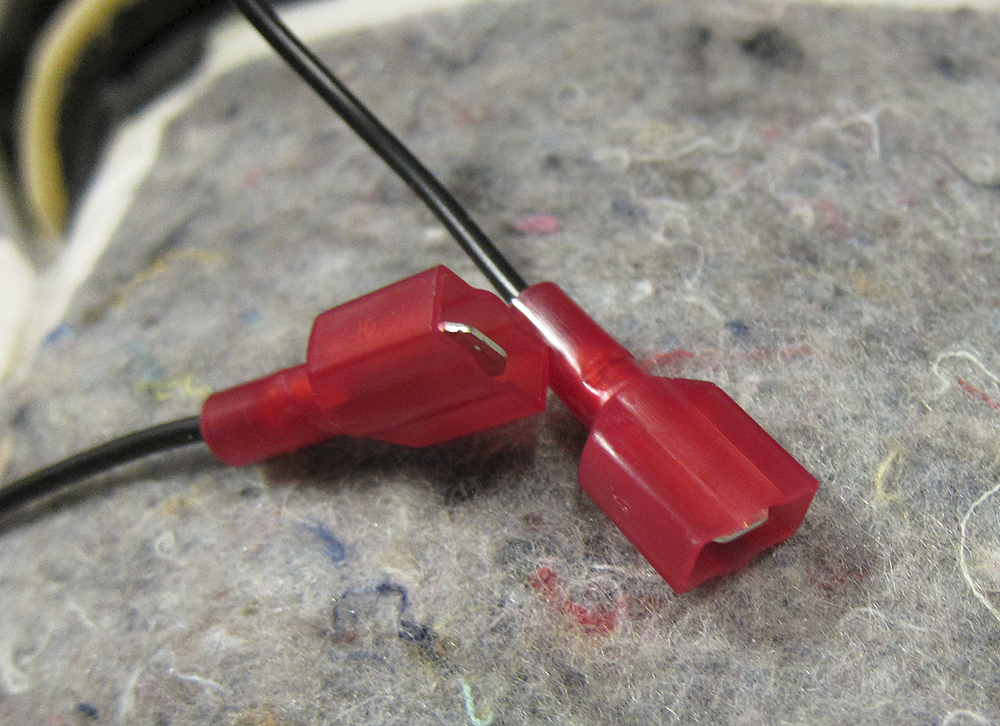
7. The LED units will come with a harness - since the IS does not have this harness, you'll have to make your own. If you don't, you'll have to cut the wires every time you remove your door panel. I cut off the LED harness and connected the two wires to some "quick disconnects." These can be found in the electrical department at any hardware store like Home Depot or Lowe's or Radio Shack. MAKE SURE you mark one of the connections from the other so you can tell which disconnects are paired with each other. I used a black magic marker to pair the female and male ends of one of the quick disconnects.
8. Here's what your door panel should look like once you've finished extending the wiring from the LED:

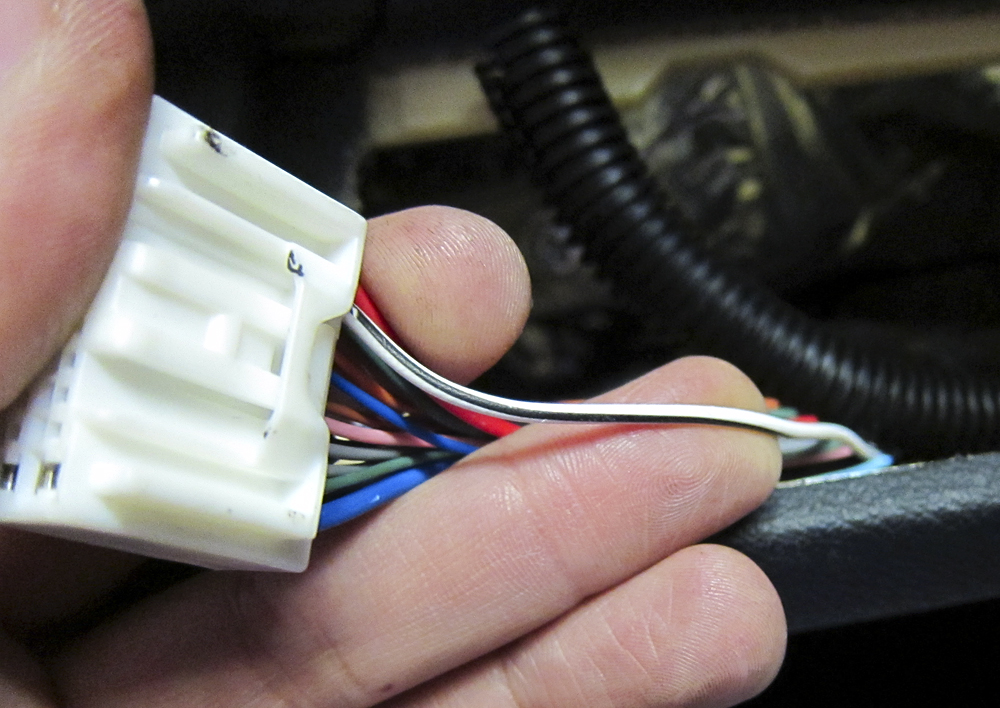
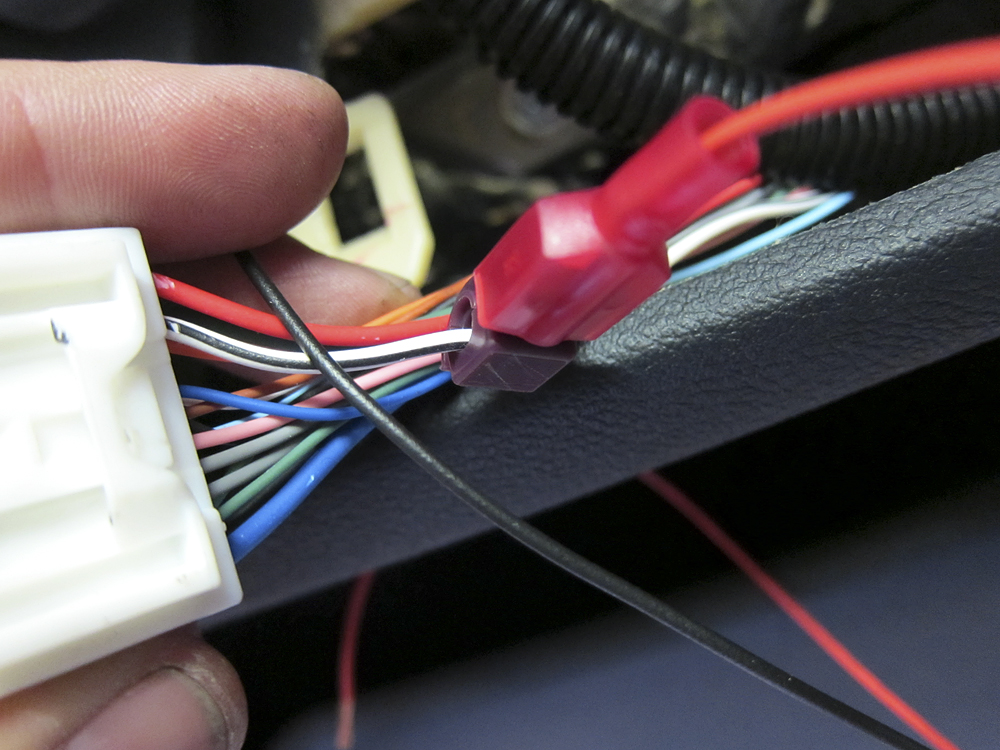
9. Now you'll need to tap two wires to power and control the door cup LEDs.
From the larger of the two harnesses that connect to the window switches, tap the white wire with a black stripe as seen here:
10. From the smaller harness, tap the orange wire as seen here:
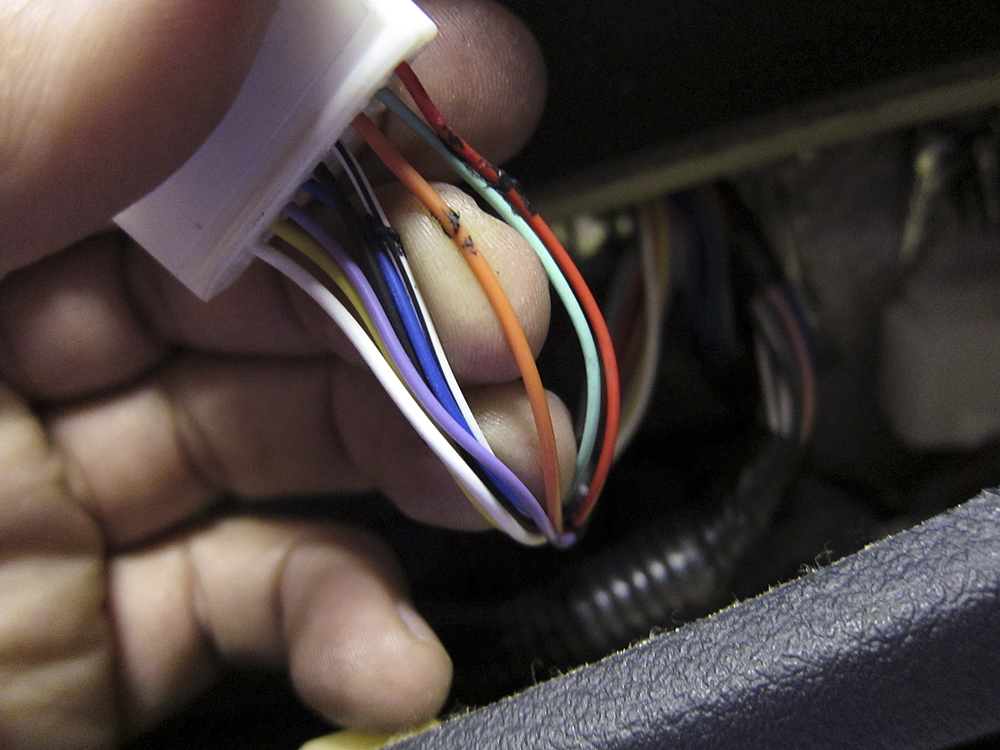
*Update* - If you have an IS-F or an ISx50 with "Reverse Tilting Side View mirrors" (found in Sport or Luxury Pkg) don't tap the thin orange wire on the smaller harness (for the mirror controls) for the driver's side - instead tap the small thin black wire found on the same large harness (window controller) that has the white wire w/black stripe. Thank You Pocky and Joe Z!!!
11. Connect the black wire from the LED to the white wire with black stripe you tapped in the large window switch harness. I matched these wires in the photos below to give you a reference.
12. The white wire coming from the LED must be connected to the orange wire you tapped in the smaller harness.
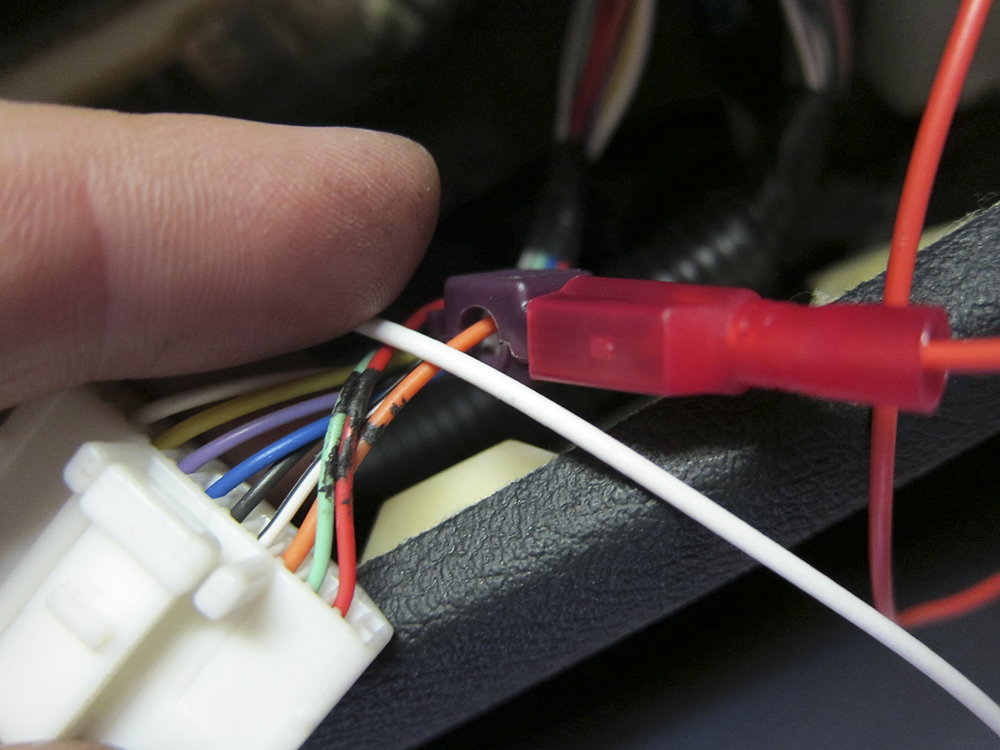
13. Notice the T-Tap I used above - this allows me to disconnect these wires whenever I need to remove my door panels. This is the "make your own harness" that I referred to earlier.
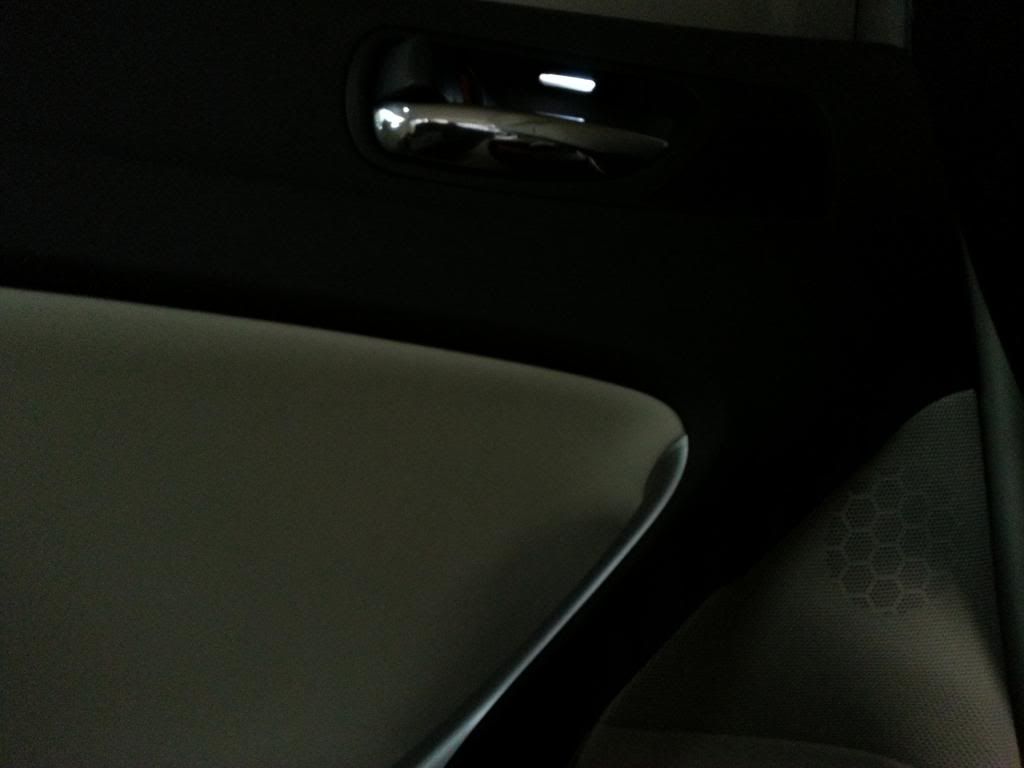
14. Verify your connections by tapping the start button to "ACC" mode and you should see the LEDs illuminate your door cups. Here's what the finished product looks like:

This is an easy mod that doesn't cost much, and really adds class to the interior of the 2IS. Feel free to ask any questions, and good luck!
*UPDATE* I've rewired the LEDs to the footwell LEDs per sinister2c's suggestion as detailed in this post:
https://www.clublexus.com/forums/5586409-post69.html
Special thanks to Luis at Carson Toyota/L-TunedParts.com, and CL members Joe Z, pocky, and sinister2c for help sorting out the wiring.
Javier
Parts list (I purchased all these parts from Luis at www.L-TunedParts.com)
Door locks, 4 total:
(2) 69741-50020-C0 (right side locks)
(2) 69742-50020-C0 (left side locks)
The door locks do not come with the orange lock indicator decals, so you'll need to order those too:
(2) 74531-0E010 (right side decals)
(2) 74531-0E020 (left side decals)
Door cup LEDs: You'll only need two sets of the LED's since the rear door cups do not have the slots or mounting points necessary to mount the LED.
(1) 81080-30050 (right side LED assembly)
(1) 81080-30060 (left side LED assembly)
1. Remove the door panel. There are plenty of posts outlining how to do this, so I won't detail that step in this DIY.
Please note that removing the interior door handle assembly is only required if you plan on installing the door cup LED's. If you are only upgrading your door locks, you can skip directly to step 6 below and remove and replace your locks without unbolting the assembly.
2. Use a phillips-head screwdriver to remove the three screws from the grey brace.
3. Once that's out of the way, remove the four screws that fasten the interior door handle assembly to the door panel.
4. You'll notice in the photo above that the upper left hand screw is blocked by the window trim. In order to access that screw, you'll have to release the tab located about an inch to the left of that screw, as seen below. You'll need a flat-head screwdriver to release that tab:
5. Once the interior door handle assembly is removed from the door panel, remove the original lock. It releases in two places. One is a tab above the lock that can be pressed with a flat-head screwdriver. Use the same flat-head screwdriver to push upward from underneath on the lock (while still holding the upper tab) and the lock will pop out. Installing the new lock is exactly the reverse of removal.
Here's the finished product:
6. While you still have the interior door handle assembly separated from the door panel, you can install the door cup LED. It's pretty straight forward - the piece aligns into place using slots, and once aligned you then push down on the piece and snap the two retaining clips into place:
7. The LED units will come with a harness - since the IS does not have this harness, you'll have to make your own. If you don't, you'll have to cut the wires every time you remove your door panel. I cut off the LED harness and connected the two wires to some "quick disconnects." These can be found in the electrical department at any hardware store like Home Depot or Lowe's or Radio Shack. MAKE SURE you mark one of the connections from the other so you can tell which disconnects are paired with each other. I used a black magic marker to pair the female and male ends of one of the quick disconnects.
8. Here's what your door panel should look like once you've finished extending the wiring from the LED:
9. Now you'll need to tap two wires to power and control the door cup LEDs.
From the larger of the two harnesses that connect to the window switches, tap the white wire with a black stripe as seen here:
10. From the smaller harness, tap the orange wire as seen here:
*Update* - If you have an IS-F or an ISx50 with "Reverse Tilting Side View mirrors" (found in Sport or Luxury Pkg) don't tap the thin orange wire on the smaller harness (for the mirror controls) for the driver's side - instead tap the small thin black wire found on the same large harness (window controller) that has the white wire w/black stripe. Thank You Pocky and Joe Z!!!
11. Connect the black wire from the LED to the white wire with black stripe you tapped in the large window switch harness. I matched these wires in the photos below to give you a reference.
12. The white wire coming from the LED must be connected to the orange wire you tapped in the smaller harness.
13. Notice the T-Tap I used above - this allows me to disconnect these wires whenever I need to remove my door panels. This is the "make your own harness" that I referred to earlier.
14. Verify your connections by tapping the start button to "ACC" mode and you should see the LEDs illuminate your door cups. Here's what the finished product looks like:
This is an easy mod that doesn't cost much, and really adds class to the interior of the 2IS. Feel free to ask any questions, and good luck!
*UPDATE* I've rewired the LEDs to the footwell LEDs per sinister2c's suggestion as detailed in this post:
https://www.clublexus.com/forums/5586409-post69.html
Special thanks to Luis at Carson Toyota/L-TunedParts.com, and CL members Joe Z, pocky, and sinister2c for help sorting out the wiring.
Javier
http://i1161.photobucket.com/albums/...ps234eb967.jpg
Last edited by huycyber; 03-29-13 at 11:19 AM.
03-29-13, 10:29 AM
#184
hi buddy , by looking at my 2011 isx50 , i have this, do i need to buy a whole new door cup since i have a slot seems like for led ? or do i just need to buy leds only and continue the work?
http://s1161.photobucket.com/user/huycyber/library/
http://s1161.photobucket.com/user/huycyber/library/
Jeff
03-29-13, 11:18 AM
#185
Driver School Candidate
oh really, im sorry, hope this below will work.
http://i1161.photobucket.com/albums/...ps234eb967.jpg
http://i1161.photobucket.com/albums/...ps234eb967.jpg
Last edited by huycyber; 03-29-13 at 01:42 PM.
04-05-13, 09:50 PM
#186
Driver School Candidate
More , i have done with running footwell wire method. it was little more work but it paid back very well, i like it . Once again, i didnt know we had this mod till javyLSU brought it up caught my attention and all the supporter, Thank you all.
here couple pics of what i have done, i used my original IS door handle front and rear of both sides.
the front installation i guess most of us already know , i just post the rear one.


here couple pics of what i have done, i used my original IS door handle front and rear of both sides.
the front installation i guess most of us already know , i just post the rear one.
04-18-13, 09:23 PM
#187

Does anyone know how much power the window switches give? I tried tapping a festoon LED into the white with black stripe, and orange wires but it didn't light up. Tested the bulb with a battery and confirmed it was working. Not sure if the door cup LEDs are lower voltage or something than a regular festoon LEDS
06-12-13, 10:38 PM
#188
Rookie
iTrader: (2)

Join Date: Oct 2011
Location: Oregon
Posts: 93
Likes: 0
Received 0 Likes
on
0 Posts
More , i have done with running footwell wire method. it was little more work but it paid back very well, i like it . Once again, i didnt know we had this mod till javyLSU brought it up caught my attention and all the supporter, Thank you all.
here couple pics of what i have done, i used my original IS door handle front and rear of both sides.
the front installation i guess most of us already know , i just post the rear one.
here couple pics of what i have done, i used my original IS door handle front and rear of both sides.
the front installation i guess most of us already know , i just post the rear one.
 12-11-13, 01:41 PM
#192

I am about ready to order the parts to do this mod. On my 2012 IS-F, I noticed the front door handle cups have VERY narrow & long slits (cut-outs). I'm assuming this is where the led light will shine thru but it appears to be a much narrower opening than I have seen in the install pictures. Has anyone done this mod on a later model (or any year) IS-F and can confirm?
Thanks!
Thanks!
12-11-13, 02:09 PM
#193
I am about ready to order the parts to do this mod. On my 2012 IS-F, I noticed the front door handle cups have VERY narrow & long slits (cut-outs). I'm assuming this is where the led light will shine thru but it appears to be a much narrower opening than I have seen in the install pictures. Has anyone done this mod on a later model (or any year) IS-F and can confirm?
Thanks!
Thanks!
12-11-13, 09:06 PM
#194
For the price of an IS-F this should have been factory on all 4 doors, as should be the illuminated seat belt receptacles (as on the LS), illuminated memory seat switches, turn signals in the mirrors (as in the regular is), remote start, WAY better navi & ML system …. I better stop now…...
Last edited by Maxxam; 12-12-13 at 10:25 AM.
