

 01-06-15, 03:46 PM
Last edit by: IB Advertising
See related guides and technical advice from our community experts:
Browse all: Exterior Guides
- How to Install F Sport Lip Bumper
Step by step instructions for do-it-yourself repairs
Browse all: Exterior Guides

DIY to install the 11' Fsport lip?
05-24-11, 08:23 AM
#1
Driver School Candidate
Thread Starter

Join Date: Apr 2009
Location: florida
Posts: 38
Likes: 0
Received 0 Likes
on
0 Posts
Does anyone know how to install the 2011 Fsport lip on the non Fsport bumper? I know there are a couple people on the forum that have done this already but i can't find to see a DIY =[ some one please help me mine just came through the door =]

 05-24-11, 09:24 AM
#3
Driver School Candidate
Thread Starter
Join Date: Apr 2009
Location: florida
Posts: 38
Likes: 0
Received 0 Likes
on
0 Posts
Mine didn't come with instructions =[ I don't have the Fsport bumper so i think it might be different to install. Hopefully I can get it installed as soon as possible!
 05-24-11, 01:19 PM
#5
Ok, I took a few pictures along the way so hopefully this helps you out. Sorry for the leopard print sheets...it was the only sheet that my wife would let me use 
First off breathe and take a deep breath, you'll have suck it up an get courageous because you will be cutting 10 large rectangles into your brand new bumper The tools you will need for this include a dremel, a power drill, sandpaper if you want to smooth out the cuts, sockets, flathead and phillips screwdrivers and wrenches.
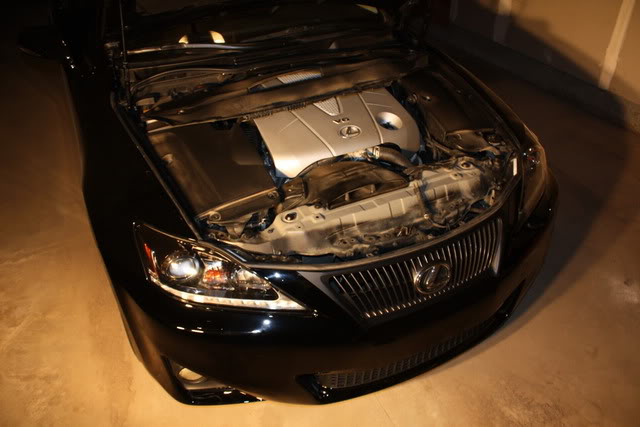
Start by taking off the engine plastic covering and all the clips along the top of the bumper. I believe there are a couple of screws that need to be removed as well.
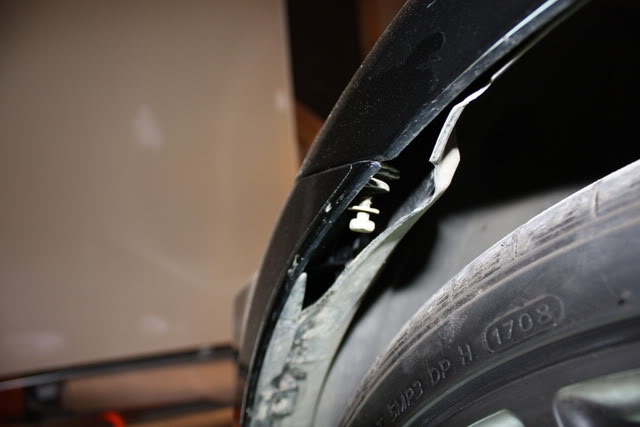
Next you can start taking off the front bumper. There are 2 bolts at each corner of the fender, you'll have to peel back the front wheel well lining to reach them. As well, there are a couple of unique clips holding the wheel well linging to the front bumper, you have to get these off.
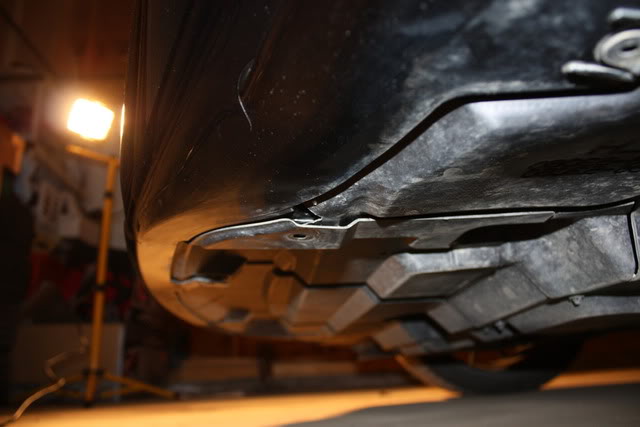
Along the bottom there are a number of clips and screws that you will have to remove.
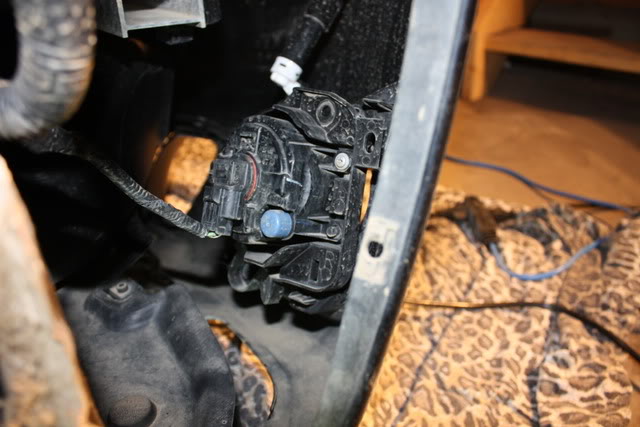
If you have headlight washers built into the bumper, like I did, you will not have a ton of room to work with, you can dissconnect the washer hoses and clamp them off to completely take the bumper off, but I chose to work with the bumper still attached to the hoses.
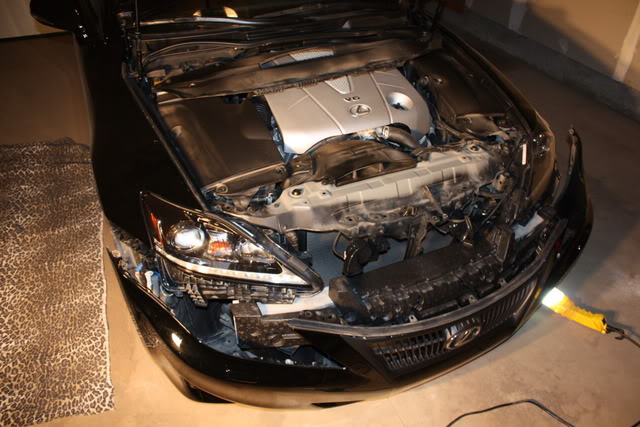
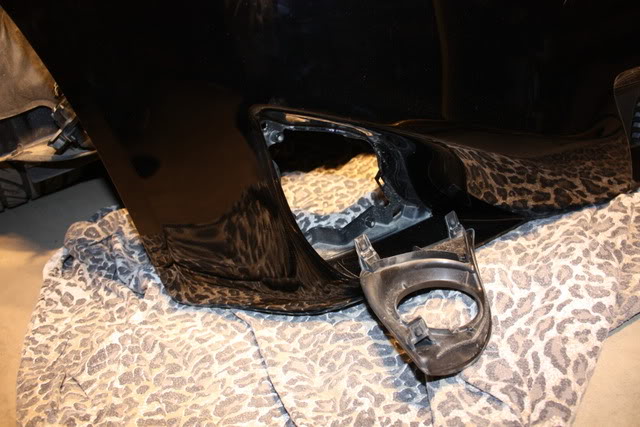
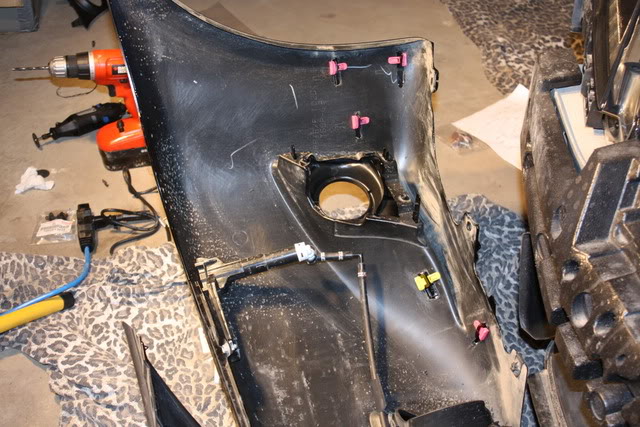
You can then take off the foglight housing. I remember there being a couple of screws and then you'll just have to unhook the clamps and it will slide right out. **This would be a great time to change your forlight bulbs if you want to I did mine the old fashioned way and cut my hands up all over the place.
You will not need the old plastic pieces as the lip has the new ones built right in.
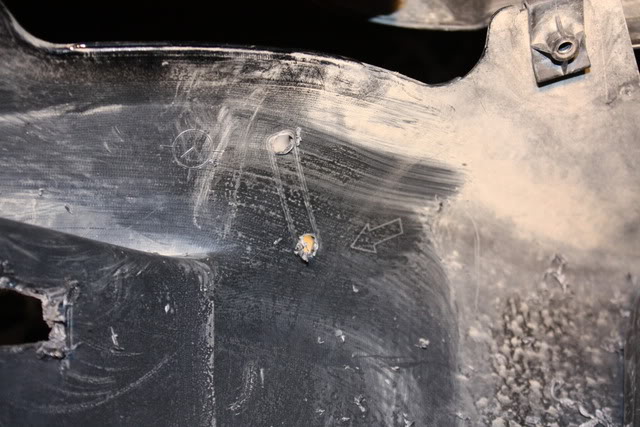
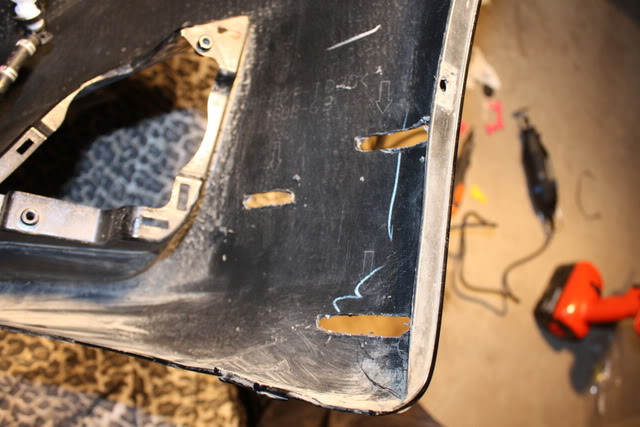
Next, wipe down the backside of your bumper with a wet rag so that you can pinpoint the cutouts. They are all marked and in total there should be 5. 3 closest to the fender and 2 along the lower lip.
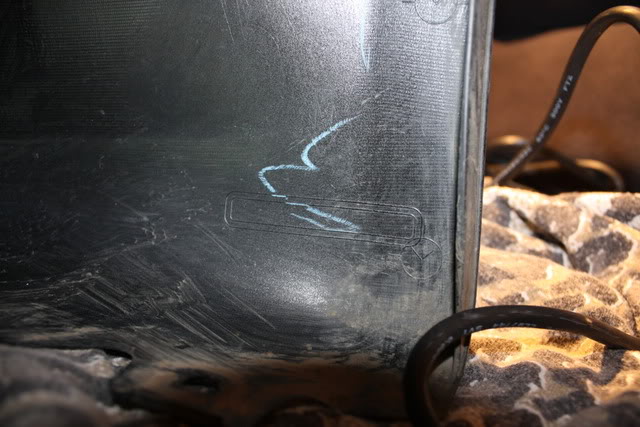
Now the fun begins. I started by drilling 2 holes on either side of the cutouts. Next, bring out the dremel and connect the holes! I found that if you line up the blade of the dremel in between the lines, it gave a perfect cut.
Then, line up the new lip peices and install the clips that are provided. Read and look at the instructions carefully, as it tells you which clips to install and where, as there are 2 types of clips provided. My first test fit was a bit off because I didnt cut one of the rectangles big enough, I had to take all the clips out and cut out a bit more.
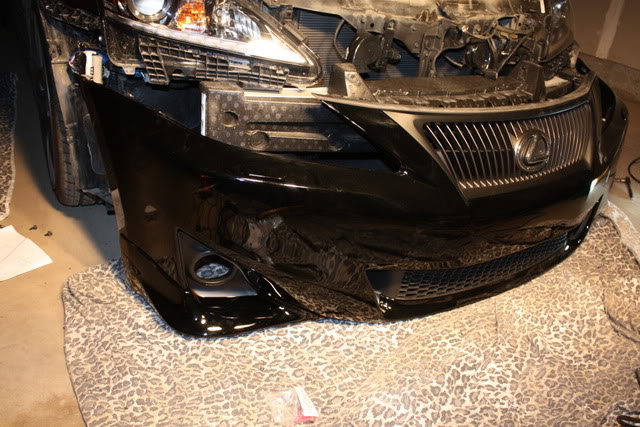
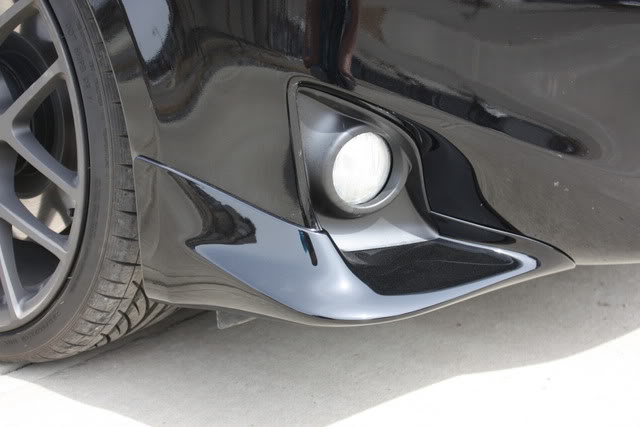
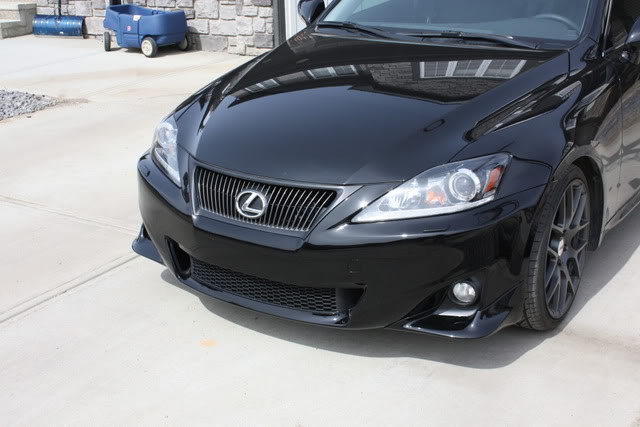
After that, install the foglight housing back into the bumper, and repeat for side 2! That wasn't bad at all huh?
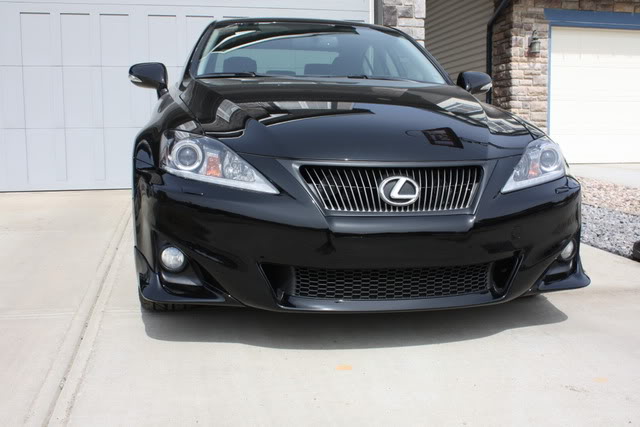
This is what the finished product should look like
First off breathe and take a deep breath, you'll have suck it up an get courageous because you will be cutting 10 large rectangles into your brand new bumper
The tools you will need for this include a dremel, a power drill, sandpaper if you want to smooth out the cuts, sockets, flathead and phillips screwdrivers and wrenches.Start by taking off the engine plastic covering and all the clips along the top of the bumper. I believe there are a couple of screws that need to be removed as well.
Next you can start taking off the front bumper. There are 2 bolts at each corner of the fender, you'll have to peel back the front wheel well lining to reach them. As well, there are a couple of unique clips holding the wheel well linging to the front bumper, you have to get these off.
Along the bottom there are a number of clips and screws that you will have to remove.
If you have headlight washers built into the bumper, like I did, you will not have a ton of room to work with, you can dissconnect the washer hoses and clamp them off to completely take the bumper off, but I chose to work with the bumper still attached to the hoses.
You can then take off the foglight housing. I remember there being a couple of screws and then you'll just have to unhook the clamps and it will slide right out. **This would be a great time to change your forlight bulbs if you want to
I did mine the old fashioned way and cut my hands up all over the place.You will not need the old plastic pieces as the lip has the new ones built right in.
Next, wipe down the backside of your bumper with a wet rag so that you can pinpoint the cutouts. They are all marked and in total there should be 5. 3 closest to the fender and 2 along the lower lip.
Now the fun begins. I started by drilling 2 holes on either side of the cutouts. Next, bring out the dremel and connect the holes! I found that if you line up the blade of the dremel in between the lines, it gave a perfect cut.
Then, line up the new lip peices and install the clips that are provided. Read and look at the instructions carefully, as it tells you which clips to install and where, as there are 2 types of clips provided. My first test fit was a bit off because I didnt cut one of the rectangles big enough, I had to take all the clips out and cut out a bit more.
After that, install the foglight housing back into the bumper, and repeat for side 2! That wasn't bad at all huh?
This is what the finished product should look like
Last edited by Rash; 10-30-11 at 01:33 PM. Reason: extra IMG tags removed
The following users liked this post:
bryceis250 (02-20-19)
05-24-11, 01:35 PM
#6
Nice work, it look meaner than before, I wonder is the new 2011 bumper has any drill marks for the parking assist? look like the new is discontinue that option? I would like ti do the facelift on my 07, but I don't know about the parking assist sensors would be at?
Trending Topics
05-27-11, 10:05 AM
#11
Lexus Fanatic
iTrader: (10)
Join Date: Nov 2004
Location: Under an IS F since 2008
Posts: 13,441
Received 1,064 Likes
on
586 Posts
I think it looks great with the side lips
All you would need to do is make drill holes in the same exact spot...
Not too hard without markings being there.
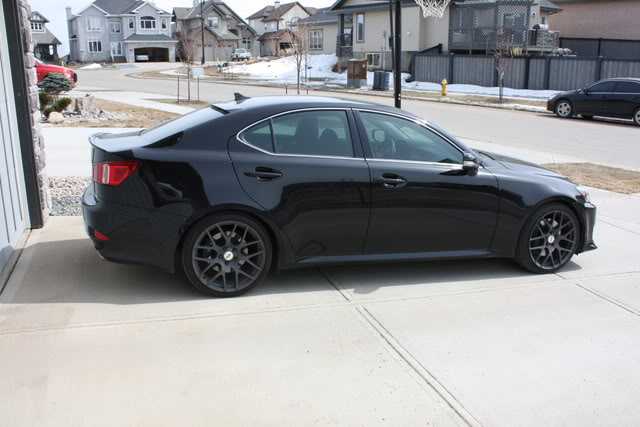
Edit: Plus, I think I can see a perfect circle in photo #10 of "Trza"s post.
Seems to be in the right spot.. (See my old IS350 below)

"Intuitive Parking Assist" is still an available option for 2011 IS Models.
Joe Z
Not too hard without markings being there.
Edit: Plus, I think I can see a perfect circle in photo #10 of "Trza"s post.
Seems to be in the right spot.. (See my old IS350 below)
"Intuitive Parking Assist" is still an available option for 2011 IS Models.
Joe Z
Last edited by Joe Z; 05-27-11 at 10:52 AM.
05-27-11, 10:36 AM
#12
Yeah, I wouldn't be surprised if the holes are already marked off for the sensors. I'll have a look when I get home at the pictures that I took and see if I can find a clear one of the backside of the bumper.
07-27-11, 04:58 PM
#14
Pole Position
Join Date: Jul 2011
Location: CA
Posts: 327
Likes: 0
Received 0 Likes
on
0 Posts