
DIY for Door Panel Removal/Dynamat Install
 07-23-11, 08:48 AM
#1
Driver
Thread Starter
Here is a DIY for removing your door panel, and or Installing dynamat on a 2007 Lexus IS250 AWD. Fist let me start by saying the door panel is very easy to remove, it is a little more tricky getting it back on due to the tweeter location. If you attempt this I am not responsible for any damage you do, this is for your information.
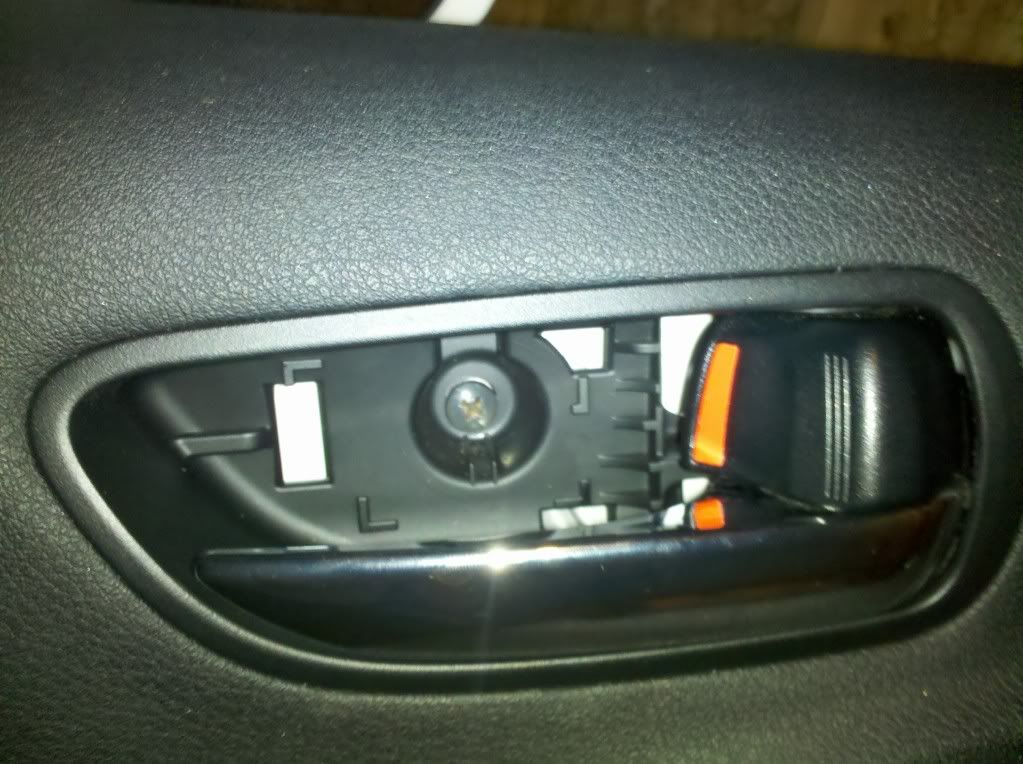
First start by pulling the little plastic cover from behind the door handle, I just stuck a tiny screwdriver on the red side of the door lock and pried, it comes off very easy.. This will reveal the first screw, take it out and set it aside.
At the bottom of the door there is a light, this can easily be pulled out, the clip side is the lower side, so just stick a tiny screwdriver in there, then unclip the light, set it aside.
Next stick your finger nails under your panel with your window and lock controls, there are two pins that hold it in place at each end, so pull from the ends and it will pop out fairly easily, unplug the two or three wire harnesses, and there is a screw reveled, unscrew that screw and set it aside.
Now slowly start at the bottom and remove the panel clips that hold the door panel on, I use my hand and feel for them, then just pull quickly to get them out, go up both sides, then push upwards on the whole panel, start at the back and you might have to give it a good jolt, they are clipped on pretty good. Then lift up and pull away, I used a milk crate with a towel on it to hold my panel while I was working, IT HELPED A TON>
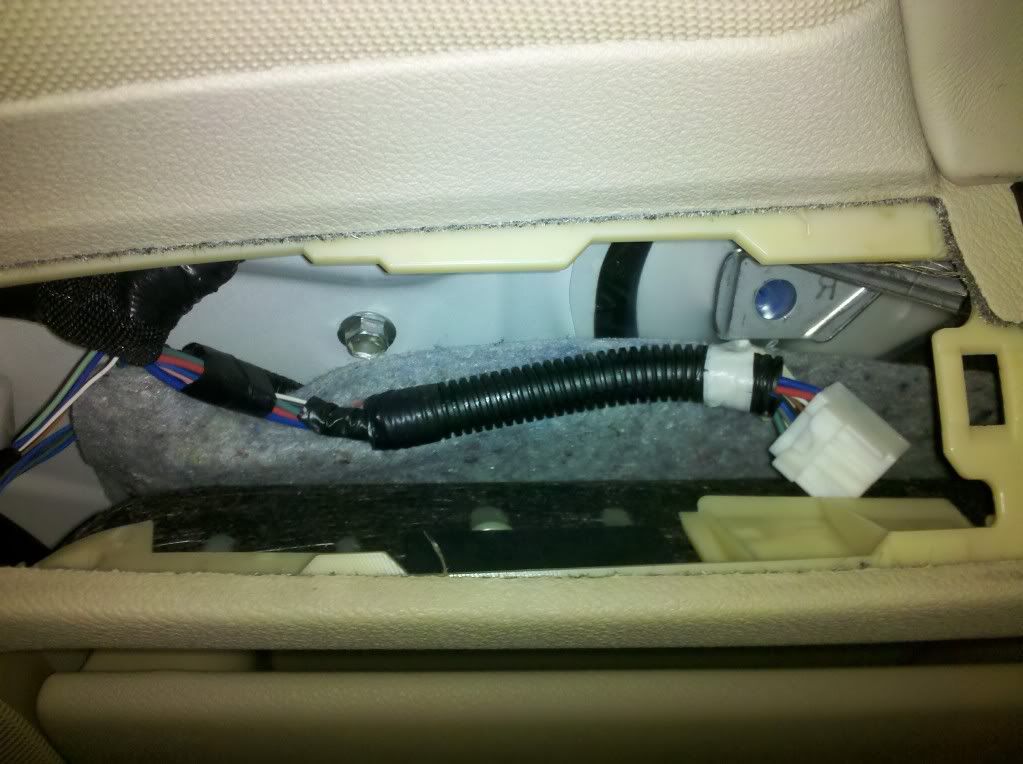
(Its the screw where the blue hole is, it is removed in the picture)
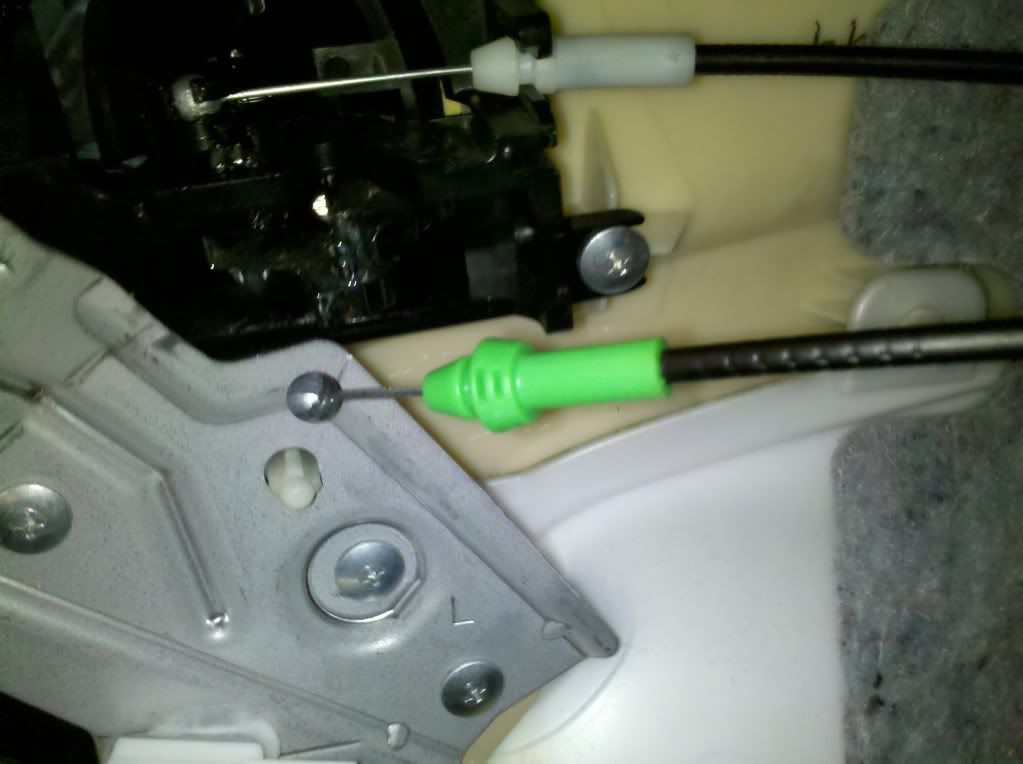
You will have to unclip the door Handle, and the lock, in the picture below you can see how the ball drops into the lock\handle and make sure you pull the lock cord and handle cord out of the little harness.. Remember to push back in all the way during the installation, they will snap into place.
Unclip the tweeter, the memory seats and any other wire harness you might have, and set your door aside. You will need to unscrew the speakers and set them aside, as well as remove the factory plastic, clean well with alcohol, and you’re ready to rock and roll.
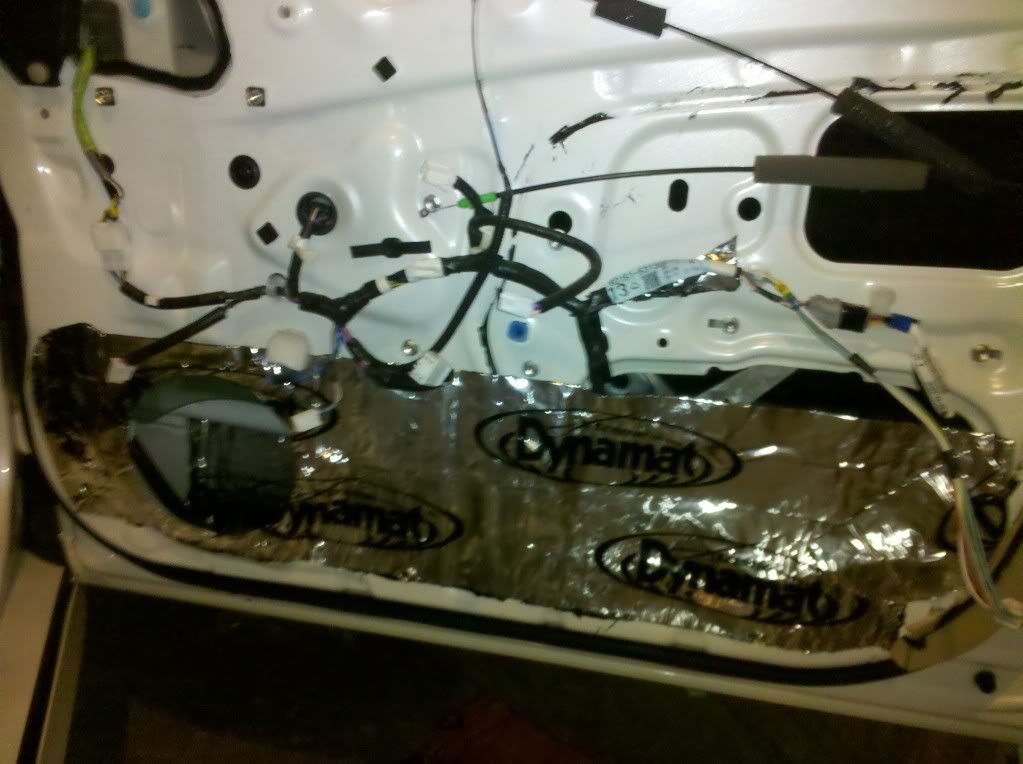
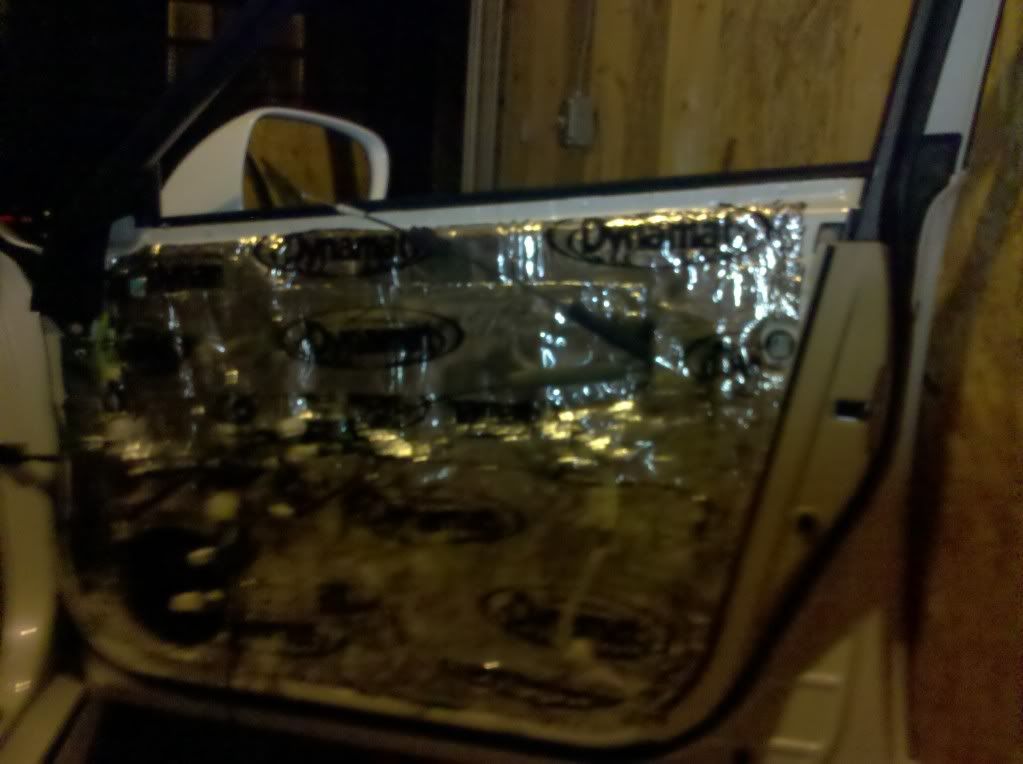
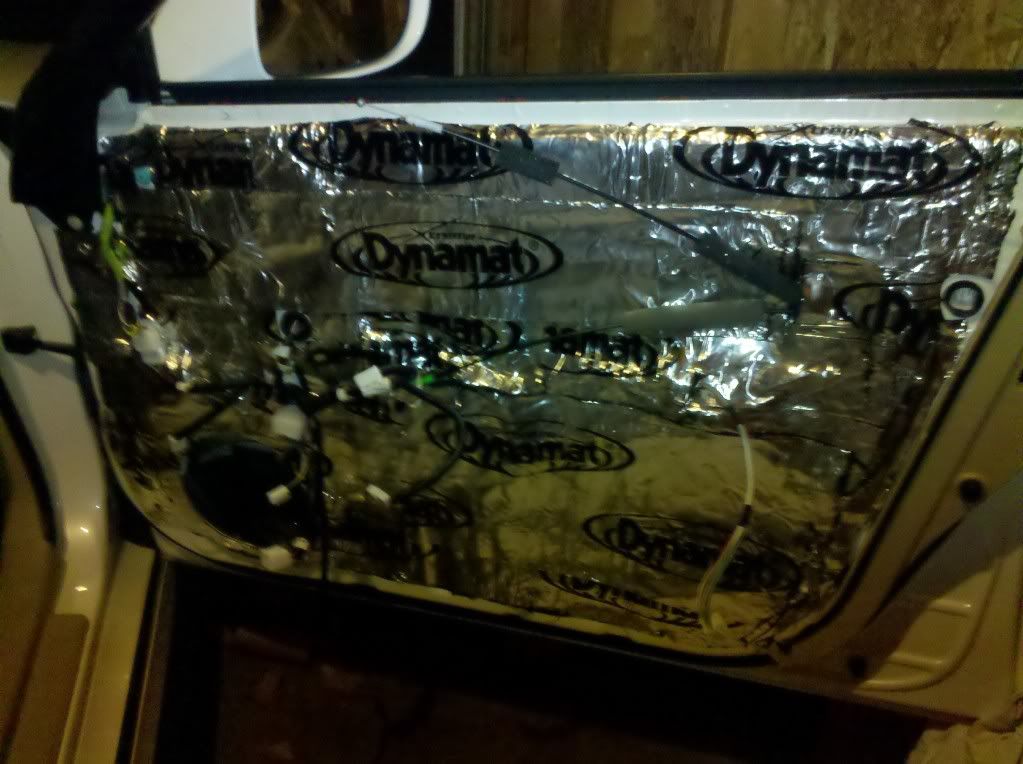
I used small strips and overlapped the dynamat, I used the logo to determine my strip size, and tried to keep whole strips as much as possible without covering everything…. MAKE DOUBLE SURE YOU ARE TAKING A SCREWDRIVER AND POKING YOUR HOLES OUT AS YOU GO… if not your going to be playing a fishing game poking your fresh dynamat looking for those holes. trust me not too sweet! I also pieced some on the outside panel of the door through the speaker hole, not a ton as the window was down to prevent scratching my tint.
I also went around the edges to make sure that everything was covered and sealed, One thing I ended up doing that you won’t see in the pics, is wherever one of those green panel clips go in, I took my razor and cut down to the metal and removed the dynamat, when I put the door back on some of the smaller clips couldn’t clear two layers of dynamat. I think there were 5 or 6.
Ok so now put everything back in the reverse order, do the lock and handle last and start putting the door on at the top by the tweeter, just put the metal clips on the trim molding, be sure there is no dynamat there to prevent the clips from sliding on.
ALL DONE.
I dont have a subwoofer in my car, I just wanted my door to sound solid when I closed it, NOW it sounds SO SOLID when it closes... Like the old steel door cars from the 70's. It was well worth the 140 bucks I spent, and I will be doing the trunk sometime in the future.
First start by pulling the little plastic cover from behind the door handle, I just stuck a tiny screwdriver on the red side of the door lock and pried, it comes off very easy.. This will reveal the first screw, take it out and set it aside.
At the bottom of the door there is a light, this can easily be pulled out, the clip side is the lower side, so just stick a tiny screwdriver in there, then unclip the light, set it aside.
Next stick your finger nails under your panel with your window and lock controls, there are two pins that hold it in place at each end, so pull from the ends and it will pop out fairly easily, unplug the two or three wire harnesses, and there is a screw reveled, unscrew that screw and set it aside.
Now slowly start at the bottom and remove the panel clips that hold the door panel on, I use my hand and feel for them, then just pull quickly to get them out, go up both sides, then push upwards on the whole panel, start at the back and you might have to give it a good jolt, they are clipped on pretty good. Then lift up and pull away, I used a milk crate with a towel on it to hold my panel while I was working, IT HELPED A TON>
(Its the screw where the blue hole is, it is removed in the picture)
You will have to unclip the door Handle, and the lock, in the picture below you can see how the ball drops into the lock\handle and make sure you pull the lock cord and handle cord out of the little harness.. Remember to push back in all the way during the installation, they will snap into place.
Unclip the tweeter, the memory seats and any other wire harness you might have, and set your door aside. You will need to unscrew the speakers and set them aside, as well as remove the factory plastic, clean well with alcohol, and you’re ready to rock and roll.
I used small strips and overlapped the dynamat, I used the logo to determine my strip size, and tried to keep whole strips as much as possible without covering everything…. MAKE DOUBLE SURE YOU ARE TAKING A SCREWDRIVER AND POKING YOUR HOLES OUT AS YOU GO… if not your going to be playing a fishing game poking your fresh dynamat looking for those holes.
trust me not too sweet! I also pieced some on the outside panel of the door through the speaker hole, not a ton as the window was down to prevent scratching my tint.I also went around the edges to make sure that everything was covered and sealed, One thing I ended up doing that you won’t see in the pics, is wherever one of those green panel clips go in, I took my razor and cut down to the metal and removed the dynamat, when I put the door back on some of the smaller clips couldn’t clear two layers of dynamat. I think there were 5 or 6.
Ok so now put everything back in the reverse order, do the lock and handle last and start putting the door on at the top by the tweeter, just put the metal clips on the trim molding, be sure there is no dynamat there to prevent the clips from sliding on.
ALL DONE.
I dont have a subwoofer in my car, I just wanted my door to sound solid when I closed it, NOW it sounds SO SOLID when it closes... Like the old steel door cars from the 70's. It was well worth the 140 bucks I spent, and I will be doing the trunk sometime in the future.
Last edited by RAMAIR; 07-23-11 at 08:54 AM.


 07-23-11, 12:28 PM
#4
Driver
Thread Starter
Yes, there was noticible sound difference, it just sounds very solid. But the biggest difference is the sound blockage from outside, and when you close the door. I park in a 1 car garage so you can hear the motor when you start it up, after the dynamat with tthe windows up you dont hear the motor anymore. I am most pleased with the sound when opening and closing the doors, sounds like a solid rock!
FYI I ended up buying the Dynamat Bulk Pack which had 9 sheets in it, I ended up with 4 full sheets left.
FYI I ended up buying the Dynamat Bulk Pack which had 9 sheets in it, I ended up with 4 full sheets left.

Thread
Thread Starter
Forum
Replies
Last Post
ancdmd
LS - 3rd Gen (2001-2006)
13
11-05-17 07:21 PM