Fog light on 2011 IS - How is it attached?
 02-27-12, 11:28 AM
#1

For anyone that has taken off their bumper, to do a F-Sport Lip install or conversion on the bumper I have a few questions if anyone knows
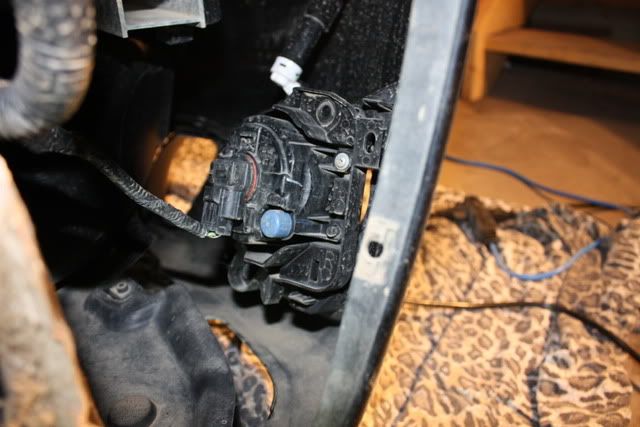
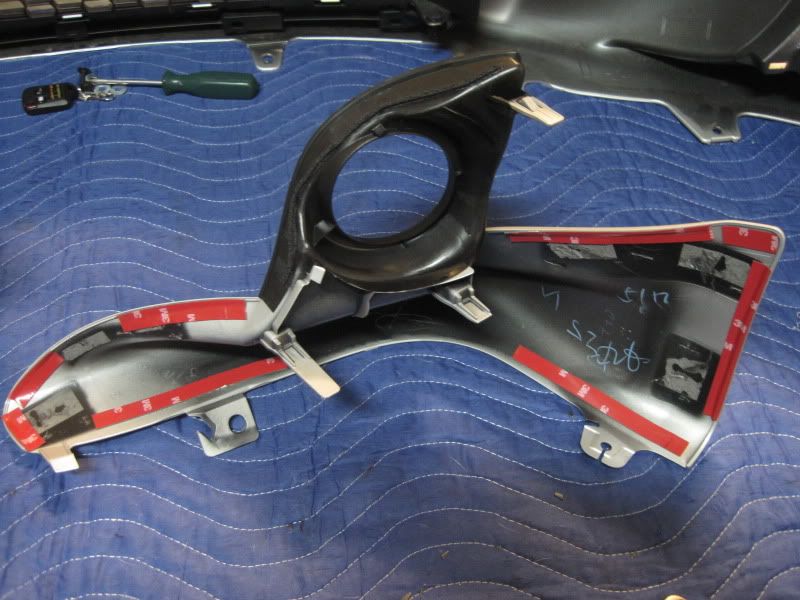
I understand that the fog like sort of attaches like this: Fog light -> bracket -> black outside piece.
Few questions:
- Does the fog light directly attach to the bracket and screwed in? Appears to be unless the screw also goes through another piece which cannot be seen (ie bumper?)
 - From the DYI 11 lip thread.
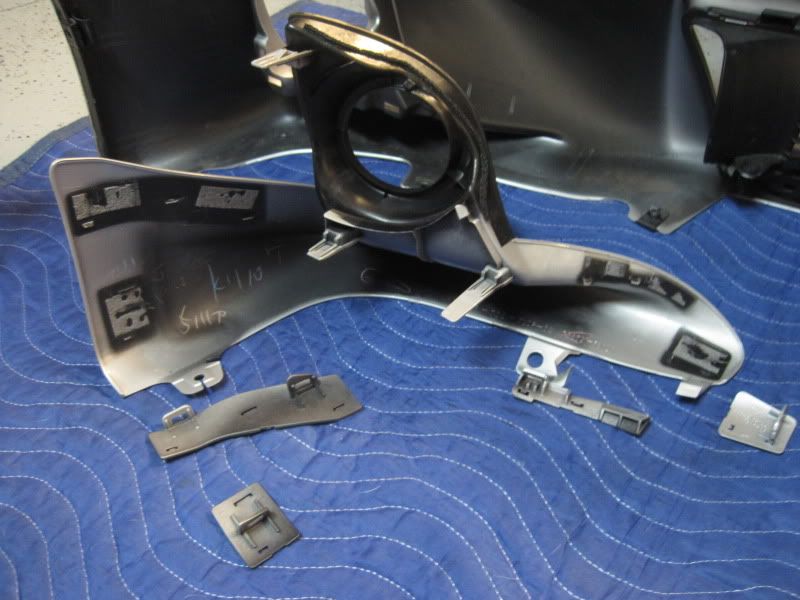
- Where does the bracket itself secure to?
- It appears to be attaching to the black outside piece but cannot tell from the following pictures including the one above. I am suspecting probably the notch thing on the black outside piece tab.

Your help is appreciated,
Thanks
I understand that the fog like sort of attaches like this: Fog light -> bracket -> black outside piece.
Few questions:
- Does the fog light directly attach to the bracket and screwed in? Appears to be unless the screw also goes through another piece which cannot be seen (ie bumper?)
- From the DYI 11 lip thread.- Where does the bracket itself secure to?
- It appears to be attaching to the black outside piece but cannot tell from the following pictures including the one above. I am suspecting probably the notch thing on the black outside piece tab.
Your help is appreciated,
Thanks
 02-27-12, 02:37 PM
#2
Lead Lap
Join Date: Sep 2009
Location: MI
Posts: 562
Likes: 0
Received 0 Likes
on
0 Posts

i didn't pay attention to where the bracket attaches to, but the fog light assembly itself attaches to the bracket with that one silver screw you see in the pic. The screw doesn't go through another piece. Once the screw is out, the assembly is free and can be taken out. You would need to kinda slide it out at an angle though since there are two notch thingy on the other side that the 'tabs' (circled red) on the other side slide behind to hold the assembly in place (no screw or anything).
02-27-12, 03:15 PM
#3
how about taking off the bumper to put on fog overlay?
i didn't pay attention to where the bracket attaches to, but the fog light assembly itself attaches to the bracket with that one silver screw you see in the pic. The screw doesn't go through another piece. Once the screw is out, the assembly is free and can be taken out. You would need to kinda slide it out at an angle though since there are two notch thingy on the other side that the 'tabs' (circled red) on the other side slide behind to hold the assembly in place (no screw or anything).
i didn't pay attention to where the bracket attaches to, but the fog light assembly itself attaches to the bracket with that one silver screw you see in the pic. The screw doesn't go through another piece. Once the screw is out, the assembly is free and can be taken out. You would need to kinda slide it out at an angle though since there are two notch thingy on the other side that the 'tabs' (circled red) on the other side slide behind to hold the assembly in place (no screw or anything).
At least we know the fog assembly links directly into the bracket. Just need to know where the bracket secures to. Need to find out if it directly connects or to see if there is any gaps or anything.
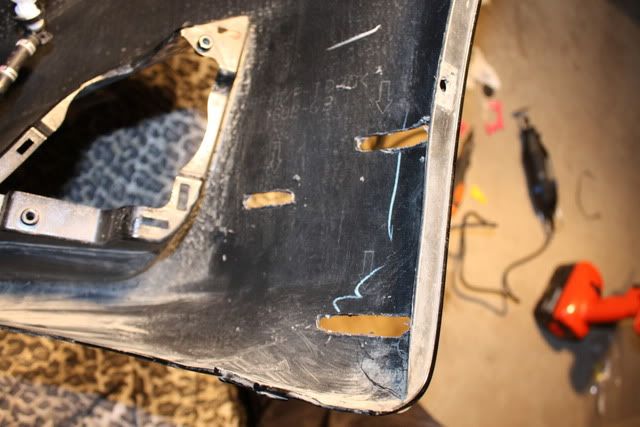
I put arrows where the bracket is possibly securing to but need confirmation. If the bracket itself connects/snaps on to the black outer piece on those notched things on the tab itself (which I put the three arrows in), this will make things easy.
Last edited by Sango; 02-27-12 at 03:38 PM.
02-27-12, 04:22 PM
#4
Lead Lap
Join Date: Sep 2009
Location: MI
Posts: 562
Likes: 0
Received 0 Likes
on
0 Posts
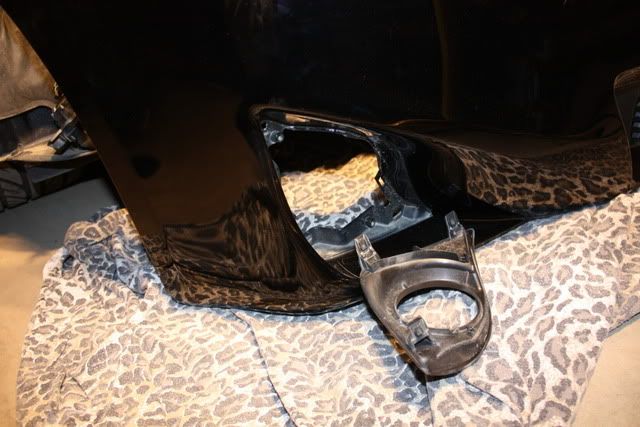
 took off bumper recently (so i can remove the fog light assembly) to install yellow overlay over my 3000K fog
02-27-12, 10:53 PM
took off bumper recently (so i can remove the fog light assembly) to install yellow overlay over my 3000K fog
02-27-12, 10:53 PM
#5
There seems to be two others screws which need to be secured and need to know where they attach to. Appears to be three from this diagram which I got and possibly a 4th on the bottom left which is not visible.
Can anyone phyiscally verify on theirs?

Can anyone phyiscally verify on theirs?
Last edited by Sango; 02-27-12 at 11:10 PM.
02-27-12, 11:50 PM
#6
Lead Lap
Join Date: Sep 2009
Location: MI
Posts: 562
Likes: 0
Received 0 Likes
on
0 Posts
I've included a very crude drawing to help with the description. The drawing is drawn in the same point of view as the first photo in your original post looking at the back of the fog assembly. The right side corresponds to what you can see in the photo. The left side is what i was trying to describe earlier. Basically, on the mounting brackets there are these two extended pieces that wrap around that the side tabs of the fog assembly slide behind, and that's all there is to it. hope this helps.
Last edited by raptor22; 02-28-12 at 12:01 AM.
02-28-12, 12:15 AM
#7
Thanks raptor, this clarifies a lot of things.
Just to my final question, in the drawing, you drew the the mounting bracket tab piece where the side tabes with holes line up on one side.
For the other side where you actaully put a screw in it, with it appears to be sitting in the bracket itself correct? I assume there are two holes on the bracket which lines up with those holes (turquise overlay) and the fog light sits in it.
Thanks
Last edited by Sango; 02-28-12 at 12:21 AM.
Trending Topics
02-28-12, 12:21 AM
#8
Lead Lap
Join Date: Sep 2009
Location: MI
Posts: 562
Likes: 0
Received 0 Likes
on
0 Posts
Thanks raptor, this clarifies a lot of things.
Just to my final question, in the drawing, you drew the the mounting bracket tab piece where the side tabes with holes line up on one side.
For the other side where you actaully put a screw in it, with it appears to be sitting in the bracket itself correct? I assume there is a hole on the bracket which lines up with it the same hole.
Thanks
EDIT: just saw your diagram. the bottom right doesn't have a hole in the bracket, because it has that cylinder-piece instead that fits thru the hole in the tab of the fog assembly. the top right does have a hole where the screw screws into.
02-28-12, 12:28 AM
#10
Lead Lap
Join Date: Sep 2009
Location: MI
Posts: 562
Likes: 0
Received 0 Likes
on
0 Posts
anyway yeah i saw your pic after i posted, so i edited my post.
hopefully someone else can chime in on the bracket attachment to the bumper.
02-28-12, 12:43 AM
#11
I think what you provided is significant enough to get a custom bracket retrofitted for the HID projector. The fact that the stock light lines up in the bracket is the main step.
I may need to verify how long the project sticks out from the tab point but don't really think so but would be nice to know.
I may need to verify how long the project sticks out from the tab point but don't really think so but would be nice to know.
Last edited by Sango; 02-28-12 at 12:53 AM.

Thread
Thread Starter
Forum
Replies
Last Post