
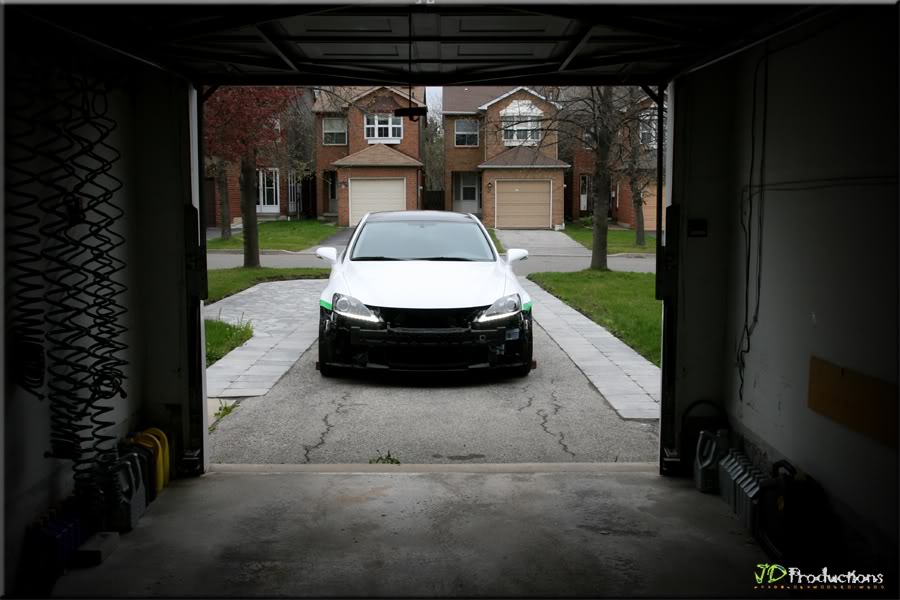
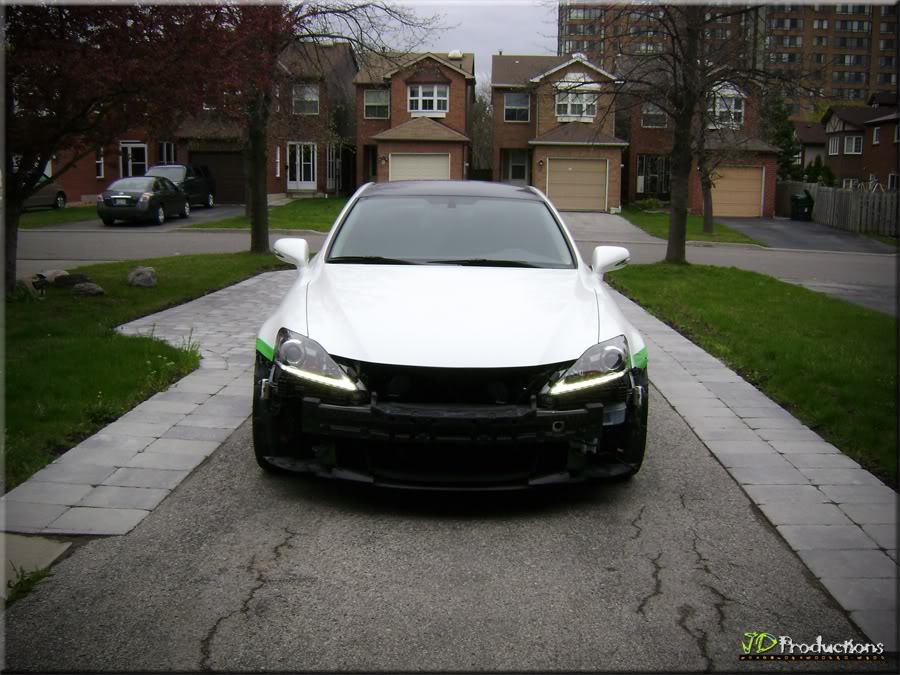
DIY: 2011+ MY LED Headlight Installation ("How To")
 04-25-12 | 08:26 AM
#1

Thread Starter
Pole Position
Joined: Nov 2008
Posts: 335
Likes: 8
From: Toronto
* * * USE AT YOUR OWN RISK * * *
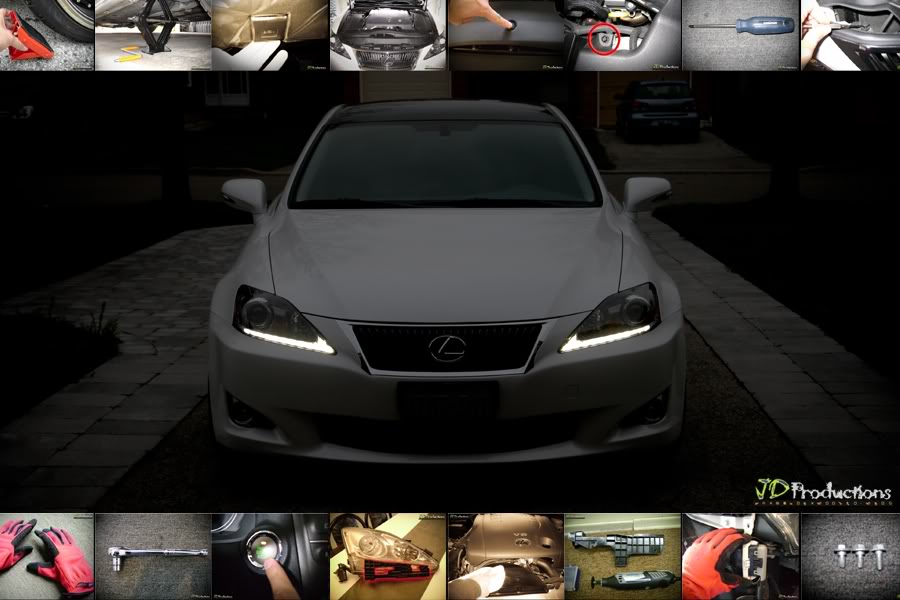
ITEM TO INSTALL:
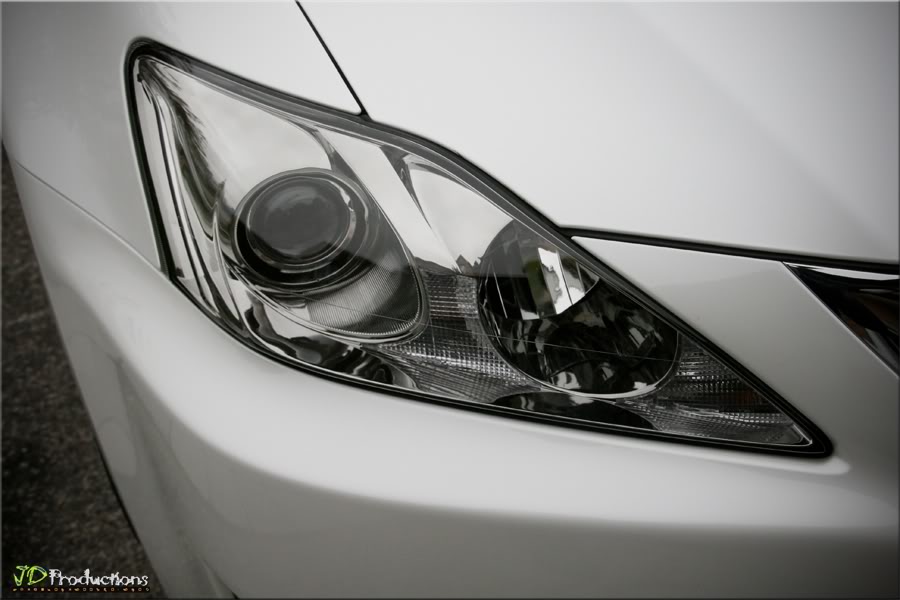
 2012MY LED HEADLAMP RETRO-KIT "Loaded" (Sewell Parts)
RECOMMENDED MATERIALS/TOOLS:
4 x Wheel Chocks (Walmart)
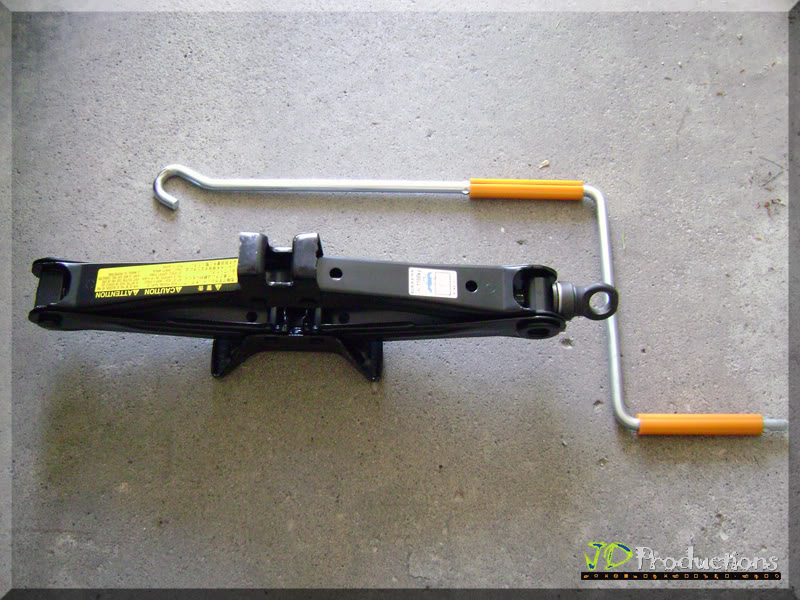
In-Car Scissors Jack (Applies to Lowered Cars)
Jack (I used Michelin 3�-ton Speedy Lift Jack @ Canadian Tire)
2 x 2-Ton Axle Stands (Walmart)
Old Carpet Runner or Old Exercise Mat (for Bumper Protection & Back Support)
Automotive Work Gloves (Canadian Tire)
Zip Lock Plastic Bags (for clips & bolts @ No Frills)
Phillips Screwdriver (Canadian Tire)
Jeweler's Screwdriver (Canadian Tire)
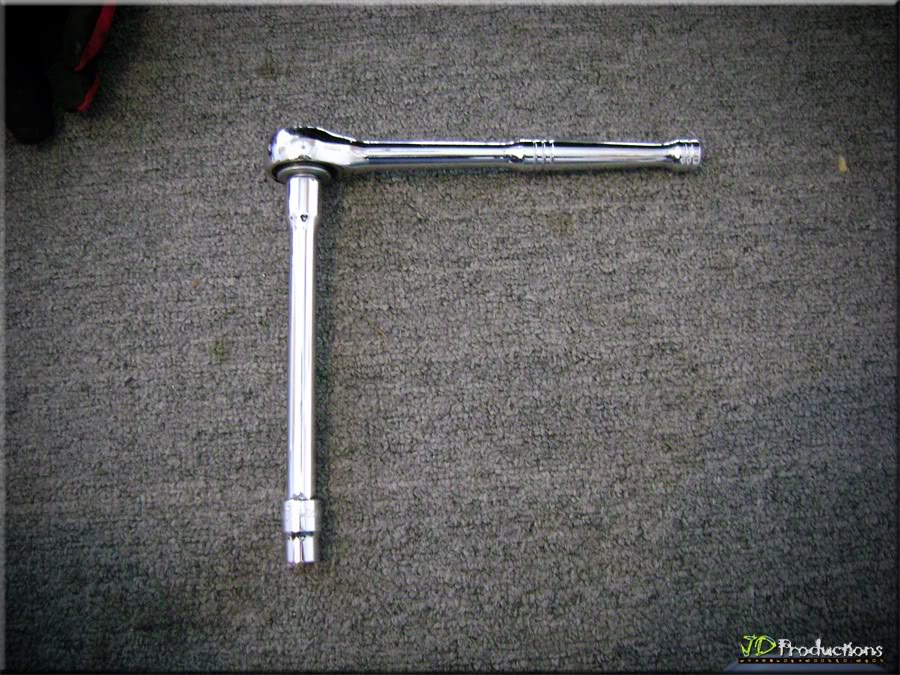
Socket Wrench with 10mm Socket + Extension (Mastercraft @ Canadian Tire)
Painter's Tape (for Fender Protection @ Canadian Tire)
Rotary/Cutting Tool (Rona)
Safety Glasses (for Eye Protection @ Canadian Tire)
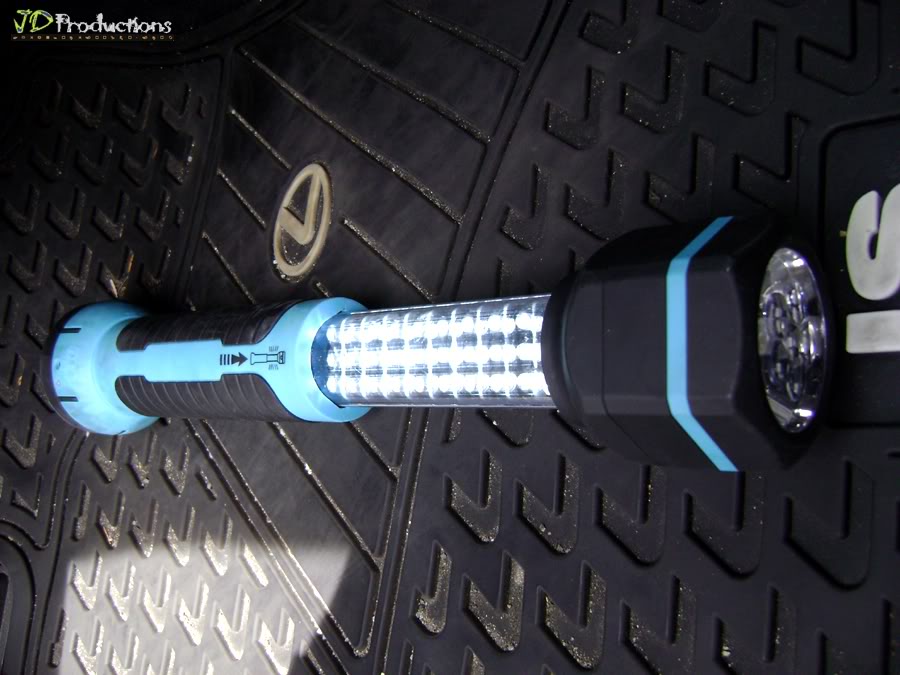
Flash Light (for Relay Flasher @ Canadian Tire)
Long Nose Pliers (for Relay Flasher @ Canadian Tire)
OPTIONAL:
62mm Audio/Video Dash Removal Tool (for stubborn clips @ Ebay Motors)
170mm Audio/Video Dash Removal Tool (for Plastic Fender Cover @ Ebay Motors)
~~~~~~~~~~~~~~~~~~~~~~~~~~~~~~~~~~~~~~~~~~~~~~~~~~~~~~~~~~~~~~~~~~~~~~~~~~~~~~~~
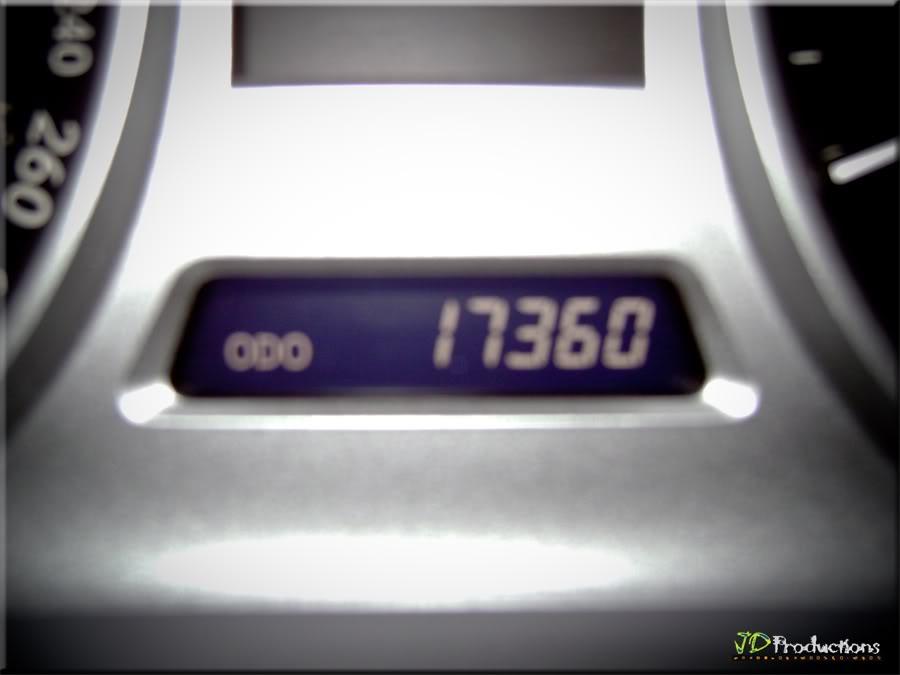
STEP 1
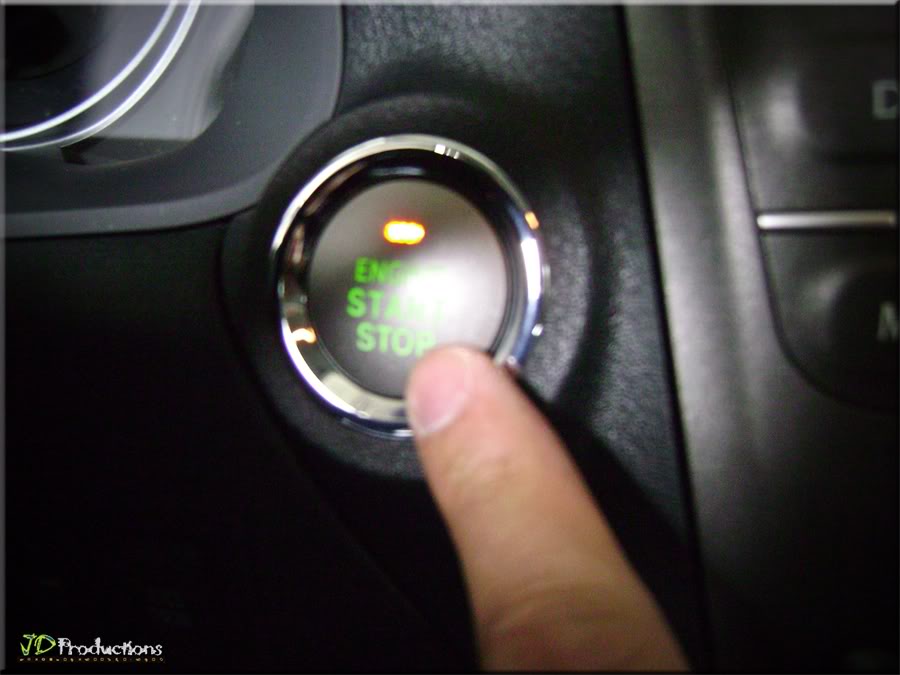
1.1) Press Engine START/STOP

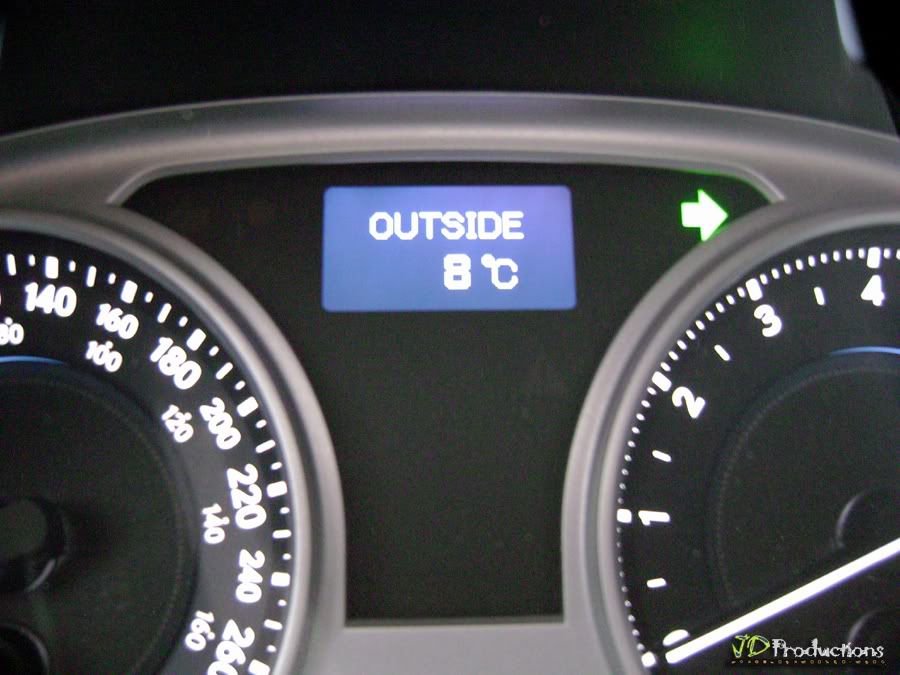
1.2) Make note of the ODOMETER Reading and Date of Install (This helps me keep track of my MODS)
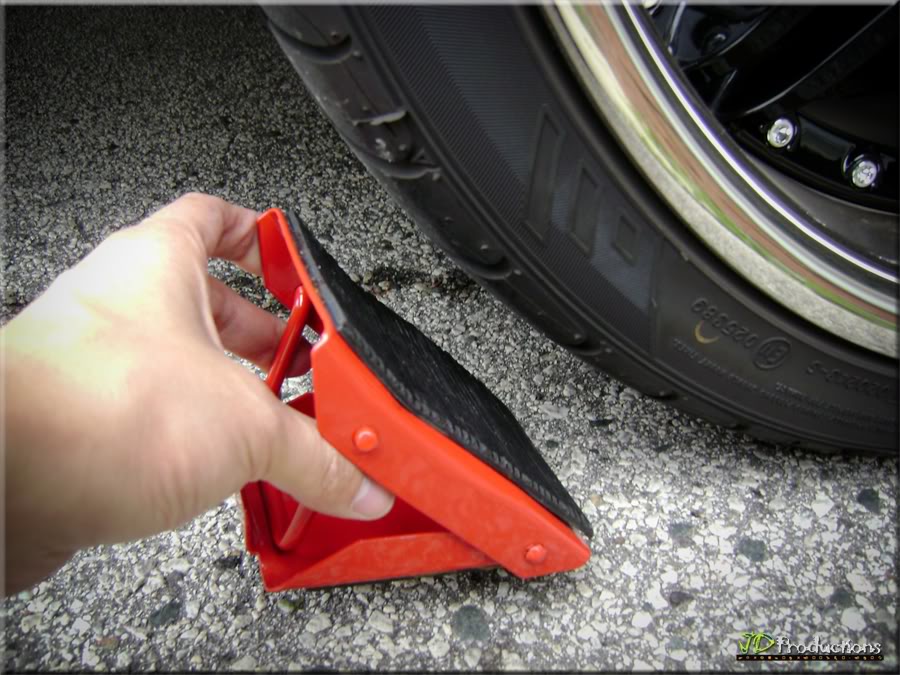
STEP 2
Place "Wheel Chocks" in front of and behind the rear wheels and wedge them securely against the tires.
"I'm not a Mechanic or Auto Body Specialist. I sit in-front of my computer all day at work. That being said; If I can do this Step-By-Step DIY, so can you!" . . . JD
ITEM TO INSTALL:
RECOMMENDED MATERIALS/TOOLS:
OPTIONAL:
~~~~~~~~~~~~~~~~~~~~~~~~~~~~~~~~~~~~~~~~~~~~~~~~~~~~~~~~~~~~~~~~~~~~~~~~~~~~~~~~
STEP 1
1.1) Press Engine START/STOP
1.2) Make note of the ODOMETER Reading and Date of Install (This helps me keep track of my MODS)
STEP 2
Place "Wheel Chocks" in front of and behind the rear wheels and wedge them securely against the tires.
Last edited by cyberscorp; 04-30-12 at 12:11 PM.
04-25-12 | 08:27 AM
#2
Thread Starter
Pole Position
Joined: Nov 2008
Posts: 335
Likes: 8
From: Toronto
STEP 3 (OPTIONAL)
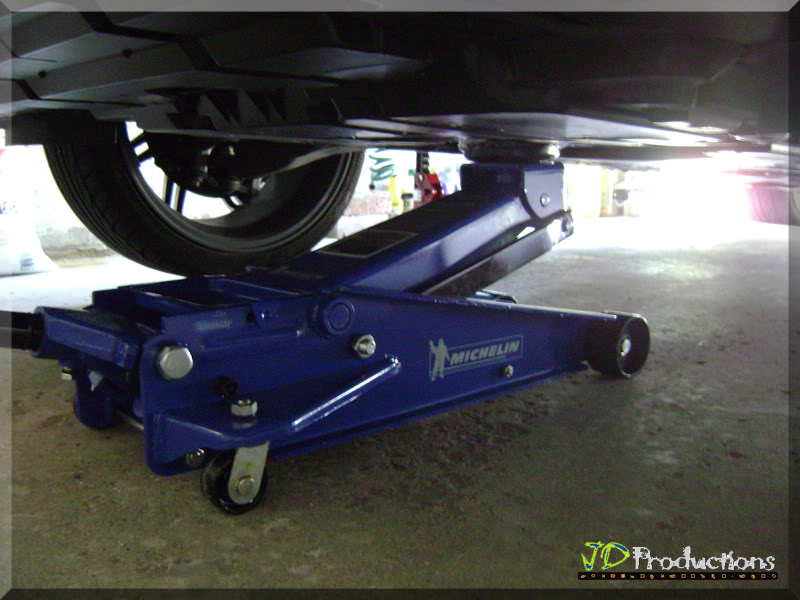
3.1) Hoist the vehicle by using Lift Jack. I used the In-Car Scissors Jack (applies to lowered Set-up) . . .
NOTE: I lifted the vehicle to gain access easily to bolts underneath. This method is not necessary for vehicle with enough clearance to reach bolts/screws. However, It's a must for lowered cars.
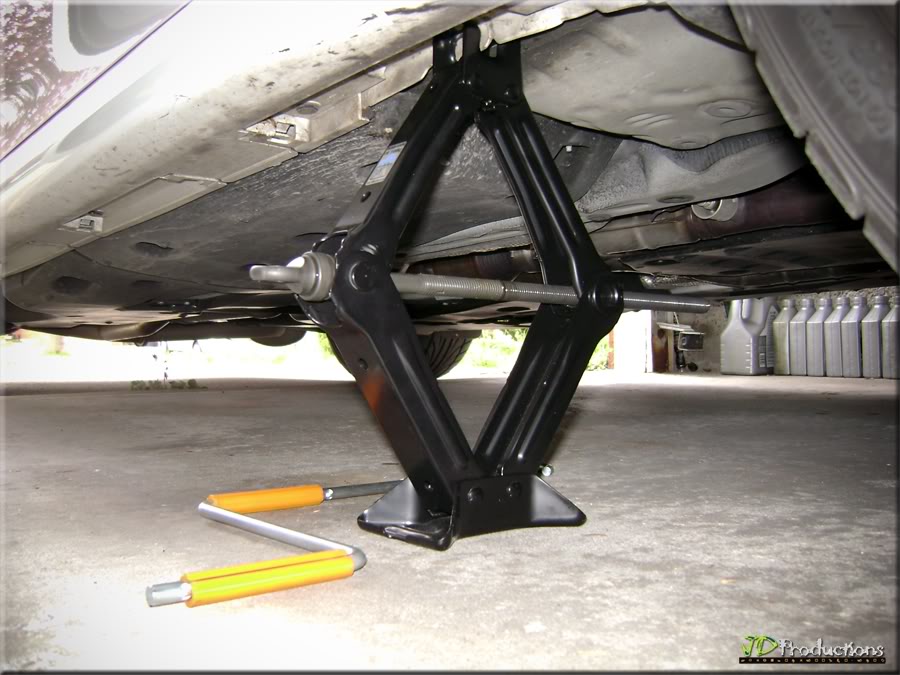
Note: Front/Center Jack Point

3.2) . . . Place "3�-ton Speedy Lift Jack" underneath the car.
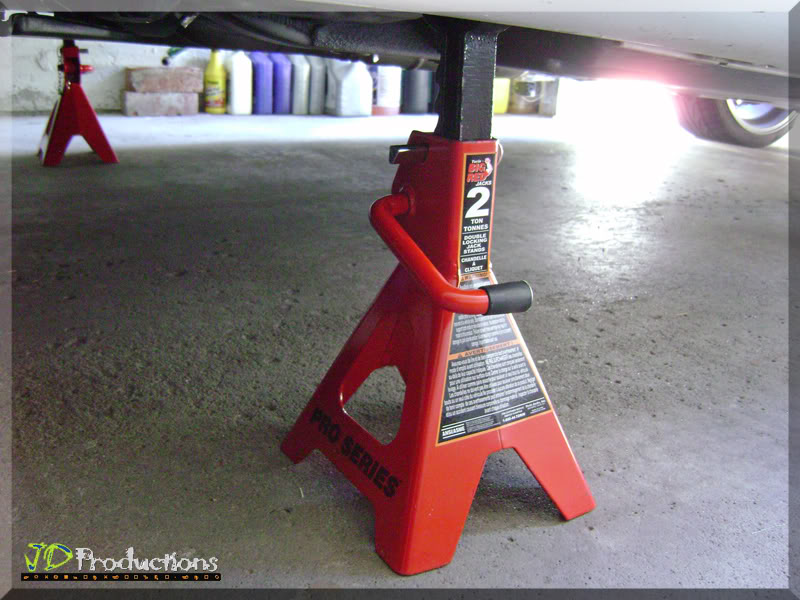
STEP 4
Place the "2-Ton Axle Stands" to the Driver & Passenger Front/Side Jack Points
STEP 5
Pull the hood release lever.
STEP 6
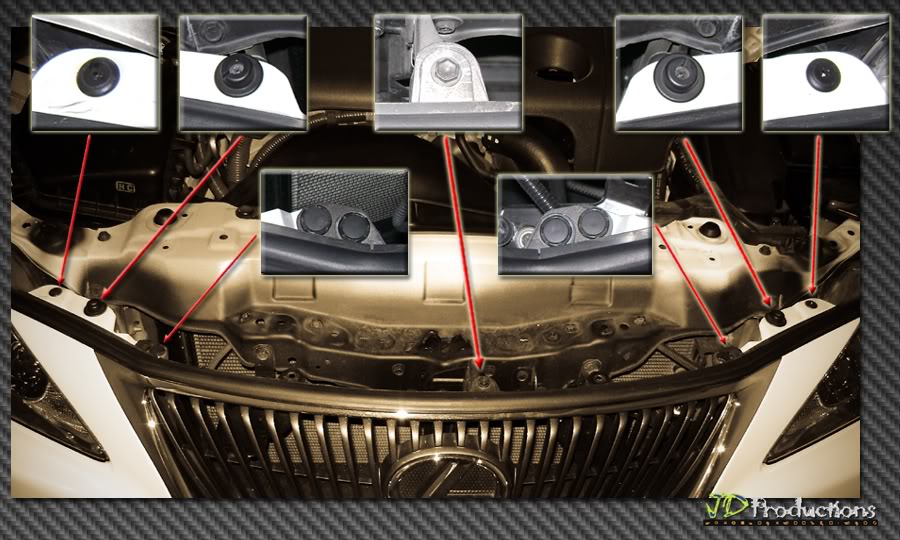
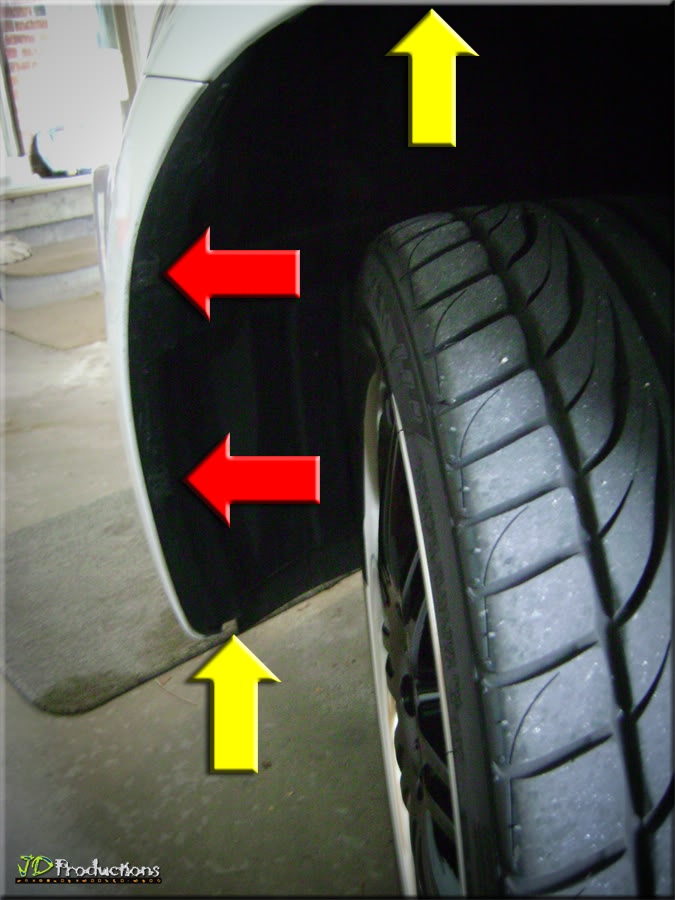
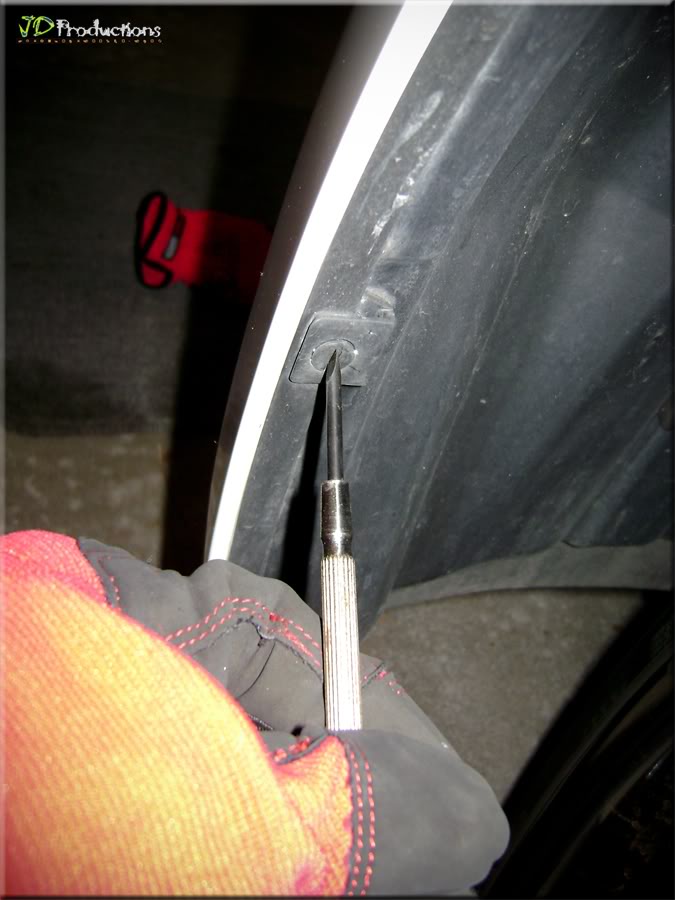
Carefully remove the Plastic Covers. There are 16 Plastic Push-In Clips (Red Arrow) and 2 Plastic Bolt (Yellow Arrow).

Push-In Clip in the middle
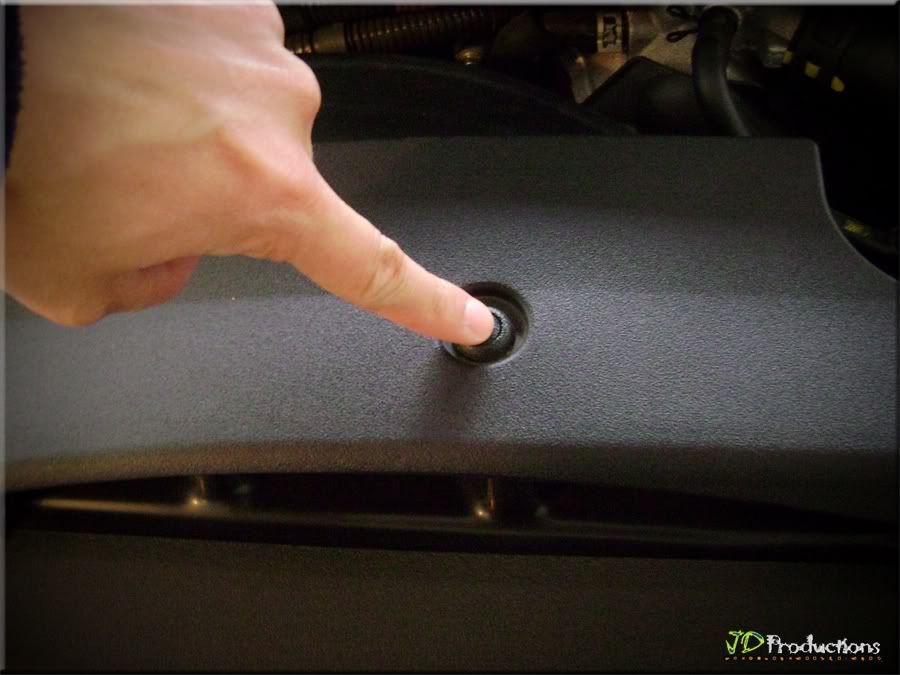
Top Left/Passenger Side Plastic Bolt (Close-up). Same bolt on the Top Right/Driver Side.
Use Phillips Screwdriver for this Plastic Bolt (Gently, this bolt is sensitive)
STEP 7
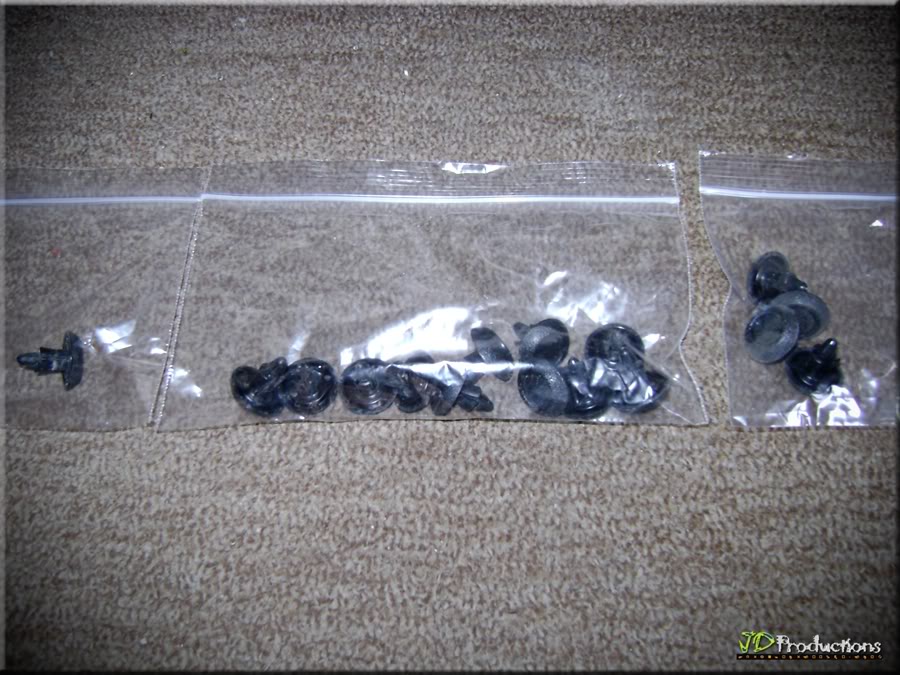
Keep all "Push-In Clips" (+Bolts/Screws) together in Zip Lock bag. It will help you when putting the parts back . . .
Perfect time to clean Dusty areas . . .
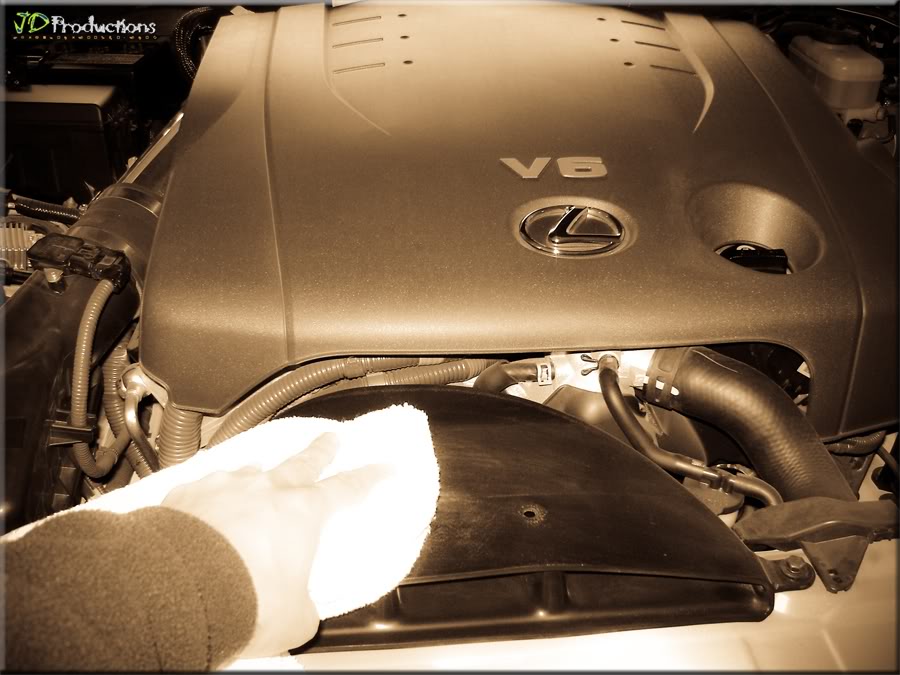
STEP 8
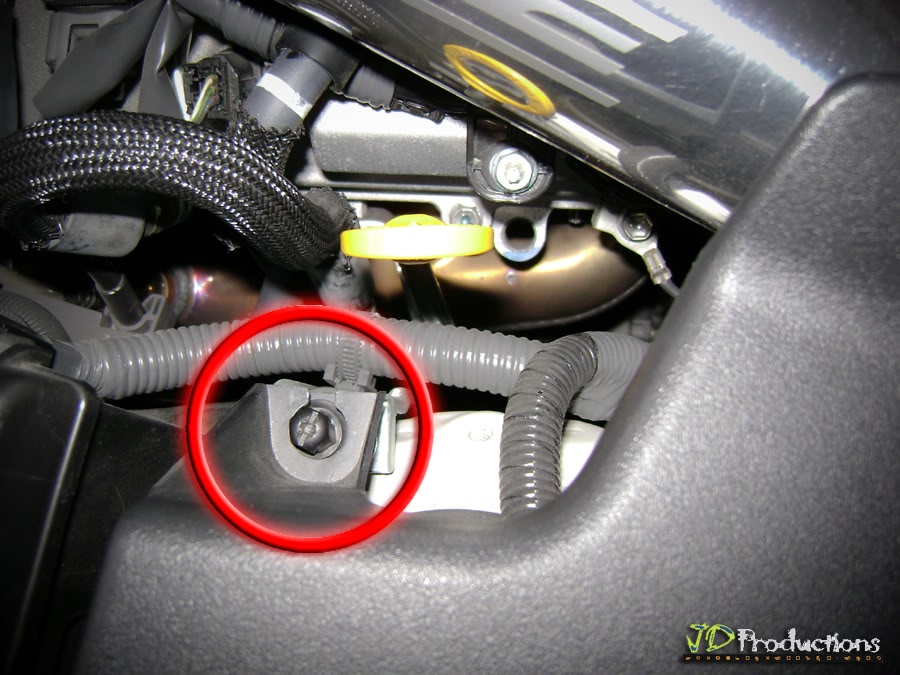
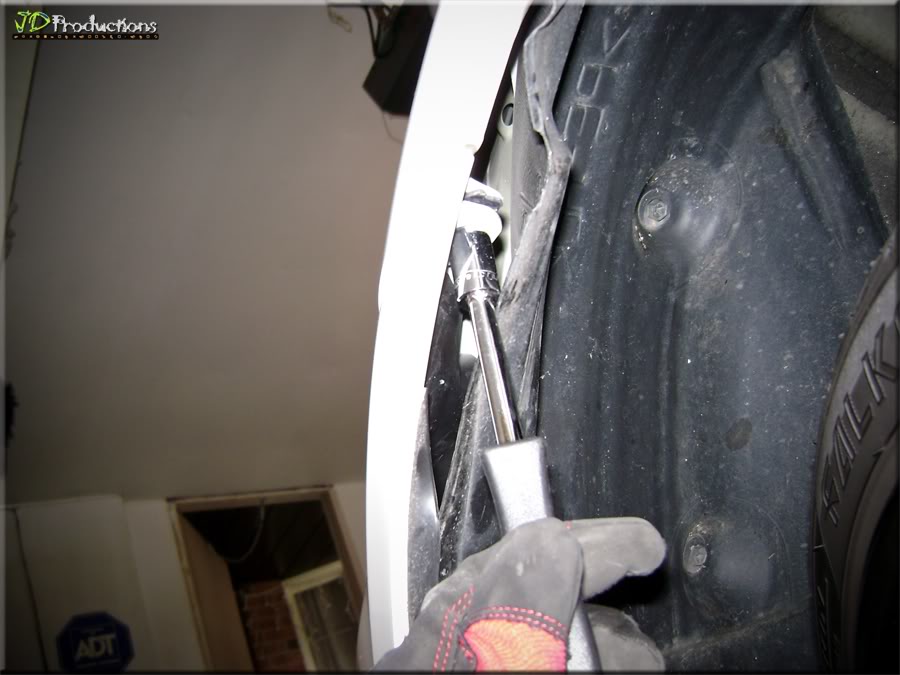
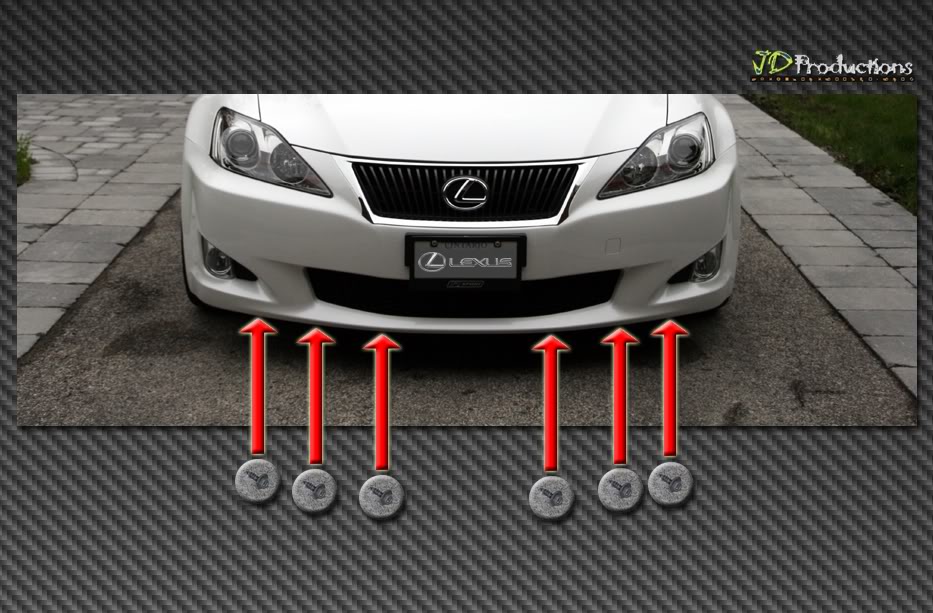
Front Bumper: More Bolts & Clips. 2 x cross head plastic screws, 2 x metal cross head screws with rubber housing, 4 x clips & 1 x 10mm bolt.
Use Phillips Screwdriver. 1 x cross head clip & 1 x cross head screw with rubber housing (Left/Passenger Side)
Use Jeweler's Screwdriver. 2 x Plastic Clips (Left/Passenger Side)
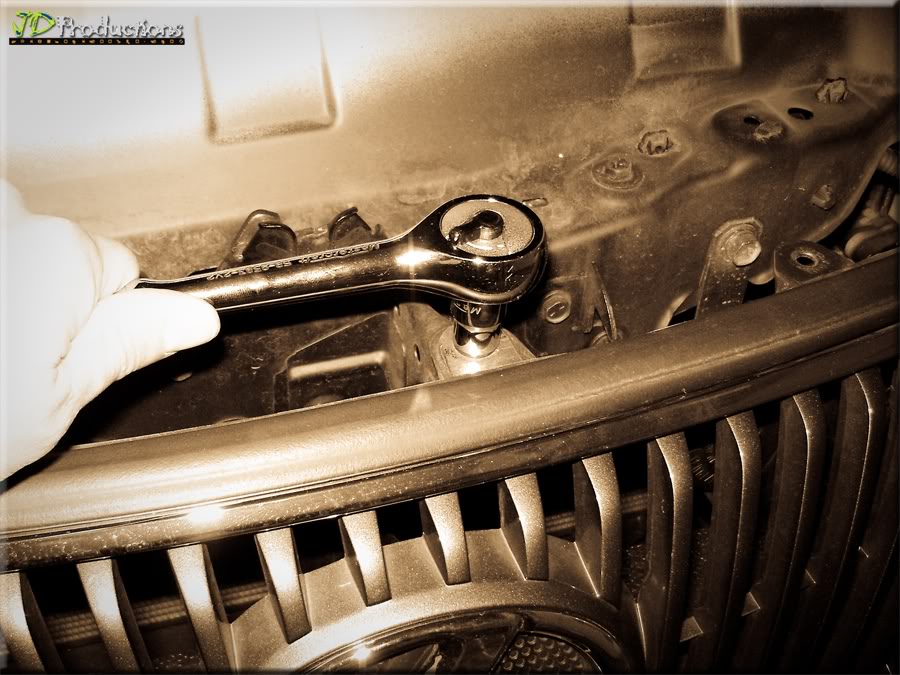
Use Wrench with 10mm Socket. 1 x 10mm bolt (center)
3.1) Hoist the vehicle by using Lift Jack. I used the In-Car Scissors Jack (applies to lowered Set-up) . . .
NOTE: I lifted the vehicle to gain access easily to bolts underneath. This method is not necessary for vehicle with enough clearance to reach bolts/screws. However, It's a must for lowered cars.
Note: Front/Center Jack Point
3.2) . . . Place "3�-ton Speedy Lift Jack" underneath the car.
STEP 4
Place the "2-Ton Axle Stands" to the Driver & Passenger Front/Side Jack Points
STEP 5
Pull the hood release lever.
STEP 6
Carefully remove the Plastic Covers. There are 16 Plastic Push-In Clips (Red Arrow) and 2 Plastic Bolt (Yellow Arrow).
Push-In Clip in the middle
Top Left/Passenger Side Plastic Bolt (Close-up). Same bolt on the Top Right/Driver Side.
Use Phillips Screwdriver for this Plastic Bolt (Gently, this bolt is sensitive)
STEP 7
Keep all "Push-In Clips" (+Bolts/Screws) together in Zip Lock bag. It will help you when putting the parts back . . .
Perfect time to clean Dusty areas . . .
STEP 8
Front Bumper: More Bolts & Clips. 2 x cross head plastic screws, 2 x metal cross head screws with rubber housing, 4 x clips & 1 x 10mm bolt.
Use Phillips Screwdriver. 1 x cross head clip & 1 x cross head screw with rubber housing (Left/Passenger Side)
Use Jeweler's Screwdriver. 2 x Plastic Clips (Left/Passenger Side)
Use Wrench with 10mm Socket. 1 x 10mm bolt (center)
Same Tools apply to Driver Side. 1 x cross head clip & 1 x cross head screw with rubber housing. 2 x Plastic Clips.
Last edited by cyberscorp; 04-26-12 at 01:55 PM.
The following users liked this post:
sede7 (03-25-23)
04-25-12 | 08:27 AM
#3
Thread Starter
Pole Position
Joined: Nov 2008
Posts: 335
Likes: 8
From: Toronto
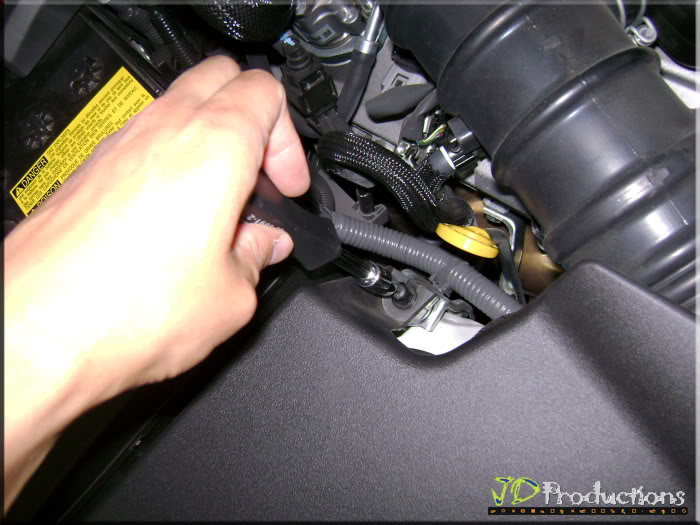
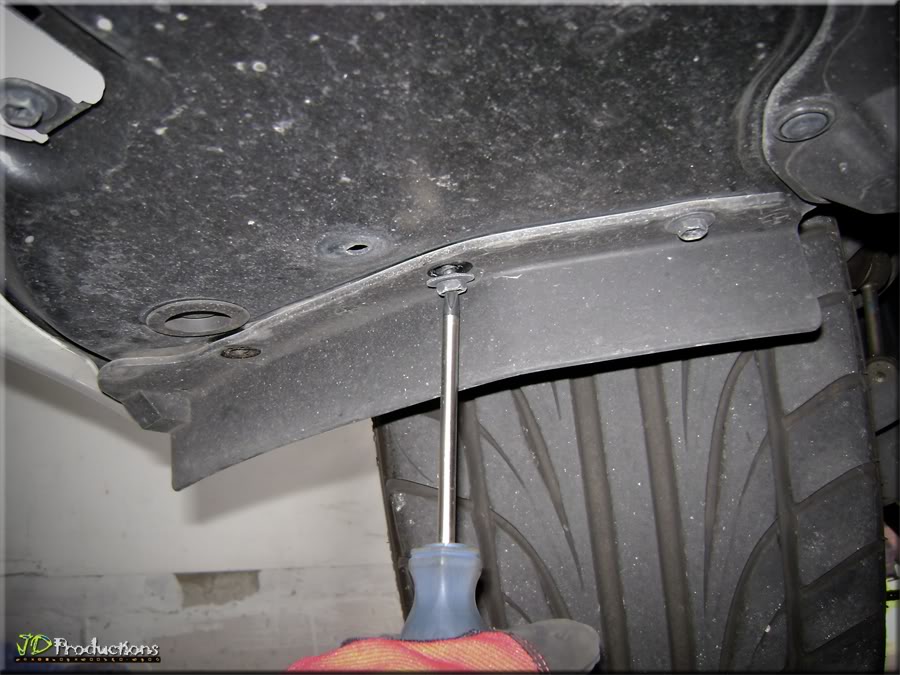
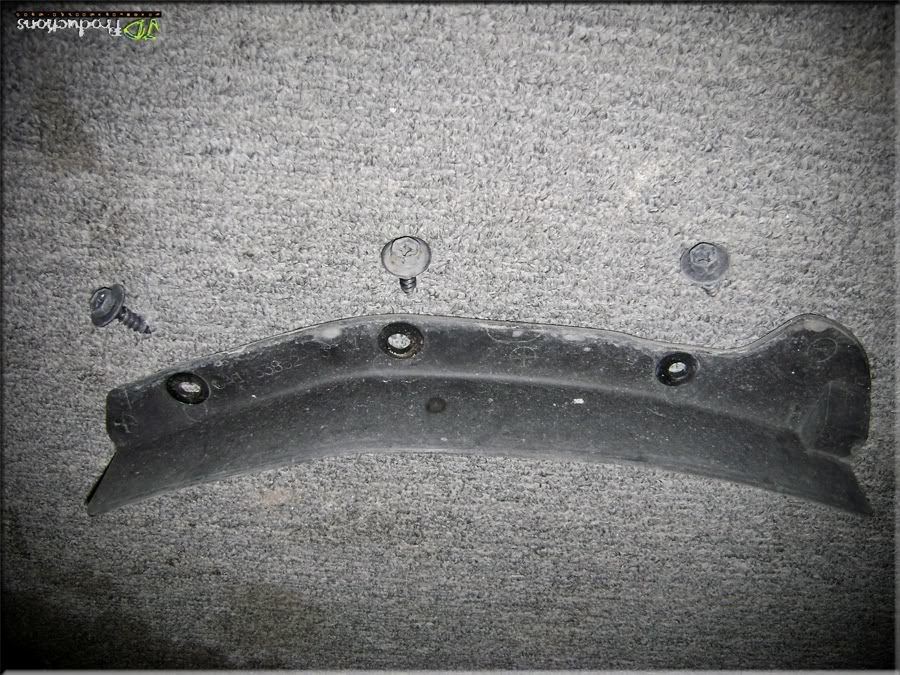
STEP 9
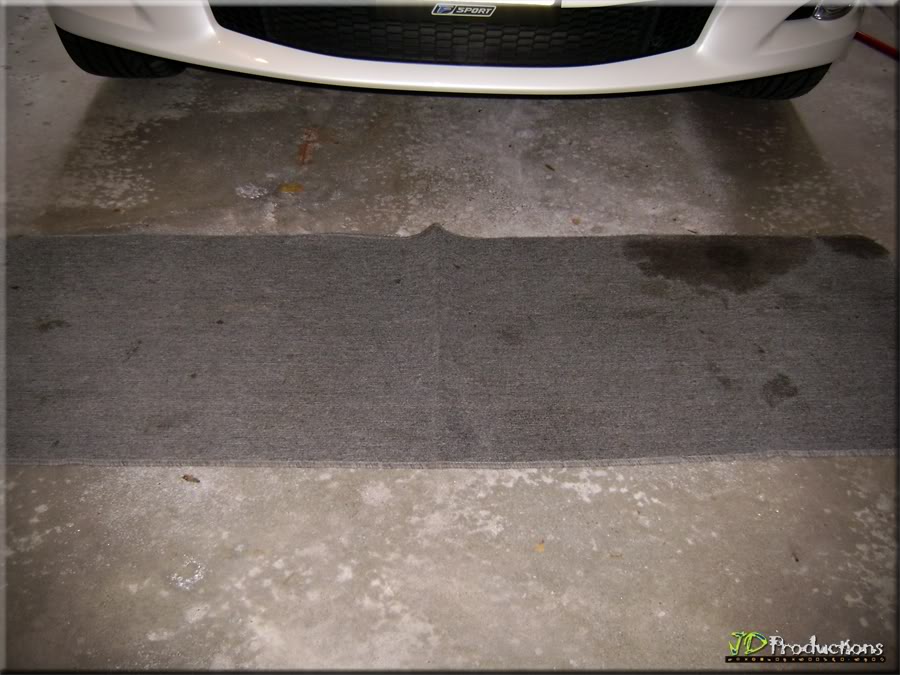
9.1) Place Old Carpet Runner to Protect Bumper from floor debris
9.2) Start Engine, Turn Steering Wheel to the Right (to gain access to Plastic Wheel Well).
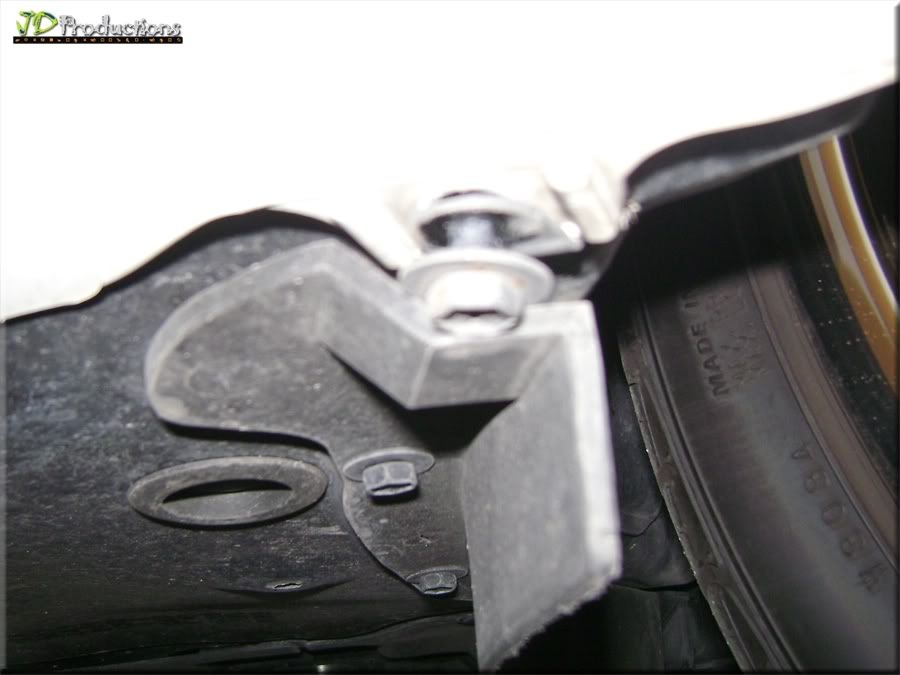
2 x clips, 4 x 10mm bolts
Work Gloves

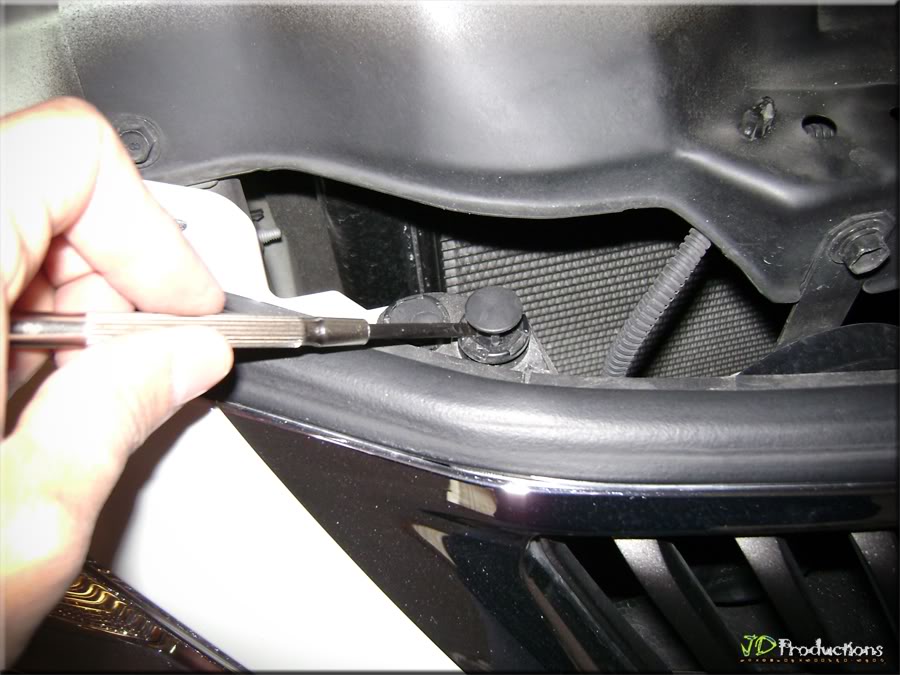
9.3) Use Jeweler's Screwdriver (2 x Plastic Clips)
9.4) Use Wrench with 10mm Socket
TIP: I used 170mm Audio/Video Dash Removal Tool to expose the hidden 10mm bolt.
9.5) Use Phillips Screwdriver for 3 x bolts attached to the Engine Under Cover
STEP 10
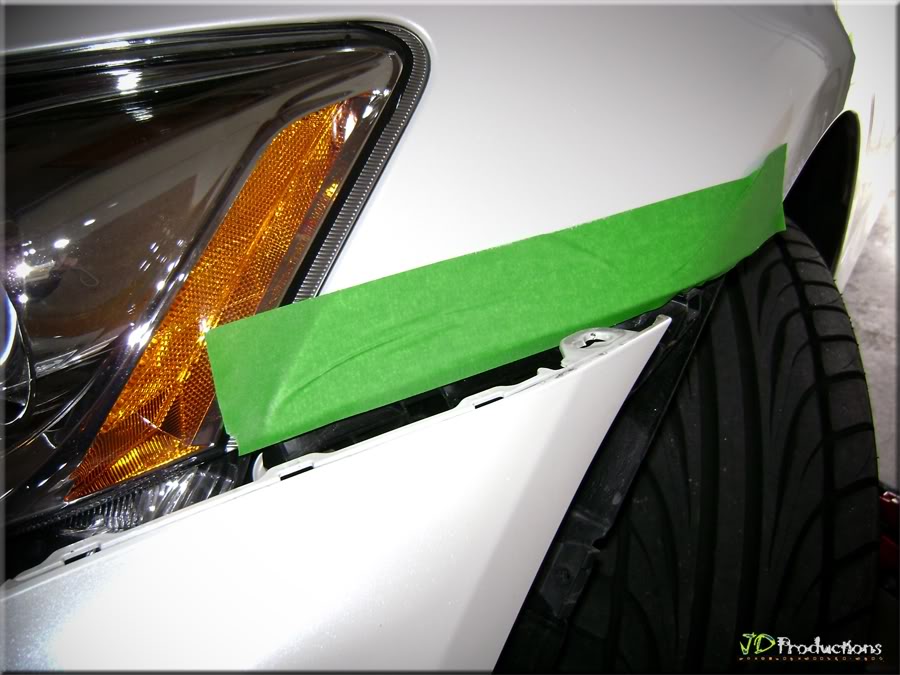
Remove 6 x 10mm bolts.
Use Wrench with 10mm Socket

NOTE: Use Masking Tape to Protect Fender/Headlight from accidental scratches
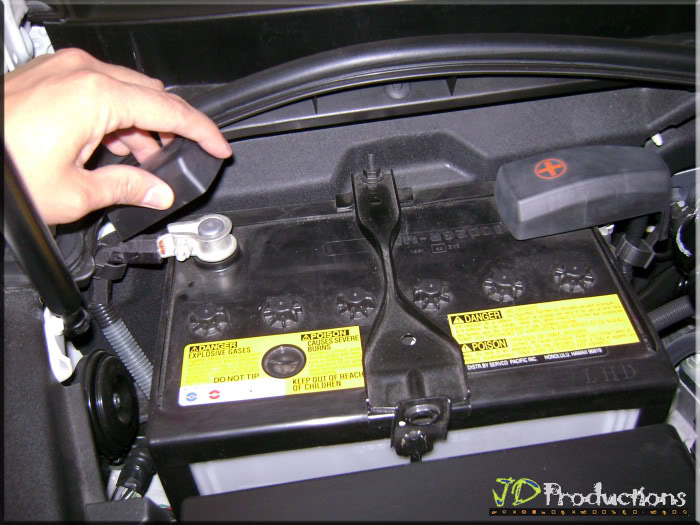
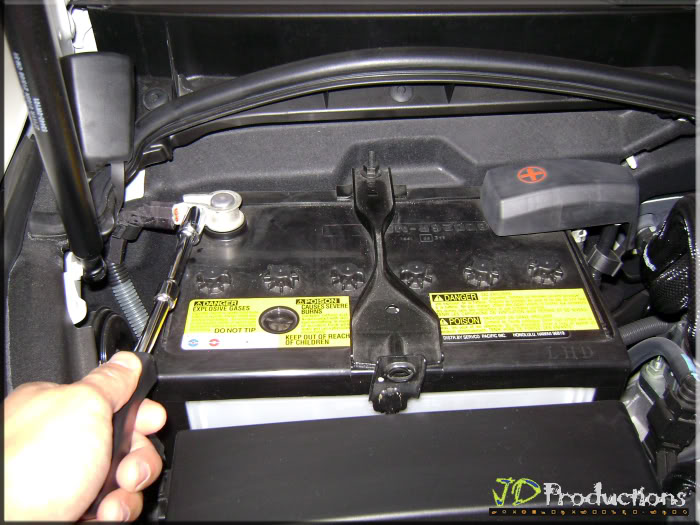
STEP 11
Lift the Negative Battery Cover and start loosening the bolt using 10mm socket wrench.
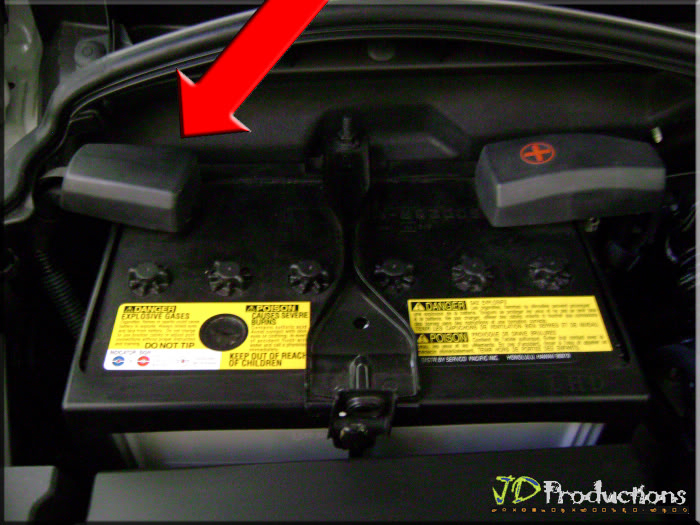
STEP 12
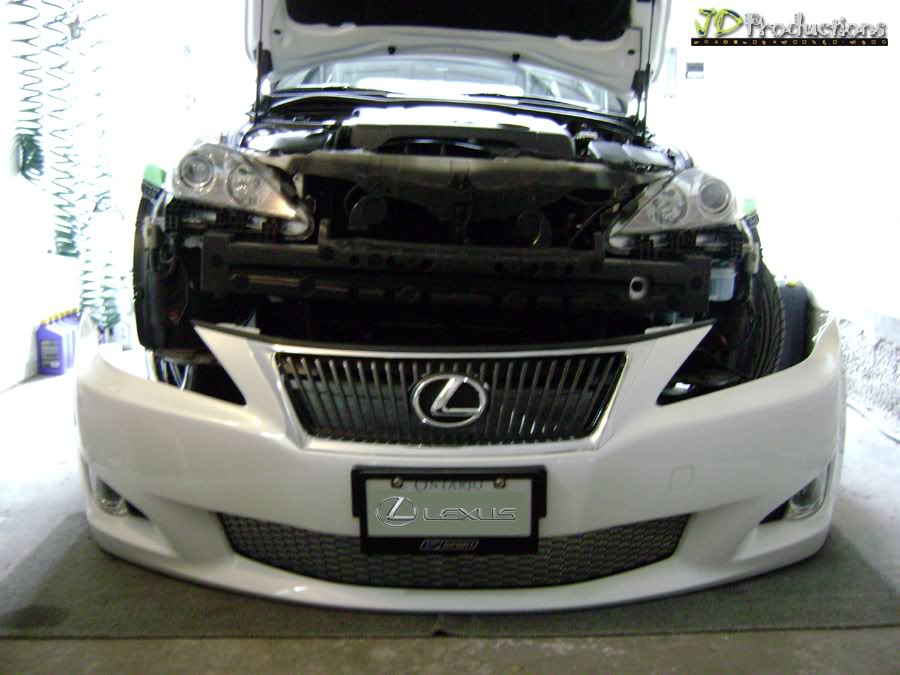
Gently pull the Bumper Off.
NOTE: You will need an assistant to help you with the Bumper Removal
Disconnect/Unplug Fog Lights
1 x connector - Passenger Side (Press Pull-down method)

2 x connector - Driver Side
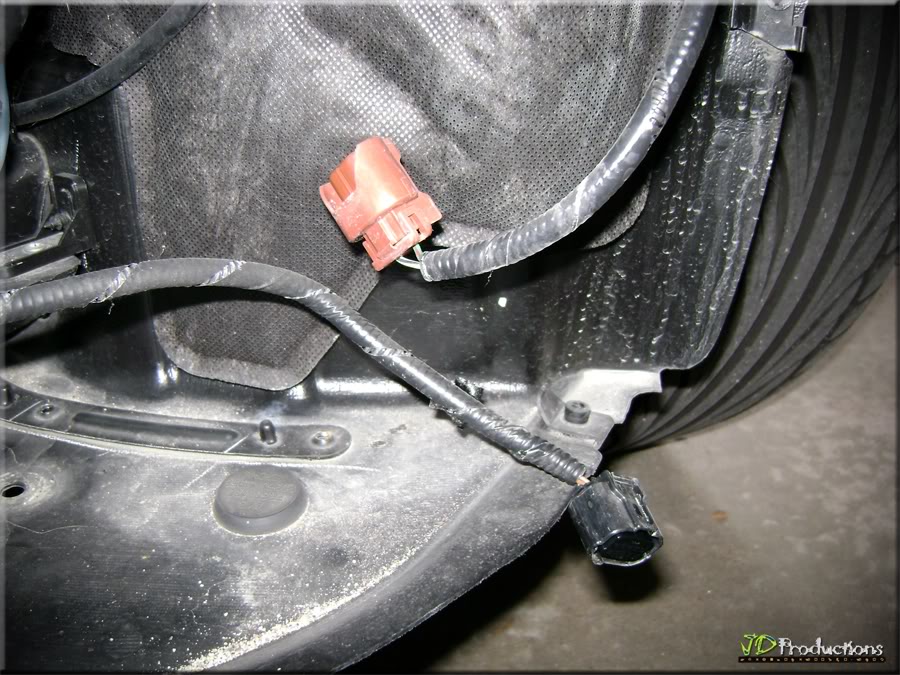
Remove Front Bumper
STEP 13
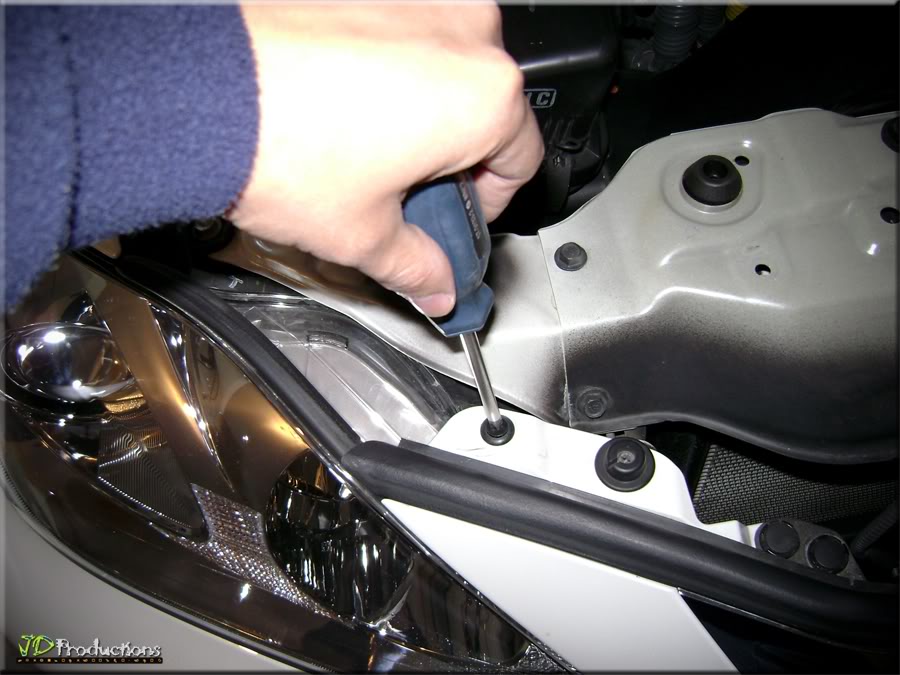
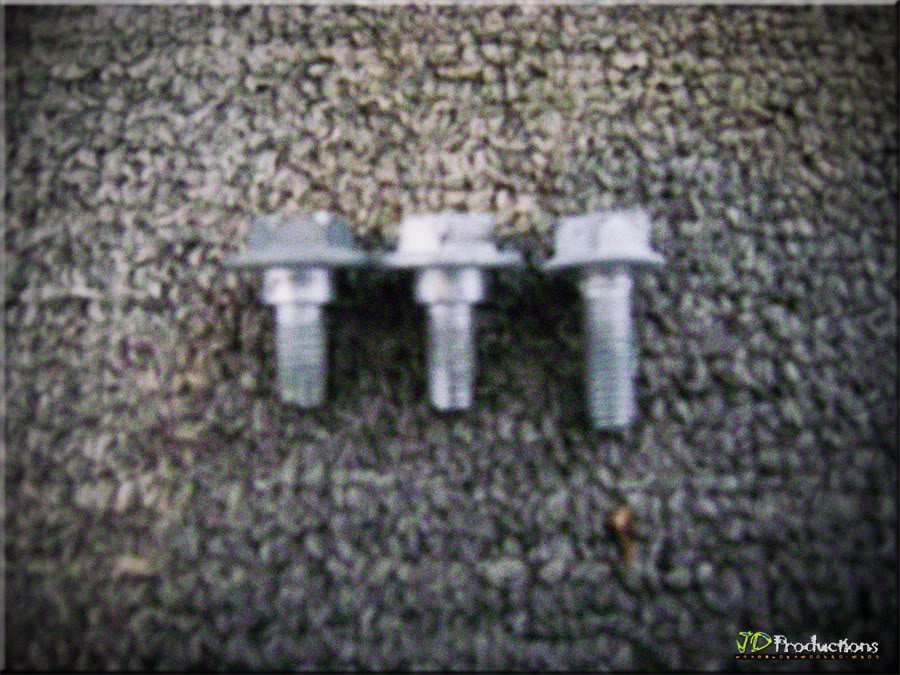
Headlights: Remove 3 x 10mm bolts with Socket Wrench.
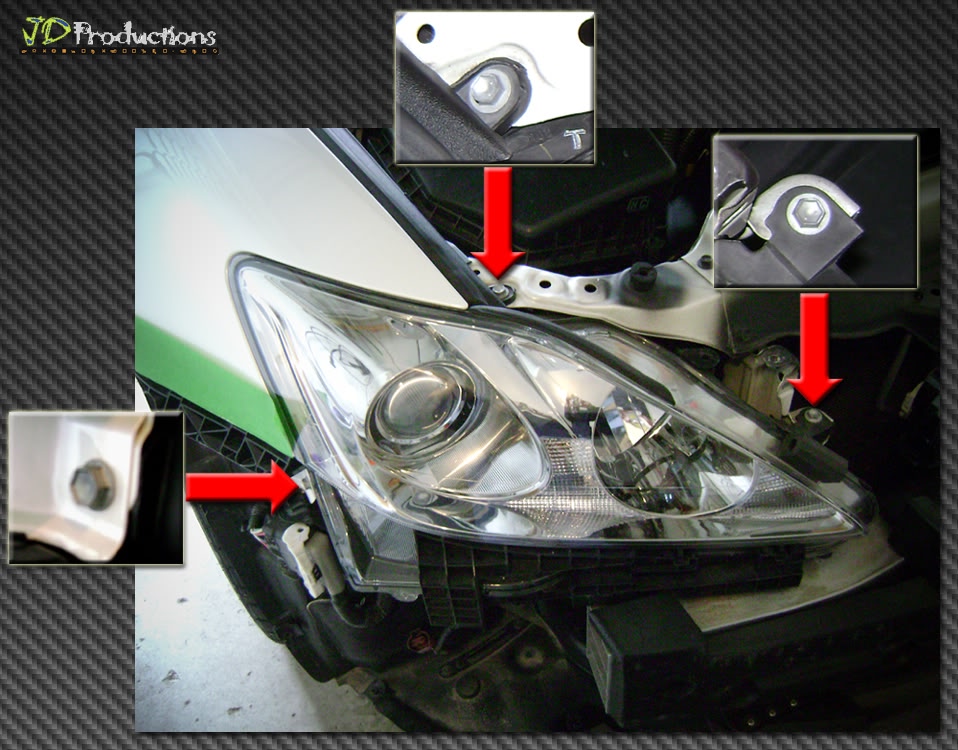
10mm Socket Wrench with Extension
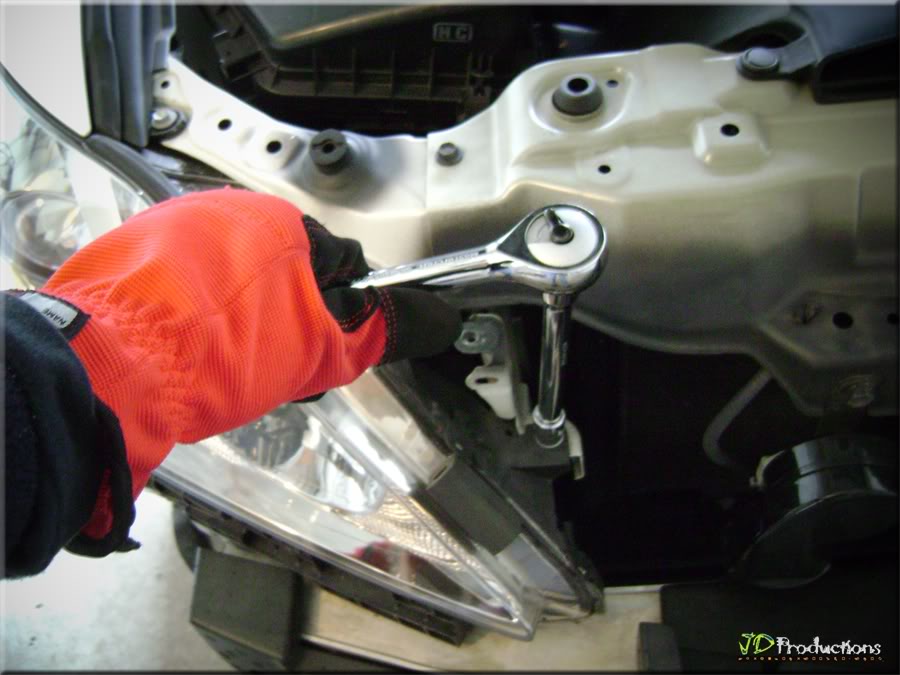
NOTE: 2 x 10mm bolts are same size (top), 1 x 10mm bolt-longer (side)
9.1) Place Old Carpet Runner to Protect Bumper from floor debris
9.2) Start Engine, Turn Steering Wheel to the Right (to gain access to Plastic Wheel Well).
2 x clips, 4 x 10mm bolts
Work Gloves
9.3) Use Jeweler's Screwdriver (2 x Plastic Clips)
9.4) Use Wrench with 10mm Socket
TIP: I used 170mm Audio/Video Dash Removal Tool to expose the hidden 10mm bolt.
9.5) Use Phillips Screwdriver for 3 x bolts attached to the Engine Under Cover
Same method applies to the Passenger Side:
1) Start Engine, Turn Steering Wheel to the Left.
2) Remove 2 x Plastic Clips
3) Remove 1 x 10mm bolt
4) Remove 3 x 10mm bolt/screws
1) Start Engine, Turn Steering Wheel to the Left.
2) Remove 2 x Plastic Clips
3) Remove 1 x 10mm bolt
4) Remove 3 x 10mm bolt/screws
STEP 10
Remove 6 x 10mm bolts.
Use Wrench with 10mm Socket
NOTE: Use Masking Tape to Protect Fender/Headlight from accidental scratches
STEP 11
Lift the Negative Battery Cover and start loosening the bolt using 10mm socket wrench.
STEP 12
Gently pull the Bumper Off.
NOTE: You will need an assistant to help you with the Bumper Removal
Disconnect/Unplug Fog Lights
1 x connector - Passenger Side (Press Pull-down method)
2 x connector - Driver Side
Remove Front Bumper
STEP 13
Headlights: Remove 3 x 10mm bolts with Socket Wrench.
10mm Socket Wrench with Extension
NOTE: 2 x 10mm bolts are same size (top), 1 x 10mm bolt-longer (side)
Last edited by cyberscorp; 04-30-12 at 02:29 PM.
The following users liked this post:
sede7 (03-25-23)
04-25-12 | 08:28 AM
#4
Thread Starter
Pole Position
Joined: Nov 2008
Posts: 335
Likes: 8
From: Toronto
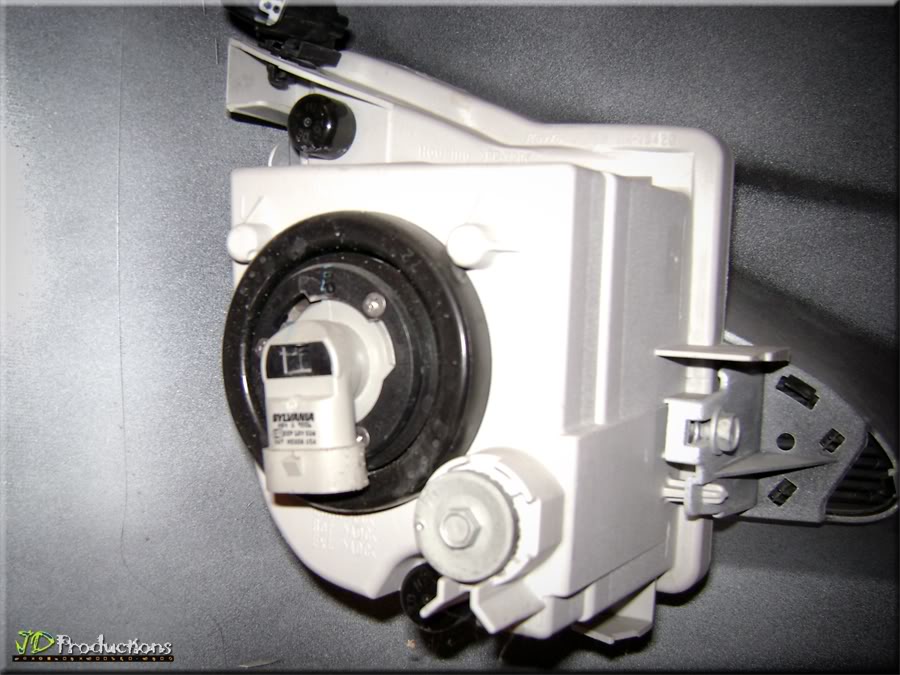
STEP 14
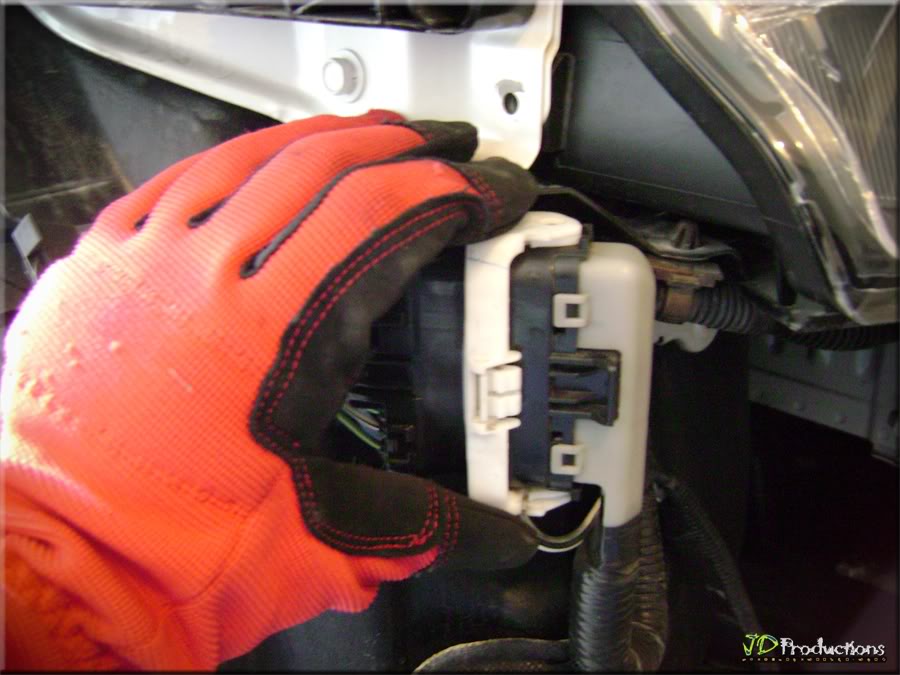
Unclip then Unplug Headlight Wire Connector.
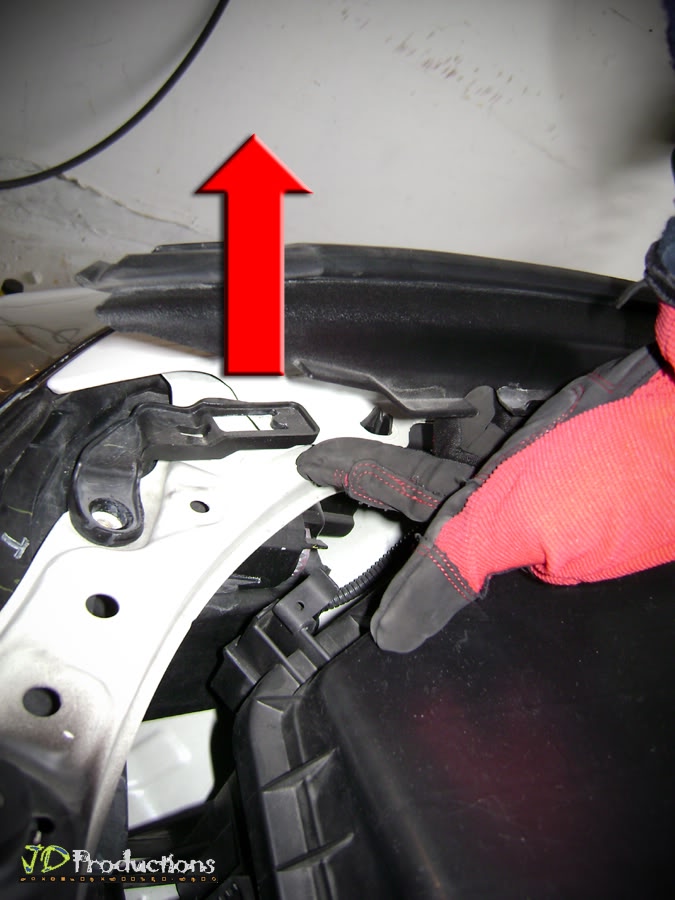
STEP 15
Gently pull Plastic Cover (as shown below).
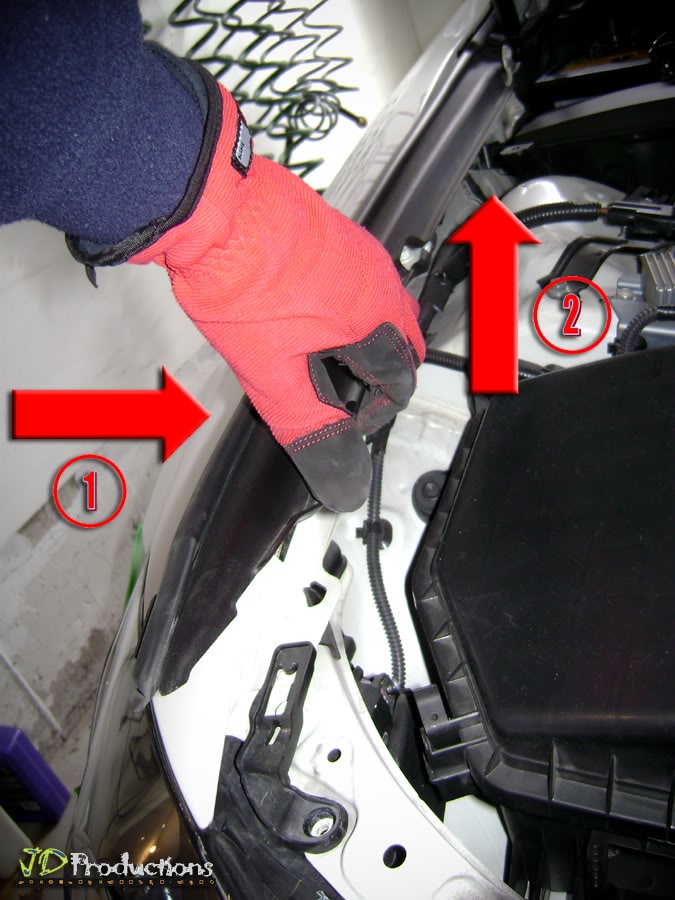
Unlock Headlight Clip (as shown below).
STEP 16
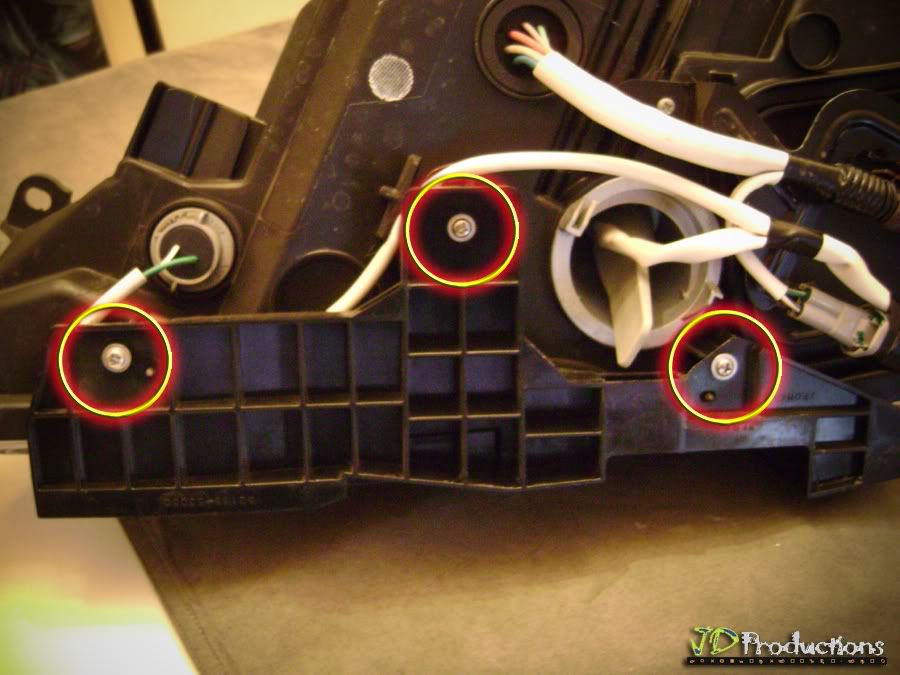
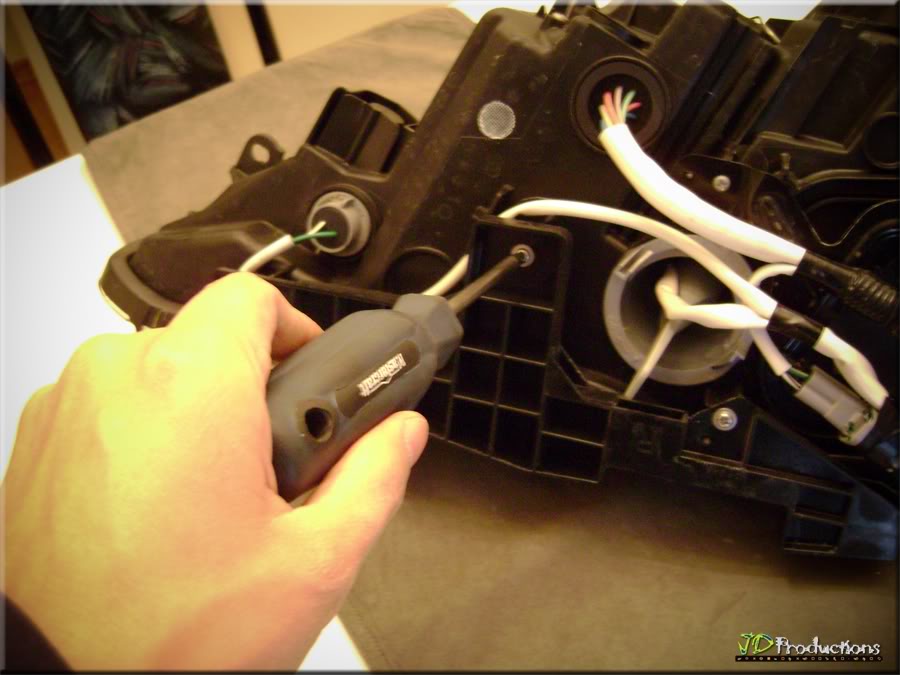
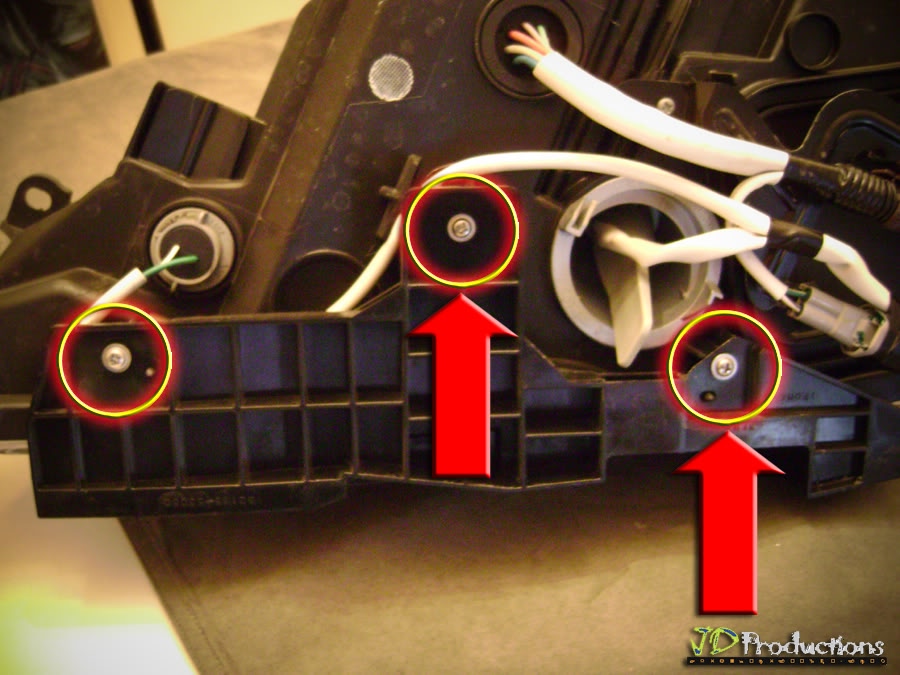
Headlight Bracket.
Remove 3 screws with Phillips Screwdriver
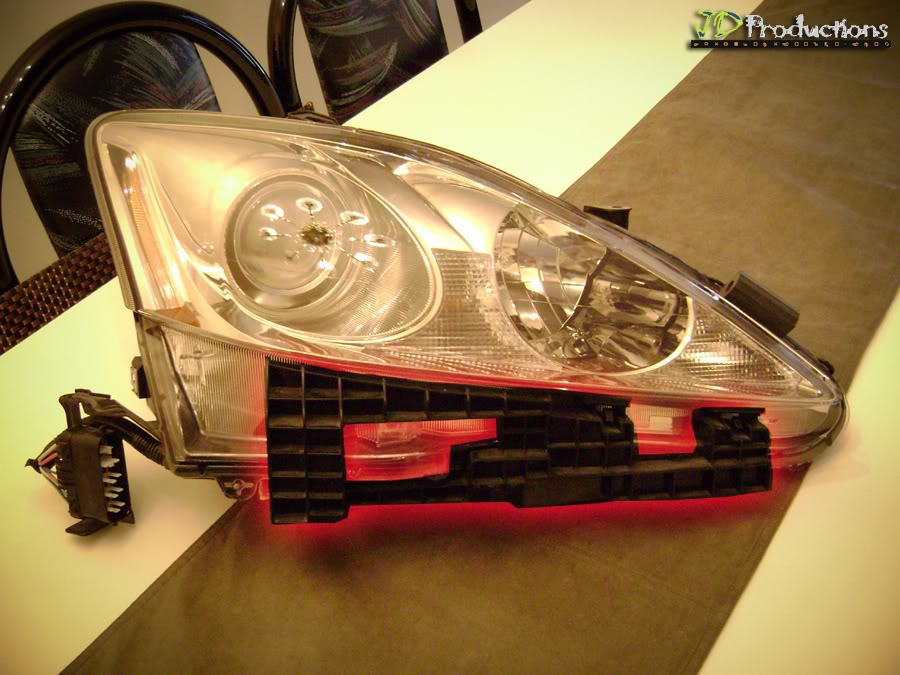
STEP 17
NOTE: You will need to custom fit the existing Bracket before transferring to the New "2012MY LED Headlights".

I use Dremel 4000 to get the job done.
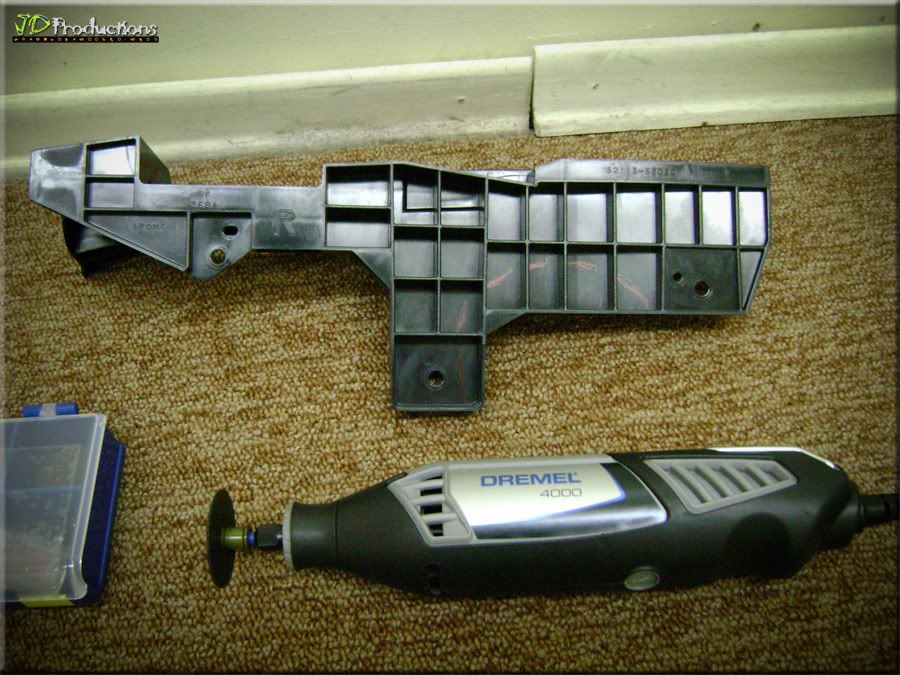
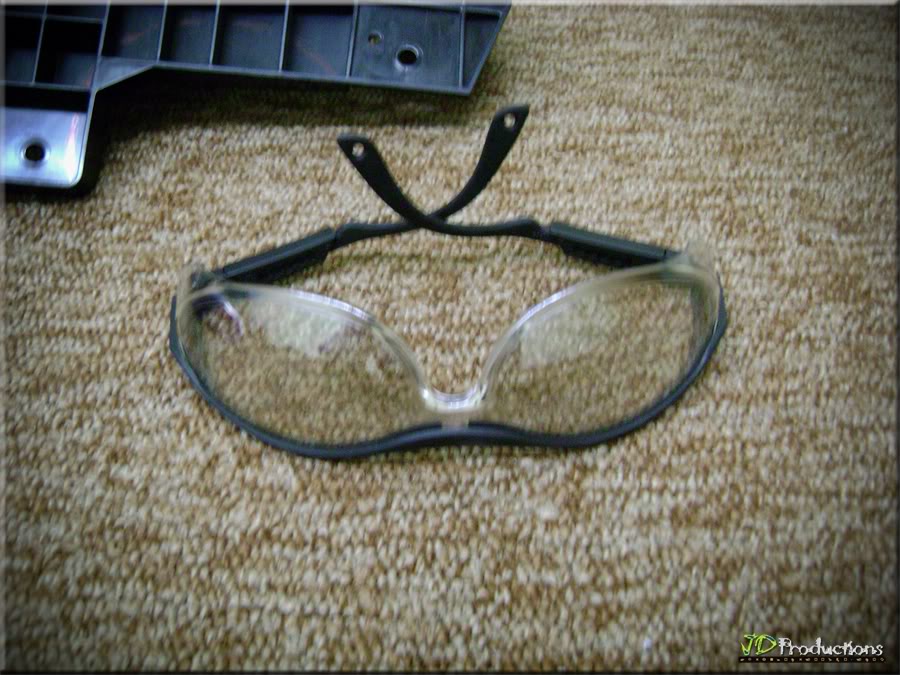
Don't forget to wear your Safety Glasses
. . . Test Fit+Cut, Test Fit+Cut, Test Fit+Cut; till it line-up properly (I did this 3 x the first time).
NOTE: ONLY 2 SCREWS WILL HOLD THE BRACKET
STEP 18
Install Relay Flasher
18.1) Remove 2 cross head screws with Phillips Screwdriver.
18.2) Slide Carefully
Flash Light Required
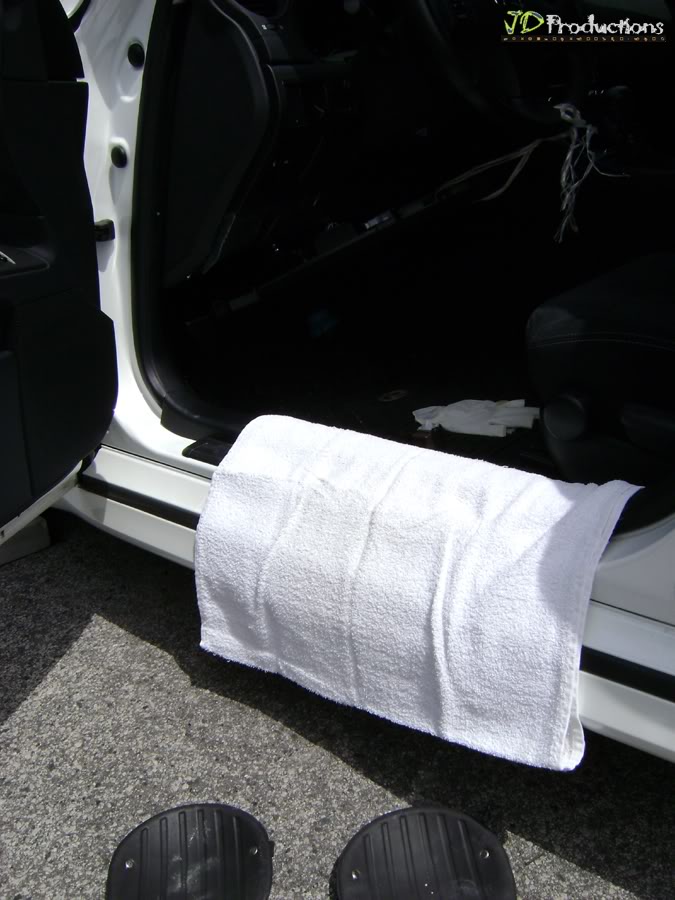
18.3) Place Old Towel (or similar) to protect Side from Scratches (My Work Jeans has small metal bottons) . . .
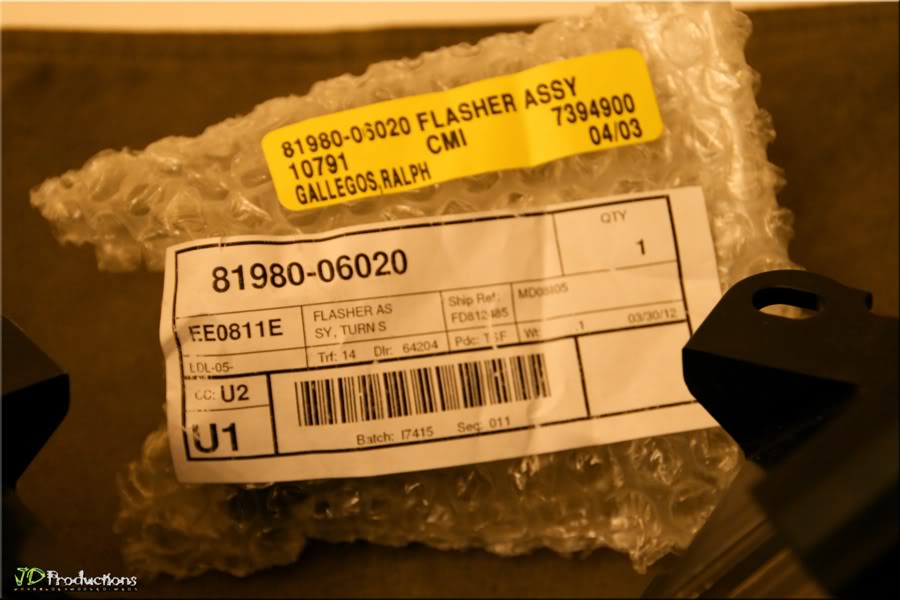
18.4) To remove the existing "Flasher Relay (Green)", use long nose pliers.
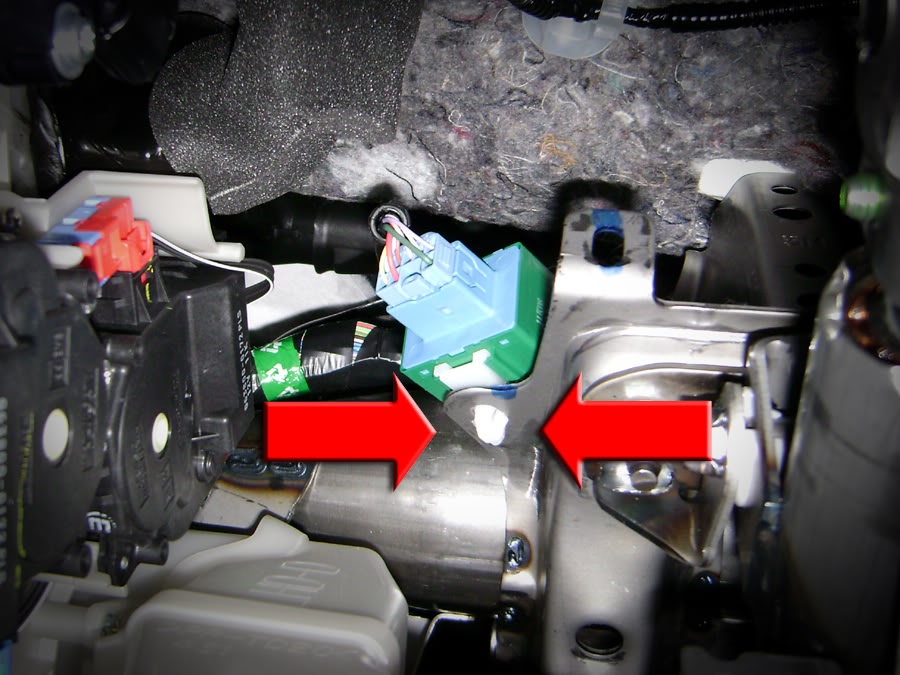
(TIP: Press to Unlock)
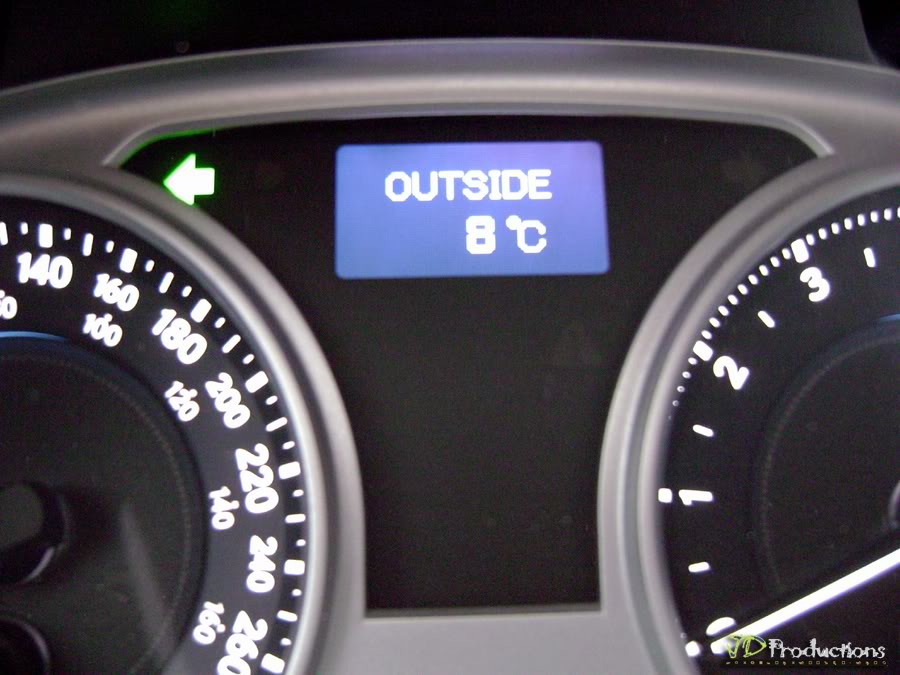
18.5) Check the Signal
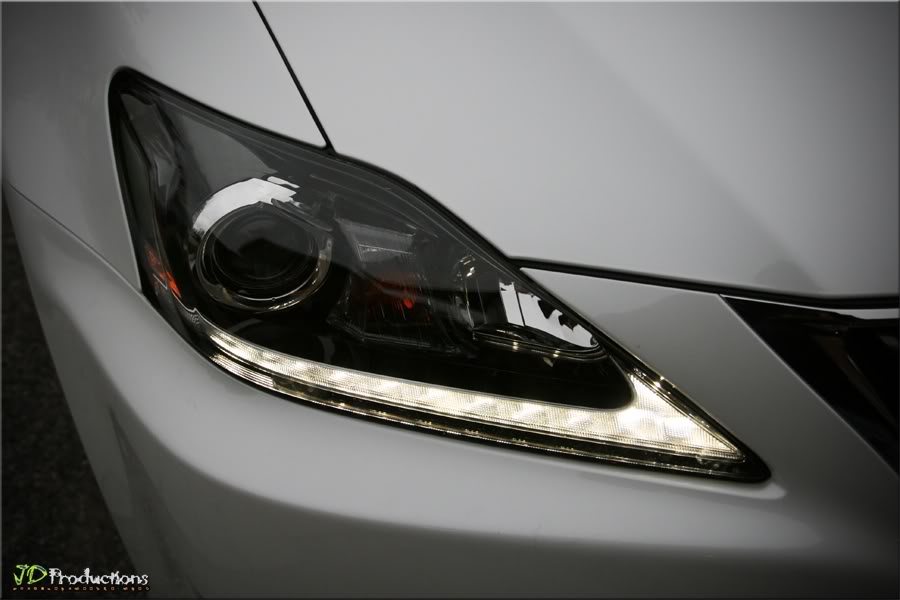
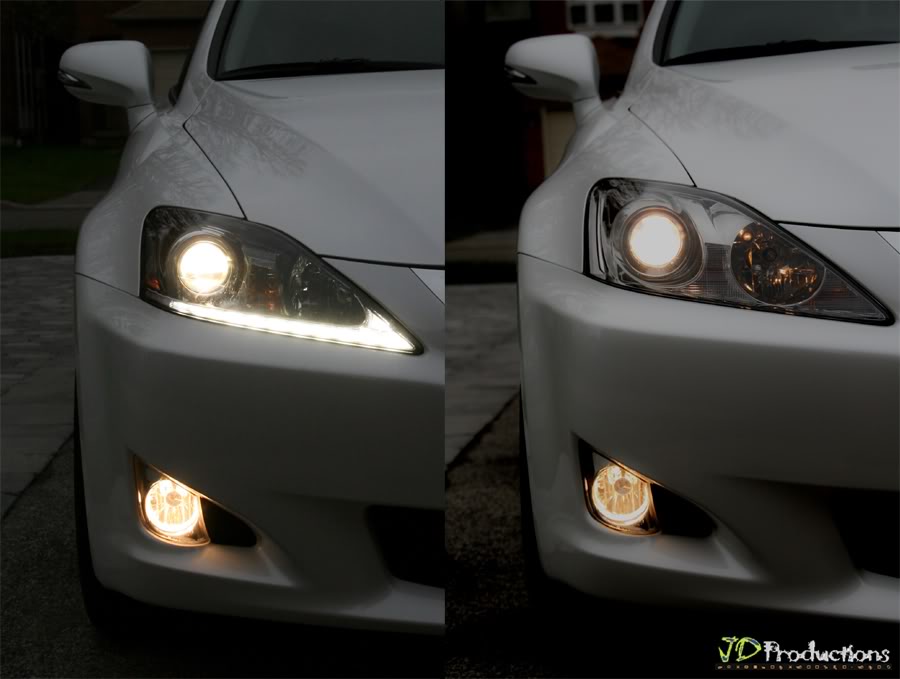
. . . at this point, you're ready to Install the "2012MY LED Headlight".
1) Attach the Custom Cut Bracket to "2012MY LED Headlight" (Passenger)
2) Re-install 3 x 10mm bolts (Longer Bolt goes to the sides)
3) Plug Headlight Wire-Connector
4) Same steps above applies to Driver Side.
STEP 19
Test all Light Settings before Installing Front Bumper.
Once satisfied; install parts in reverse order . . .
Unclip then Unplug Headlight Wire Connector.
STEP 15
Gently pull Plastic Cover (as shown below).
Unlock Headlight Clip (as shown below).
STEP 16
Headlight Bracket.
Remove 3 screws with Phillips Screwdriver
STEP 17
NOTE: You will need to custom fit the existing Bracket before transferring to the New "2012MY LED Headlights".
I use Dremel 4000 to get the job done.
Don't forget to wear your Safety Glasses
. . . Test Fit+Cut, Test Fit+Cut, Test Fit+Cut; till it line-up properly (I did this 3 x the first time).
NOTE: ONLY 2 SCREWS WILL HOLD THE BRACKET
Same method applies to the Driver Side Headlight:
1) Remove 3 x 10mm bolts
2) Unplug Wire Connector
3) Unlock Headlight Clip
4) Remove 3 x Screws from Bracket
5) Custom Fit/Cut Bracket
1) Remove 3 x 10mm bolts
2) Unplug Wire Connector
3) Unlock Headlight Clip
4) Remove 3 x Screws from Bracket
5) Custom Fit/Cut Bracket
STEP 18
Install Relay Flasher
18.1) Remove 2 cross head screws with Phillips Screwdriver.
18.2) Slide Carefully
Flash Light Required
18.3) Place Old Towel (or similar) to protect Side from Scratches (My Work Jeans has small metal bottons) . . .
18.4) To remove the existing "Flasher Relay (Green)", use long nose pliers.
(TIP: Press to Unlock)
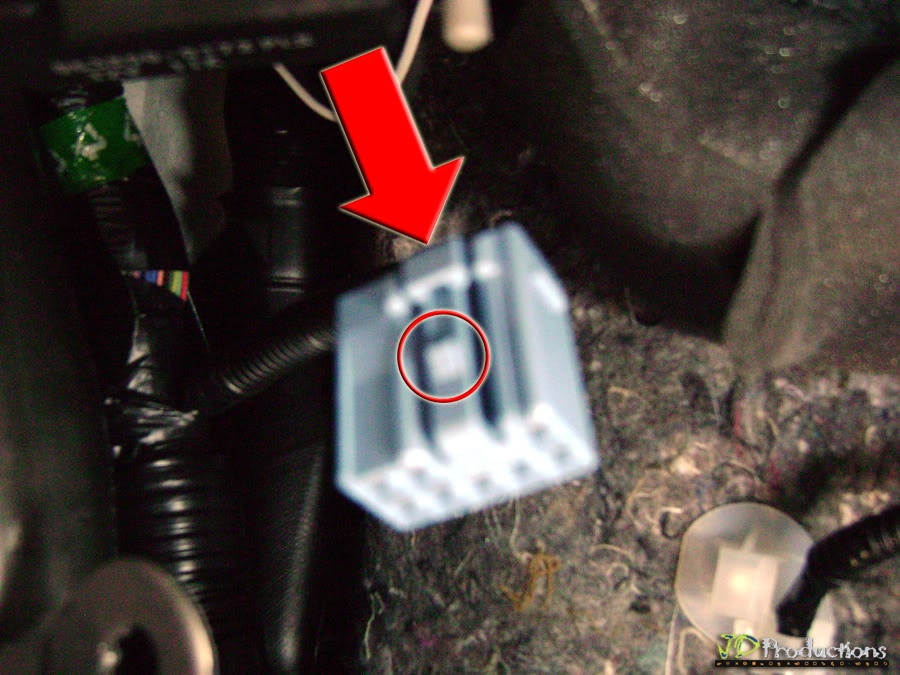
Install new Flasher Relay 81980-06020 (Brown)
1) Attached to Connecting Wire
2) Re-attach to place-holder
1) Attached to Connecting Wire
2) Re-attach to place-holder
18.5) Check the Signal
. . . at this point, you're ready to Install the "2012MY LED Headlight".
1) Attach the Custom Cut Bracket to "2012MY LED Headlight" (Passenger)
2) Re-install 3 x 10mm bolts (Longer Bolt goes to the sides)
3) Plug Headlight Wire-Connector
4) Same steps above applies to Driver Side.
STEP 19
Test all Light Settings before Installing Front Bumper.
Once satisfied; install parts in reverse order . . .
Last edited by cyberscorp; 04-30-12 at 12:09 PM.


Trending Topics


The following users liked this post:
MrHarris (05-17-22)