When you click on links to various merchants on this site and make a purchase, this can result in this site earning a commission. Affiliate programs and affiliations include, but are not limited to, the eBay Partner Network.
Pretty sure but confirm by looking at the door sticker. Is the engine bay and the car in general clean? I hate working on a filthy car I always wash everything before I do an engine swap.
Pretty sure but confirm by looking at the door sticker. Is the engine bay and the car in general clean? I hate working on a filthy car I always wash everything before I do an engine swap.
Yep. Luckily I managed to find a copy of (most) of the service manual for the IS, so I also have some instructions to go on.
OK, so things to keep in mind: first time doing a transmission drop, and I'm following the lexus repair manual, so I'll probably do a bunch of unnecessary **** and screw something up. This is also primarily a resource to aid me putting this thing back together, so I'll probably skip a few steps in the photos. In the meantime, let's get to it! Not sure if I'm allowed to post screenshots of the repair manual or not, if someone can confirm I'll add those.
Step one: Remove intake air surge tank assembly. Pull the tube off of the throttle body. Also recommend removing the throttle body from the manifold, it's got some hoses that are a pain to remove. Easier to leave in place. Also, I highly recommend doing this before you lift the car so you don't end up on a stepstool leaning over the hood like an idiot, like me. Remove this thing - bolt and a hose. I think it's the purge valve. And this thing. Looks expensive. Unplug the cable Hidden bolt behind the throttle body, a bit difficult to get to. Last hidden bolt. I believe these are 5mm hex bolts. There are two nuts and six bolts holding the top down, and a few on the sides. Bolt under the cable Nasty hidden bolt, very hard to reach. Tried to illuminate it the best I could for the pic. Another hose in the back
Bunch more bolts and stuff but those are the main ones and the more difficult ones.
Step 2, 3, 4, 5: drain ATF and coolant. Hopefully self explanatory. And hopefully you remembered to unplug your battery and stuff.
Step 6 (to keep continuity with the maintenance manual): Remove propeller with center bearing shaft assembly.
Step 6a: that manual directs us to first remove the "front exhaust pipe assembly".
Step 6b: Remove front center floor brace. First, remove the plastic shields on around it. The big round clips actually screw out as a unit. Bit difficult to get them out but they do come out. Then the brace comes right out. 6 bolts, 2 nuts.
Step 6c: remove the o2 sensors. Note, make sure you get a short/offset o2 sensor socket. I got the long type and there isn't enough clearance for it.
Step 6d: remove the bolts on the exhaust. 4 bolts front and back. Mine are rusted and my M18 1/2 impact isn't getting them off, so I'm currently busy grinding them off.
So I was able to get the o2 sensors off with the long socket, but it required me to drop the front half of the exhaust first. Luckily my angle grinder and dremel with a cut off wheel got the stuck ones, and the rest came off with a good soak in PB blaster.
Dropping the rear end of the exhaust is much easier if you take these rubber grommets off first, as it allows you to get an impact wrench in there, which is very difficult to do otherwise. Be warned however, that they are the only thing holding the exhaust in place. Place a jackstand or a block under the exhaust, otherwise it will fall on your head.
Step 6E: remove the exhaust support bracket. Just two bolts.
Step 6F: Place matchmarks on the front propeller shaft and remove it. This thing.
6 6mm hex bolts on each side. The ones on the top are a pain to get to. Use hand tools, not power tools. If you screw up and round the bolts out, you're in for a world of pain.
Was trying to figure out why you had to remove the starter, but got some advice in the mechanicadvice IRC chat that made sense - the gap it fits in is the only place you have access to the drive plate/torque converter bolts. Unfortunately, the TIS guide skips a few steps, including the fact that it's damn near impossible to get to. Near as I can tell, you also have to drop the driver side exhaust manifold, which is quite the problem to get to. I'm currently working on that, and will update as I go along. This little project may end up taking a few more months at this rate.
Do you have a PDF of the manual, or some browser interactive based version?
If it's a PDF the problem is that every time you see "Click here info", it's actually a link to the specific step by step instructions for the action they are asking you to perform that is located in another area of the manual.
Without knowing where the link goes, because it's a PDF, then you'd have to manually find the specific section that it's referring to every time.
To save on repetition and space, there is on place in the manual where is provides all the instructions to replace the starter, so if removing the starter is needed for another repair process, they will just provide a link back to that one section where it shows to replace the starter.
I think on the IS the easiest way to remove the tranny would be to drop the entire front subframe with the engine and tranny as one.
Personally I haven't tried it, but once the entire assembly is out, then all these small steps become a breeze.
Of course you have to be able to lift the car higher than the assembly in order to get the whole thing out from under the car to work on it...not ideal if you don't have a hoist or some type of lift system available to you.
And yes, as you confirmed the IS250 AWD tranny is the A760H...and the starter is blocking you from removing the torque converter bolts.
I have a PDF copy of almost all of TIS for the 3IS. Unfortunately, they are rather annoying to use for the reasons you mentioned, as the hyperlinks in the PDF's don't work. I attached a copy of the instructions for the manifold removal in case you might be able to shed some light onto it. I have the car lifted some 24 inches off the ground. I suppose one could just drop the engine but wouldn't that require stripping everything it's connected to first? Or what would I need to disconnect in order to do so?
Finally managed to get the exhaust manifold off, exposing the starter. It was a ***** and a half to get it off, had to jack the engine up after loosening the mounts and then I used a mechanics mirror to get to them with a long 12 and a 1.5in extension. Incredibly tight space, I ended up having to call a smaller pair of hands to assist as I was simply not able to get in there with my XL mitts.
I have no clue how I'm going to manage to get it back on there. Starting to think that dropping the engine and transmission as one piece would have been easier as Sasnuke suggested. I ended up picking up four 6 ton jackstands from autozone and a Sunex 6602LP jack and it has made everything significantly easier as I now have slightly over two feet of space beneath the car. I may end up dropping the engine anyways when it comes time to bolt everything back up.
Also went looking for a nice length of metal pipe to use as a breaker bar and about fell on my *** when I saw how expensive they were now. However, it turns out a nice length of PVC pipe is $5 and just as effective.
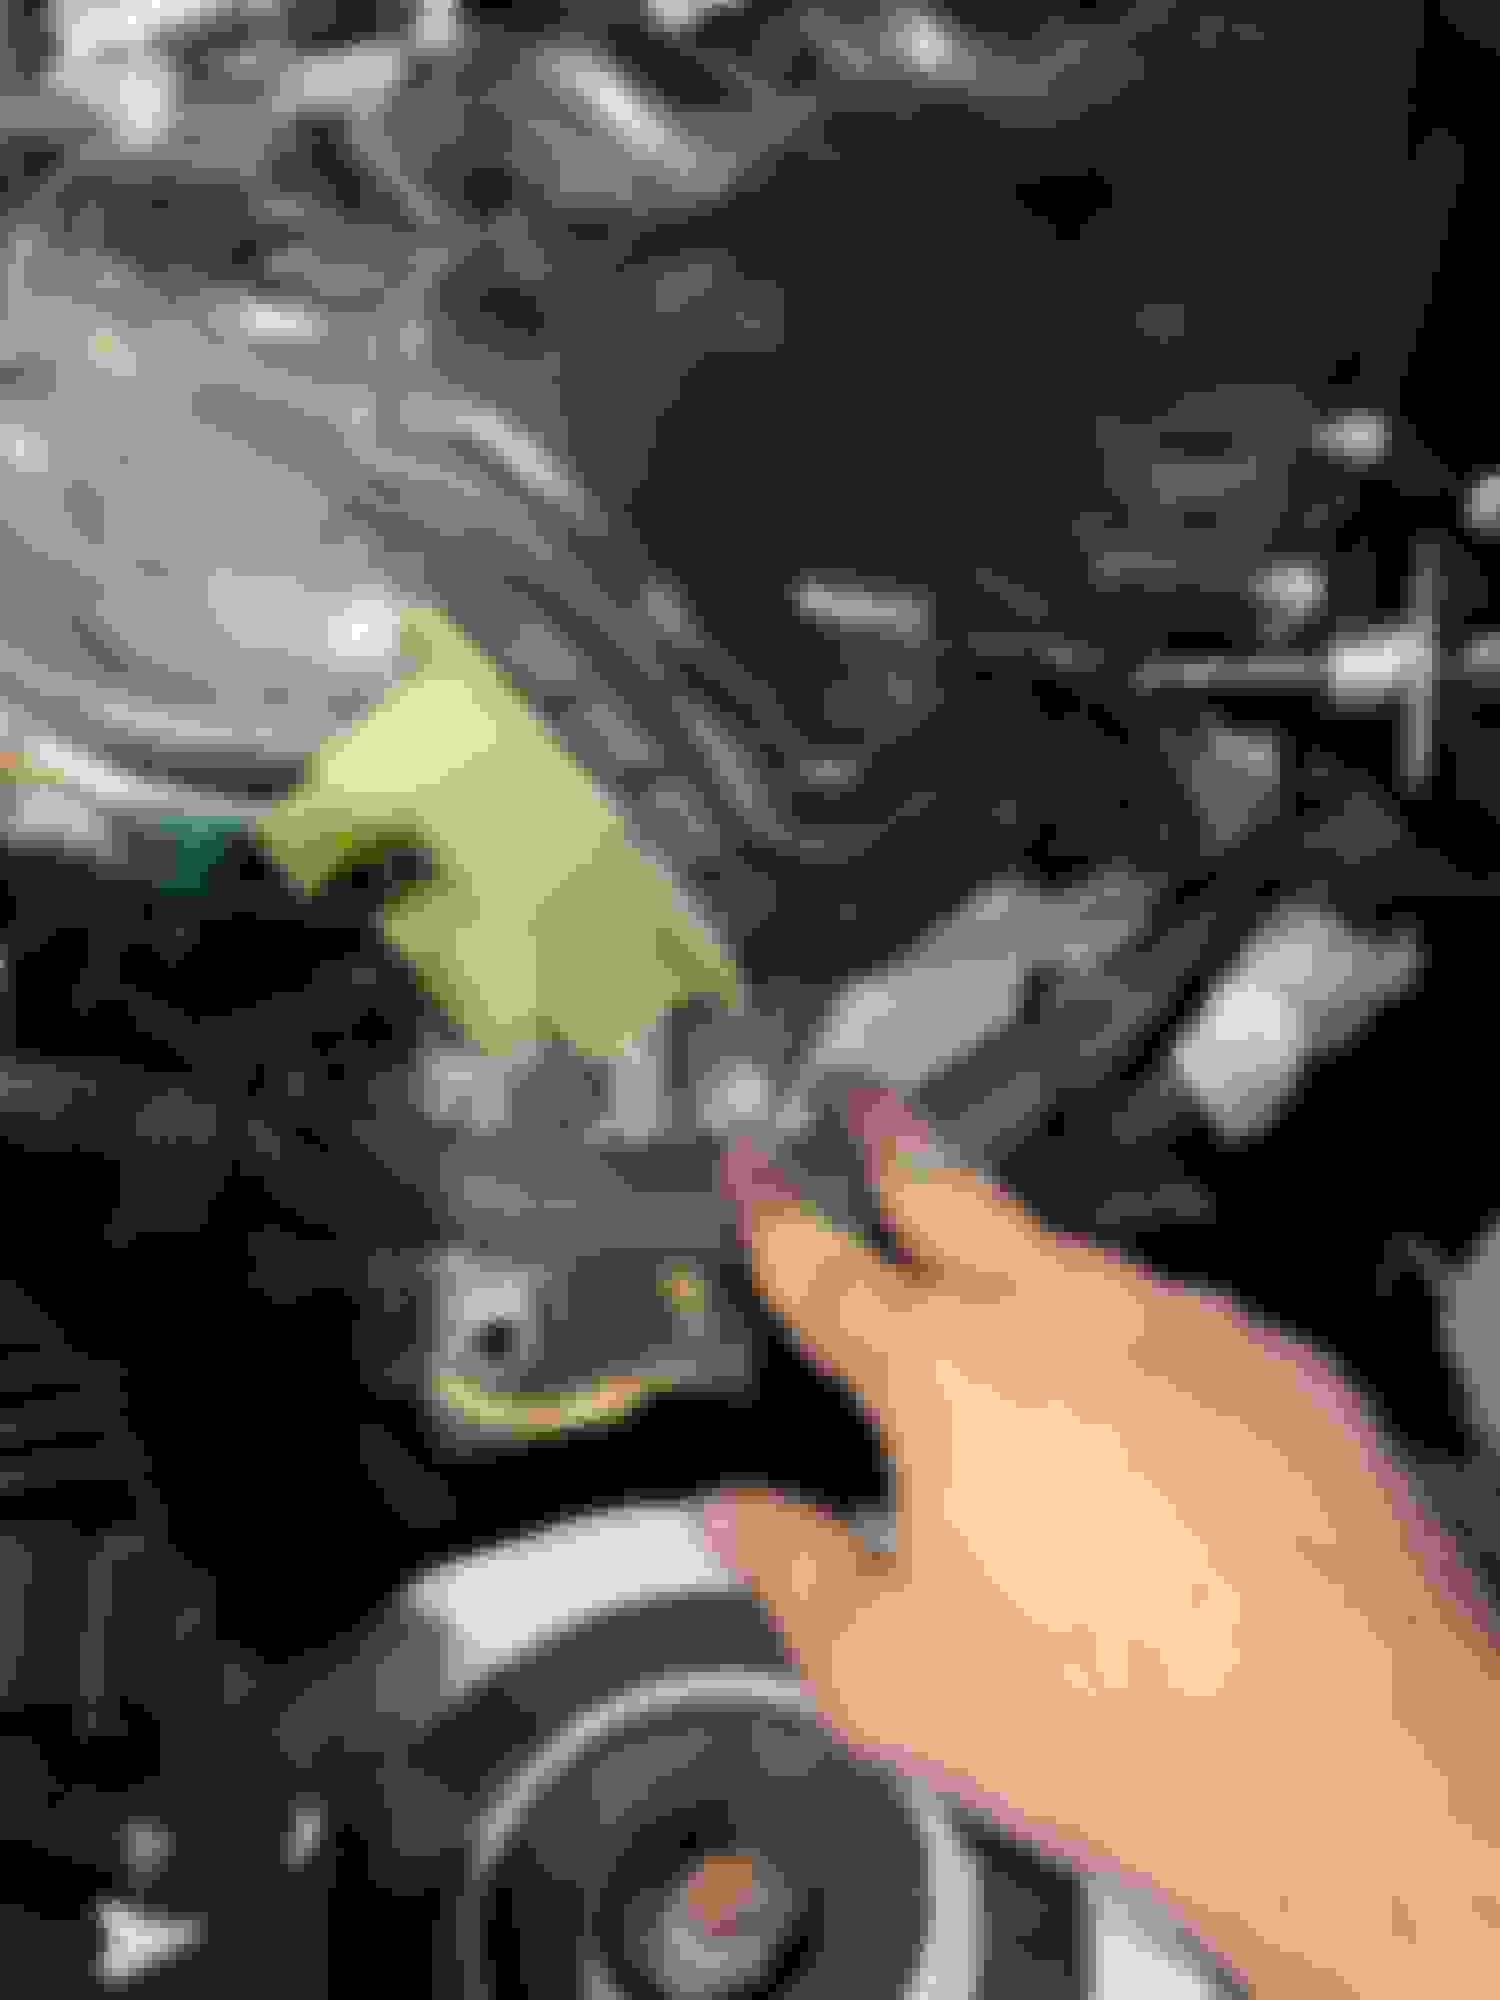
Got the starter off, exposing the manifold. Two 12mm bolts. Looks like they were hit with locktite, had to give them a few seconds with my impact to get them loose. It then took quite a bit of twisting to get it out, but I did, exposing the flexplate bolts. I then ran into the next problem: it’s incredibly hard to actually get to the bolts with an impact. The access panel is very small and the space you have to get to it is very tight. It’s also difficult to get a cheater bar in, and your movement is severely limited. I am going to pick up some more extensions for my impact and maybe another U-joint tomorrow, and if that doesn’t do the trick I will most likely end up dropping the entire assembly. I’m fairly certain that if I had just dropped the engine/tranny as one bit I would have been done by now. Just push the black tab in to remove the starter cable Remove this nut and the cable comes off The two bolts you have to remove. Starter just drops free after.
Ended up removing a bunch more stuff to try to get a better angle to the flexplate bolts, so I guess this is also going to be the first alternator removal tutorial for the 3IS too. Looks like the same procedure as the 2IS had. The Lexus manual conveniently forgot to mention the 12mm bolt on the back of it that is quite a bit of trouble to get out, but with the manifold off it wasn’t too bad. Also pulled the wiring harness per the instructions for the manifold, as well as the ECU box to make more space.
Alternator, both sides. In their infinite wisdom, Lexus put a bolt on the far side of the back. Had to use a mechanics mirror to get to it, but it wasn't stuck and I was able to get it off with a 3/8 wrench. Afterwards I just had to wiggle it loose with a crowbar, as it was wedged pretty tight in there and had to be oriented in a very specific direction to come out.
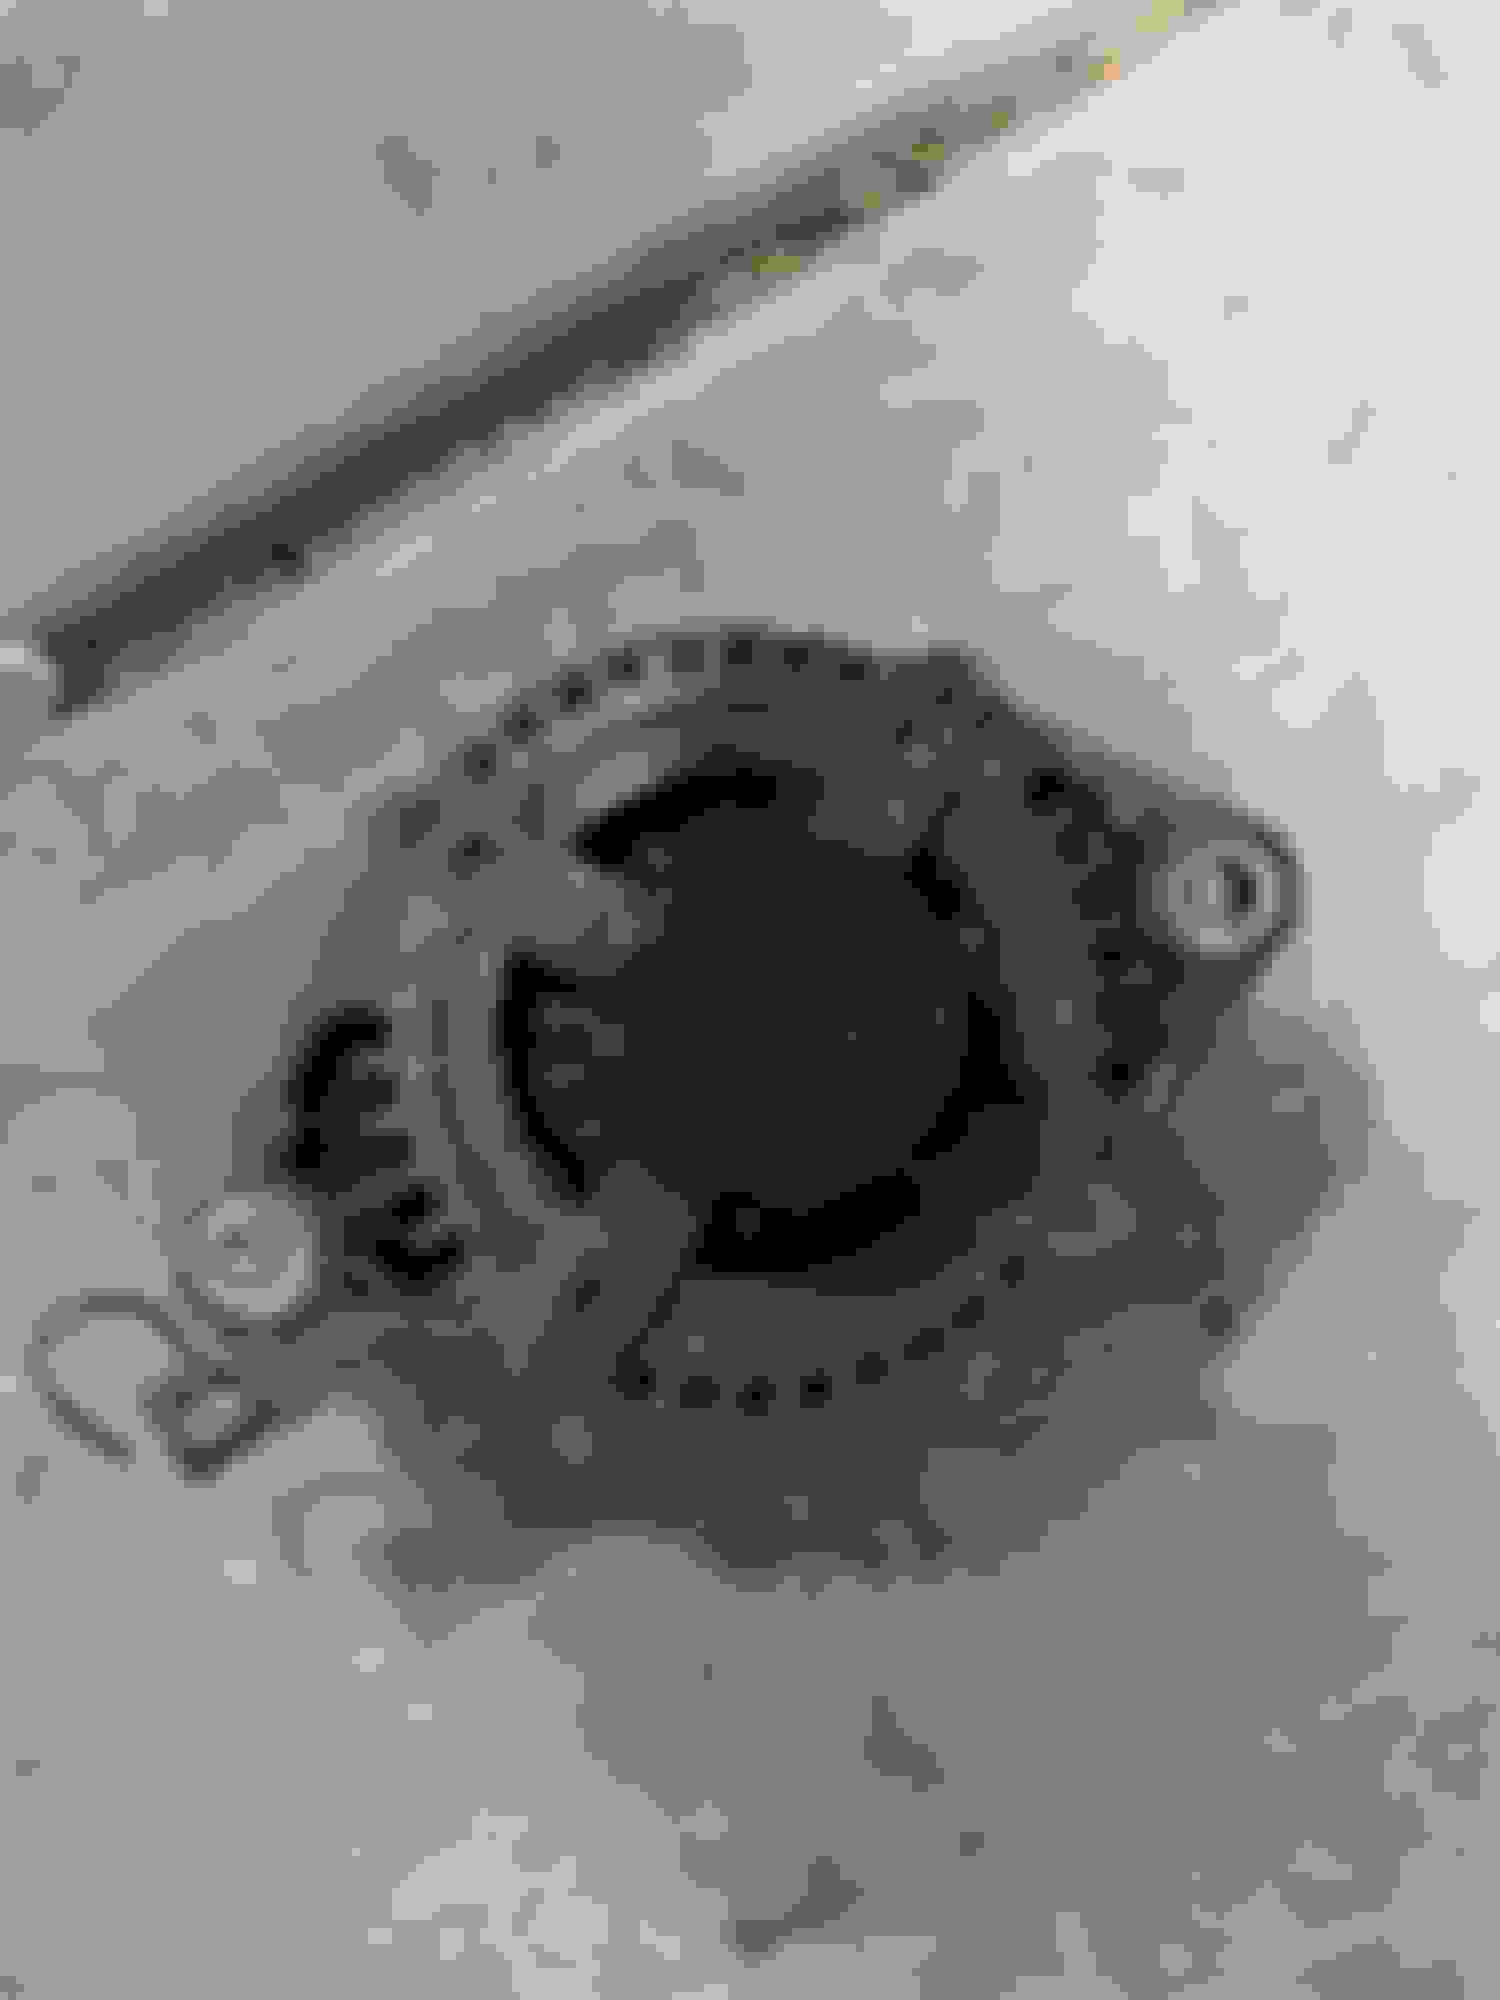
You're right, my bad. The pics I took of the alternator removal vanished into Apple Vapor™ in the Apple icloud™, so I just went back and updated it with pics of the removed alternator.
On the bright side, I finally managed to get the flywheel/flexplate bolts off! It ended up being a culmination of multiple issues - the computer box and all the wiring and cooling pipes were keeping me from getting a good angle, and my chinesium impact socket wasn't actually getting a good grip on it and was slipping off. They were also rusted into place - a nice 15 minute soak in PB blaster made a huge difference. Once I ripped out all the aforementioned stuff and bent the metal pipe out of the way I was able to chain together two U-joints and a couple of extensions and pop them out. The monstrosity. A 24 inch 1/2in extension, another 2in 1/2 in extension, a 1/2in U joint, a 1/2 ->3/8 converter, a 3/8 U joint, and a deep 14mm socket.
I just want to say that if you don't have a Milwaukee M18 FUEL 1/2in impact, you are doing yourself a major disservice. 1400 ft/lb of torque is absolutely amazing, and if it's struggling with something, then I know it's time to grab the angle grinder. The single most useful tool I own, and the reason why I have given Milwaukee far too much of my money. Well, Home depot sales are to blame for that too, I suppose. Home depot is also to blame for my extensive Ryobi collection. 18V hedge trimmer for $49? Yes please. And it's a really great one too.
This is what my engine bay currently looks like. The zip lock bags are labeled bolt bags, I make a fresh one for each new part to keep track of bolts and make it easier to put this back together.
 08-13-21, 07:37 PM