
~FINALLY, my custom IS-F rear diffuser (took idea from my NSX-R rear diffuser)
 11-23-09 | 12:25 PM
#1

As many of you know there are very limited choices for rear diffusers on the IS-F. Every manufacturer seems to be stuck on either WILD and GAUDY or too subtle. As I said before Lexus tuners really need to take note of how some of the German cars (C63 / M3) design their rear bumpers as it’s a nice mix of aggressive while still keeping it clean.
I have 2 major gripes on the IS-F rear bumper:
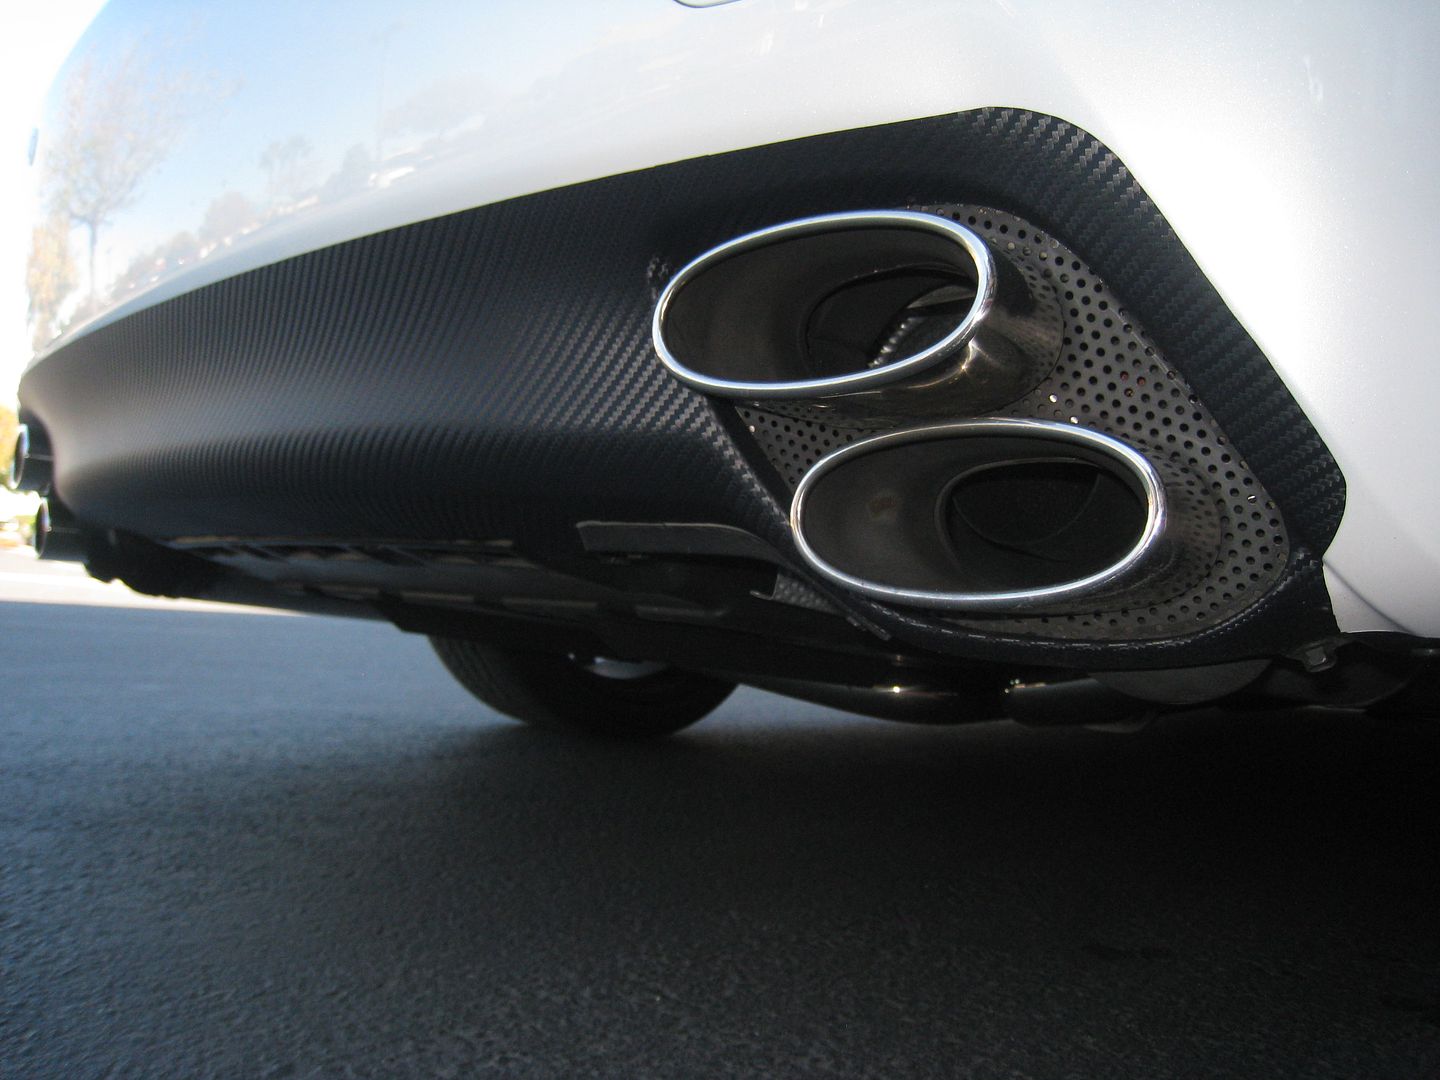
a) There is too much white space between the tips which give the appearance of a fat looking rear bumper. Note most cars these days have some sort of mesh or black area in between the exhaust tips.
b) The rear bumper on the IS-F sits WAY TOO HIGH, almost like a girl bending over all the time! At stock ride height it’s ugly (same problem with the e92 m3) and at lowered height it still exposes too much of the underside.
My design is not rocket science and requires no cutting or permanent damage to the bumper. I took a 2-stage approach.
Step 1 was to get rid of the blank space between the exhaust tips. I chose to use the 3M matte Carbon Fiber vinyl to give the illusion of a diffuser in between the exhaust tips. (If you don’t like the 3M CF vinyl, you can also use black vinyl or simple paint this area).
Step 2 was where I took cues from my NSX. The rear diffuser on the NSX is a simple add-on piece with roughly 5 shark fins that protrude below the bumper. The NSX bumper is flat in the rear while the IS-F bumper actually has a nice curved line making it a bit more tricky. I took measurements out of cardboard and fabricated a shark fin piece that sits exactly between the dual exhaust tips. The width is roughly 32” wide and has about a 15 degree curve that flows with the rear bumper. Once the shape was formed, I used a mixture of wood, bondo, fiberglass to create a mold. The entire piece weighs less than 16 ounces. I’m going to put these into an Injection Mold plastic machine once I get the overall dimensions finalized.
The finish is black right now and I’m debating if I should go with a gloss black finish or perhaps having it also wrapped in matte 3M carbon fiber? What do you guys think?
Here’s a shot with the mock shark fin diffuser attached with trusty painter’s tape. I’m going to have to do some more trimming and heat forming / sanding this piece before it’s ready for final fitment. But you can get an idea of the overall look.
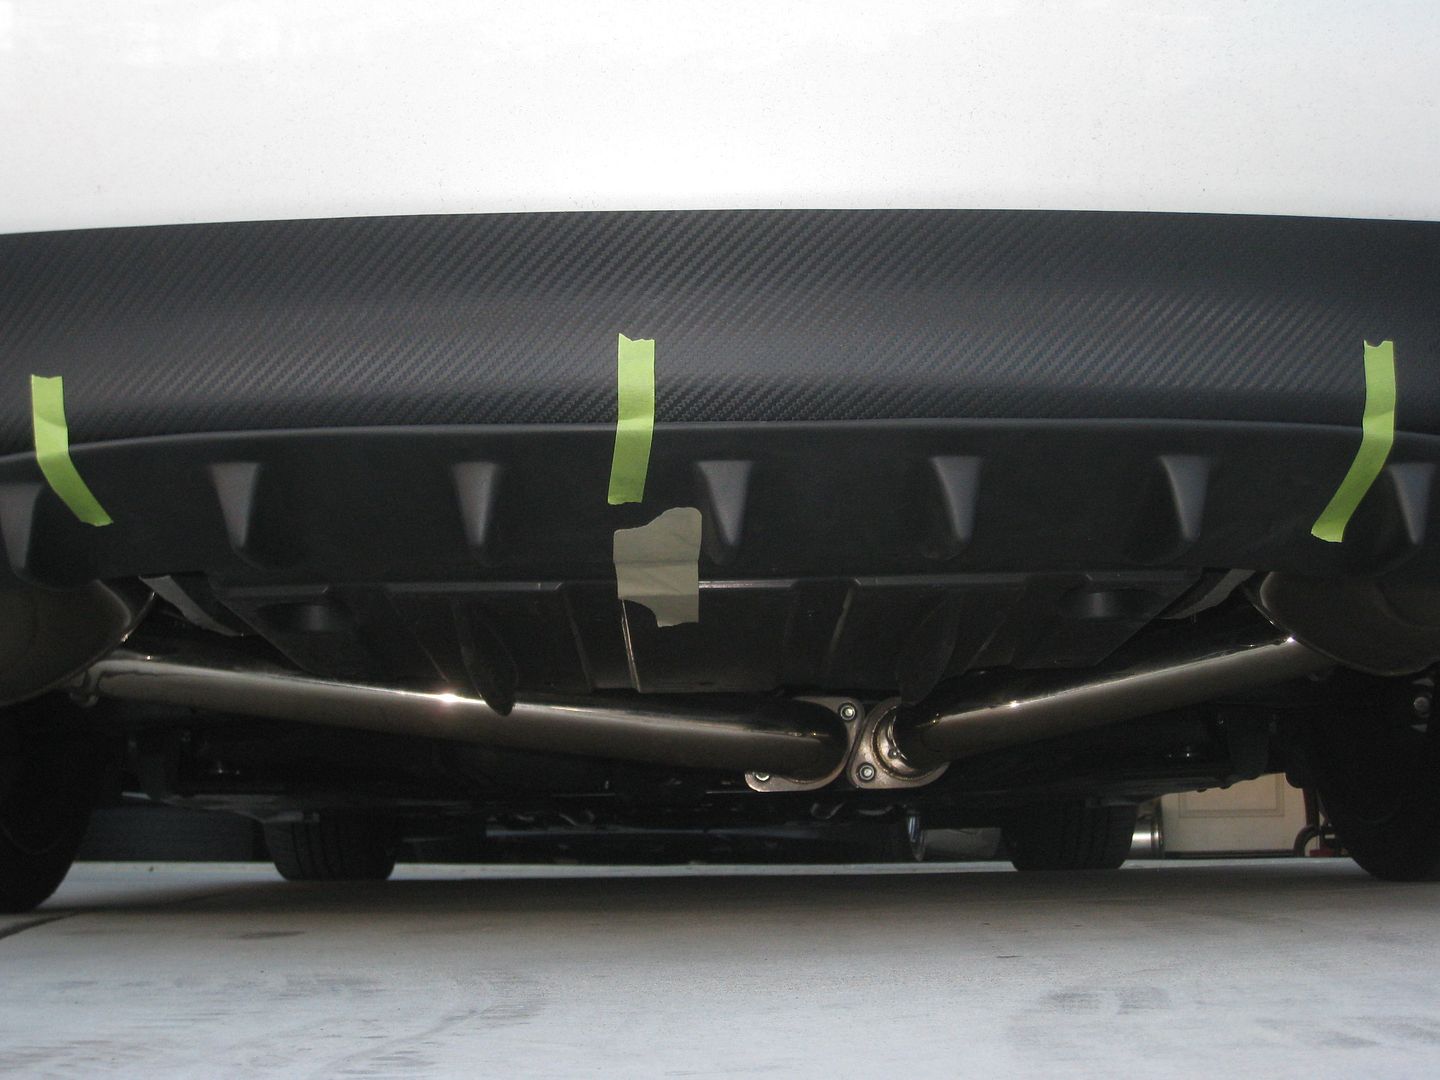
I’m pretty excited about this project as now the rear bumper underpinnings are hidden and the shark fin diffuser really adds to the aggressive sports car nature of the car!
Sorry my camera is MIA so will have pictures soon!
Rick
I have 2 major gripes on the IS-F rear bumper:
a) There is too much white space between the tips which give the appearance of a fat looking rear bumper. Note most cars these days have some sort of mesh or black area in between the exhaust tips.
b) The rear bumper on the IS-F sits WAY TOO HIGH, almost like a girl bending over all the time! At stock ride height it’s ugly (same problem with the e92 m3) and at lowered height it still exposes too much of the underside.
My design is not rocket science and requires no cutting or permanent damage to the bumper. I took a 2-stage approach.
Step 1 was to get rid of the blank space between the exhaust tips. I chose to use the 3M matte Carbon Fiber vinyl to give the illusion of a diffuser in between the exhaust tips. (If you don’t like the 3M CF vinyl, you can also use black vinyl or simple paint this area).
Step 2 was where I took cues from my NSX. The rear diffuser on the NSX is a simple add-on piece with roughly 5 shark fins that protrude below the bumper. The NSX bumper is flat in the rear while the IS-F bumper actually has a nice curved line making it a bit more tricky. I took measurements out of cardboard and fabricated a shark fin piece that sits exactly between the dual exhaust tips. The width is roughly 32” wide and has about a 15 degree curve that flows with the rear bumper. Once the shape was formed, I used a mixture of wood, bondo, fiberglass to create a mold. The entire piece weighs less than 16 ounces. I’m going to put these into an Injection Mold plastic machine once I get the overall dimensions finalized.
The finish is black right now and I’m debating if I should go with a gloss black finish or perhaps having it also wrapped in matte 3M carbon fiber? What do you guys think?
Here’s a shot with the mock shark fin diffuser attached with trusty painter’s tape. I’m going to have to do some more trimming and heat forming / sanding this piece before it’s ready for final fitment. But you can get an idea of the overall look.
I’m pretty excited about this project as now the rear bumper underpinnings are hidden and the shark fin diffuser really adds to the aggressive sports car nature of the car!
Sorry my camera is MIA so will have pictures soon!
Rick
Last edited by s4play; 11-24-09 at 08:54 AM. Reason: added rough pics

 11-23-09 | 04:14 PM
#5


Trending Topics

 11-24-09 | 11:21 AM
#9

Advanced
Joined: Sep 2002
Posts: 531
Likes: 6
From: CA
The only problem with using your own homemade design on this is it hasn't been wind tunnel tested. I'd be worried about lift at high speeds or something in the back. Unless you keep it under 100mph all the time I guess it won't matter too much.
11-24-09 | 01:06 PM
#10
True, this has not been wind tunnel tested but my car rarely hits triple digit speeds 
This is mainly a cosmetic add-on for now so no claim for more performance is advertised for sure. I wonder how many other body kit mfr. really test their products in a wind tunnel???
Well first thing's first, I'm going to swap out my BCR coils soon for a set of KWV3 as right now the ride is too soft for me.


 11-24-09 | 09:01 PM
#15
Dave600hL: LOL that tape is hardcore - my painter's tape is more show worthy!
Robs IS250: Patience
 I still have some work to get the fitment right before I can attach it to the bumper and then of course the paint booth.
L-S-D: Thanks stay tuned...more pics to come!