
DIY: IS-F front brake rotors
 11-25-11 | 07:02 PM
#1
Original rotors and second set of pads with 35k on the odometer, my last track session finally resulted in needing a complete front brake job. This thread is specific to the rotors, but in step one I have a link to pad only replacement.
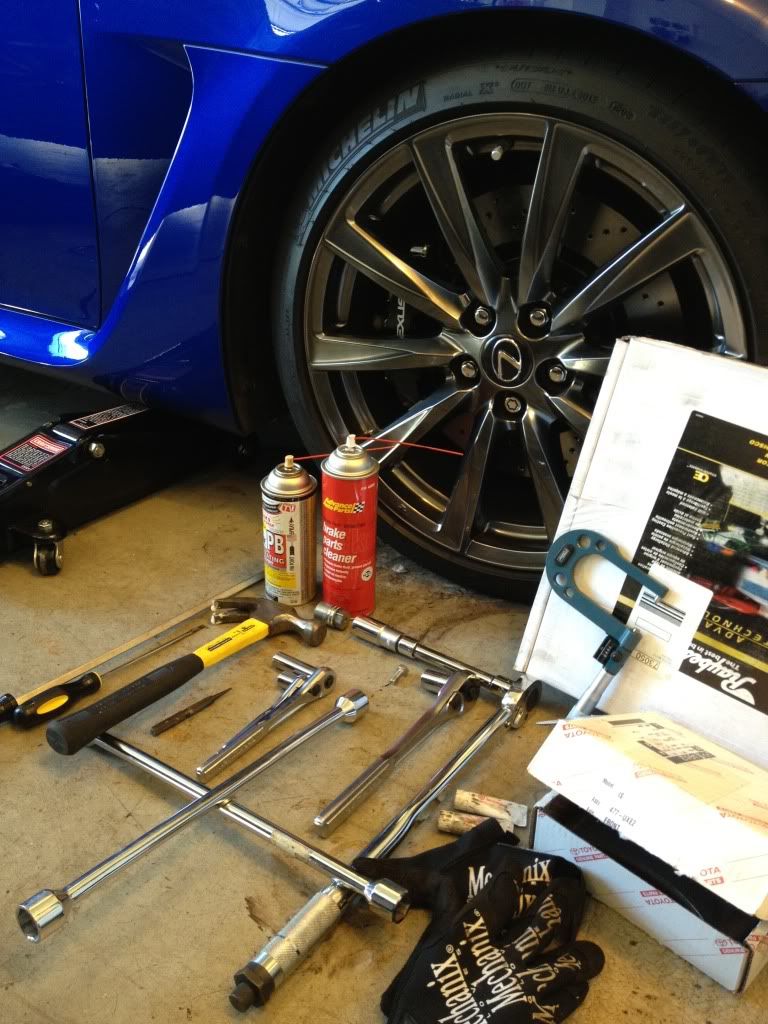
Most everything you need for this project:
1. New Rotors/pads (Raybestos rotors ordered from RockAuto.com and the pads are OEM)
2. Brake Cleaner
3. WD-40 or equivalent to spray the hub
4. Disc brake lube for back of the shims
5. C-clamp or flat head screw driver to push the pistons back in the caliper
6. Hammer and Pin-punch to tap out the top pins
7. 13 and 17 mm sockets
8. M8x1.25 bolt to help remove the rotor
9. Torque bar
10. Towels and Gloves
Step One
Remove old brake pads as described in this thread.
Step Two
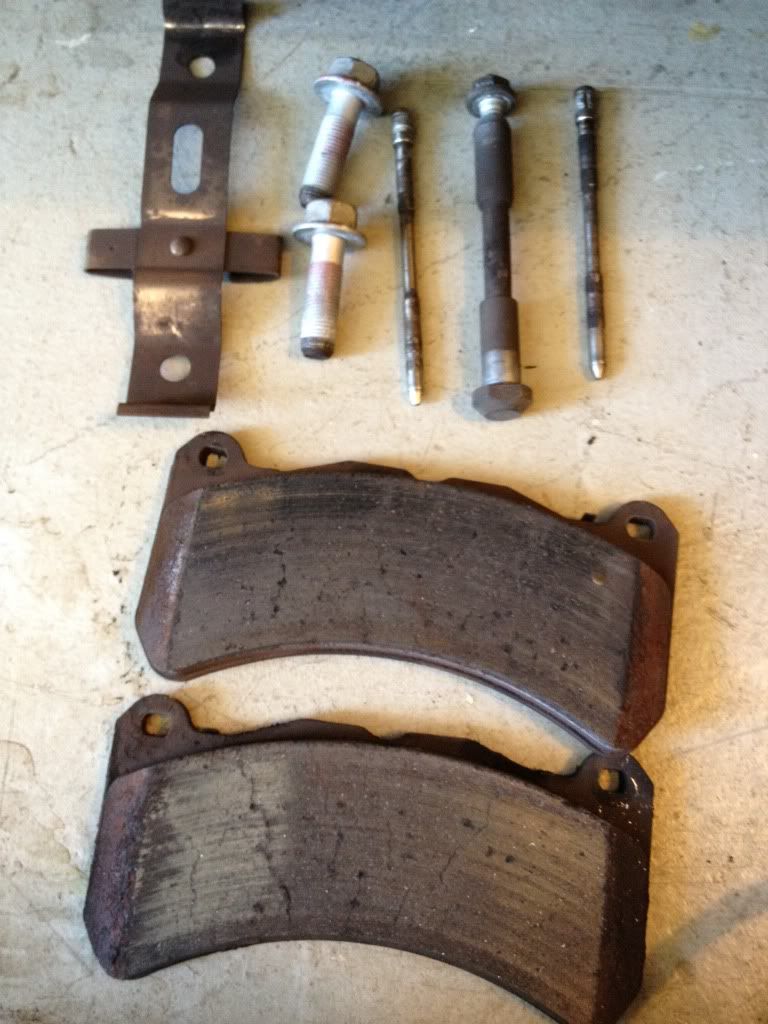
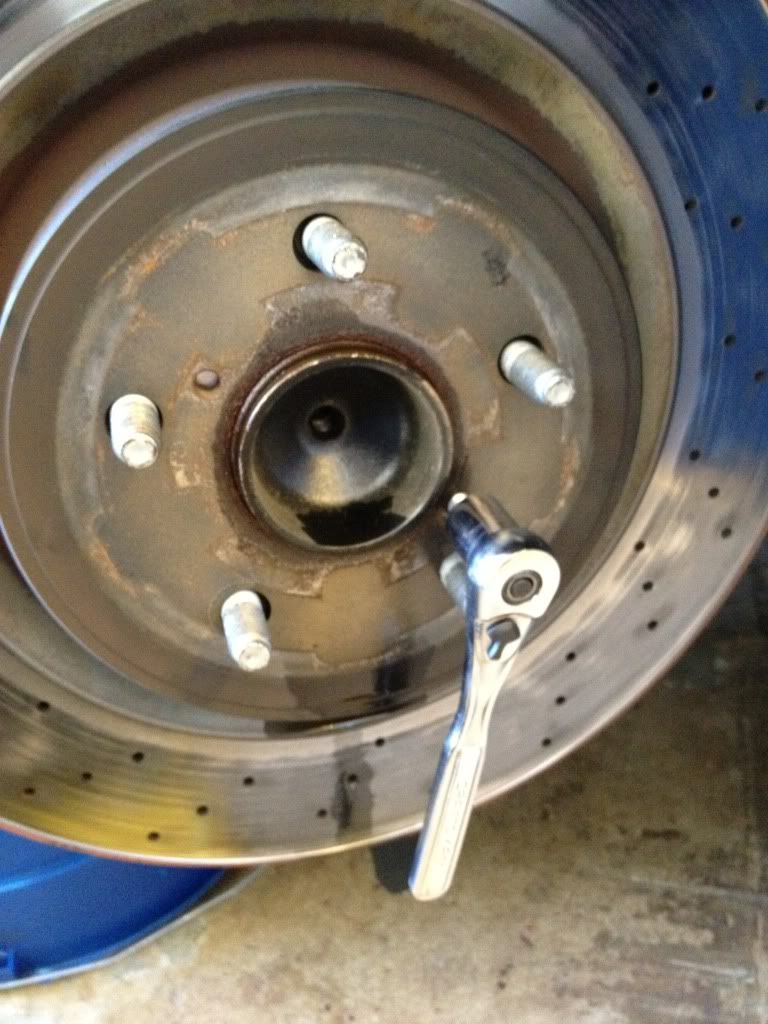
After removing the pads you can then remove the (2) 17mm bolts that hold the caliper in place. This is what you should then have. (2) pins, (1) center bolt, (1) anti-rattle clip, (2) 17 mm bolts and (2) very worn pads. (notice the hair line cracks! I definitely won't be using stock pads at the track again.
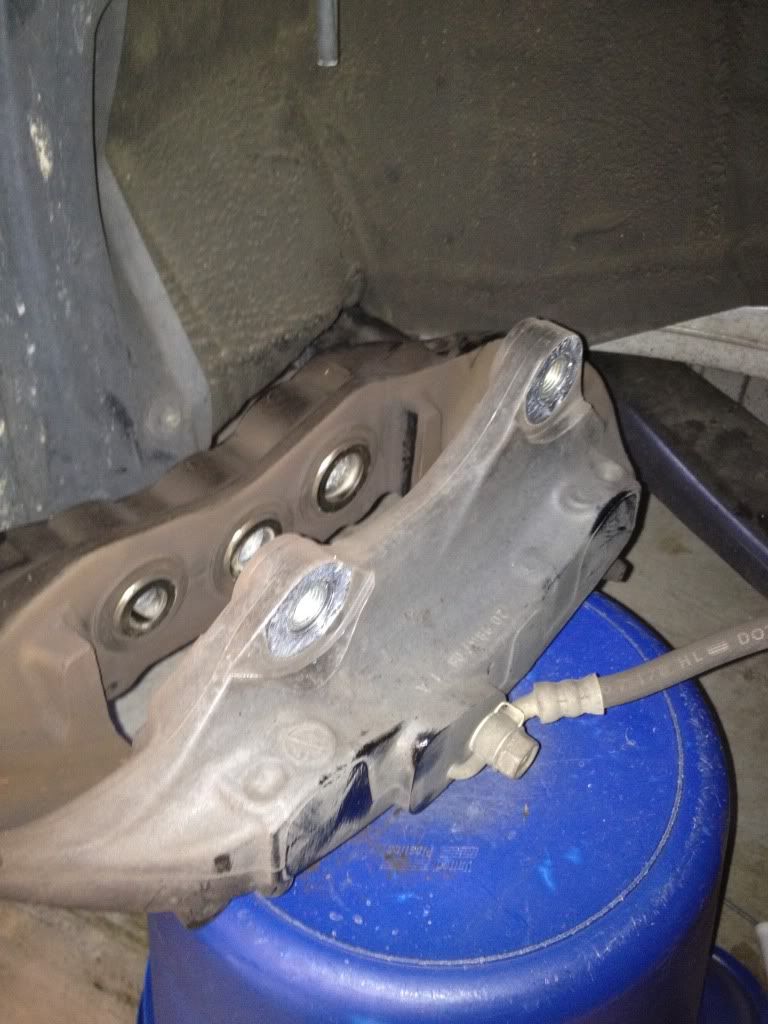
When you remove the caliper place it on something such as a bucket to prevent damage.
Step Three (optional)
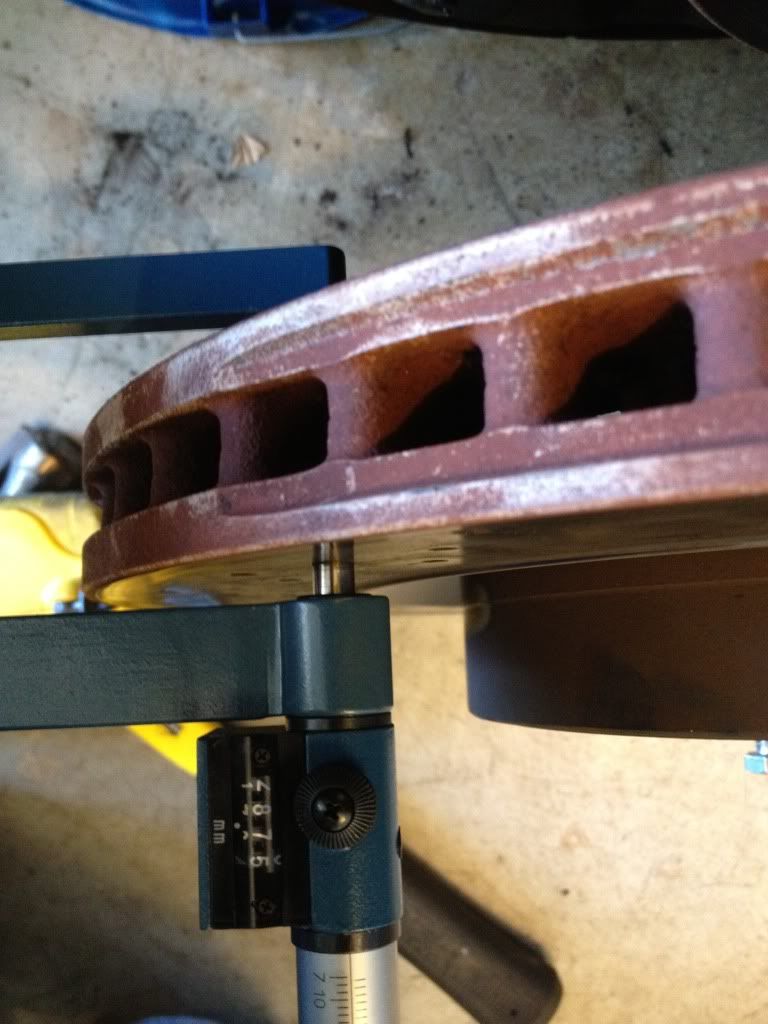
If you have a micrometer you can check the thickness of the rotors. They call for replacement at 28mm in the front. I measured 28.75, which is close enough for me.
Step Four
Spray some WD-40 or equivalent around the center hub. After about a minute take that M8x1.25 bolt and tighten into the rotor until the rotor (pops) free. My rotor was loose enough that just the one bolt was enough.
Step Five
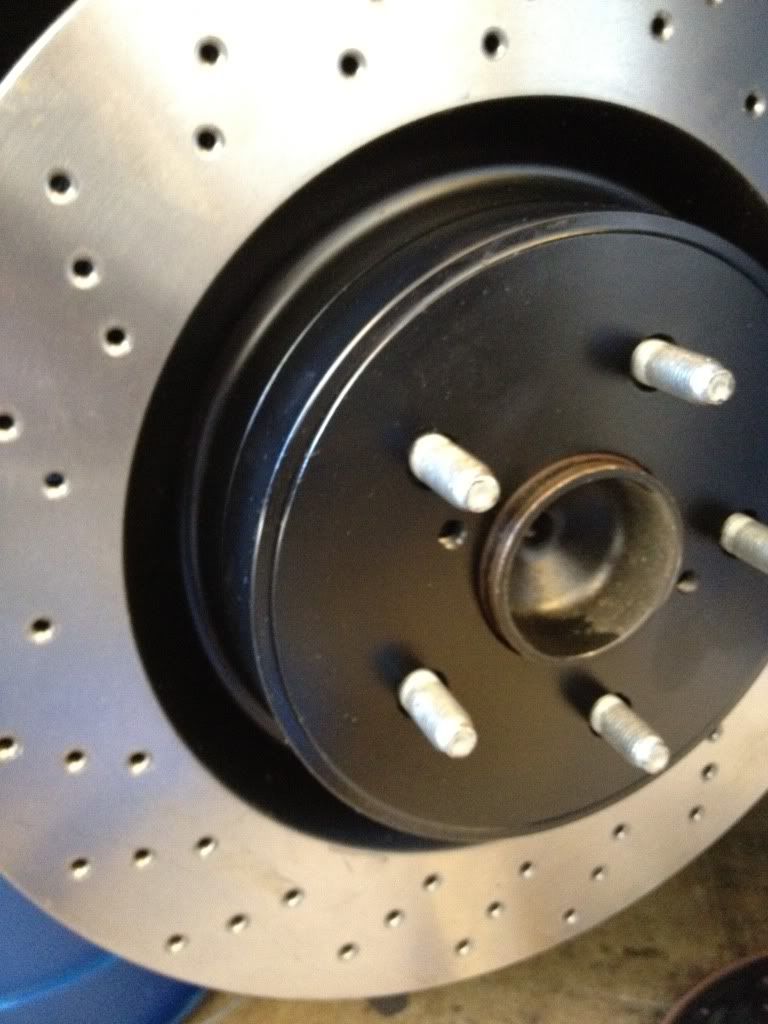
Remove old rotor and then remove any rust/debris around the the hub area to ensure the new rotor is able to sit flush.
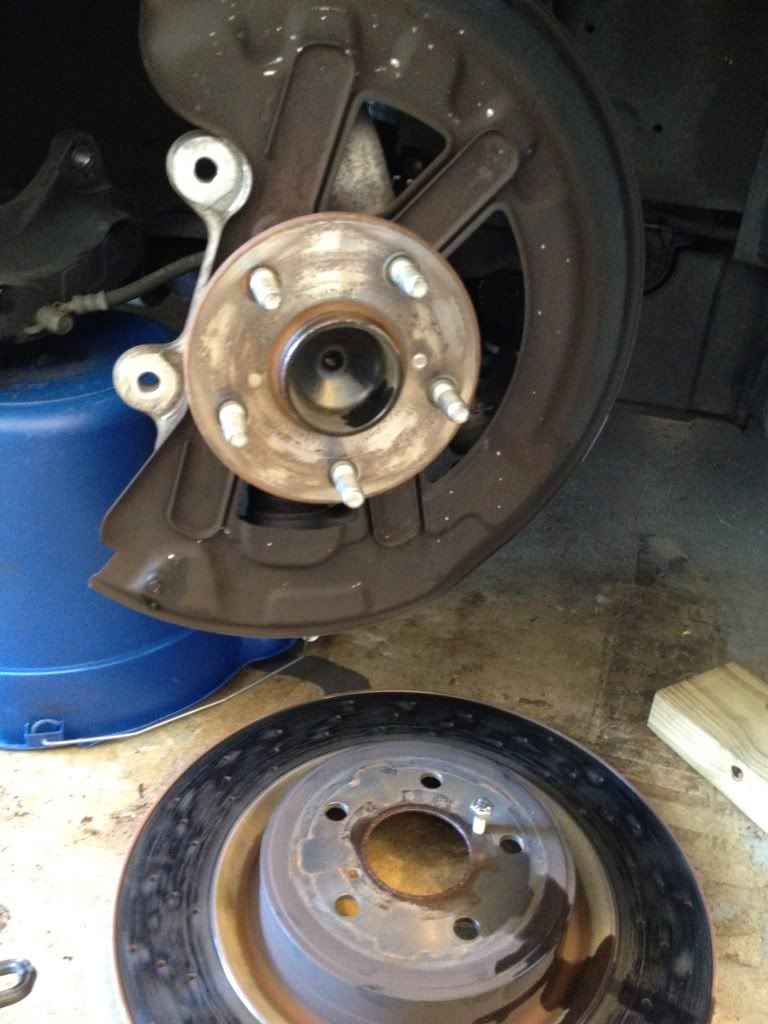
Step Six
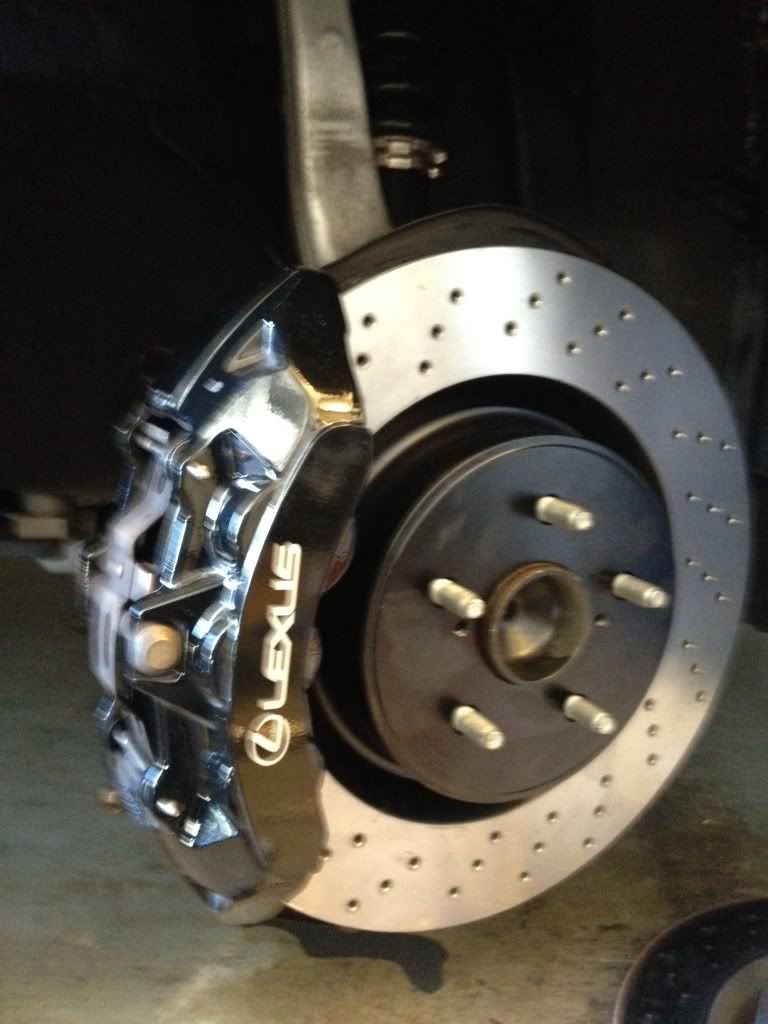
Install new rotor ensuring that it is fully seated against the hub. Once positioned I used a lug nut to temporarily hold the rotor in place. <<<<<< Just don't over tighten. With the rotor in place you can remount the caliper and torque to spec.
Step Seven
Install the new pads as shown in this thread
Step Eight
Double check that you tightened everything down and put your wheel back on ensuring you torque to spec.
Final Steps
- Double check everything including your brake fluid reservoir cap!
- Put your wheel back on and torque the lug bolts to spec
- Embed the pads to the rotor properly. I do several 60 to 10mph slow downs. Do not come to a complete stop!
- Clean up and savor the money you just saved by doing this easy brake job yourself.
Most everything you need for this project:
1. New Rotors/pads (Raybestos rotors ordered from RockAuto.com and the pads are OEM)
2. Brake Cleaner
3. WD-40 or equivalent to spray the hub
4. Disc brake lube for back of the shims
5. C-clamp or flat head screw driver to push the pistons back in the caliper
6. Hammer and Pin-punch to tap out the top pins
7. 13 and 17 mm sockets
8. M8x1.25 bolt to help remove the rotor
9. Torque bar
10. Towels and Gloves
Step One
Remove old brake pads as described in this thread.
Step Two
After removing the pads you can then remove the (2) 17mm bolts that hold the caliper in place. This is what you should then have. (2) pins, (1) center bolt, (1) anti-rattle clip, (2) 17 mm bolts and (2) very worn pads. (notice the hair line cracks!
I definitely won't be using stock pads at the track again. When you remove the caliper place it on something such as a bucket to prevent damage.
Step Three (optional)
If you have a micrometer you can check the thickness of the rotors. They call for replacement at 28mm in the front. I measured 28.75, which is close enough for me.
Step Four
Spray some WD-40 or equivalent around the center hub. After about a minute take that M8x1.25 bolt and tighten into the rotor until the rotor (pops) free. My rotor was loose enough that just the one bolt was enough.
Step Five
Remove old rotor and then remove any rust/debris around the the hub area to ensure the new rotor is able to sit flush.
Step Six
Install new rotor ensuring that it is fully seated against the hub. Once positioned I used a lug nut to temporarily hold the rotor in place. <<<<<< Just don't over tighten. With the rotor in place you can remount the caliper and torque to spec.
Step Seven
Install the new pads as shown in this thread
Step Eight
Double check that you tightened everything down and put your wheel back on ensuring you torque to spec.
Final Steps
- Double check everything including your brake fluid reservoir cap!
- Put your wheel back on and torque the lug bolts to spec
- Embed the pads to the rotor properly. I do several 60 to 10mph slow downs. Do not come to a complete stop!
- Clean up and savor the money you just saved by doing this easy brake job yourself.
Last edited by caymandive; 11-25-11 at 07:09 PM.
The following users liked this post:
AndrewISF (02-26-17)
 02-07-12 | 09:10 PM
#4
Something to keep in mind - Cole said 28mm is minimum thickness but his measured 28.75 - close enough for him - he's throwing away a rotor with 37.5% of its service life left. You only have 2mm of wear from the original 30mm. If you're concerned about keeping costs down, you'll run it to 27.99mm...


Trending Topics
 02-10-12 | 02:50 PM
#10

Is there a typical mileage one should expect to get out a non-tracked rotor? I don't own a micrometer and don't want to go out and buy one to check, if my rotors w/ 42,000 miles on them still have plenty of life left in them.
Also, does this differ from the fronts to the back?
Thanks
Also, does this differ from the fronts to the back?
Thanks
02-10-12 | 04:01 PM
#11
There is no typical mileage. It takes me an eternity to wear out rotors, and yet I've seen guys on this site claiming their rotors were shot in less than 20k miles. Honestly, I think many people get taken for a very expensive ride when it comes to brakes.
Minimum thickness is different front and rear, but it is stamped in the rotor hat so you don't need any reference manual, you can just get the number off the rotor.
A micrometer isn't essential. You can use a caliper, and even a pretty inexpensive dial caliper will be good enough for measuring rotors. The danger of going too thin is primarily cracking with a very slight chance the rotor will actually break apart. This is incredibly unlikely at street speeds. Taking a thin rotor to the track is a whole different consideration, and something I wouldn't choose myself. I have seen guys competing with rotors cracked beyond limits and they've still maintained basic integrity.
02-10-12 | 05:28 PM
#12
Awesome! I did my own front breaks (pads & rotors) a couple months ago they are very easy to swap.
I have 41k miles on my '08
I recommend people to do them yourself and save a lot of money without taking it to the dealership.
I have 41k miles on my '08
I recommend people to do them yourself and save a lot of money without taking it to the dealership.