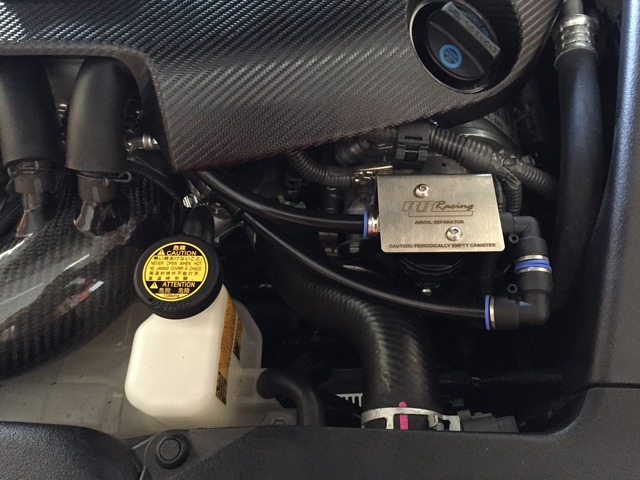
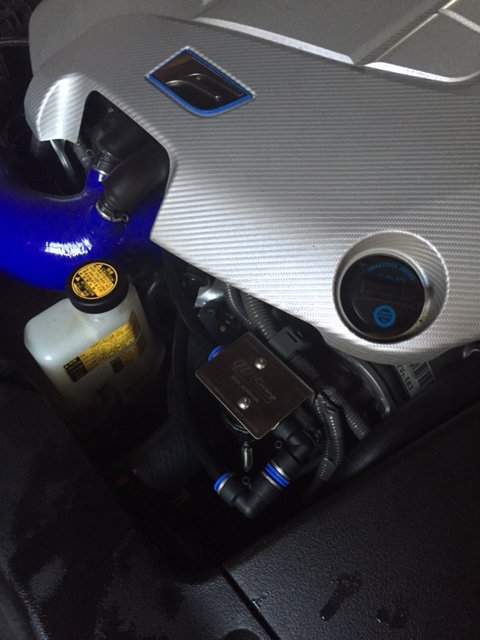
Anyone have experience with the RR Racing Air/Oil Separator
The following users liked this post:
breed (11-22-17)
#50
im going to be ordering one soon and ill do a full review and write up on one of these with install
The following users liked this post:
isfvss (01-25-17)
#51
Nice! I just got a batch of blue hose... if you would like to switch, PM me and and we will gladly send it free of charge. I think we will switch to blue hose for all future orders, seems like that's what most people prefer.
-Rafi
-Rafi
__________________
We Engineer Track Proven Upgrades For Your Lexus!
SUPERCHARGERS : ECU TUNING : SUSPENSION : EXHAUST : PPE MASTER DEALER
SUPERCHARGERS : ECU TUNING : SUSPENSION : EXHAUST : PPE MASTER DEALER
#52
Car is going in Monday for the ELF recall. I'm thinking of taking the Air/Oil separator off before it goes in since the install was so easy. Don't want the dealership breaking it and just electrical taping it back.
#53
I got my AOS in yesterday and installed it this evening. Very simple install and the instructions are very easy to follow with pictures and numbered locations. When I pulled the PCV hose off mine looked indentical to Mikersofts with a little oil puddling.
Now I need to slap on the 4 piston rear calipers!
Thanks Rafi for the freaky fast delivery to my APO box.
Now I need to slap on the 4 piston rear calipers!
Thanks Rafi for the freaky fast delivery to my APO box.
#54
I promised I would make a diy tutorial. There is no need. If you cant install this thing then you shouldnt even open your hood. Simple plug and play.
Just a little break down. RRracing air/oil separator is quality, fit well and serves a purpose. Now I dont track but I am over per-cautious and it never hurts to have an extra engine mod.
Instructions -
1. Undo PCV hose from intake manifold
2. Remove top two bolts on the crank case. They are 10mm
3. position air/oil system in place with the two crank screws you just took out. Make sure you put the spacers in on the new bolts. Botl them in.
4. Connect the stock PCV with right side hose from air/oil system
5. Then connect left hose to intake manifold.
Put all stock clamps back on. Your done. Super easy.
Some issues that I did run into.
1. The new intake manifold hose was good quality, but a super tight fit. I used a little LUBE to get her on.
2. There is a wire loom that was tight when installing the actual system to crank case. I had to move the loom clamp a little father down and actually flipped it around so it allowed the loom to be free. I was scared the metal might cut into the wires. You dont have to do this I am just super OCD.
3. Does come with instructions but they are pretty basic. Once I put two and two together it made more sense.
Other then that, great fit, would recommened to anyone. RRracing thanks for making quality products.

#56
I have seen video of my car running at the track from the view of a car right behind me for 2-3 laps and never saw any smoke. I figure it might be good just to be safe especially considering the temps we get in AZ and my tendency to still push the car in the heat. Its only $160
#57
I was able to get out for a few hours drive sustaining 120-140 for majority of the drive with occasional 150-160's. The car seem to run smoother after installing the AOS. This could be just placebo. I will check the catch and oil level this evening and see if there was a change in either.
#58
I have seen video of my car running at the track from the view of a car right behind me for 2-3 laps and never saw any smoke. I figure it might be good just to be safe especially considering the temps we get in AZ and my tendency to still push the car in the heat. Its only $160
#59
I have seen video of my car running at the track from the view of a car right behind me for 2-3 laps and never saw any smoke. I figure it might be good just to be safe especially considering the temps we get in AZ and my tendency to still push the car in the heat. Its only $160
I know you are a track junkie, and I guarantee you that you would be shocked to see how much oil you will accumulate in a typical track day. I empty my AOS after every 1/2 hour session.
Here is what we accumulated after 4 sessions at NJMP:
__________________
We Engineer Track Proven Upgrades For Your Lexus!
SUPERCHARGERS : ECU TUNING : SUSPENSION : EXHAUST : PPE MASTER DEALER
SUPERCHARGERS : ECU TUNING : SUSPENSION : EXHAUST : PPE MASTER DEALER
#60
And every engine will be different. The biggest issue here is ring fit. With good rings, there is little blowby, with poor ring fit, there is lots of blowby. I've been through lots of this back in the days I was building road race engines for motorcycles.


 I ordered mine with blue hoses
