
DIY: Looks as good as the $300+ Black badges sold online!
 09-25-09 | 10:18 AM
#1

I have no problem paying money for quality modifications for my cars….but $$$ for plastic badges is just rape IMO! For me it’s even more wasteful since I already have my front grill painted gloss black so I only needed the rear trunk badges blacked out.
Anyways this whole project took me 2 days only because of drying time which is the key step in getting this to turn out professionally.
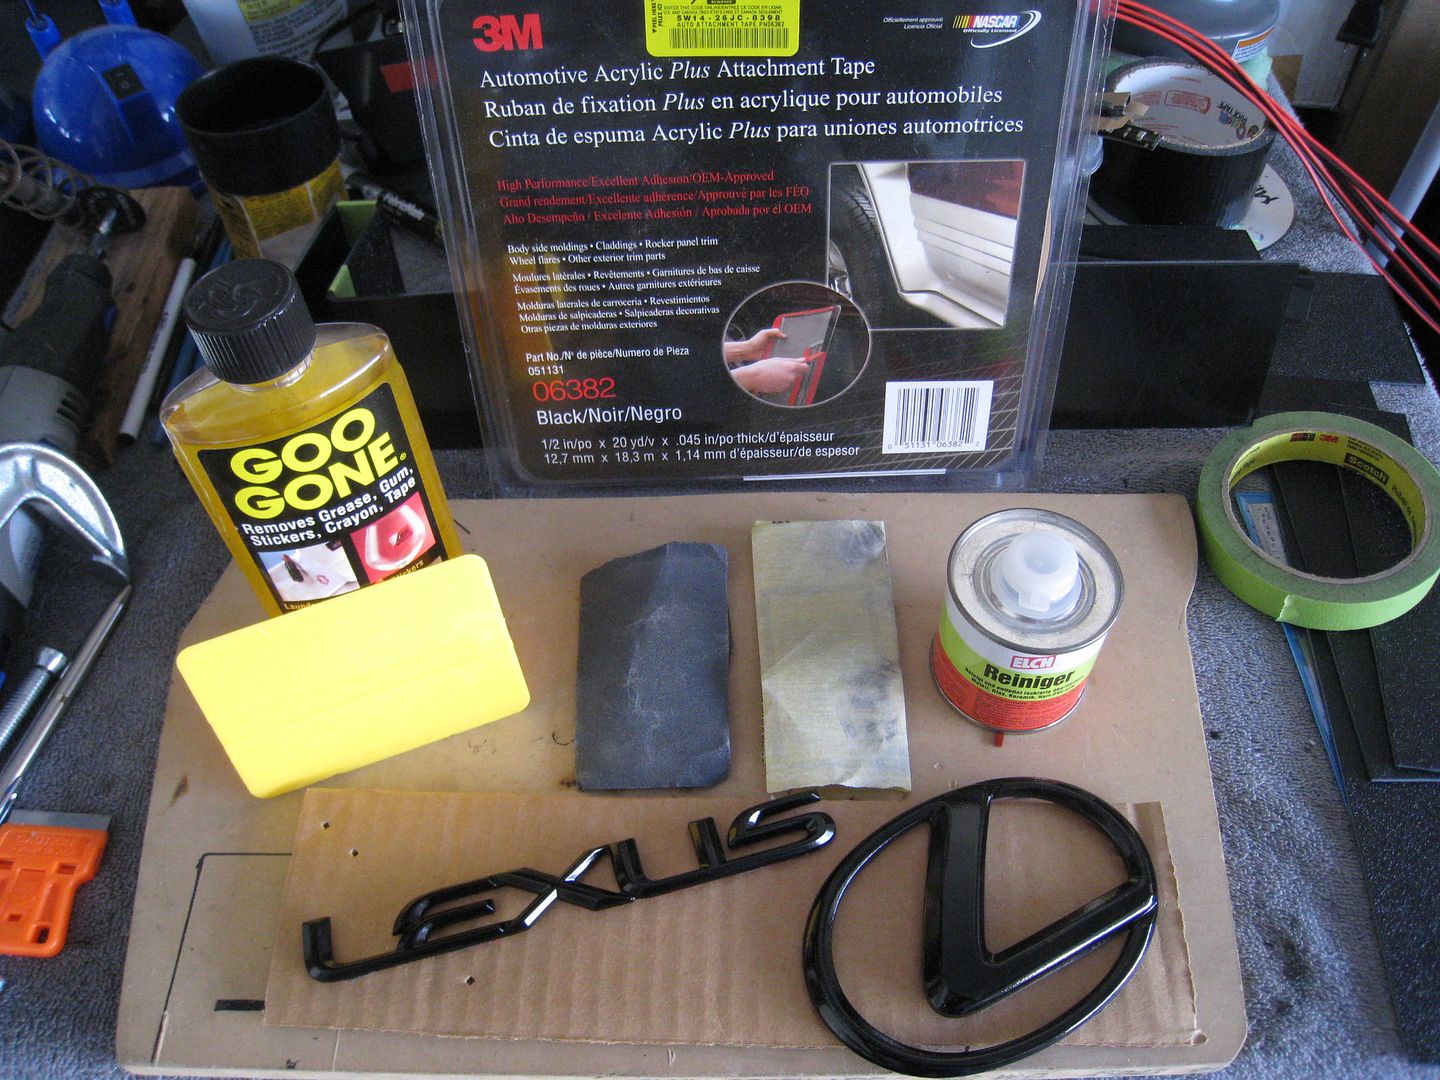
Here’s a list of what you need:
1) Heat Gun
2) Plastic scraper to remove badges
3) Bottle of Goo Gone
4) Rubbing Alcohol
5) 300 and 1000 grit sandpaper
6) 3M Double sided tape
7) PATIENCE
Lexus has small guide holes on the Lexus badge, L-logo, and the “I” but not the “S” for some odd reason so replacement is really easy. The overall result turned out perfect (and I’m a perfectionist).
First step is to wash the trunk area since you don’t want any dirt or debris in the surrounding areas. Then use the heat gun set on low heat and keep it moving back and forth to soften the adhesive tape. Use the plastic scraper to carefully pry the badge away working from one end and be careful not to force it or the badge will bend. Repeat this process for all the badges. Once all removed, use the Goo Gone to clean all the surfaces so there are no sticky residue left. My advice is to do this in the garage on a warm day so the paint surface is easy to adhere to the tape.
Next take the 300 grit sandpaper and sand every surface of the badge. This will take some time since the smaller ones you really have to work it a bit. The idea is to create a surface for the primer to stick to better by creating a rougher surface. Finish with the 1000 grit paper and wash all the badges under soapy water and let dry thoroughly.
For the painting process, do it outdoors with adequate sunlight. This will help speed up the drying process. Spray paint bottles work best if they are slightly warm too. Start with 2 LIGHT coats of primer with about 20 minutes drying time between. Take your time and use light coats. After the second coat of primer is dry you can spray your black color. I simply used gloss black automotive paint. Do 3 layers of black and be sure to let each layer dry. Lastly finish it off with 2 light coats of clear coat and you are done.
I let it completely dry overnight to be safe. Next clean each badge with rubbing alcohol and don’t touch the back again since your fingers have oils. Use the 3M tape to carefully re-apply the double sided tape on each badge. Clean the trunk areas with rubbing alcohol next and let it dry. Stick on the new badges and you are DONE!
Total cost of this project - $15.00, not having to pay someone $300+ dollars (priceless)
I took some pictures so stay tuned but hope this helps. The new look is stunning and night/day difference!
Rick
Anyways this whole project took me 2 days only because of drying time which is the key step in getting this to turn out professionally.
Here’s a list of what you need:
1) Heat Gun
2) Plastic scraper to remove badges
3) Bottle of Goo Gone
4) Rubbing Alcohol
5) 300 and 1000 grit sandpaper
6) 3M Double sided tape
7) PATIENCE
Lexus has small guide holes on the Lexus badge, L-logo, and the “I” but not the “S” for some odd reason so replacement is really easy. The overall result turned out perfect (and I’m a perfectionist).
First step is to wash the trunk area since you don’t want any dirt or debris in the surrounding areas. Then use the heat gun set on low heat and keep it moving back and forth to soften the adhesive tape. Use the plastic scraper to carefully pry the badge away working from one end and be careful not to force it or the badge will bend. Repeat this process for all the badges. Once all removed, use the Goo Gone to clean all the surfaces so there are no sticky residue left. My advice is to do this in the garage on a warm day so the paint surface is easy to adhere to the tape.
Next take the 300 grit sandpaper and sand every surface of the badge. This will take some time since the smaller ones you really have to work it a bit. The idea is to create a surface for the primer to stick to better by creating a rougher surface. Finish with the 1000 grit paper and wash all the badges under soapy water and let dry thoroughly.
For the painting process, do it outdoors with adequate sunlight. This will help speed up the drying process. Spray paint bottles work best if they are slightly warm too. Start with 2 LIGHT coats of primer with about 20 minutes drying time between. Take your time and use light coats. After the second coat of primer is dry you can spray your black color. I simply used gloss black automotive paint. Do 3 layers of black and be sure to let each layer dry. Lastly finish it off with 2 light coats of clear coat and you are done.
I let it completely dry overnight to be safe. Next clean each badge with rubbing alcohol and don’t touch the back again since your fingers have oils. Use the 3M tape to carefully re-apply the double sided tape on each badge. Clean the trunk areas with rubbing alcohol next and let it dry. Stick on the new badges and you are DONE!
Total cost of this project - $15.00, not having to pay someone $300+ dollars (priceless)
I took some pictures so stay tuned but hope this helps. The new look is stunning and night/day difference!
Rick
 Process didn't take too long and sounds fairly easy. I'd like to see the pics once you have them up
09-25-09 | 04:28 PM
Process didn't take too long and sounds fairly easy. I'd like to see the pics once you have them up
09-25-09 | 04:28 PM
#3
awesome post,
excellent, cant wait to see the pics
and when u reapplied the 3m tape
did u have to trim?
im not to familiar with that product
so im sorry if its a dumb question
and i agree that its a total rip off to pay that much
someone like "doug" should offer a similar option like he does with the painted engine cover where we can swap and exchange them for black
09-25-09 | 10:58 PM
#7
Trending Topics
09-26-09 | 01:03 AM
#8
ok for the rest of us who can't sell their stock badges painting works

Yes black chrome, matte black and gloss black are some options. Obviously with spray paint, the latter 2 are easier.
I love the final look, so much more aggresive!


 Goo Gone works wonders..i used that to remove my badges on the GS..
 09-28-09 | 08:13 AM
#14
Painting the Lexus “L” on the front grill is same process so no issues there however the entire front grill is a different story. It’s a rather large piece and any imperfections will be more noticeable. I had my front grill sprayed gloss black at my local body shop and paid them to do it right.
Here’s what the badges look like now:
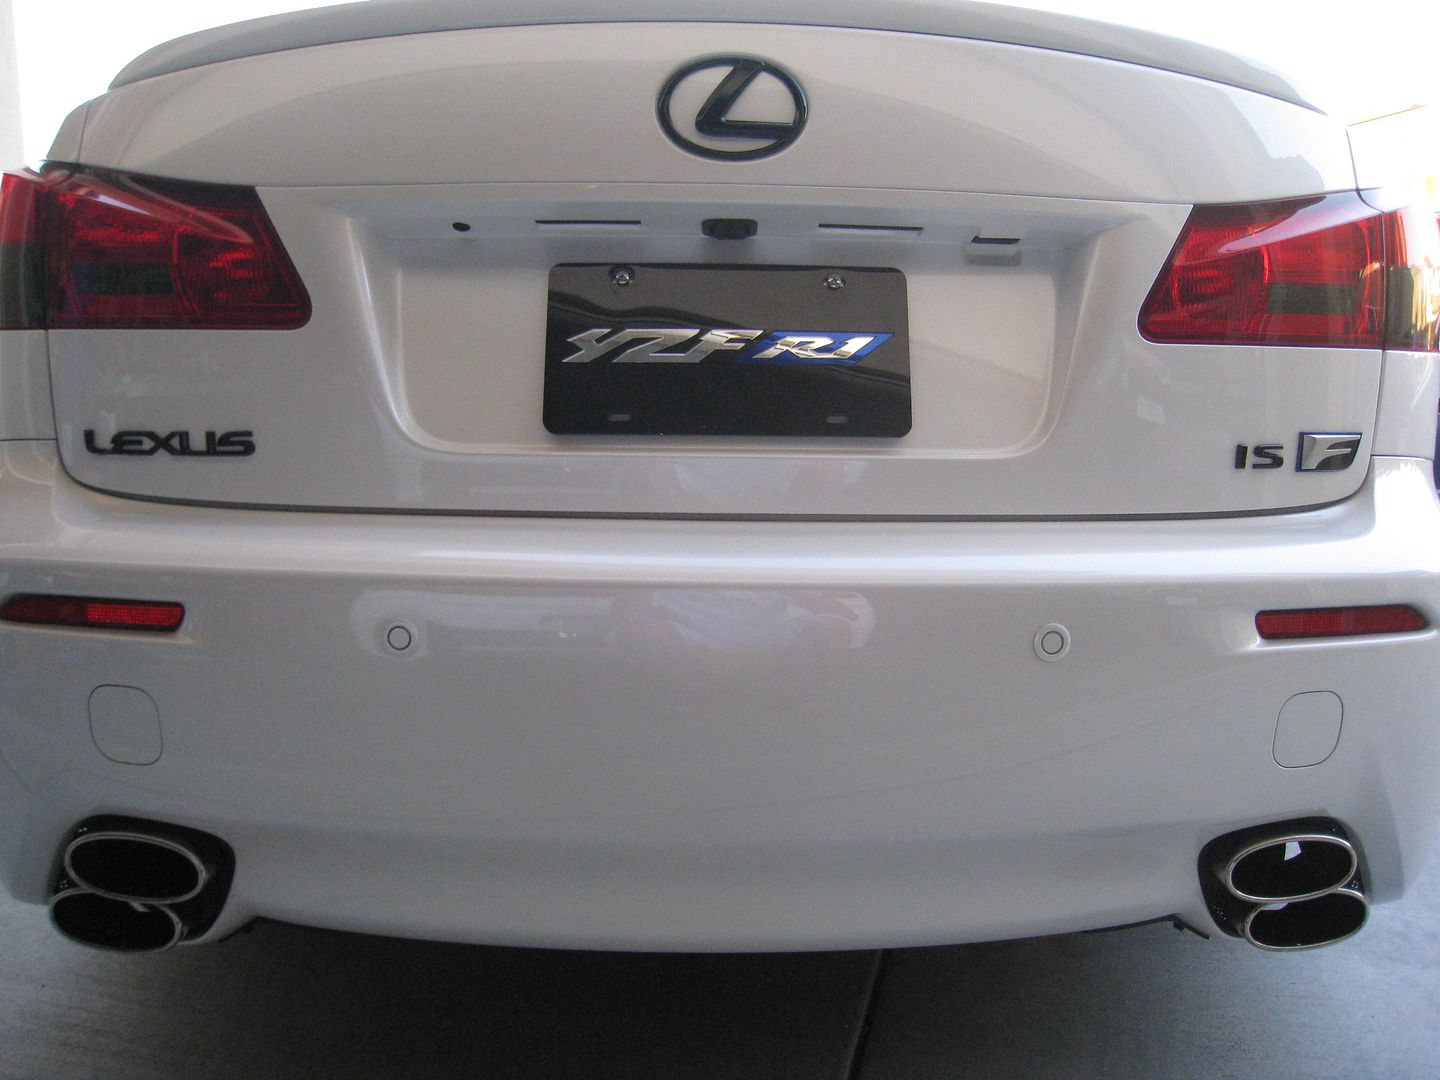
Here’s what the badges look like now: