DIY: 9" DVD double headrest monitor in my SIENNA SE
 01-24-11, 04:46 PM
#1

My 9" DVD eonon double headrests with black leather arrived last week. It comes with the regular remote, game remote, manual, headphone.
Let me tell you, the screens are huge and the headrest is even bigger.
Quality is good, padding is good. I even love the new leather scent after installing them
I'll see if I find something white to rub onto the stitchings to match the oem SE leatherette.
After you open the lid up, you can the see the blue SONY lens imprint that they claim they are using.
The 640 pixel is pretty good actually. We'll see how long these.
Installation took over 2 hours b/c I didn't use the cigarette lighter adapter for the power source. Time was spent hiding and tucking the wires neatly for a clean look.
The seat backrest does NOT need to come out. I just used the clothes hanger to fish the wires. If you're using clothes hanger, bend and tape the end so it's not pointy and won't poke the backrest. If you have the heavier duty fishing tool, it'll be ALOT easier.
Angle your fishing line to left for the left pole, and angle to the right for the right pole.

cable layout and inserted. left tubing is also inserted. The 12 mm isn't wide enough. I used the foam pad that came with the screen and squeezed them into the headrest poles and they were pretty firm. I'm going to check with the seller to see if he has thicker ones, probably 14 mm.


preparing

a/v out is shorter at the top, so black tape was used so it doesn't slip when you're pulling it down

left side-A/V out

right side-A/V in

underneath the left seat

getting ready to fish cable, going under the right seat post.

Use a 14mm to loosen the bolt to allow room for the cable going under the carpet.

exit a little early, going to go across and under the console

if you want AUDIO OUT to the AUX IN, use a 1/8" to RCA audio extension cable that you can run along the middle console to the front. There's an option to use the built wireless FM-modulator that I haven't tried yet, probably won't it.

hooking the a/v out to a/v in. I won't be using the AUX in. However, it's under the seat and easily accessible if I change my mind.

routing to the right side. again, use 14mm socket to remove the screw to allow for more cable clearance


under the right seat is where the cable will exit

there's the exit point-forgive the hairy arm pic

voila

3 ways to power the dvds:
1. power tap here for constant on, no keys needed

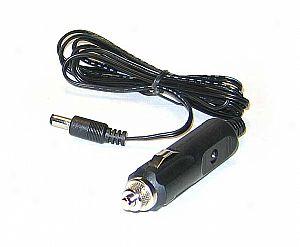
2. or use the cigarette adaptor, wire the 2 dvds in series and plug it into the cig. lighter under the dash. You can pick one up for around $5'ish at the auto parts store. You don't need one with a fuse since the supplied power wire for each dvd has a fuse built in.
I had a spare laying around and it worked fine.
3. However, I prefer the clean install, no wires dangling, so I spliced the wires behind the top cigarette lighter.
Pull the cig. lighter unit with cubby (circled in red) out towards you, it's pretty easy. You'll see the wires behind there. Sorry, I don't have pictures of that. Left plug is (+) and right(-) I believe. Re-verify with a simple light tester.
Run each wires separately (labeled in purple) along the center console, tucking the wires inside and going under the seat base. If I get a chance, I'll take some pictures of these (if anyone wants to see it)

red light-power indicator


right screen, with subtitles on. I'll be using this as the slave screen though rather than an individual dvd player.

There's a setting in the screen to select where the movie will resume when you start it up again.
Enjoy! If you have any questions, let me know.
Let me tell you, the screens are huge and the headrest is even bigger.
Quality is good, padding is good. I even love the new leather scent after installing them
I'll see if I find something white to rub onto the stitchings to match the oem SE leatherette.
After you open the lid up, you can the see the blue SONY lens imprint that they claim they are using.
The 640 pixel is pretty good actually. We'll see how long these.
Installation took over 2 hours b/c I didn't use the cigarette lighter adapter for the power source. Time was spent hiding and tucking the wires neatly for a clean look.
The seat backrest does NOT need to come out. I just used the clothes hanger to fish the wires. If you're using clothes hanger, bend and tape the end so it's not pointy and won't poke the backrest. If you have the heavier duty fishing tool, it'll be ALOT easier.
Angle your fishing line to left for the left pole, and angle to the right for the right pole.
cable layout and inserted. left tubing is also inserted. The 12 mm isn't wide enough. I used the foam pad that came with the screen and squeezed them into the headrest poles and they were pretty firm. I'm going to check with the seller to see if he has thicker ones, probably 14 mm.
preparing
a/v out is shorter at the top, so black tape was used so it doesn't slip when you're pulling it down
left side-A/V out
right side-A/V in
underneath the left seat
getting ready to fish cable, going under the right seat post.
Use a 14mm to loosen the bolt to allow room for the cable going under the carpet.
exit a little early, going to go across and under the console
if you want AUDIO OUT to the AUX IN, use a 1/8" to RCA audio extension cable that you can run along the middle console to the front. There's an option to use the built wireless FM-modulator that I haven't tried yet, probably won't it.
hooking the a/v out to a/v in. I won't be using the AUX in. However, it's under the seat and easily accessible if I change my mind.
routing to the right side. again, use 14mm socket to remove the screw to allow for more cable clearance
under the right seat is where the cable will exit
there's the exit point-forgive the hairy arm pic
voila
3 ways to power the dvds:
1. power tap here for constant on, no keys needed
2. or use the cigarette adaptor, wire the 2 dvds in series and plug it into the cig. lighter under the dash. You can pick one up for around $5'ish at the auto parts store. You don't need one with a fuse since the supplied power wire for each dvd has a fuse built in.
I had a spare laying around and it worked fine.
3. However, I prefer the clean install, no wires dangling, so I spliced the wires behind the top cigarette lighter.
Pull the cig. lighter unit with cubby (circled in red) out towards you, it's pretty easy. You'll see the wires behind there. Sorry, I don't have pictures of that. Left plug is (+) and right(-) I believe. Re-verify with a simple light tester.
Run each wires separately (labeled in purple) along the center console, tucking the wires inside and going under the seat base. If I get a chance, I'll take some pictures of these (if anyone wants to see it)
red light-power indicator
right screen, with subtitles on. I'll be using this as the slave screen though rather than an individual dvd player.
There's a setting in the screen to select where the movie will resume when you start it up again.
Enjoy! If you have any questions, let me know.
Last edited by GS3Tek; 01-24-11 at 04:49 PM.


Thread
Thread Starter
Forum
Replies
Last Post
swifteeeee
GX - 1st Gen (2003-2009)
3
05-13-10 12:48 PM
jamessinh
1Gen IS300 Classifieds (98-05)
1
05-22-07 05:39 PM