When you click on links to various merchants on this site and make a purchase, this can result in this site earning a commission. Affiliate programs and affiliations include, but are not limited to, the eBay Partner Network.
DYI - Amplifier Integration and Bypass; ES300 Audio Upgrade
There are a bunch of existing threads about aftermarket head units going into an old 3ES ('97-01 ES300) that talk about either using or bypassing the factory amplifier. I'm starting yet another thread, at this late date, to summarize and document what I've learned or discovered (but haven't seen clearly written up elsewhere).
Summary -- This is about upgrading the factory "Lexus Premium Sound System" in the '97-01 ES300 sourced from Pioneer. Update: further research suggests that these bypass instructions also apply to the Nakamichi factory option. It explains how to cleanly integrate an aftermarket head unit with the factory amplifier and speakers, then optionally bypass the factory amp while still utilizing the factory speakers (or at least the factory speaker wiring if you also plan to upgrade the speakers and/or subwoofer). All the posts I've seen about bypassing the factory amp conclude on identifying which factory wires to cut... don't do that. We can use Metra harnesses connecting with factory plugs so that all we do is cleanly reversible.
If you're still reading this, you're likely in one of the following states or "phases". Under each phase, I explain why you may want to go to the next phase and list / link to the parts needed to get there:
Phase 0 - Totally stock virgin OEM sound system. It's not bad, but you're tired of using CDs and a cassette or FM adapter to connect your smartphone. Chances are, the LCD display in your factory head unit is also burnt out. You get a new head unit (with modern smatphone support) and integrate to the factory amplifier, speakers and subwoofer (they sound OK, right?). You're now aiming for what I call "Phase 1", an aftermarket head unit “integrated” with (connected to) the factory amp, speakers and subwoofer. Because there are plenty of other DIYs and videos that document this straightforward installation, I won't go into how it's done, but to get to phase 1 you'll need the following stuff:
An aftermarket Head Unit. To connect the factory amp, it must have 4-channel stereo line pre-outputs (4 RCA connectors). IMHO It should also have high-level speaker outputs with at least 4x20w RMS @ 4ohm (to optionally drive the factory door speakers in Phase 2).
An aftermarket Dash Kit / mounting panel. I chose the Scosche over the Metra. Read the
The Wiring Adapter or "Harness" to connect your Head Unit into the existing wire bundle plug in the ES300 that was plugged into the factory head unit and connects to the factory amp (for now):
For '97-99 ES300 models: Metra 70-8112 "Toyota AMP Integration 15 Pin" (or equivalent). Note that this harness lacks an orange "illumination" wire to inform your new head unit of when you turn on your headlights. Rumor has it some competing harnesses do (or did?).
For 2000-2001 models: Metra 70-8113 "Lexus/Toyota 2000-2007" - a 20-pin connector leading to the factory amp. I don't know about the orange wire in this case (I have a '98 3ES : - ).
ES300 models with the Nakamichi amp also use the Metra 70-8113 "Lexus/Toyota 2000-2007" harness.
Phase 1 - Aftermarket Head Unit connected to Factory Amplifer, Speakers and Subwoofer. Whether you did it yourself or inhereited it from the previous owner, I hope your aftermarket head unit was well chosen and correctly installed using the parts outlined above. This configuration can sound OK, but unless you're very lucky or using a bunch of filters to hide the problem, you will hear some ground noise (a background hiss or buzz - faint at times and louder at others) along with a higher-pitched whining interference from the alternator that increases with engine RPM. Also, most will hear a solid "Pop!" through the speakers whenever the factory amp turns on or off. I put up with this for a while before deciding to bypass the factory amp: "Phase 2". Getting from a noisy factory amp "integration” Phase 1 to Phase 2 with the bypassed factory amp is mostly what this post is all about, so details and pictures follow below. To get to Phase 2 from Phase 1, you'll need the following:
[Another] Metra 70-8112 "Toyota AMP Integration 15 Pin" harness. This will connect to the amplifer-end of the wire bundle that runs between the Head Unit and the factory amp.
The Metra 70-1761 "Toyota / Scion / Subaru 1987-Up Harness". This connects to the factory speaker wiring and (in conjunction with the Metra 70-8112) reroutes 12v power back to your head unit.
About 12 feet of good speaker wire, cut into eight 18-inch lengths, to span the distance between the high-level speaker outputs of your aftermarket HU's harness to the Metra 70-1761 harness and factory speaker wiring behind the glovebox. (Feedback) NOTE: when connecting these wires, you can go ahead and disconnect the 4 RCA plugs of the 1st Metra 70-8112 from the back of the Head Unit (they may not interfere with Phase 2, but they serve no purpose once the factory amp is bypassed).
Phase 2 - Factory Amplifier cleanly bypassed with Aftermarket Head Unit connected to factory speaker wiring. This is where we're aiming to get to without cutting & splicing any original factory wires. NOTE: Phase 2 abandons the factory subwoofer under the rear window because it depends on the factory amp for power (see Phase 3). Nonetheless, assuming your aftermarket head unit has a decent internal amplifier and sufficient power to drive the front and rear door speakers, this should sound noticeably better than Phase 1 (even with the rather weak factory subwoofer disconnected).
Phase 3 - Add a powered Subwoofer; an Aftermarket Amplifier; upgraded Speakers.
Having gotten to "Phase 2" you'll likely want to restore or replace your subwoofer… perhaps by adding an external 5-channel amplifier that can properly power the factory door speakers and subwoofer. The options are here are too numerous to discuss in this post, but feel free to ask questions or share your "Phase 3 configuration" later on in this thread.
NOTE: If you’re currently at Phase 0 (totally stock) with plans to go directly to something Phase 3ish with an aftermarket external amp, consider getting only the Metra 70-1761 harness for head unit power and access to factory speaker wiring… See this post.
Getting to "Phase 2" (a clean & reversible factory amp bypass)
The following images were taken behind the glovebox where the factory amplifier is mounted. Please refer to the image captions and embedded text.
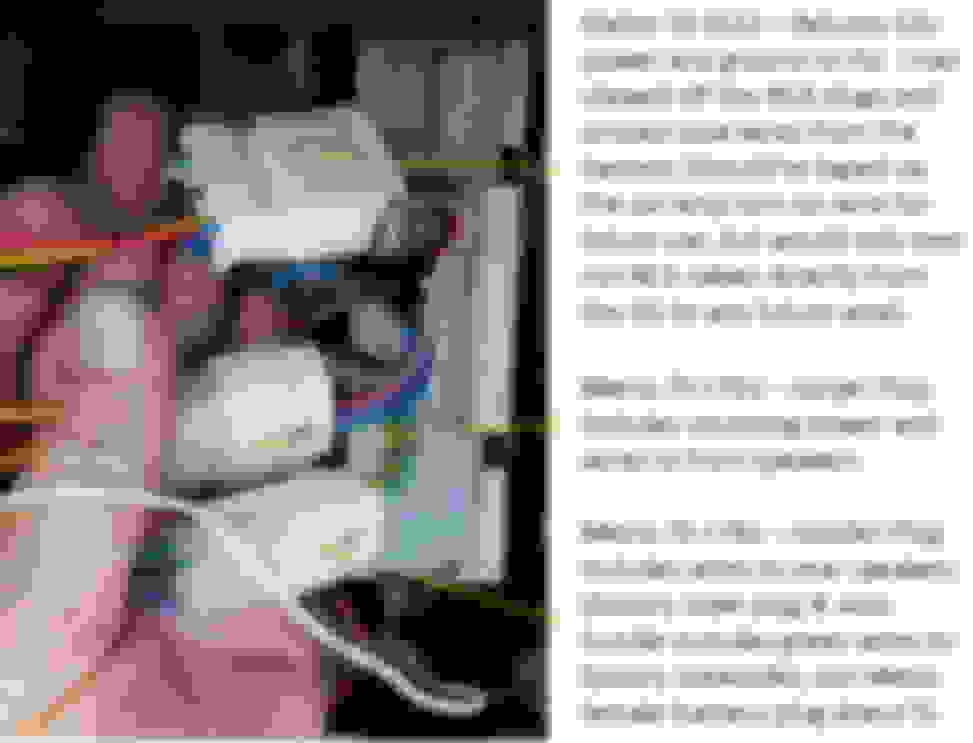
This image, taken behind the glovebox, shows the ECU (on the left) and the Factory Amplifier we're about to bypass, with 3 wire bundles plugged into it, on the right. NOTE: this picture shows the more common factory amp sourced from Pioneer; apparently the optional factory Nakamichi amp uses the exact same connectors.
This shows the 3 wire bundles previously plugged into the factory pioneer amp (shown in its "bypassed" state behind on right) now connected to Metra 8112 and 1761 harnesses. The white wire by itself can be ignored... I had attached it to the factory amp chassis looking for a cleaner ground source for my aftermarket HU in "Phase 1" (it didn't help eliminate the noise).
Incoming 12v power (12v accessory, 12v constant & ground) flows through the factory amp to the Head Unit. Connecting the red, yellow and black wires of the '8112 and '1761 harnesses as shown will reroute power back to the Head Unit while bypassing the factory amp.
This shows the two female sockets of the Metra 70-1761 harness. The black wires in the upper left extend the high-level speaker outputs from the Head Unit to the speaker leads of the Metra 70-1761 harness (connected using crimp caps). NOTE: Be CAREFUL when matching the speaker outputs of the head unit to the color-coded speaker leads of the 70-1761 harness using unmarked extension wires. Double-check your work because mixed up polarities (positive/negative) will sound like ****.
As mentioned above, this "Phase 2" factory amp bypass, abandons the (2 ohm) factory subwoofer that's dependent on an external amp. My aftermarket Head Unit, an ATOTO A6 Pro, has a decent internal amp that's said to deliver 29w RMS to all 4 door speakers. Connecting it directly to the factory pioneer door speakers (with the component tweeters in the front doors) clearly sounded much cleaner and better than the factory amp had (even when abandoning the factory subwoofer in the bypass). Your mileage may vary, etc. The good news is that you can now simply unplug your new harnesses behind the dash and reconnect to the factory amp for comparisons (assuming the RCA leads remain connected to the aftermarket Head Unit - I disconnected mine).
For my "Phase 3" I added an old Infinity BassLink powered/active subwoofer in the trunk, and removed the factory subwoofer from under the rear window (to better let the thump out of the trunk). I also finally replaced all the factory door speakers with some well-regarded but lower-end JBLs (component woofers & tweeters in front with matching 2-way speakers in the rear doors)... this last door speaker "upgrade" made less improvement than did the new (Phase 1) Head Unit, the (Phase 2) factory amp bypass, and the (Phase 3) powered subwoofer had... Those old factory made-in-japan Pioneer woofers in the doors were pretty hefty!
All done (for now)! - Here's my '98 ES300 with the ATOTO A6 Pro Android Head Unit, the (Infinity) subwoofer remote gain control between the steering wheel and climate controls; A strap-on Steering Wheel Controls remote, a wireless charging smartphone mount (camouflaged & shaded with silk bamboo leaves), and my 20oz water bottle sitting securely thanks to my cup-holder hack.
Thanks and credit to @teamgoon in this ClubLexus thread from 17 years ago for pointing out that one should use the AAMP/Best harness #BHA1761 (Metra 70-1761 equiv) to cleanly connect into the factory speaker wiring (originally connected to the factory amp). Thanks also to @NYC ES3 for starting that thread and the nifty amp wiring pic.
Last edited by BMeek; 05-20-21 at 08:46 PM.
Reason: Update OP with further lessons learned re: Nakamichi and “straight to Phase 3” considerations
A quick question. Since were connecting the color coded speaker wires of the Metra 70-1761 directly to the head unit harness, does this mean that it isn't necessary to connect the four RCA plugs of the original '8112 into the head unit itself?
A quick question. Since were connecting the color coded speaker wires of the Metra 70-1761 directly to the head unit harness, does this mean that it isn't necessary to connect the four RCA plugs of the original '8112 into the head unit itself?
Yes - the RCA line outs from the head unit need only be plugged into the '8112 harness when using the factory amp.
If you're installing an aftermarket external amp or powered sub, connect your RCA cables directly to the HU rather than through the RCA plugs of the two '8112 harnesses. I assume the latter approach would work, but not as cleanly.
Ah, then that's why it sounds terrible. I followed your write-up with no issues at all; I just had to take to my time. Logically I guess I was thinking to plug everything in to where anything should go, and I connected the original "phase 1" '8112 harness onto the four RCA lines on the head unit when I apparently shouldn't have.
This would mean the "phase 2" bypass disconnects/leaves out those RCA cables; the only thing connected to the head unit should be the Atoto harness then.
Hopefully there's no potential damage that could happen since they're connected and shouldn't be?
I don't recall any obvious noise with the RCA plugs left unnecessarily connected, but I did unplug mine while I was back there. The '8112 harness uses a common signal ground wire for all 4 channels/RCA plugs, so maybe that draws voltage and/or introduces ground noise with some head units?
I've been thinking to edit the original post because it's just too damn long, but I'll at least add the recommendation to disconnect the Metra 70-8112 harness' RCA plugs from the head unit while bypassing the factory amp.
Your post wasn't too long in any way, I actually wouldn't have been able to complete my install if it wasn't as detailed at it was since it didn't presuppose any prior knowledge or experience, which I didn't have when it comes to radio wiring.
So I disconnected the four RCAs from the head unit this morning and there was no improvement. Both the right front and right rear speakers have that papery blown speaker rattle even at pretty low volume. I'm most certain the speakers aren't damaged though as the stock system sounded excellent. I have no idea what could be the issue. I was hoping for the same result that you got with the new head unit taking advantage of those sturdy Pioneers in the car, but something is amiss.
I'm not sure what my troubleshooting path should be, but I'm tempted to reinstall the stock radio to confirm all is well, as it was before, and trying to reinstall the new Atoto from scratch again.
Same, the Atoto A6 Pro. I skipped over phase 1 and went straight to phase 2 so, I don't know. I presumed it would sound bad in phase 1.
Originally Posted by BMeek
Bummer. I would double-check the speaker wiring between the A6 harness and '1761 harness plugs... verify polarity of each speaker, etc.
So, @turtlepeas... I'm hoping you're well. Did you ever get this sorted out? Did you try a "phase 1" config (new head unit connecting to your factory amp)?
[QUOTE=BMeek;10841314]So, @turtlepeas... I'm hoping you're well. Did you ever get this sorted out? Did you try a "phase 1" config (new head unit connecting to your factory amp)?[/QUOTE
I'm doing good thanks, hope you and yours are well also. I haven't tried it yet but everyday I drive I'm reminded that I need to get it done.
SUPER helpful thread. I have a new (to me) '97 es300 and have been stuck in Phase 1 for 3 weeks, trying (and failing) to eliminate the buzz of the aftermarket + stock amp combo. For others starting out - just go straight to phase 2 and 3. Save yourself the headache. Can't wait to be free of that annoying whine.
Here's the project, thanks entirely to this thread. I doubt I would have come close to starting this project were it not for the guidance here.
Soundstream PN5.640D Amplifier (5 channel), with Pioneer CarPlay head unit already in car from Phase One debacle in October. I've been listening pretty much exclusively to the Apple Carplay function of the Pioneer, and putting up with the constant buzzing at every speed. This week it decided to add a very loud alternator whine (it always whined, but was tolerable over 15 mph thanks to road noise) which was the last straw, as the new noise was now completely intolerable at every speed. That was Thursday. Turning off the radio would turn off the factory amp and kill the buzzing sound, but that kind of defeats the purpose of having a stereo upgrade.
I chose the Soundstream because it was small enough to fit in the space that was previously occupied by the factory CD changer, and had 5 channels of output, enough to power the factory sub. I'm going to try and stick this thing in the glovebox on the shelf that was created when the changer was removed. I also removed the factory amp out of spite. Man, that buzzing was annoying. A bit about me - I'm old, and don't listen to music at loud volumes, and the factory speakers sounded just fine to me. On paper it looks like the Soundstream will correctly power all 5 speakers, and if the airflow inside the cavity created inside the glovebox is sufficient, this may be the solution I was looking for. Fingers crossed.
I did have to remove the plastic cover which was over the CD changer, as the assembly got in the way of the new amp which was ever-so-slightly wider than the brackets which held the CD changer in place, and held the mounting points for the plastic cover. No worries; the glovebox is always closed and the new opening hould help a little bit with airflow and allow me to keep a closer eye on the amp until I decide that it's working correctly. I mounted it on bolts which elevated it off of the plastic shelf, so there is a little bit of air underneath it and plenty over on top of it.
Today was disassembly and wiring; tomorrow is reassembly and connecting the amp to the battery. There is a big firewall plug just behind the glovebox and I'll be using that for access. I'll report on the success or failure of the upgrade in a few days.
Thanks for providing a great write up with pictures, it really helps. I'm working on getting my Android radio to get its speakers to work, I'm going to reattempt tomorrow. I do have a few questions, sorry i'm a noobie.
From my understanding, please correct me if i'm wrong, we need 3 metra adapters which plugs into the amp's harness. From those 3 adapters, I need to use extended speaker/wire cables to connect from the smaller metra harness (purple, green, grey, etc) for my speakers, but where do the other end of the extended cable go to? does that get tapped into the android harness wires speakers?
What about the harness that is in the back of the original stereo? do I leave that hanging? i feel like i'm missing a middle harness.
Please help or provide pics. My goal is just to get my speakers to work, I don't care about the amp or the subwoofer. I skipped phase 1 and jumped to phase 2.
My car is a 2001 Lexus ES300.
Yes and yes. You need 2 harnesses (one has 2 plugs) that will connect to the 3 bundles that come out of the old amplifier. These two harnesses supply power to your new stereo, and route the new head-unit-powered speaker wires back to your new speakers. 1761 connects to 8112 by connecting red, yellow, and black (constant power, switched power, and ground) and these all connect to the equivalent wires coming out of your new stereo.
1761 is wired to drive all of your speakers.
These two harnesses are connected to the three wire bundles that were connected to the old amplifier.
Wiring your new stereo's powered output speaker wires (NOT the RCA outs on your new stereo) into 1761 should be straightforward - the tricky part is powering your new stereo with ground, switched power, and constant power (red, yellow, black) - you need to connect the three wires coming out of 1761 and 8112 to your new stereo.

 05-03-20, 02:48 PM