
CCFL Dome lights & License Plate Lights
 10-02-08, 03:43 PM
#1
iModerate
Thread Starter
CCFL License Plate Lights DIY below on Post #14
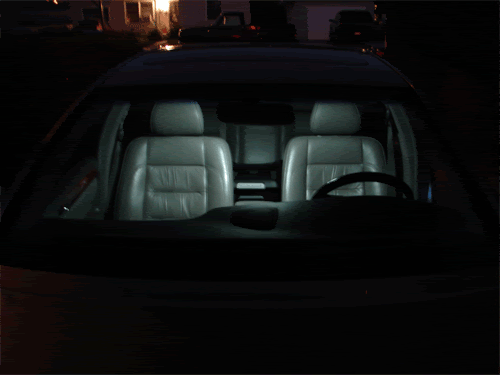
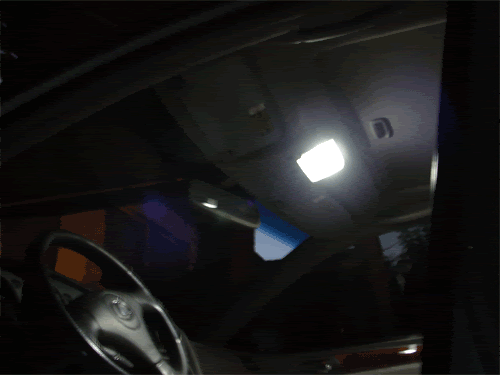
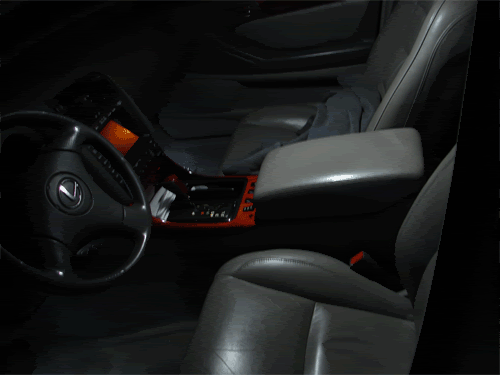
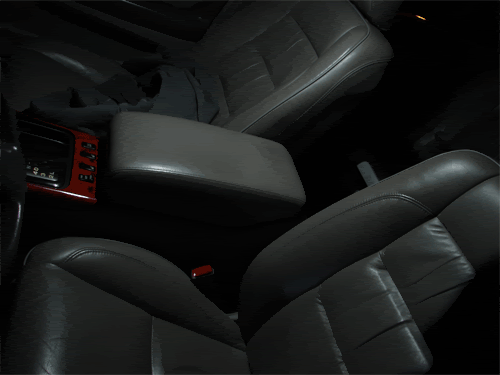
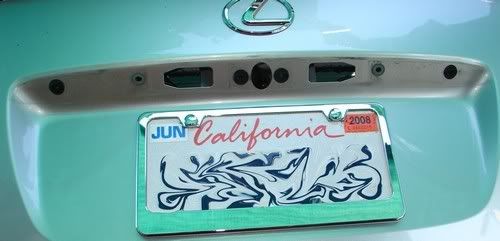
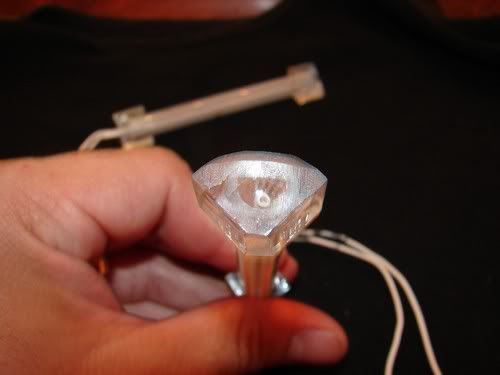
After doing a full LED conversion on my GS (see HERE) it was suggested I check out Jeff Tsai's CCFL (Cold Cathode Fluorescent Light) Dome Light install. I did and I liked what I saw. So i ordered a few CCFL light kits. This is what I ended up with.
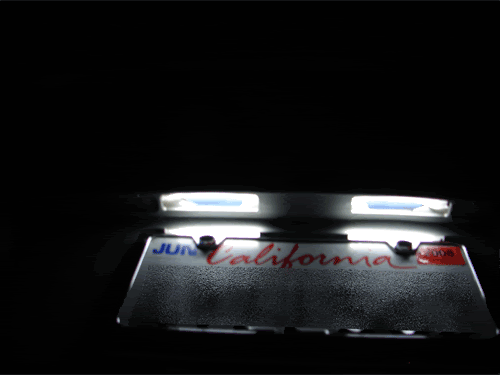
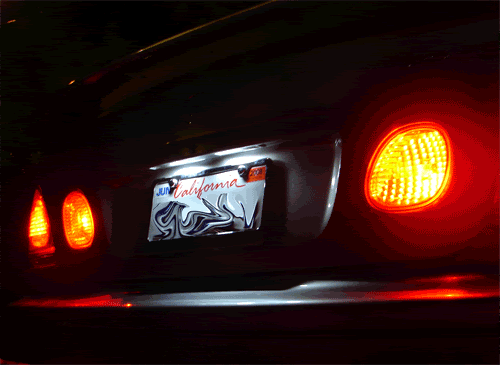
I had another CCFL kit left over so I figured I would install it for the license plate lights. Initially it was way too bright - look at the light pattern on the bumper. DIY on post #14 below

So I adjusted the amount of light that is released and that did the trick. It looks real crisp.
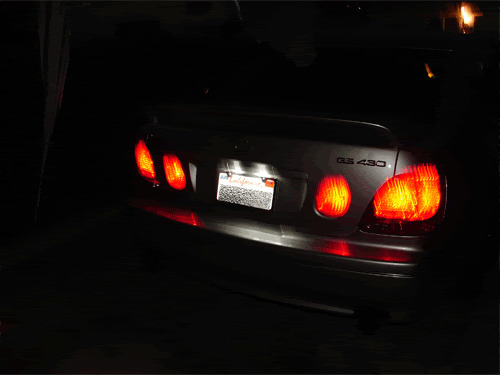

EDIT: Am I the first one to do CCFL License Plate lights?
After doing a full LED conversion on my GS (see HERE) it was suggested I check out Jeff Tsai's CCFL (Cold Cathode Fluorescent Light) Dome Light install. I did and I liked what I saw. So i ordered a few CCFL light kits. This is what I ended up with.
I had another CCFL kit left over so I figured I would install it for the license plate lights. Initially it was way too bright - look at the light pattern on the bumper. DIY on post #14 below
So I adjusted the amount of light that is released and that did the trick. It looks real crisp.
EDIT: Am I the first one to do CCFL License Plate lights?
Last edited by Debonair; 12-10-08 at 06:39 AM.
 10-02-08, 06:51 PM
#2
Lexus Test Driver
iTrader: (2)
Join Date: Jul 2008
Location: DFW, TX
Posts: 860
Likes: 0
Received 0 Likes
on
0 Posts
Definitely the first I have heard of. It looks great, I have LEDs in my interior and plate light. I love the look of yours now, very bright for sure.
Hats off to you sir
Hats off to you sir
10-03-08, 08:46 AM
#3
iModerate
Thread Starter
 . I loved their look but I like the CCFL better.
  10-04-08, 12:16 AM
#5
iModerate
Thread Starter

Trending Topics
10-07-08, 08:36 PM
#8
iModerate
Thread Starter
 to them for sure.
10-09-08, 12:42 PM
to them for sure.
10-09-08, 12:42 PM
#10
iModerate
Thread Starter
 .
. 10-10-08, 12:00 AM
#12
iModerate
Thread Starter
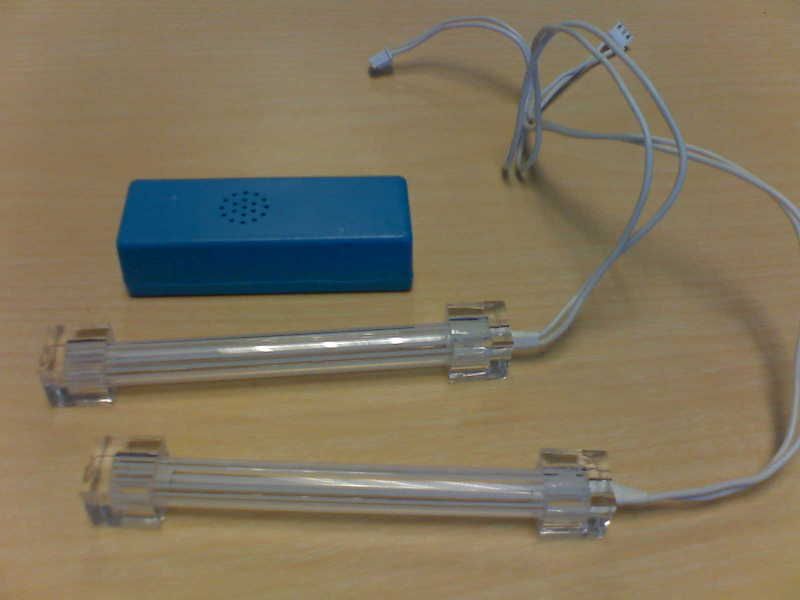
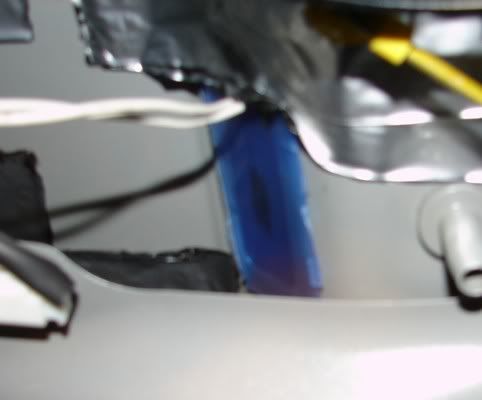
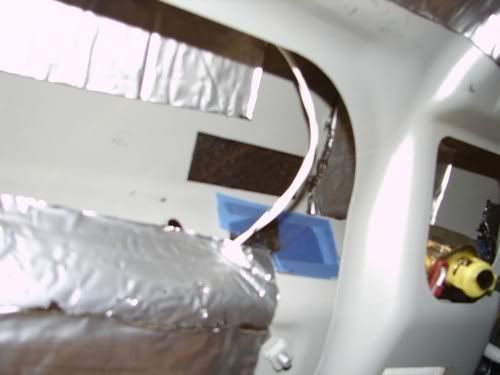
I removed the trunk bar. Removed the factory light housings. Grounded down the edges of the CCFL light tubes (the square part) so that they matched the contours of the trunk bar perfectly. Then I used 3M double stick molding tape to secure them. I routed the wires into the trunk lid and secured the inverter with the 3M tape also. Tapped into the factory wiring and I was done. I am hoping to tear it apart and take picture reassembling it so I can post them up here.
10-14-08, 03:00 PM
#14
iModerate
Thread Starter
Ok so here is the CCFL License Plate Light Conversion DIY:
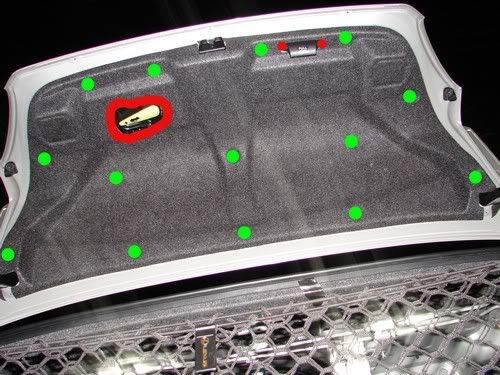
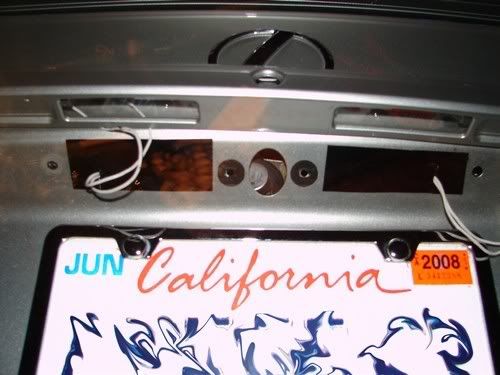
Remove the trunk lid liner by pulling off the 14 push in retainers and the two screws the secure the lid pull. You will also need to remove the emergency trunk release trim ring.
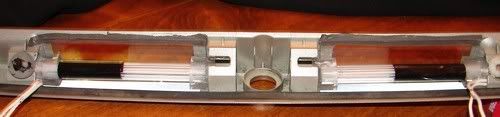
Remove the original bulb sockets from the OE license plate light housings. Uninstall the two bulbs that you will no longer need. Now remove the four nuts that secure the trunk bar to the trunk lid. Once those are removed squeeze the two clips on the trunk bar and pull it up at the same time to remove it.

Once the trunk bar has been removed uninstall the OE light housings from the car and store those away. Now fabricate a cover for the OE light opening in the trunk lid and a clear lens for the trunk bar. I used items found around the house for this - nothing special. Be sure to leave room to pass the CCFL plug through into the trunk in the inner cover. For the lens cover I used a MP3 players hard packaging. It was cut and ground it into shape. They are both attached with 3M molding tape.
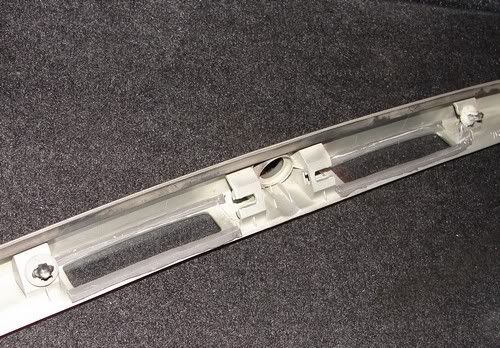
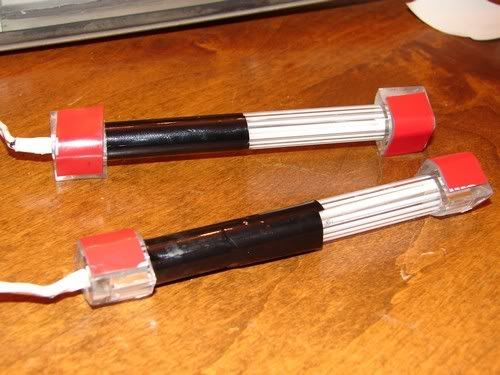
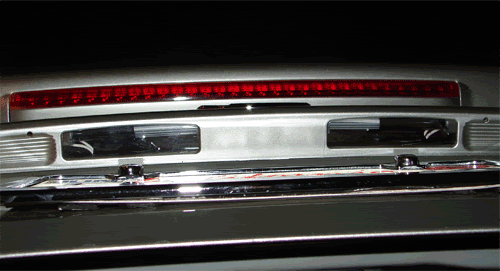
Now on to the actual CCFL lights. Grind or sand them down to resemble the picture below. This will allow them to fit in the trunk bar. Their full brightness was too much for me so I covered roughly 50% of them in black vinyl. This of course can be changed to your preference. Apply 3M double stick tape to the ends where they will attach to the trunk lid and lens, the more square side.
Remove the trunk lid liner by pulling off the 14 push in retainers and the two screws the secure the lid pull. You will also need to remove the emergency trunk release trim ring.
Remove the original bulb sockets from the OE license plate light housings. Uninstall the two bulbs that you will no longer need. Now remove the four nuts that secure the trunk bar to the trunk lid. Once those are removed squeeze the two clips on the trunk bar and pull it up at the same time to remove it.
Once the trunk bar has been removed uninstall the OE light housings from the car and store those away. Now fabricate a cover for the OE light opening in the trunk lid and a clear lens for the trunk bar. I used items found around the house for this - nothing special. Be sure to leave room to pass the CCFL plug through into the trunk in the inner cover. For the lens cover I used a MP3 players hard packaging. It was cut and ground it into shape. They are both attached with 3M molding tape.
Now on to the actual CCFL lights. Grind or sand them down to resemble the picture below. This will allow them to fit in the trunk bar. Their full brightness was too much for me so I covered roughly 50% of them in black vinyl. This of course can be changed to your preference. Apply 3M double stick tape to the ends where they will attach to the trunk lid and lens, the more square side.
Last edited by Debonair; 10-14-08 at 03:03 PM.
10-14-08, 03:01 PM
#15
iModerate
Thread Starter
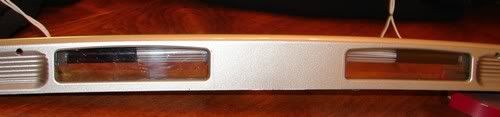
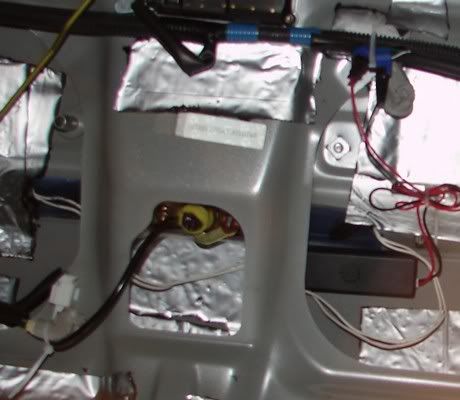
Now install them into the trunk bar. Push the CCFL light plug through the OE light opening cover. I applied black vinyl to these covers from the outside just to clean up the look. Attach the trunk bar back to the trunk lid.
To power the inverter I tapped one of the two factory light sockets wiring. TEST FOR POSITIVE AND NEGATIVE BEFORE HOOKING THE INVERTER UP. If hooked up in reverse the inverter will fail and will have to replaced. Test the lights and make sure they work. Both factory socket leads were secured to other wiring on the lid as they were not going to be used anymore. The inverter was attached to the truck lid using velcro.
Reattach the lid liner and pull and you are all done. Step back and
admire your work.

To power the inverter I tapped one of the two factory light sockets wiring. TEST FOR POSITIVE AND NEGATIVE BEFORE HOOKING THE INVERTER UP. If hooked up in reverse the inverter will fail and will have to replaced. Test the lights and make sure they work.
Both factory socket leads were secured to other wiring on the lid as they were not going to be used anymore. The inverter was attached to the truck lid using velcro. Reattach the lid liner and pull and you are all done.
Step back and admire your work.
Last edited by Debonair; 10-14-08 at 03:29 PM.