Hello LS forum, 92' LS4 on craiglist and I bought it.
 09-04-10, 01:21 PM
#211
Instructor
Thread Starter

WOW!, you are making really fast progress. It looks like it is all coming together. Is your merge constructed from pipe you got at an exhaust shop? If it is then it is most likely galvanized or aluminized. If so, make sure you get all that nasty coating out of the weld zone of the pipe before you weld it; I recommend using a sanding disc. Not only is it super toxic when it burns but it also contaminates the weld and messes it all up. That is why I try to always use stainless, I hate that coated stuff. I think you made a good decision going with the tial, sure the other one would have probably worked but with the tial you know you are getting a quality part. Also the smaller overall size does help. It is good to see that you now have your shielding set up correctly; you can really see the difference now in your welds. Keep up the good work!
What do you think of my setup?
 09-05-10, 07:13 PM
#212
Instructor
Thread Starter
Update.
Wire tuck.
I took a note out of the Supra/Honda/F-body boy's book's and did a wire/connector tuck. I couldn't stand the ugly looking engine bay with so much time and effort built into the fabrication of the setup. I bought some high temp paint and went at the wiring and kept what I needed and moved or got rid of what I didn't. I needed to do a little modifying but I didn't cut anything only just moved/hid and taped up. Since the car won't see any bad weather or winter, I feel fine about hiding everything outside of the engine bay.
Previous...
And here is the wire/connector tuck.

The reverse angle, just a little better idea of what I did. I will be wrapping the whole that was cut for the cold side of the compressor in rubber to make sure there is no metal on metal action.

This is where everything went, minus the two ignitors. I moved the ignitors down below the cruise control actuator just because I had space there. I modified the bracket a bit and tweak the harness a little to make it look a little better.

This side needed a bit of attention and haven't quite figured out what I'm going to do with everything. I think I will just throw the plastic fuse housing back in because it's easy and I would like to make sure this stays in a control environment no matter what, plus I don't really need to save too much space over here because this side won't see the temperatures and I'm likely going to move the battery to the trunk, the thing is that I'm worried that since my lock is jacked, if the battery dies I'd foooked. I'd probably install jumper pegs to make sure this isn't the case.

As always, any thoughts and comments are welcome. I decided to just order a CNC'd T3 flange instead of fabbing one up to just save me some time, and $15 shipped won't break my bank. Mocked the wastegate up as well, everything fits, even with the fabbed power steering feed on, success. Now I will just straighten everything up and burn in the welds. Thanks for coming by.
- The alternator wiring will be a piece of cake.
- The turbo drain will take come work to clear the frame rail. I need to make an adapter for the drain back to the pan. e57820 has an awesome idea of just removing the oil level sensor, I'm a mechanic, not an idiot.
- I need to go to the junkyard and ****** up my Taurus fan and wire it up.
- If I find a suitable radiator there, I might just try to buy it and make it work temporarily, the biggest things are outlet sides and temp sensor built in the rad.
- I need to plumb the power steering cooler/power steering high psi line.
- I also need to make intercooler supper brackets, easy, just out of pre-punched material.
- Finish the driver's side fuse box.
Wire tuck.
I took a note out of the Supra/Honda/F-body boy's book's and did a wire/connector tuck. I couldn't stand the ugly looking engine bay with so much time and effort built into the fabrication of the setup. I bought some high temp paint and went at the wiring and kept what I needed and moved or got rid of what I didn't. I needed to do a little modifying but I didn't cut anything only just moved/hid and taped up. Since the car won't see any bad weather or winter, I feel fine about hiding everything outside of the engine bay.
Previous...
And here is the wire/connector tuck.
The reverse angle, just a little better idea of what I did. I will be wrapping the whole that was cut for the cold side of the compressor in rubber to make sure there is no metal on metal action.
This is where everything went, minus the two ignitors. I moved the ignitors down below the cruise control actuator just because I had space there. I modified the bracket a bit and tweak the harness a little to make it look a little better.
This side needed a bit of attention and haven't quite figured out what I'm going to do with everything. I think I will just throw the plastic fuse housing back in because it's easy and I would like to make sure this stays in a control environment no matter what, plus I don't really need to save too much space over here because this side won't see the temperatures and I'm likely going to move the battery to the trunk, the thing is that I'm worried that since my lock is jacked, if the battery dies I'd foooked. I'd probably install jumper pegs to make sure this isn't the case.
As always, any thoughts and comments are welcome. I decided to just order a CNC'd T3 flange instead of fabbing one up to just save me some time, and $15 shipped won't break my bank. Mocked the wastegate up as well, everything fits, even with the fabbed power steering feed on, success. Now I will just straighten everything up and burn in the welds. Thanks for coming by.
- The alternator wiring will be a piece of cake.
- The turbo drain will take come work to clear the frame rail. I need to make an adapter for the drain back to the pan. e57820 has an awesome idea of just removing the oil level sensor, I'm a mechanic, not an idiot.
- I need to go to the junkyard and ****** up my Taurus fan and wire it up.
- If I find a suitable radiator there, I might just try to buy it and make it work temporarily, the biggest things are outlet sides and temp sensor built in the rad.
- I need to plumb the power steering cooler/power steering high psi line.
- I also need to make intercooler supper brackets, easy, just out of pre-punched material.
- Finish the driver's side fuse box.
Last edited by 3UZFTE; 09-08-10 at 10:03 PM.
09-05-10, 09:49 PM
#213
Driver School Candidate

Join Date: Dec 2009
Location: AZ
Posts: 25
Likes: 0
Received 0 Likes
on
0 Posts
You could hold off on the cooling fan. I removed the factory mechanical fan and used only the two factory pusher fans and never got even a little hot... IN PHOENIX! I guess the flipside to that is if you are solely reliant on the pusher fans they will fail sooner and you could potentially overheat then. Why are you getting rid of the mechanical fan, clearance issues? Or is it from your background in oldschool American hotrods and you are trying to "save horsepower".
09-05-10, 10:20 PM
#214
Driver School Candidate
Join Date: Dec 2009
Location: AZ
Posts: 25
Likes: 0
Received 0 Likes
on
0 Posts
I think your setup is really cool and when you get it tuned right you will be VERY VERY happy. In my opinion the areas you have chosen to build out of mild steel are less critical then the actual manifolds which do take a lot of punishment. The one area I would inspect for cracking from time to time is the merge, there will likely be a lot of heat there.
You will be smoking trannies in no time
You will be smoking trannies in no time
09-06-10, 10:18 AM
#215
Instructor
Thread Starter
You could hold off on the cooling fan. I removed the factory mechanical fan and used only the two factory pusher fans and never got even a little hot... IN PHOENIX! I guess the flipside to that is if you are solely reliant on the pusher fans they will fail sooner and you could potentially overheat then. Why are you getting rid of the mechanical fan, clearance issues? Or is it from your background in oldschool American hotrods and you are trying to "save horsepower".
I think your setup is really cool and when you get it tuned right you will be VERY VERY happy. In my opinion the areas you have chosen to build out of mild steel are less critical then the actual manifolds which do take a lot of punishment. The one area I would inspect for cracking from time to time is the merge, there will likely be a lot of heat there.
You will be smoking trannies in no time
You will be smoking trannies in no time
09-06-10, 10:33 AM
#216
Lexus Champion

I apologize if this has already been covered,
but what are your power goals with this setup?
250rwhp? 300rwhp?
My car has only one stock condenser pusher fan. When I pulled off my factory clutch fan I used a stupid cheap eBay fan in its place on the radiator, spliced it into the condenser fan's harness (so both come on and both are on the same circuit) and then installed a switch that cuts into the radiator-mounted temperature sensor's circuit. When connected, the fans don't come on unless the car is overheating. When disconnected, both fans switch on.
It was a lot easier than messing with relays, temperature sensors, and all that other aftermarket stuff.
Last edited by sdls; 09-06-10 at 10:36 AM.
09-06-10, 07:43 PM
#217
Lexus Test Driver

Join Date: Nov 2007
Location: TX
Posts: 843
Likes: 0
Received 0 Likes
on
0 Posts
nice update. i know you're more about the mechanical/power aspect but the wire tuck is what interests me. i am planning a color change which means i will be pulling everything from the bay soon. perfect time to do a shave/tuck. in fact, i'll probably start tomorrow.
i had to reread a lot of the thread to figure out what all was going on but the abs removal seems like a must. i noticed you removed the ac line as well and was wondering what the plan was there? will you be running no ac or rerouting the lines?
i had to reread a lot of the thread to figure out what all was going on but the abs removal seems like a must. i noticed you removed the ac line as well and was wondering what the plan was there? will you be running no ac or rerouting the lines?
09-06-10, 10:23 PM
#218
Instructor
Thread Starter
Ah, conversion is nice!
No need for apologies, and I don't think we've conversed before, thanks for checking out my thread. I don't think I ever mentioned a specific goal or at least had one in mind. I think 250-300rwhp would be a bit on the safe side. I think as far as my own personal goals were to have it built on the cheap, learn how to do it, and make as much power as I can. I would very much like to push the 180k 1UZ and A341e to the limits. As of right now, the #1 shift solenoid seems to be funky, but I haven't driven it in a year so I don't recall. From what I can recall, the A341e trans can hold up to 350rwhp, that's not to say that mine will. The motor will handle a healthy 7 psi without devastation. Sure, you can push more than that but you risk a number of issues, but being that it's a earlier, beefier rods, it should have 7 pounds no problem. Since it's a smaller mid sized T3, it's going to spool quick but I'm sure there will be hp left on the table. I'm sure if I went with a larger T3 or even a T4, I would imagine I could easily be over the stated number, but that just wasn't part of the budget/build. I didn't want to drive a Honda where it's like a light switch, bog.. bog... power..., I want to see power from idle. I have been working on the 64' Falcon now, and have about $2,000 into the motor and just dances on about anything, including my GS430, and I mean a song and a dance, not just a dance, it's fast. But the cam only makes power from 2-6,000 rpm where as this was built to make power, now!
I like the wiring idea. I think that it's more than likely what I'll end up doing. I am more than confident that the OE condenser fans would do the job, I just don't need two different fans, when I could use one and move the same amount of air, and save space to run other things. I think I will do pretty much what you described, and since I am in the junkyard pretty often, I am going to try to get a smaller import tranny cooler fan and mount that to a on/off switch, and run the Taurus e-fan through the stock wiring and keep the engine from overheating.
I love power and I'm a sucker for sleepers.... but without 12v and a ground, even Jesus couldn't turn gasoline into exhaust. No worries, I'm glad to go back and rehash it with ya. I'm not an electrical wizard but I can easily make/modify a wiring harness as I built my own when I put the 93' 5.0 in our 64' Falcon. Since I've owned the LS, I've actually really despised the engine bay due to wires, vacuum lines, coolant lines, pretty much everything running everywhere. As you said, now was the time since I had everything apart. While I am waiting for the T3 flange, I figured I would put some time and effort into degreasing/cleaning/painting an area that will house a turbine that tends to get very very hot. I didn't want to take the risk of burning up the fuel pump relay or the headlight harness. Plus since all that ABS/AC junk wasn't there anymore, I could really get in there, and make it look clean since I'll probably be showing it off, a lot. I used 500*F white engine paint to absorb some heat as well. Not to mention I like to impress others and be different from the crowd. I haven't quite decided if I should shave off and sand the studs smooth that were left since the brackets aren't being used any more. I'm going to wait until the setup is final to make sure I couldn't make use of it. To be honest, the only thing that I have made unreserveable is that I cut the brake existing lines shorter to save space, the exhaust manifolds/system is gone, all the wiring is intact, the pumps are in my garage.
As far as the AC system, I am not going to retain any of it. The AC wasn't working when I bought it, and instead of going through the work and replacing almost all the AC related components due to corrosion, rust, broken o-rings, etc, I just figured I would pull it and save the space which has helped clear things up. I believe you could easily run a AC/Hydraulic line up the passenger side fender well, probably not the OE one, but I'd assume with some laboring work behind your keyboard you could find your answer. I remember e57820 said he was going to just run his AC line over the passenger side strut tower and make it look clean as his turbo manifold occupies the old space, maybe he could chime in as I chose to remove my system. In Minnesota, AC is awesome, but like I said earlier, if it's turbocharged or air conditioned, I choose boost. Since this car will be a fair weather car, no winters, no rainy days, etc., I'm not worried about not having AC, ABS, windshield washer, wire tucks, etc. Since most of my AC stuff was junk and needs to be replaced anyways, I don't feel like to finding and sourcing parts rather than just removing them and going more of the performance route. My thoughts are keep my engine, tranny, steering, turbo all cool rather than me and my precious passengers (who rarely give gas money). All my windows work, and my sunroof works fine, and since I won't need to defrost a frozen windshield, I just don't see the need to retain AC. And the last thing I will say is that since it's a mechanical pump attached to the drive belt, it's takes power to spin the pulley, and a heck of a lot more to spin the pump. Since I pulled all the AC stuff, I think I saved a good 20 lbs., and now my drive belt will be like 30".
The last bit of the cold side... I think I'll go with the cheaper route since I have 3" piping, just one less thing to buy.

Well that was a lot, but I hope it cleared up some questions for those of you who didn't ask, and for the ones who did, I'm sure it's more than you thought you would've wanted to know. Anyways, glad to shed some light, didn't do anything on the car today, enjoyed the day off, I am just waiting on the T3 flange, once I get it here, everything will be fit again and the merge welds will be burned in, the wastegate will be set in stone, then on the the down pipe, the power steering reservoir, feed and return, turbo oil feed, return, drain adapter to pan and I'm definitely ditching the corroded stock radiator and stupid pressurized overflow with something a little more high performance minded, preferably a pressurized aluminum radiator with a non-pressurized overflow. I think that taxes my mind for tonight, I could sit here and list off a list of dozens of other things I need to do but that seems to be a good one for now.
I apologize if this has already been covered,
but what are your power goals with this setup?
250rwhp? 300rwhp?
My car has only one stock condenser pusher fan. When I pulled off my factory clutch fan I used a stupid cheap eBay fan in its place on the radiator, spliced it into the condenser fan's harness (so both come on and both are on the same circuit) and then installed a switch that cuts into the radiator-mounted temperature sensor's circuit. When connected, the fans don't come on unless the car is overheating. When disconnected, both fans switch on.
It was a lot easier than messing with relays, temperature sensors, and all that other aftermarket stuff.
but what are your power goals with this setup?
250rwhp? 300rwhp?
My car has only one stock condenser pusher fan. When I pulled off my factory clutch fan I used a stupid cheap eBay fan in its place on the radiator, spliced it into the condenser fan's harness (so both come on and both are on the same circuit) and then installed a switch that cuts into the radiator-mounted temperature sensor's circuit. When connected, the fans don't come on unless the car is overheating. When disconnected, both fans switch on.
It was a lot easier than messing with relays, temperature sensors, and all that other aftermarket stuff.
I like the wiring idea. I think that it's more than likely what I'll end up doing. I am more than confident that the OE condenser fans would do the job, I just don't need two different fans, when I could use one and move the same amount of air, and save space to run other things. I think I will do pretty much what you described, and since I am in the junkyard pretty often, I am going to try to get a smaller import tranny cooler fan and mount that to a on/off switch, and run the Taurus e-fan through the stock wiring and keep the engine from overheating.
nice update. i know you're more about the mechanical/power aspect but the wire tuck is what interests me. i am planning a color change which means i will be pulling everything from the bay soon. perfect time to do a shave/tuck. in fact, I'll probably start tomorrow.
i had to reread a lot of the thread to figure out what all was going on but the abs removal seems like a must. i noticed you removed the ac line as well and was wondering what the plan was there? will you be running no ac or rerouting the lines?
i had to reread a lot of the thread to figure out what all was going on but the abs removal seems like a must. i noticed you removed the ac line as well and was wondering what the plan was there? will you be running no ac or rerouting the lines?
As far as the AC system, I am not going to retain any of it. The AC wasn't working when I bought it, and instead of going through the work and replacing almost all the AC related components due to corrosion, rust, broken o-rings, etc, I just figured I would pull it and save the space which has helped clear things up. I believe you could easily run a AC/Hydraulic line up the passenger side fender well, probably not the OE one, but I'd assume with some laboring work behind your keyboard you could find your answer. I remember e57820 said he was going to just run his AC line over the passenger side strut tower and make it look clean as his turbo manifold occupies the old space, maybe he could chime in as I chose to remove my system. In Minnesota, AC is awesome, but like I said earlier, if it's turbocharged or air conditioned, I choose boost. Since this car will be a fair weather car, no winters, no rainy days, etc., I'm not worried about not having AC, ABS, windshield washer, wire tucks, etc. Since most of my AC stuff was junk and needs to be replaced anyways, I don't feel like to finding and sourcing parts rather than just removing them and going more of the performance route. My thoughts are keep my engine, tranny, steering, turbo all cool rather than me and my precious passengers (who rarely give gas money). All my windows work, and my sunroof works fine, and since I won't need to defrost a frozen windshield, I just don't see the need to retain AC. And the last thing I will say is that since it's a mechanical pump attached to the drive belt, it's takes power to spin the pulley, and a heck of a lot more to spin the pump. Since I pulled all the AC stuff, I think I saved a good 20 lbs., and now my drive belt will be like 30".
The last bit of the cold side... I think I'll go with the cheaper route since I have 3" piping, just one less thing to buy.
Well that was a lot, but I hope it cleared up some questions for those of you who didn't ask, and for the ones who did, I'm sure it's more than you thought you would've wanted to know. Anyways, glad to shed some light, didn't do anything on the car today, enjoyed the day off, I am just waiting on the T3 flange, once I get it here, everything will be fit again and the merge welds will be burned in, the wastegate will be set in stone, then on the the down pipe, the power steering reservoir, feed and return, turbo oil feed, return, drain adapter to pan and I'm definitely ditching the corroded stock radiator and stupid pressurized overflow with something a little more high performance minded, preferably a pressurized aluminum radiator with a non-pressurized overflow. I think that taxes my mind for tonight, I could sit here and list off a list of dozens of other things I need to do but that seems to be a good one for now.
Last edited by 3UZFTE; 09-06-10 at 10:37 PM.
09-07-10, 01:40 PM
#219
Driver School Candidate
Join Date: Dec 2009
Location: AZ
Posts: 25
Likes: 0
Received 0 Likes
on
0 Posts
I never got around to doing it but the plan was as Justin mentioned to run the A/C lines up and over the passenger's side strut tower near where the fender bolts on. There is plenty of room to do it, however if you are going for the tucked look then you may want to come down the firewall and run along the frame. I guess it all just depends on how handy you are with aluminum welding, learn that and you can do a lot of cool stuff. Just remember to pressure test them before installing.
09-08-10, 07:40 PM
#220
Instructor
Thread Starter
Update.
Turbo oil feed... I made a short trip over to Home Depot to see what I could pick up. Here is what I came up with. It seems like most people are going with this setup, or something similar. I know there NPT but I always use teflon paste just for insurance. I tried to label it to give you a little better understanding. The only thing that I am missing is a 1/8NPT to -3AN adapter, then the "T" will be complete. I am just going to order a pre-made stainless line with -3AN fittings on both ends to run from the T to the turbo, no leaks.

Left to right; 1/8"NPT "T" union, 1/8"NPT male to male flare, Oil psi switch, (missing a 1/8"NPTx-3AN fitting)
Here is what I picked up for the drain at the same time. I tried to use the stock oil level indicator but I didn't have any luck welding the aluminum. So I transferred the pattern to a piece of 6awg stainless and went at it. Then while I was the store I improvised this beast...

Left to right; 3/8"x3" Black plumbing pipe, 1/2" hose to 1/2" pipe adapter, 3/8"x1/2" adapter, and the flange I made.
View from pan to drain.

View from drain to pan.

A side shot of the whole thing, approximately the angle it'll be sitting at, the welding was like perfect!

Painted black, siliconed up and bolted down.

Finally burned in the welds on the merge and the wasted gate...

Definitely not the most pretty thing I've every done, but lets face it, she's going to driven hard and put away wet.

Waiting on the T3 flange, then I will degrease it, trim the edges, and paint it with high temp stuff.
Turbo oil feed... I made a short trip over to Home Depot to see what I could pick up. Here is what I came up with. It seems like most people are going with this setup, or something similar. I know there NPT but I always use teflon paste just for insurance. I tried to label it to give you a little better understanding. The only thing that I am missing is a 1/8NPT to -3AN adapter, then the "T" will be complete. I am just going to order a pre-made stainless line with -3AN fittings on both ends to run from the T to the turbo, no leaks.
Left to right; 1/8"NPT "T" union, 1/8"NPT male to male flare, Oil psi switch, (missing a 1/8"NPTx-3AN fitting)
Here is what I picked up for the drain at the same time. I tried to use the stock oil level indicator but I didn't have any luck welding the aluminum. So I transferred the pattern to a piece of 6awg stainless and went at it. Then while I was the store I improvised this beast...
Left to right; 3/8"x3" Black plumbing pipe, 1/2" hose to 1/2" pipe adapter, 3/8"x1/2" adapter, and the flange I made.
View from pan to drain.
View from drain to pan.
A side shot of the whole thing, approximately the angle it'll be sitting at, the welding was like perfect!
Painted black, siliconed up and bolted down.
Finally burned in the welds on the merge and the wasted gate...
Definitely not the most pretty thing I've every done, but lets face it, she's going to driven hard and put away wet.
Waiting on the T3 flange, then I will degrease it, trim the edges, and paint it with high temp stuff.
Last edited by 3UZFTE; 09-08-10 at 07:45 PM.
09-09-10, 08:20 PM
#221
Instructor
Thread Starter
Update.
I started the day degreasing and finishing up the wiring. If anyone wants to know, I've been using Simple Green degreaser and it works great. The first thing I did was deal with the alternator wiring that runs underneath the oil pans. I decided to keep most of the plastic shell that's already there, and cut it a little shorter so I can run the wires up the side of the block away as far away from the exhaust as possible, which isn't far at all. Here is a picture that sort of depicts it, but it's a bit hard to tell.

Here is the wiring to the alternator, it is tight for a reason as I don't have much space with my manifolds both running in that vicinity.

Here is the driver's side clean up a bit. In a perfect world, I would've relocated this underneath the master cylinder and the fender well but I wasn't going to get ridiculous so I just cleaned up the wiring and go rid of a few things. Unfortunately I didn't clear enough space for a battery, unless I purchase a Braille small race battery, which is a possibility, but I just don't think it will fit with the cold side piping running either around or over the top of it.

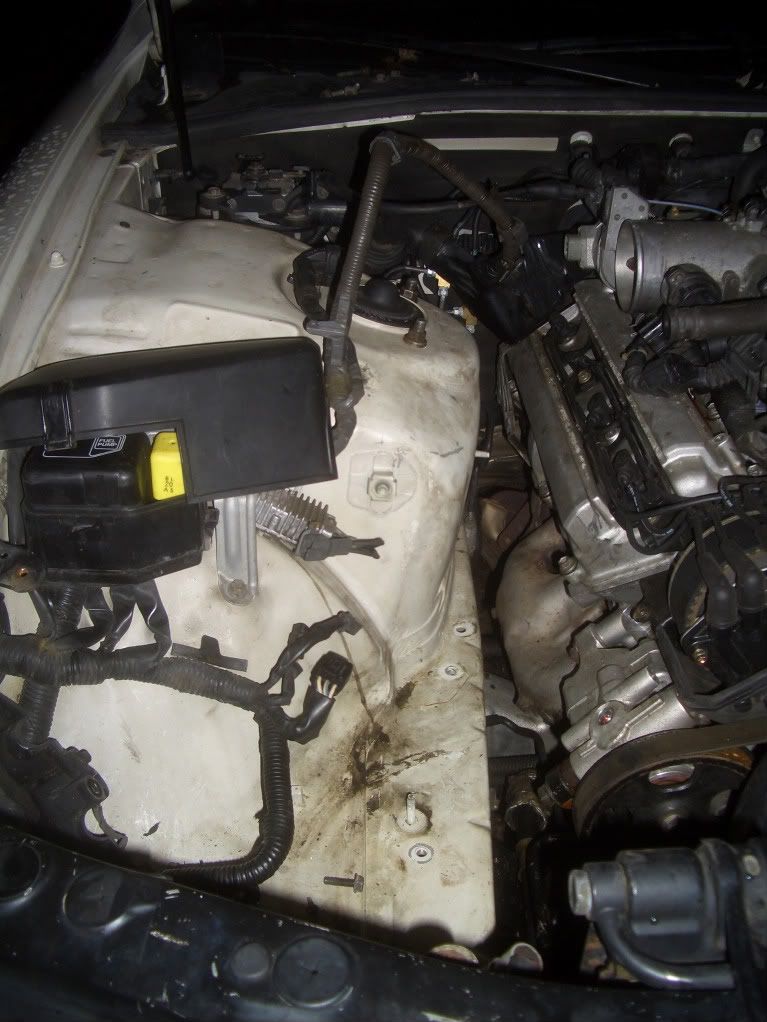
Here is the freshly degreased and painted face. The picture was taken after the brackets were made, but this is pretty much how it will look. I have plumbed the power steering cooler/return, now I just need to figure out where to put my SC400 power steering reservoir. I am saving up for a Mishimoto Supra radiator, and I still need to plumb the hayden tranny cooler.

Here are the brackets I made. Nothing special, I don't even know what type of material it is. It definitely isn't very strong, so in order to reuse factory studs I just bent them at an angle and bolted them right up. The are just barely enough to hold up the intercooler, but if it sits for a while it starts to lean forward and bend downwards.

Here is my idea of a top mount. Instead of making my own bracket, I decided that I would use a junk radiator mount that I discarded when I put a 93' radiator into a 87' 626 for a customer. I cut off the back side and welded on a little plate that allowed me to use the rubber bumper on the inside. I put a little bit of foam padding on the backside, in between the plate and intercooler to prevent the steel from rubbing on the aluminum. In order to secure it to the car, I just used a bracket that I am discarding and welded it to the back at an angle so I can reuse a factory welded bolt, like clock work.

Final intercooler mock up.

I know we've seen this picture before but this time it's final, not cutting or modifying of the bumper shell. As far as the aluminum bumper and foam, that won't fit anymore unfortunately. My intercooler now has the task of crash guard, basically my bumper and intercooler are toast if I bump something pretty good. The bumper sags a bit, but I think once I bolt everything up it shouldn't anymore.

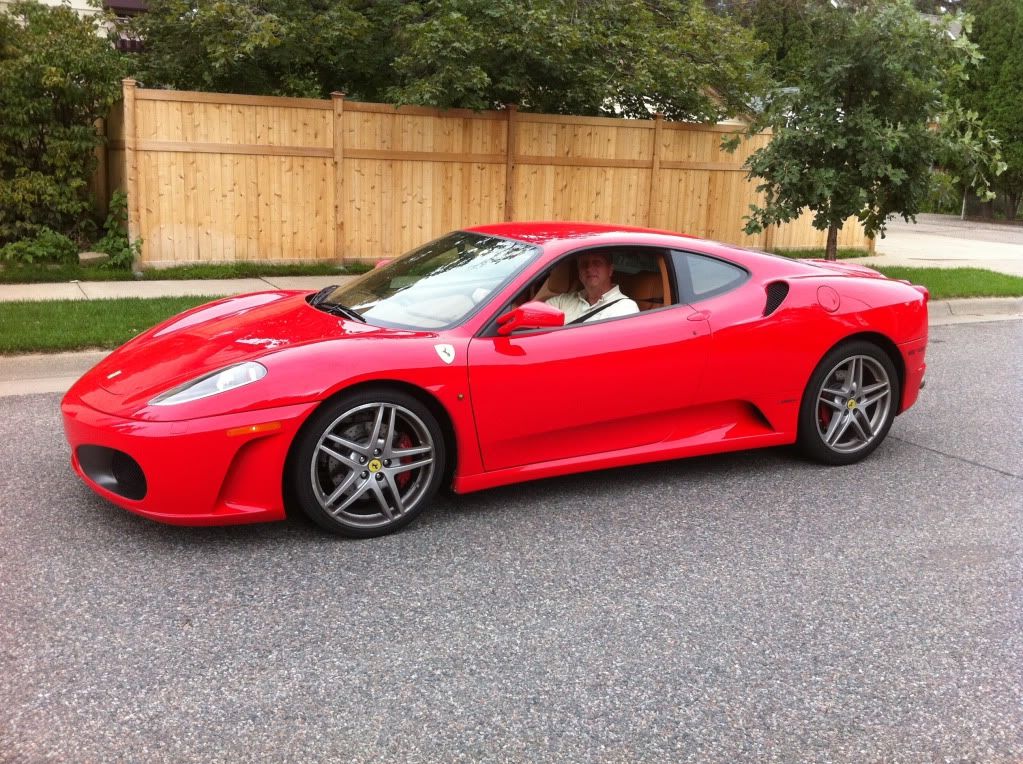
A side note... I won't be doing any work from Saturday til' Tuesday or Wednesday because I am going to help my brother bring back a vehicle from Salt Lake City, Utah. It is a 20 hour drive which isn't bad by any means but the car and the owner are someone you won't find are car soup. This guy owns a few exotics but my brother is going to purchase a mint 95' Ferrari 348 Spyder with a testerosa kit. I figure very few times in my life as would I ever get to drive a Ferrari, 95', 74' or 10', I could careless, a Ferrari is a Ferrari when your driving one. Anyways, I happened to be working on Snow White, the LS400, and I here a weird sounding motor, and didn't really think of it. I pull my head up and I see a bright red something pull over the hill. I was like fawk, I missed whatever it was, and a minute later, he comes roaring back through the intersection. It was a mint Ferrari F430.... I called my brother up to see if he was playing tricks on me, he normally doesn't like cars... He replied he wasn't anywhere close. 20 minutes go by, every car that drives by I pick my head up, and sure enough, this F430 comes flying around the corner, and I drop everything and come flying out in the street trying to flag him down. He stops and we chat for a bit, and it turns out that he works for a company that he drives this as a promotional deal, pretty sweet job....
Hopefully I can get an update in before I leave, otherwise I'm sure my T3 flange will be in by then. Once that happens, were in business. I feel as if I can see daylight at the end of the tunnel, I can only think of a hand full of things remaining. I think my overall list is down to like 15 things which includes fuel and tuning.
- T3 flange, silicone couplers and clamps, Walbro fuel pump, injectors, regulator, an fittings, stainless brained line, wideband, piggy back, radiator w/ overflow, downpipe w/ wastegate entrance, oil cooler lines, power steering feed line and rez, serp belt... I am sure there are more but my mind has left me for the evening. I am busy watching the Vikings lose, I just watch Brett Favre I guess. Anyways, as always it's been a pleasure. Feel free to add to the list.
I started the day degreasing and finishing up the wiring. If anyone wants to know, I've been using Simple Green degreaser and it works great. The first thing I did was deal with the alternator wiring that runs underneath the oil pans. I decided to keep most of the plastic shell that's already there, and cut it a little shorter so I can run the wires up the side of the block away as far away from the exhaust as possible, which isn't far at all. Here is a picture that sort of depicts it, but it's a bit hard to tell.
Here is the wiring to the alternator, it is tight for a reason as I don't have much space with my manifolds both running in that vicinity.
Here is the driver's side clean up a bit. In a perfect world, I would've relocated this underneath the master cylinder and the fender well but I wasn't going to get ridiculous so I just cleaned up the wiring and go rid of a few things. Unfortunately I didn't clear enough space for a battery, unless I purchase a Braille small race battery, which is a possibility, but I just don't think it will fit with the cold side piping running either around or over the top of it.
Here is the freshly degreased and painted face. The picture was taken after the brackets were made, but this is pretty much how it will look. I have plumbed the power steering cooler/return, now I just need to figure out where to put my SC400 power steering reservoir. I am saving up for a Mishimoto Supra radiator, and I still need to plumb the hayden tranny cooler.
Here are the brackets I made. Nothing special, I don't even know what type of material it is. It definitely isn't very strong, so in order to reuse factory studs I just bent them at an angle and bolted them right up. The are just barely enough to hold up the intercooler, but if it sits for a while it starts to lean forward and bend downwards.
Here is my idea of a top mount. Instead of making my own bracket, I decided that I would use a junk radiator mount that I discarded when I put a 93' radiator into a 87' 626 for a customer. I cut off the back side and welded on a little plate that allowed me to use the rubber bumper on the inside. I put a little bit of foam padding on the backside, in between the plate and intercooler to prevent the steel from rubbing on the aluminum. In order to secure it to the car, I just used a bracket that I am discarding and welded it to the back at an angle so I can reuse a factory welded bolt, like clock work.
Final intercooler mock up.
I know we've seen this picture before but this time it's final, not cutting or modifying of the bumper shell. As far as the aluminum bumper and foam, that won't fit anymore unfortunately. My intercooler now has the task of crash guard, basically my bumper and intercooler are toast if I bump something pretty good. The bumper sags a bit, but I think once I bolt everything up it shouldn't anymore.
A side note... I won't be doing any work from Saturday til' Tuesday or Wednesday because I am going to help my brother bring back a vehicle from Salt Lake City, Utah. It is a 20 hour drive which isn't bad by any means but the car and the owner are someone you won't find are car soup. This guy owns a few exotics but my brother is going to purchase a mint 95' Ferrari 348 Spyder with a testerosa kit. I figure very few times in my life as would I ever get to drive a Ferrari, 95', 74' or 10', I could careless, a Ferrari is a Ferrari when your driving one. Anyways, I happened to be working on Snow White, the LS400, and I here a weird sounding motor, and didn't really think of it. I pull my head up and I see a bright red something pull over the hill. I was like fawk, I missed whatever it was, and a minute later, he comes roaring back through the intersection. It was a mint Ferrari F430.... I called my brother up to see if he was playing tricks on me, he normally doesn't like cars... He replied he wasn't anywhere close. 20 minutes go by, every car that drives by I pick my head up, and sure enough, this F430 comes flying around the corner, and I drop everything and come flying out in the street trying to flag him down. He stops and we chat for a bit, and it turns out that he works for a company that he drives this as a promotional deal, pretty sweet job....
Hopefully I can get an update in before I leave, otherwise I'm sure my T3 flange will be in by then. Once that happens, were in business. I feel as if I can see daylight at the end of the tunnel, I can only think of a hand full of things remaining. I think my overall list is down to like 15 things which includes fuel and tuning.
- T3 flange, silicone couplers and clamps, Walbro fuel pump, injectors, regulator, an fittings, stainless brained line, wideband, piggy back, radiator w/ overflow, downpipe w/ wastegate entrance, oil cooler lines, power steering feed line and rez, serp belt... I am sure there are more but my mind has left me for the evening. I am busy watching the Vikings lose, I just watch Brett Favre I guess. Anyways, as always it's been a pleasure. Feel free to add to the list.
09-10-10, 10:26 AM
#222
Driver School Candidate
Join Date: Dec 2009
Location: AZ
Posts: 25
Likes: 0
Received 0 Likes
on
0 Posts
If it will fit then you can cut out the impact bar and foam between the frame rails. Then you still have quite a bit of structure to hold the bumper in place. Just cut the impact bar out between where it bolts to the frame and then cut the foam to fit the pieces that are bolted to the frame. No more saggs.
09-10-10, 11:18 AM
#223
Instructor
Thread Starter
If it will fit then you can cut out the impact bar and foam between the frame rails. Then you still have quite a bit of structure to hold the bumper in place. Just cut the impact bar out between where it bolts to the frame and then cut the foam to fit the pieces that are bolted to the frame. No more saggs.
Update.
Not much of one but I figured I would spend sometime in my happy place (junk yard) and do some surveying, the Taurus fan being my main goal in hopes of spotting a mint aluminum radiator to make work for now. I wasn't able to find a rad that I was just smitten about so I just kept looking for good fans. I got my fan and harness, but I happened to stumble upon a early 90's Toyota Tercel which used quite a small e-fan, perfect for my tranny cooler, run it off a toggle switch that's always hot, that way I have some cooling 24/7 key on or off. The Taurus fan will be wired up so that it comes on when it gets too hot it comes on as well as if the AC is on, even though I don't have any of the pieces installed.

I also stumbled upon a few Hondas with fairly small overflows. A few different sizes but grabbed the one that looked the most adaptable figuring I'd toy with a few locations. Behind the driver's strut tower, next to the master cylinder seemed to be the best spot, seeing that nothing else can fit into this spot. Although it's far away from the rad, a long hose should be fine. I really think I'm going to get the Mishimoto Supra rad.

I'm calculating and weighing the cost vs. reward of a battery, relocation kit, and jumper studs vs. a Braille lightweight compact battery. I would guess for $100 I could do a battery relocation and since my trunk lock does work, I would install studs that are excessible from the outside to jump the vehicle. OR I could spend an extra $50 and buy a battery with the same specs but measures 6x4x6 and weighs 17lbs, which I can mount sideways would would allow my cold side piping to run over the top or to the side.... Still debating..
Last edited by 3UZFTE; 09-10-10 at 11:22 AM.
09-10-10, 11:45 AM
#224
Lexus Champion
I did my battery relocation cheaply. I used welding cable and a battery box from Wal-Mart. My total cost came out to somewhere around $35.
09-11-10, 08:14 AM
#225
Instructor
Thread Starter
Hey thanks for the tip. I'm not familiar with welding cable but I'll find out more. Did you just run the power line up and connect it to the old battery connectors or did you re-wire everything? I just need to make sure I have jumper studs so that can access my battery even though my battery's dead and my trunk lock is ****ed. I could probably have my friend bend me a box for a few beers.