
Hello LS forum, 92' LS4 on craiglist and I bought it.
 09-11-10, 09:58 AM
#226
Driver School Candidate
iTrader: (1)

Join Date: Jul 2010
Location: nj
Posts: 36
Likes: 0
Received 0 Likes
on
0 Posts
Looks great! I had a Honda with a t3/t4 and it did take forever to spool and worked like a light switch. It had nothing til about 3700 rpm where it started to spool then by 4500 it was shredding the tires. Great in a straight line, but puttinmg the power on in the turns was kind of scary seeing as the car would just go straight. I like smaller turbos. I am thinking about Putting a twin setup on my Lightning with 2 very small turbos instead of 1 huge one so they spool quick and the power should be more linear.
Keep up the good work!!!
Keep up the good work!!!
 09-12-10, 01:00 AM
#227
Lexus Champion

Hey thanks for the tip. I'm not familiar with welding cable but I'll find out more. Did you just run the power line up and connect it to the old battery connectors or did you re-wire everything? I just need to make sure I have jumper studs so that can access my battery even though my battery's dead and my trunk lock is ****ed. I could probably have my friend bend me a box for a few beers.
 09-15-10, 09:44 AM
#228
Instructor
Thread Starter

Hey guys, no update as we're still on the road. As I type we are driving through the farm land of Iowa. Since I brought my mobile wi-fi, I figured I would put some eye candy out for you guys to see as I can't possibly do any work on the road. Anyways, here it is... It's a 95' Ferrari 348 Spider. 3.4 V8 with a 5 speed gear box and tons of fun to drive. As expected flying out there, I think this guy is a huge douche bag, but it turns out he is a hot rodder like most of us. He explained to me the motto of the Ferrari club is never pay for Ferrari unless you have to. He went on to explain that the CV shafts are out of a late Audi, the ECUs are (2) VW Fox ECUs that work in tandem to achieve the goal. About the only thing he said that comes from Ferrari is the oil filter and a few other things. Anyways I'm running low on battery, but here are a few pictures.
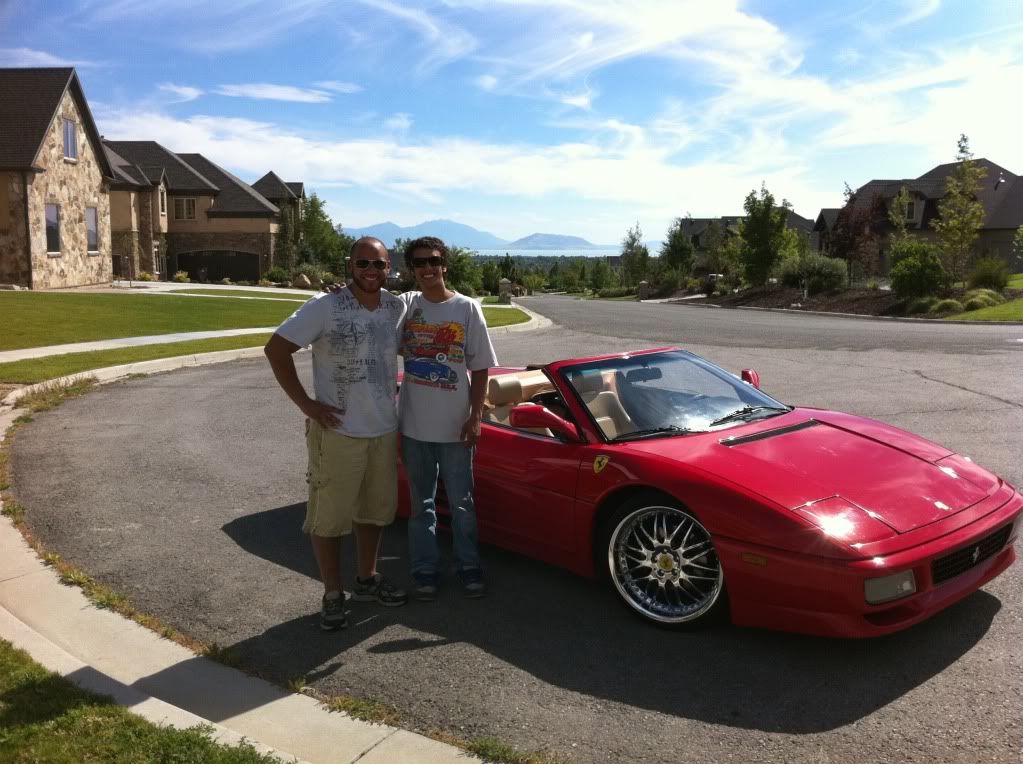
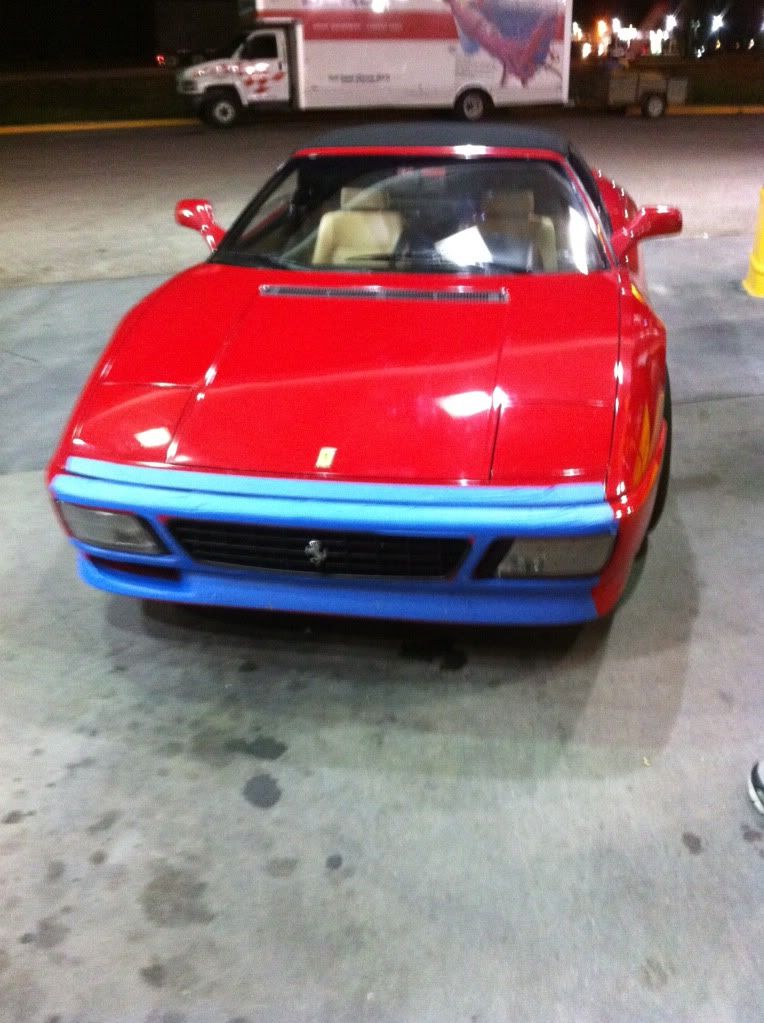
Since I am an import boy, I didn't barrow anything, but I basically took a page from the import boys' books and did the 3M painters tape bra to avoid rock chips and bugs on the 1,300 mile trip.
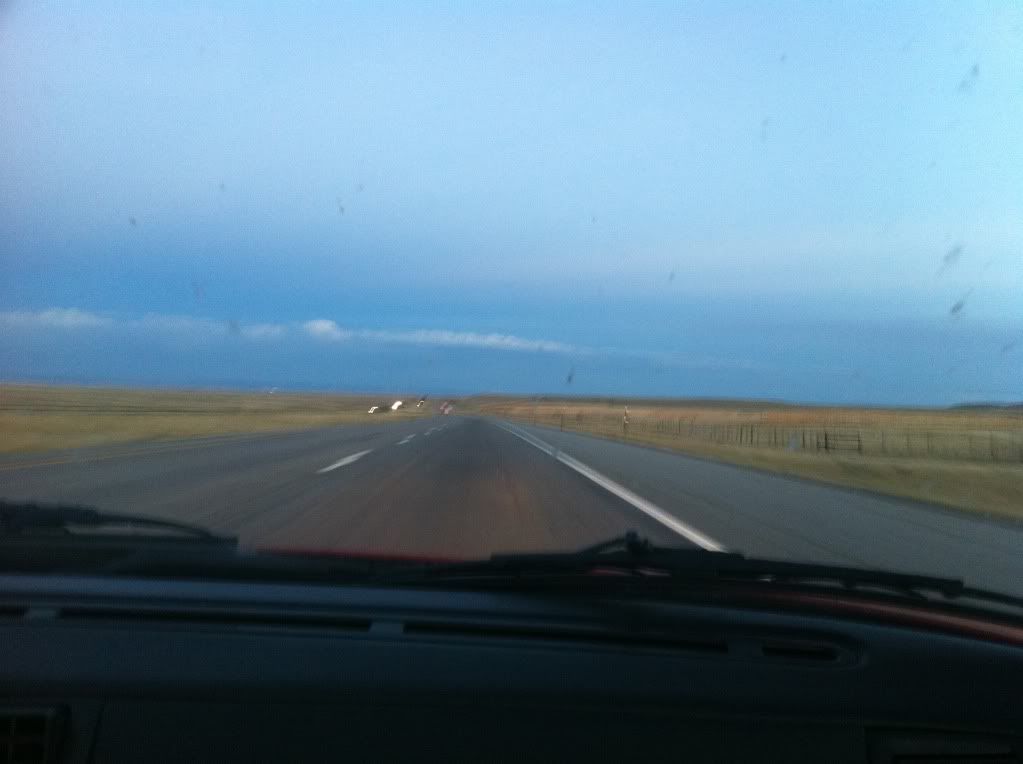
View from either Utah, Wyoming or both I forgot..

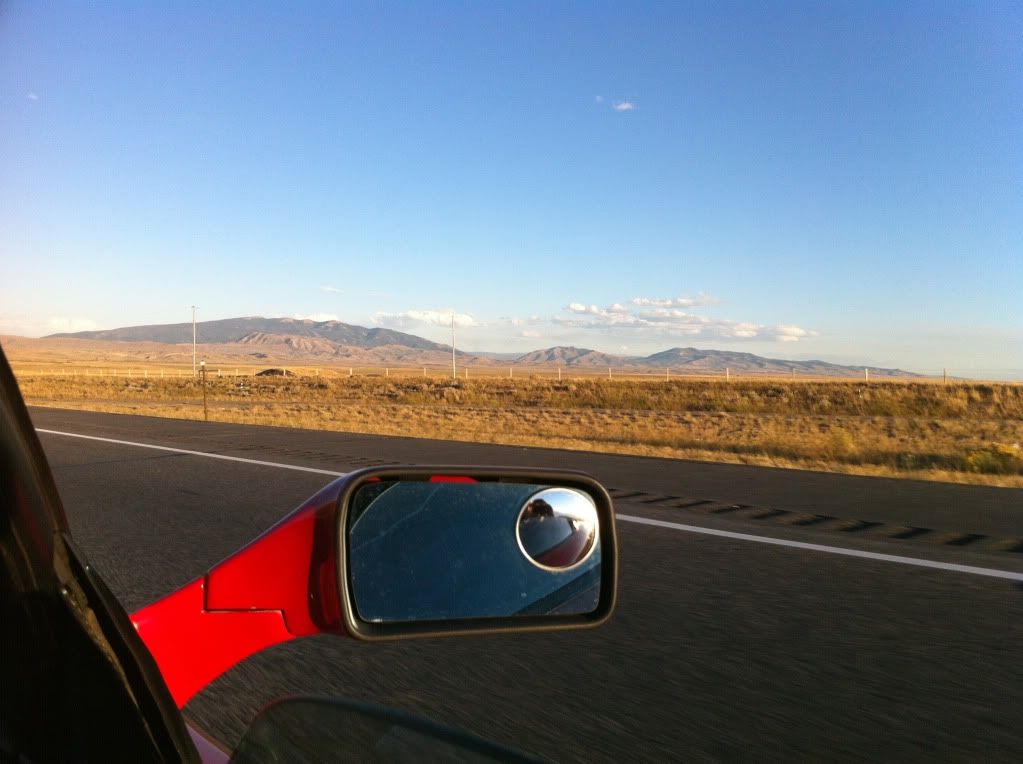

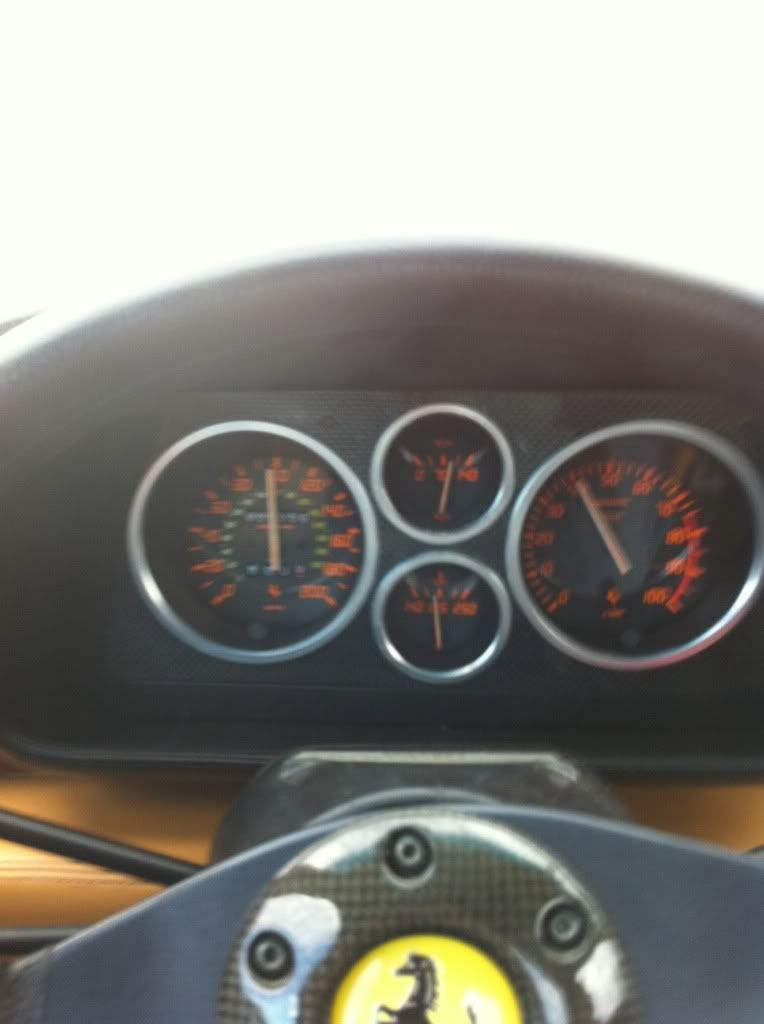
The speedo must be a bit off.... I swear I was going the speed limit officer...
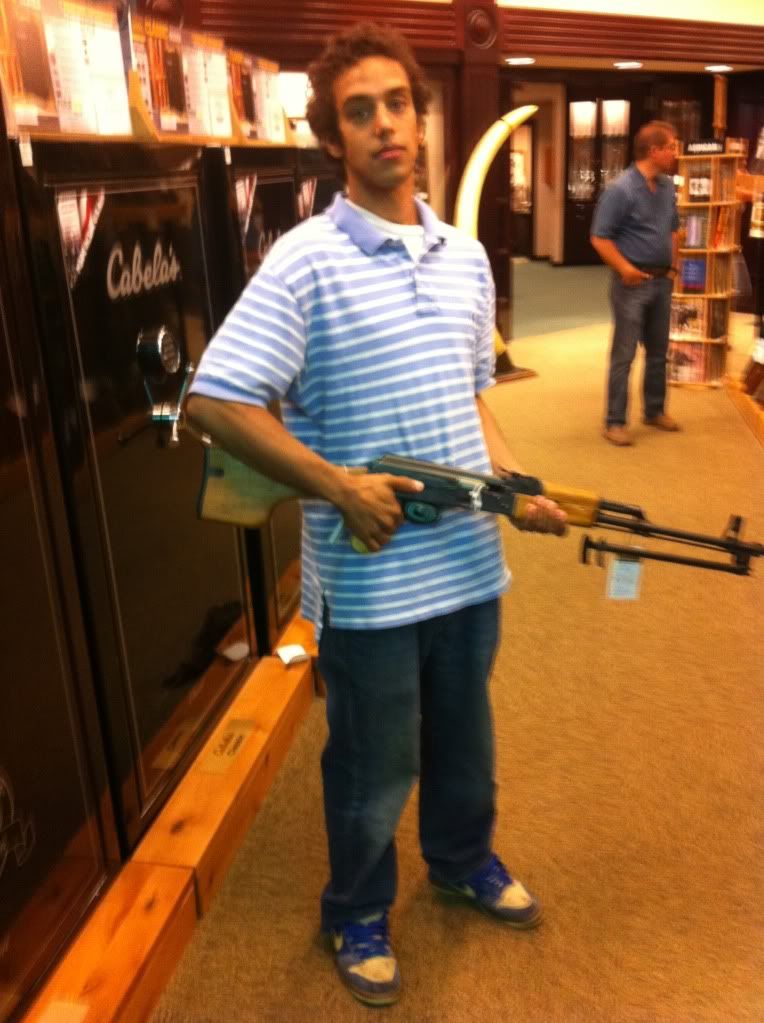
Just having a little fun at Cabela's, don't worry, I cleared the check and bought it....
Since I am an import boy, I didn't barrow anything, but I basically took a page from the import boys' books and did the 3M painters tape bra to avoid rock chips and bugs on the 1,300 mile trip.
View from either Utah, Wyoming or both I forgot..
The speedo must be a bit off.... I swear I was going the speed limit officer...
Just having a little fun at Cabela's, don't worry, I cleared the check and bought it....
Last edited by 3UZFTE; 09-15-10 at 09:47 AM.
09-17-10, 06:09 PM
#229
Instructor
Thread Starter
Update.
Hey all, we made the trip home and everything held up fine. I wouldn't bet otherwise, which is why I was there in the first place.
Although the trip was fun, it was nice to be back. I would like to say I've accomplished a lot more but unfortunately with customer's cars, last warm Saturday of the year, and a few others, I got a few things done, but now I am waning to build some funds up so I can buy my oil feed line, AN fittings, piggyback, etc. Unfortunately I live in Minnesota and it's probably going to start snowing soon... I gotta get my act in gear!
Here is a bracket that I fabbed up with a SC400 engine cooling fan reservoir and support bracket. I'm pretty sure this is the hydraulic circuit that power the engine cooling fans, but I don't know really, it fits my application, so it's happening.

Here is the mock up of the resv and bracket.

I was skeptical about the taurus fan clearance so I moved it forward and 2". This is the final product. I'm sure it'll make bleeding the air out difficult, but who cares, I think it's sick.

Painted the cap chrome, and was going to paint the rest and leave a little strip to gauge the level but in reality, no one will see it. I'm pretty sure that brown gunk is acid and has etched into the cap and resv, degreasing and scrubbing didn't even work.

After the enitial mock up the Tial and T3 came in contact so I had to extend the WG a bit, It sure isn't perfect, but it work, it clears everything however the merge is pretty close to the MAF and will need to be wrapped. I don't think there's any leaks, but I needed to let it cool, and I had just about had enough energy to take this picture and call it a day.

Had to weld the stud in because there wasn't enough room to slid a nut in, so I had to grind down a bolt and welded it in.

Next. I need to make a down pipe with the WG entrance. Order braided line, -3AN fittings, make a support bracket for the turbo. It's getting closer. Later guys, hope I'm not boring y'all....
Hey all, we made the trip home and everything held up fine. I wouldn't bet otherwise, which is why I was there in the first place.
Although the trip was fun, it was nice to be back. I would like to say I've accomplished a lot more but unfortunately with customer's cars, last warm Saturday of the year, and a few others, I got a few things done, but now I am waning to build some funds up so I can buy my oil feed line, AN fittings, piggyback, etc. Unfortunately I live in Minnesota and it's probably going to start snowing soon... I gotta get my act in gear!
Here is a bracket that I fabbed up with a SC400 engine cooling fan reservoir and support bracket. I'm pretty sure this is the hydraulic circuit that power the engine cooling fans, but I don't know really, it fits my application, so it's happening.
Here is the mock up of the resv and bracket.
I was skeptical about the taurus fan clearance so I moved it forward and 2". This is the final product. I'm sure it'll make bleeding the air out difficult, but who cares, I think it's sick.
Painted the cap chrome, and was going to paint the rest and leave a little strip to gauge the level but in reality, no one will see it. I'm pretty sure that brown gunk is acid and has etched into the cap and resv, degreasing and scrubbing didn't even work.
After the enitial mock up the Tial and T3 came in contact so I had to extend the WG a bit, It sure isn't perfect, but it work, it clears everything however the merge is pretty close to the MAF and will need to be wrapped. I don't think there's any leaks, but I needed to let it cool, and I had just about had enough energy to take this picture and call it a day.
Had to weld the stud in because there wasn't enough room to slid a nut in, so I had to grind down a bolt and welded it in.
Next. I need to make a down pipe with the WG entrance. Order braided line, -3AN fittings, make a support bracket for the turbo. It's getting closer. Later guys, hope I'm not boring y'all....
Last edited by 3UZFTE; 09-17-10 at 06:27 PM.
09-20-10, 06:16 PM
#230
Instructor
Thread Starter
Update.
I finished up the merge. That's a lot of filler rod.

My favorite part.

Tested for leaks with water.

Wrapped the headers with wrap, I didn't have enough to wrap the entire header, so I did what I could.

Power steering mocking up, and IAC is plumbed.

Didn't like this mock up for the fact that it would be too close to my downpipe/wastegate.

Ended up with this, and I will use brass line to run underneath the turbo and a 90* bend to feed the pump.

The underneath plumbing...

Had to modify the power steering feed a bit.


Finished the merge.

Still need oil feed and return lines, make a turbo support bracket, and modify the existing power steering line, or have a new one made, I also need some more header wrap and I think I'll order a turbo heat blanket.
As far as electronics go, I am going to run stock setup for a while until I can source a complete Megasquirt setup for under $500, including ECU, coils, wires, etc. I would very much like to change the timing curves, run more boost, and get rid of all the unneeded junk like the dual dizzys, cam position sensors, etc.
I finished up the merge. That's a lot of filler rod.
My favorite part.
Tested for leaks with water.
Wrapped the headers with wrap, I didn't have enough to wrap the entire header, so I did what I could.
Power steering mocking up, and IAC is plumbed.
Didn't like this mock up for the fact that it would be too close to my downpipe/wastegate.
Ended up with this, and I will use brass line to run underneath the turbo and a 90* bend to feed the pump.
The underneath plumbing...
Had to modify the power steering feed a bit.
Finished the merge.
Still need oil feed and return lines, make a turbo support bracket, and modify the existing power steering line, or have a new one made, I also need some more header wrap and I think I'll order a turbo heat blanket.
As far as electronics go, I am going to run stock setup for a while until I can source a complete Megasquirt setup for under $500, including ECU, coils, wires, etc. I would very much like to change the timing curves, run more boost, and get rid of all the unneeded junk like the dual dizzys, cam position sensors, etc.
 09-21-10, 07:33 AM
#232
Instructor
Thread Starter
I was a bit concerned with that as well. You may have just talked me into getting it ceramic coated.... I have not only heard horror stories with wrap, but even the cheap paint sucks, last time I check, there was a guy that does an entire load for $100 or something.
 09-21-10, 11:09 AM
#234
Subscribed. Sweet progress! Btw, can you do us new commers a favor and go back to your first post and change the title to your thread to something along the lines of turbo LS or something? Thx.
09-21-10, 03:13 PM
#235
Instructor
Thread Starter
Patients was never my strong suit, besides there's probably a month left of good weather, I need every minute.
That's not a bad idea, I guess my thought process is that if you don't spend a little more time searching and thinking outside the box, you miss out on something great.
Thanks to PD, I called around and found a single place that's about 30 minutes north of the Twin Cities that does ceramic coating for around $200, depending on the size. I figured since it was probably in my best intrest I would invest. I decided to make sure my headers weren't going to leak, especially after I spent money to have them coated. I spent a few hours testing with water and air pressure. Here is everything on the way to being ceramic coated.

The only down side is a 1 week turn around, so I better have the oil lines and power steering pressure line ready to go when their back as well as a battery relocation kit.
Thanks to PD, I called around and found a single place that's about 30 minutes north of the Twin Cities that does ceramic coating for around $200, depending on the size. I figured since it was probably in my best intrest I would invest. I decided to make sure my headers weren't going to leak, especially after I spent money to have them coated. I spent a few hours testing with water and air pressure. Here is everything on the way to being ceramic coated.
The only down side is a 1 week turn around, so I better have the oil lines and power steering pressure line ready to go when their back as well as a battery relocation kit.
09-22-10, 09:46 PM
#238
Driver School Candidate

Join Date: Dec 2009
Location: AZ
Posts: 25
Likes: 0
Received 0 Likes
on
0 Posts
Have you thought about running two gaskets and leaving the fixture plate in place to help support the weight of the turbo. The only drawback I can think of is that since the fixture plate bolts to the PS pump there will be some heat soak. Because your crossover pipe is not rigid The bulk of the load of your turbo is carried by the passenger's side exhaust manifold. Depending on how you build the down pipe it can also be used to support some of the turbo load, I just think the stainless fixture would be good extra insurance.
09-23-10, 09:06 AM
#239
Instructor
Thread Starter
+1 for the LC-1.
http://www.fordmuscle.com/archives/2...ebandShootout/
^written by Mike Kojima of many import mag fame and motoiq.com
http://www.fordmuscle.com/archives/2...ebandShootout/
^written by Mike Kojima of many import mag fame and motoiq.com
Have you thought about running two gaskets and leaving the fixture plate in place to help support the weight of the turbo. The only drawback I can think of is that since the fixture plate bolts to the PS pump there will be some heat soak. Because your crossover pipe is not rigid The bulk of the load of your turbo is carried by the passenger's side exhaust manifold. Depending on how you build the down pipe it can also be used to support some of the turbo load, I just think the stainless fixture would be good extra insurance.
Off to pick up my mad scientist creations from the powder coating place. Pics to come.
09-23-10, 12:02 PM
#240
Instructor
Thread Starter
Pure sex and worth every Andrew Jackson.

Ordered 1/8 NPT to -3AN, premade braided oil line with -3AN fittings on both sides and an AEM Uego for $140. I am also probably picking up a boost gauge tonight for $25. I haven't decided where to locate both gauges, but I don't want to be the douchebag that has a sleeper but gives it away by having a gauge pod or two gauges mounted on the dash of a Lexus. Decisions..
Also, I am contemplating the idea of making a homemade power steering line using an AN fitting on the rack side and a banjo bolt style fitting on the pump side. Line will hold up to 300psi, pump shouldn't see more than that. Either that, or I take my line and have a hydraulic shop cut and splice mine. I'm leaning toward the AN line.