Hello LS forum, 92' LS4 on craiglist and I bought it.
 11-08-10, 05:36 PM
#286
Instructor
Thread Starter

Update.
So, the little seat time I did have, I was able to find a few things out regarding my setup. There seemed to be a sort of a bucking feeling. After conversing with e57280, I was able to trace my issue back to my wastegate vacuum routing. The source of the problem is that I was getting my vacuum from the intake manifold, eventhough the directions say clearly to take it from before the throttle body, and not the intake manifold.

Since the cold side piping runs right by the wastegate, I decided to just weld a nipple on the under side of the pipe in order to provide a little stealthier look.

Here it is all hooked, and since I now have an open port on the intake manifold, I decided to make my own plug out of rubber hose and silicone, should do the trick.

Hopefully I'll have a little better luck. I also decided to buy some NGK BKR6E plugs and am going to gap them at .044, which seems to be what the stock Supra boys are running.
So, the little seat time I did have, I was able to find a few things out regarding my setup. There seemed to be a sort of a bucking feeling. After conversing with e57280, I was able to trace my issue back to my wastegate vacuum routing. The source of the problem is that I was getting my vacuum from the intake manifold, eventhough the directions say clearly to take it from before the throttle body, and not the intake manifold.
Since the cold side piping runs right by the wastegate, I decided to just weld a nipple on the under side of the pipe in order to provide a little stealthier look.
Here it is all hooked, and since I now have an open port on the intake manifold, I decided to make my own plug out of rubber hose and silicone, should do the trick.
Hopefully I'll have a little better luck. I also decided to buy some NGK BKR6E plugs and am going to gap them at .044, which seems to be what the stock Supra boys are running.
 11-15-10, 06:06 PM
#287
Instructor
Thread Starter
Hey all, looks like the build's going in hibernation for a while. The weather has seemed to turn, and 2 days ago we got a massive snow storm that massed about 8" of cold wet snow. Unfortunately, little did I know at the time, but I lost one of my best friends in southern Minnesota as he was trying to free his car from a ditch, a vehicle coming the other direction lost control, ended up striking my friends Subie, killing him. Needless to say, My project means very little to me right now.
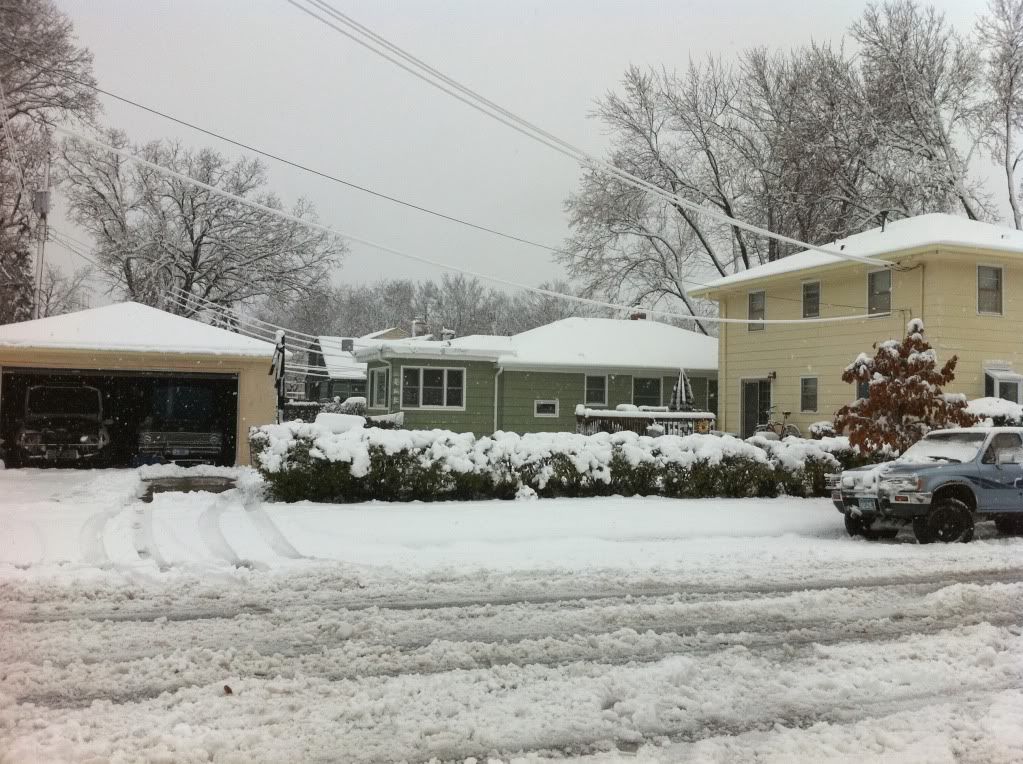
Safely tucked away.

My friend that was killed, John Kennedy IV.

I hope you all are enjoying life and those around you because you never know when people or things will be taken from us. If you don't already, remind those closest to you how important they are on a consistent basis.
Safely tucked away.
My friend that was killed, John Kennedy IV.
I hope you all are enjoying life and those around you because you never know when people or things will be taken from us. If you don't already, remind those closest to you how important they are on a consistent basis.


 11-17-10, 10:09 AM
#295
Instructor
Thread Starter
Thanks again guys for your support. I've been struggling to come to terms with losing him and so I need to stay busy. Yesterday I welded up some steel step bars for my Toyota pickup, and today I figured I'd take a ride in my project on my friends behalf.

Update.
I decided to tidy the front up for winter just in case I lose motivation and I get pulled over for not having a front bumper, plate, lights, etc., so I went ahead and buttoned up the front. Since I didn't want a flapping bumper and as much of the original look as possible, I just gutted the crash gaurd. In the picture you can see what I kept and what I cut, the gaurd is upside down, but during mock-up, it didn't matter.

I am trying to keep the original look in tact. Like I mentioned, I didn't want a flappy bumper so I used all the pieces in order to make sure I don't just rip up the intercooler and all the other cooling lines running behind there.

And finally, ready for some good old fashion boost.

I was skeptical of my cheap a$$ Autolites that I decided to put in when I was rebuilding it NA style. Now that I'm boosted, I'm almost positive these plugs just won't work with the existing plug gaps. They probably would've worked, but definitely at a much smaller gap. After I pulled them, I measured the gaps and I was shocked, they ranged from .024"-.041", which is almost twice the gap, no wonder it's misfiring. I decided to upgrade the plugs at this point, so decided to cruise Supraforums and found that a lot of people go with NGKs, so I went with one step colder plug, so I ended up with BKR7E plugs that are gapped to .028". If I find out their too cold for my build, I'll just regap the Autolites down to something similar.
Update.
I decided to tidy the front up for winter just in case I lose motivation and I get pulled over for not having a front bumper, plate, lights, etc., so I went ahead and buttoned up the front. Since I didn't want a flapping bumper and as much of the original look as possible, I just gutted the crash gaurd. In the picture you can see what I kept and what I cut, the gaurd is upside down, but during mock-up, it didn't matter.
I am trying to keep the original look in tact. Like I mentioned, I didn't want a flappy bumper so I used all the pieces in order to make sure I don't just rip up the intercooler and all the other cooling lines running behind there.
And finally, ready for some good old fashion boost.
I was skeptical of my cheap a$$ Autolites that I decided to put in when I was rebuilding it NA style. Now that I'm boosted, I'm almost positive these plugs just won't work with the existing plug gaps. They probably would've worked, but definitely at a much smaller gap. After I pulled them, I measured the gaps and I was shocked, they ranged from .024"-.041", which is almost twice the gap, no wonder it's misfiring. I decided to upgrade the plugs at this point, so decided to cruise Supraforums and found that a lot of people go with NGKs, so I went with one step colder plug, so I ended up with BKR7E plugs that are gapped to .028". If I find out their too cold for my build, I'll just regap the Autolites down to something similar.
Last edited by 3UZFTE; 11-17-10 at 10:13 AM.
11-24-10, 08:26 AM
#296
Driver School Candidate

Join Date: Nov 2010
Location: SC
Posts: 2
Likes: 0
Received 0 Likes
on
0 Posts
hey man! awesome build thread! just though I'd ask a few questions, pick your brain a bit, I've found a nissan 240sx with an ls400 swap in it. swap looks clean, I still have yet to drive it. I was just curious though, as to what turbo kit you put on your car. If I were to buy the 240 I was wanting to turbo it, but wasn't sure what type to get. Any info on this would be great!
Thanks.
Thanks.
11-24-10, 07:36 PM
#297
Lexus Champion

make sure you get the turbo kind that has spool and boost. That's the best kind. You can usually find it in the turbo's description in Gran Turismo.
11-26-10, 12:24 PM
#298
Instructor
Thread Starter
hey man! awesome build thread! just though I'd ask a few questions, pick your brain a bit, I've found a nissan 240sx with an ls400 swap in it. swap looks clean, I still have yet to drive it. I was just curious though, as to what turbo kit you put on your car. If I were to buy the 240 I was wanting to turbo it, but wasn't sure what type to get. Any info on this would be great!
Thanks.
Thanks.
Update..
I decided to decorate the MS3 case in honor of my friend, John Kennedy IV.

I finally got the motivation to take it for another spin, and I can sure tell the difference the plugs make. Still having some issues, but A/F ratios look good, power is there, throttle response leaves a bit to be desired, once it makes boost, hold on.... Here's a winter cruise.
http://www.youtube.com/watch?v=iW4nf...e_gdata_player
Since the build is kind of on a hiatus, I decided to put a list together and I'm sure I'll skip somethings, but here's an attempt to list my cost for the turbo build. I strted by buying a Lincoln TIG welder so I can fabricate stuff, you may already have a welder or know someone, I bought mine for close to $1,000; Ridgid chop saw, $100; die grinder, whizzy wheel, and carbide bits, $$$ (Snap-on). As far as the turbo build.. eBay turbo, $250; SC400 driver's exhaust manifold (turned backwards), $45; 2" & 3" steel, $200; Tial Wastegate, $175; Intercooler, BOV, and cold side piping, $300; silicone couplers, $50; oil feed & drain, $50; AEM UEGO (wideband), $140; Walbro 255 hi-psi, $65; custom power steering line, $80; Autometer boost gauge, $25; flexible exhaust crossover, $25; NGK BKR7E plugs, $50; black, silver, white hi-temp paint, $30; Hi-temp powder coat, $200; Taurus efan, $25; tranny cooler, $45; T3 flange, $10; V-band clamps, $40; assortment of hoses and o-rings, vacuum tees, $40; hose clamps, $20; header wrap, $30; battery relocation, $100; welding supplies (gas, rod, #4 & #6 cups), approximately $100; and remember, I have a buddy with a sheetmetal shop who allowed me to make gaskets and block off plates and cutting and boxing in my radius rod for the downpipe for free, so maybe another $200 on top of that. And that was only the first part of the build, Stage 2 is going to be moooooore boost. Megasquirt3 v3.0 w/ MS3X expansion card, $500; LSx coil-near-plugs w/ harness, $100; Flex fuel sensor, $100; Aeromotive adjustable FPR, $150; AN lines and fittings, $50; Tial 15psi WG spring, $20; 36# injectors, $100; wiring, connectors, and sensors, $50; Supra Alum. radiator, $200; custom gauges, $200; to be continued...
Grand total... Stage 1, $2,095; Stage 2, $1,470... and PLEASE note that my cost only contained parts to go forced induction and not the price of the vehicle repair or rebuild, nor for ANY tools, including my welder. I am positive I'm forgetting the cheap stuff like wiring, solder, tools, elec. tape, teflon tape, silicone, nuts/bolts and other piddelly things as people usually have that stuff lying around. Also, I didn't account for spending more than $250 for a turbo, which is cheap as sheit, so you could easily add $250-1,000 for a name brand turbo. Hopefully this list helps out a bit as far as what it cost. Also keep in mind, my time is free for me, but not for you...
As usual, questions and comments are welcome. Feel free to add anything I may have missed, thanks again for checking out my build.
11-26-10, 04:58 PM
#299
Driver School Candidate

Join Date: Dec 2009
Location: AZ
Posts: 25
Likes: 0
Received 0 Likes
on
0 Posts
It is a good idea to mention that there will be a fair amount of money tied up in doing things more than once. I nearly completed a drivers side header in 304 stainless before I ended up scraping it. That kind of stuff happens more than you think. As much as you may not want to end up doing something more than once; always making sure to measure twice and cut once. It really dosen't matter, you will do some things twice, that is the learning curve. Especially on a project this ambitious.
11-26-10, 06:59 PM
#300
Driver School Candidate
Join Date: Dec 2009
Location: AZ
Posts: 25
Likes: 0
Received 0 Likes
on
0 Posts
In the video your temp gauge is pegged. I think the computer and the temp gauge take their readings from different sensors. Maybe it is coincidence but a funky temp signal to the computer screws up all kinds of things. You may want to verify that they are using different sensors when you get a chance. You can finally actually hear it come to life, sounds cool. I saw some of your welding on pirate 4X4; you are really getting the hang of it, good work. What a difference seat time makes.