
DIY Brake Pad Replacement/Sensor Fix (UCF20)
 12-31-11 | 08:11 AM
#1

Thread Starter
Driver School Candidate
Joined: Dec 2011
Posts: 24
Likes: 2
From: CT
In this thread i will show you how to replace your front brake pads WITHOUT removing the caliper and also how to fix your "brake pad sensor"
Time: 1/2hr-1hr
Tools Needed:
Floor Jack
Jack-stands
Breaker-bar
21mm socket
Pry bar (x2)
Flathead screwdriver
Pliers
Soldering gun
Solder
Heat-shrink
PART #1: PAD REMOVAL/REPLACEMENT
1. Park your car on level ground and jack up the front end and place your jack-stands securely underneath the car.
2. Take your breaker-bar and 21mm socket and remove your front wheels, don't forget your wheel lock key!
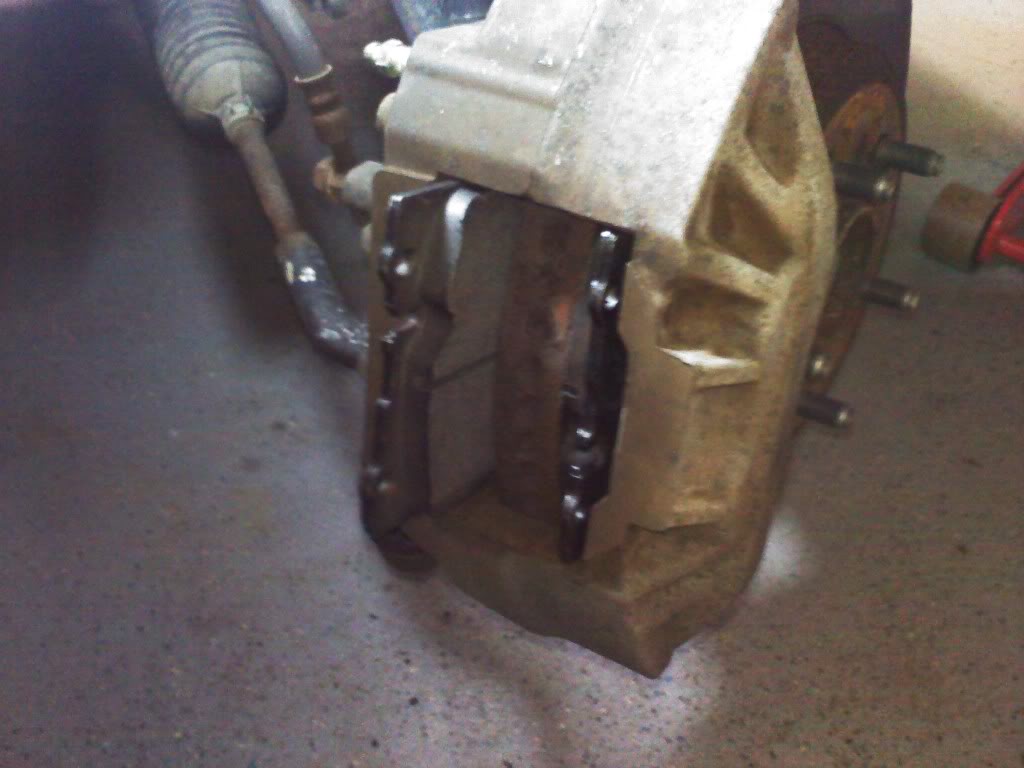
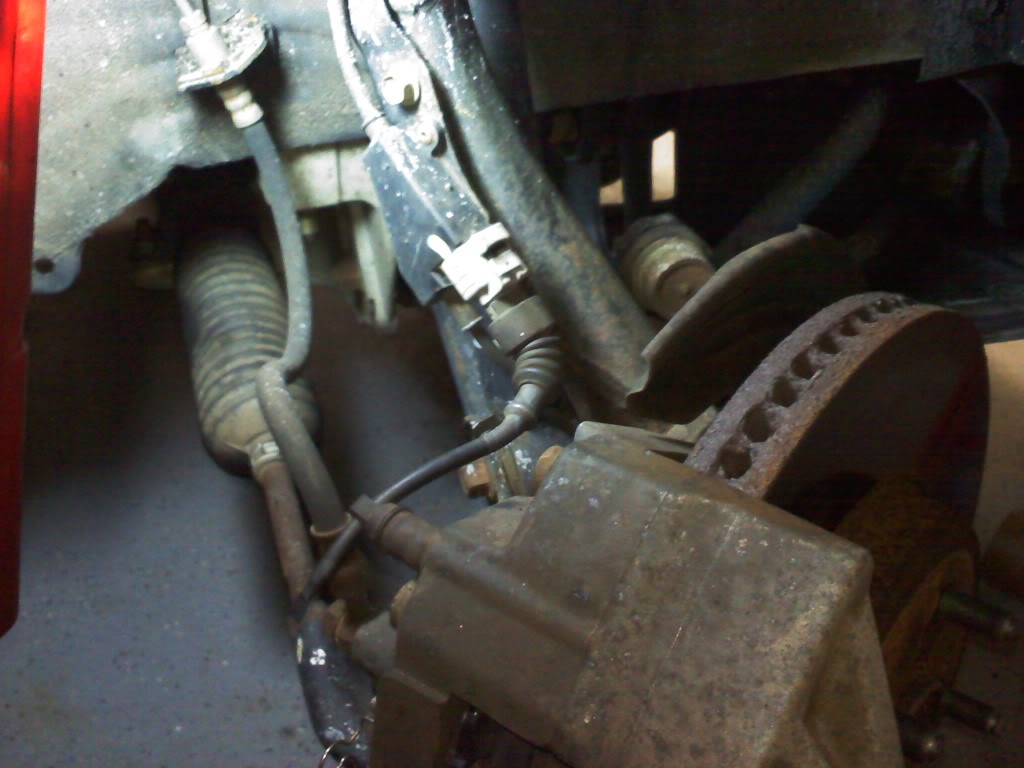
3. Heres the caliper still loaded
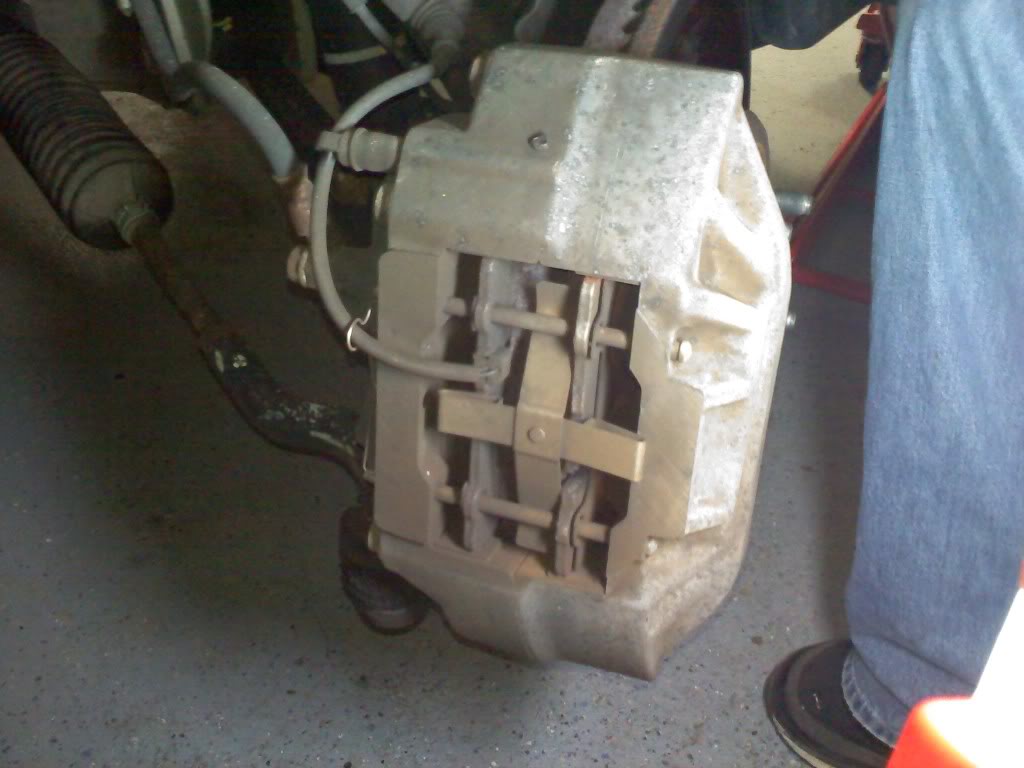
That wire attached to the caliper is the sensor in question
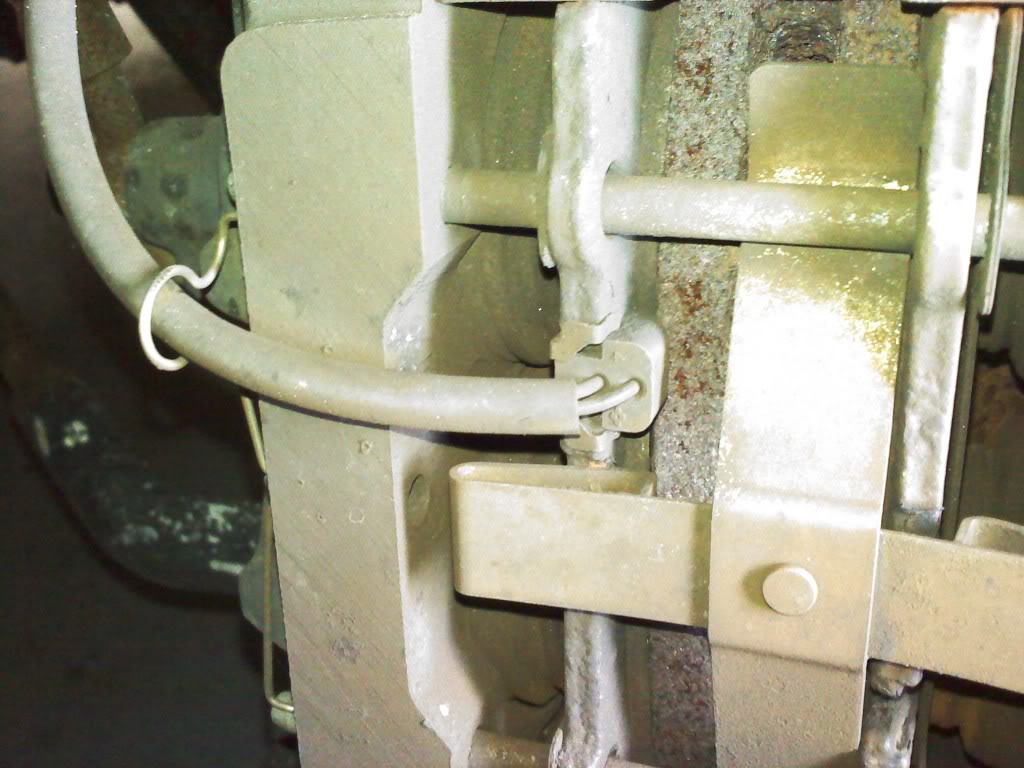
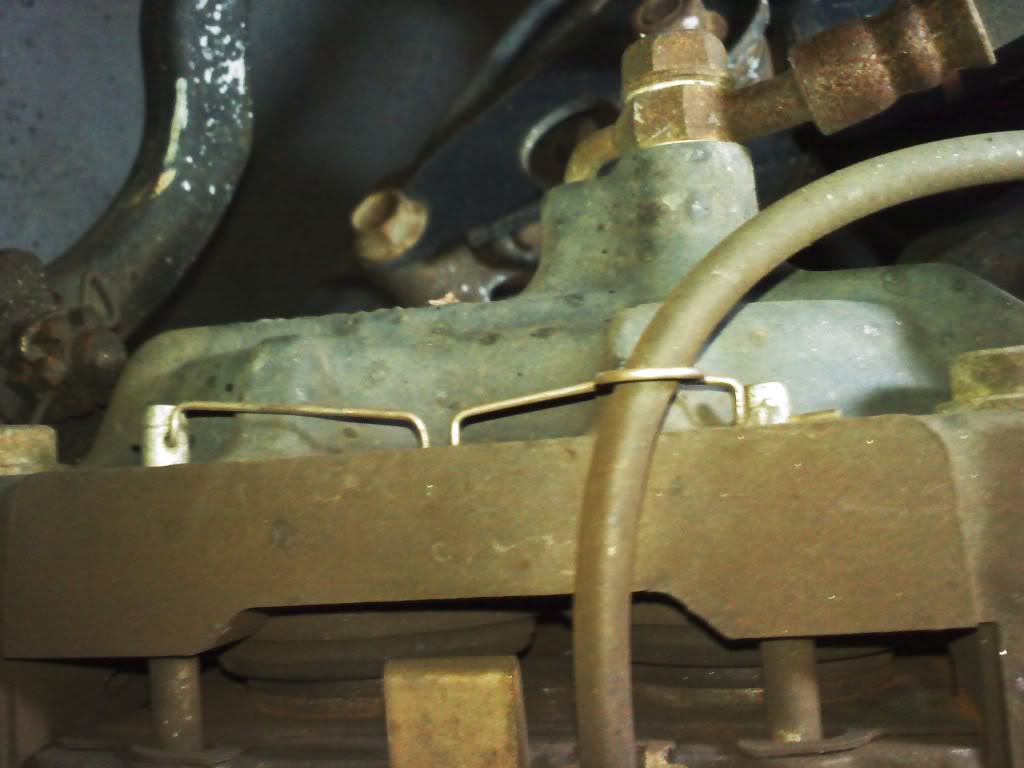
4. Remove the clip on the back of the caliper that holds the brake pad pins in, you can do this by hand.
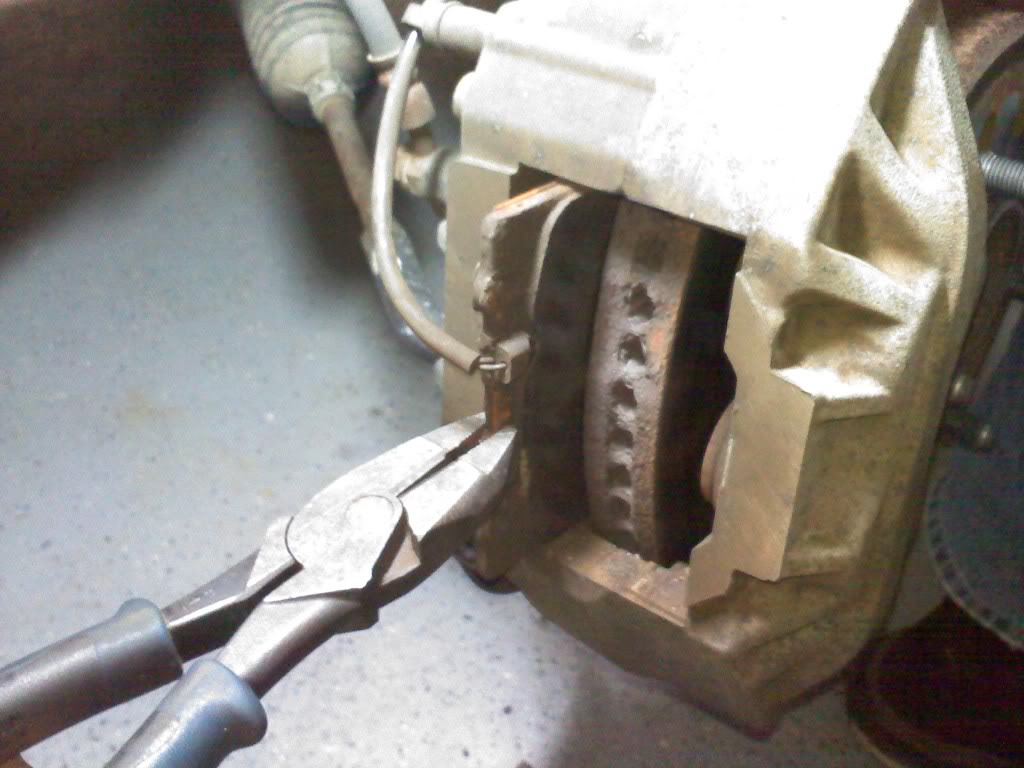
5. With one hand hold the metal clip while you pull the pad pins out with the pliers

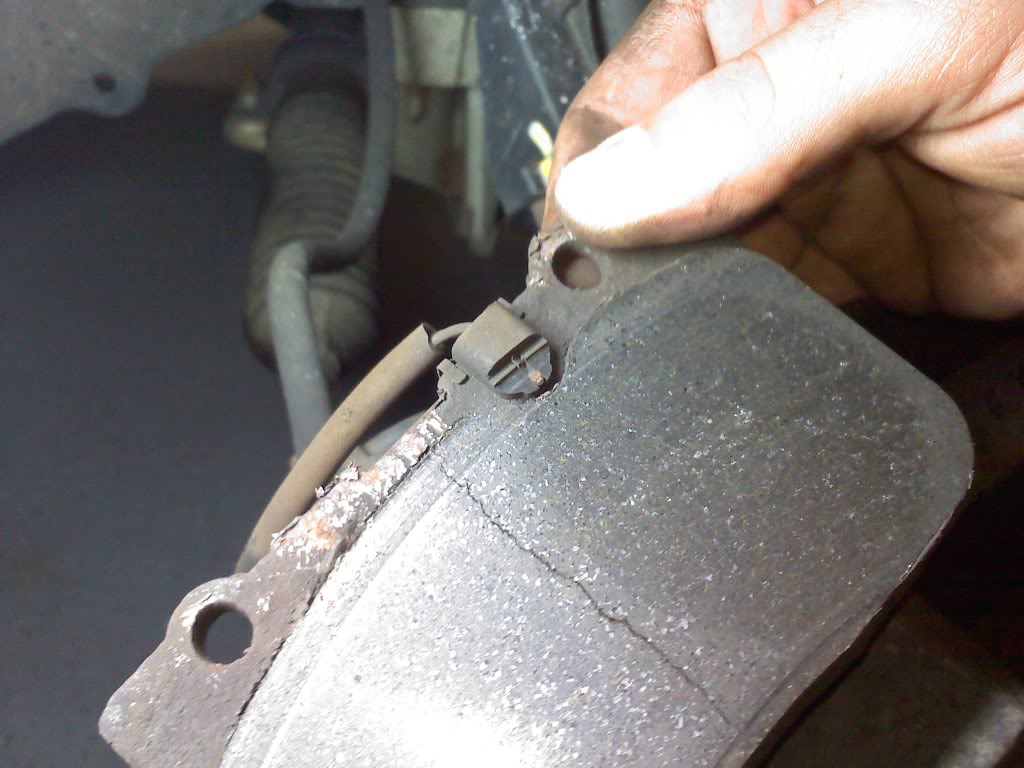
6. Take your pliers and shimmy the pads out, this will take a little effort
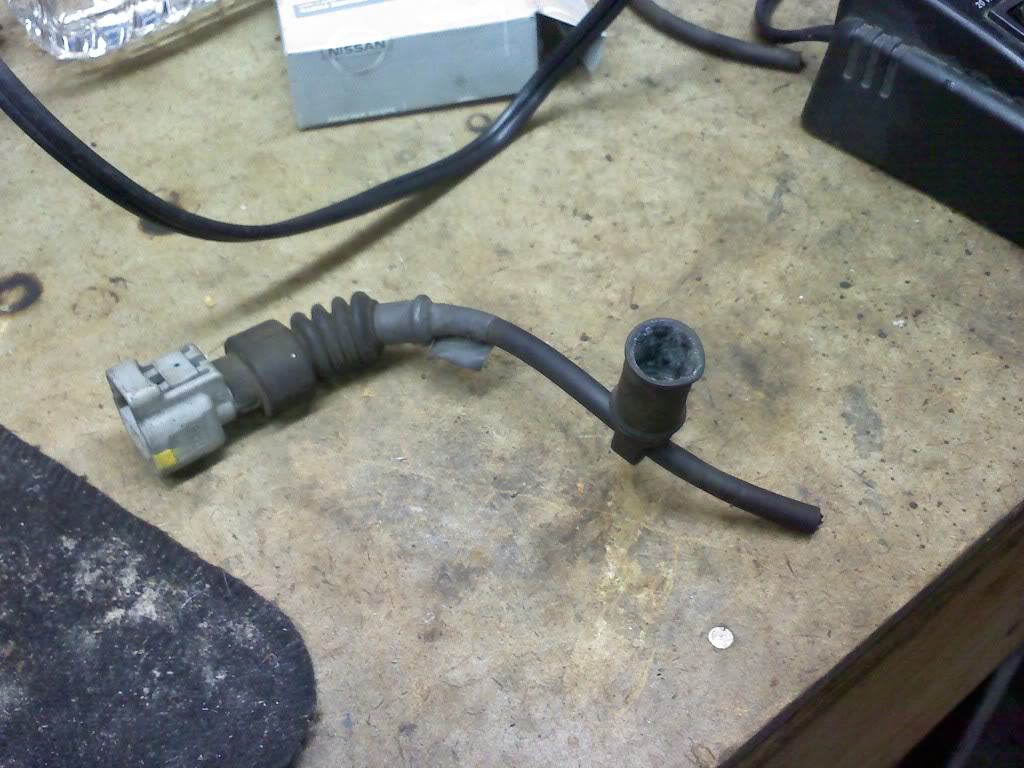
This is what your worn pad and sensor look like
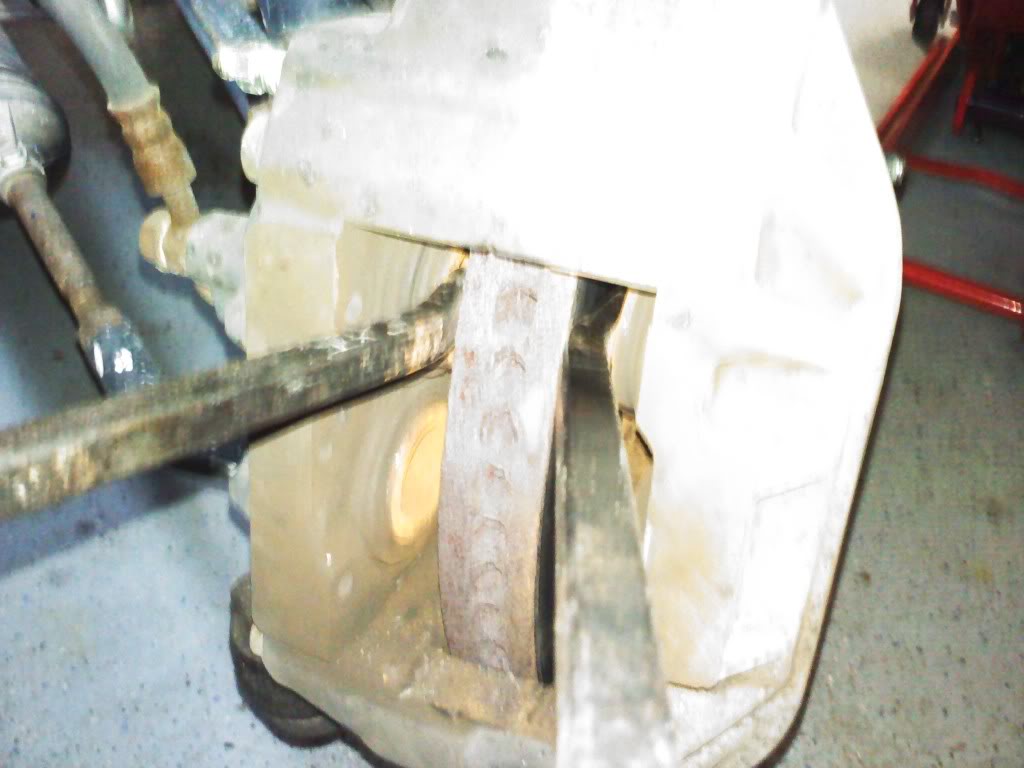
7. Take your 2 pry-bars and push the pistons back into the caliper
8. Slide your new pads back in
**** most new pads either come with or without new shims, its ok to use your old ones if they are clean and not cracked, if they are in bad shape its ok to drive without them, but your front brakes might be noisy, you can buy a new shim kit from http://lexus.sewellparts.com/
9. Put the metal clip back on top of the pads and slide the pins in, then attach the clip that holds the pins from sliding out.
You have now finished installing your new pads! onto PART #2: Brake Pad Sensor Fix
*Break in period: when you go out for the first drive do a 25mph to almost stop, 35mph to almost stop and 45mph to almost stop, do not brake hard for about 50-100 miles, after that your pads are broken in.
PART #2: BRAKE PAD SENSOR FIX
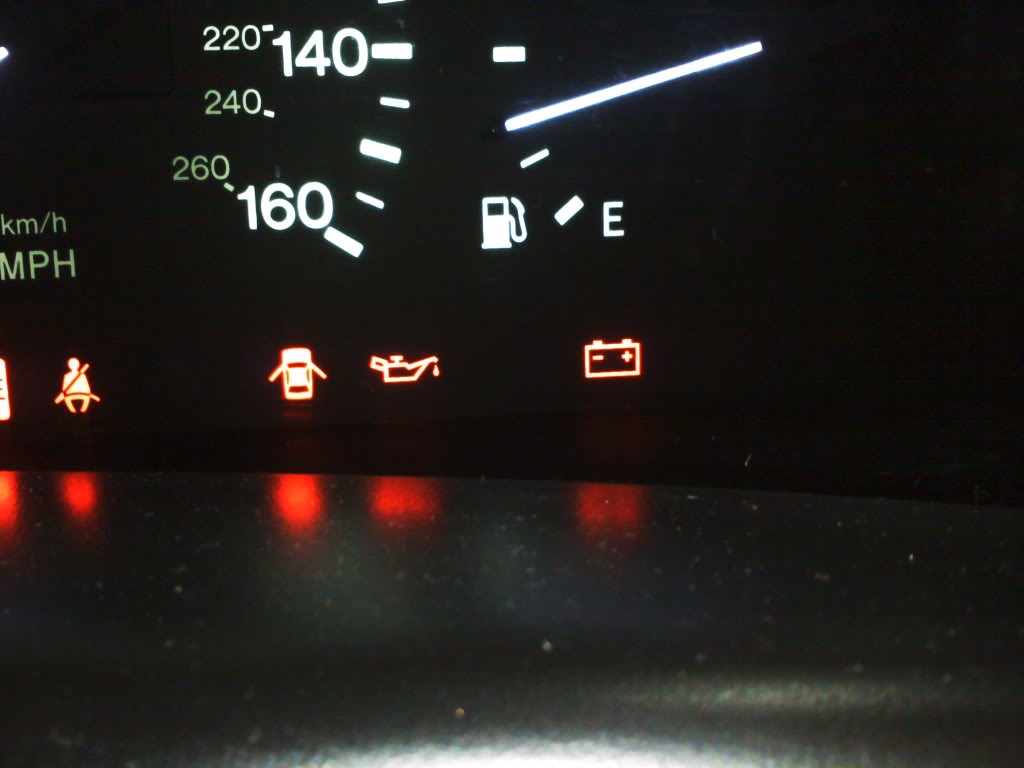
When your pads get really low a light will appear on your dashboard looking like this (o) that is the indicator for the Brake Pad Sensor. There is only two way to fix this problem and to get that annoying light off your instrument cluster.
A# you can buy a new sensor from Lexus or other various aftermarket suppliers for anywhere from $30-50
B# you can clip the sensor wires and put them together to complete the circuit thus shutting the light off on your dashboard. <- I chose this option
I ended up soldering the wires together and wrapped them in heat-shrink, I've seen people just twist the wires together and wrap it in electrical tape but soldering and heat-shrinking is a lot cleaner and provides an air tight seal.
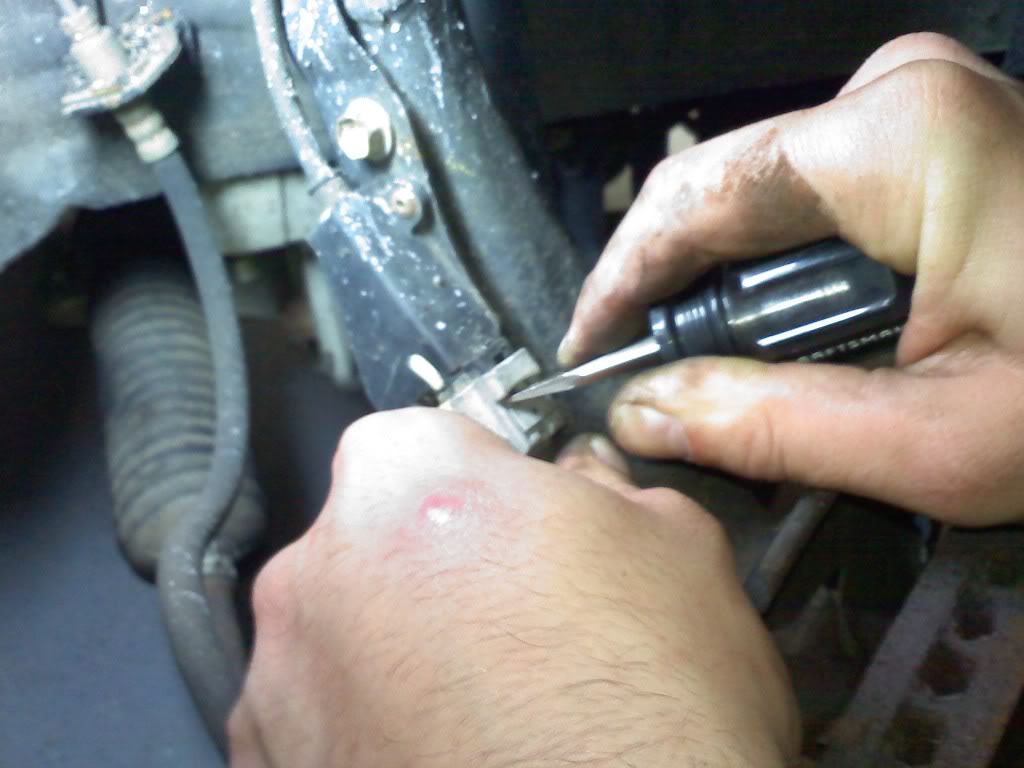
1. Remove the sensor from the bracket, take a flat-head screwdriver and press firmly on the clip and wiggle it to slide the connector out
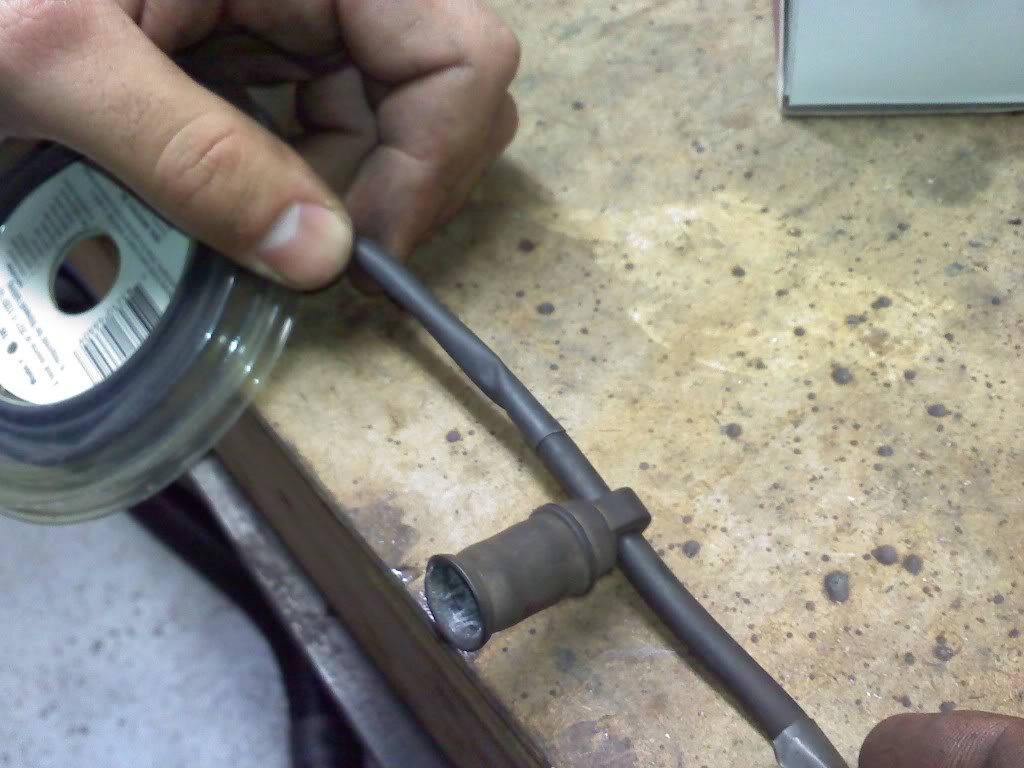
2. Take the sensor and clip the end off
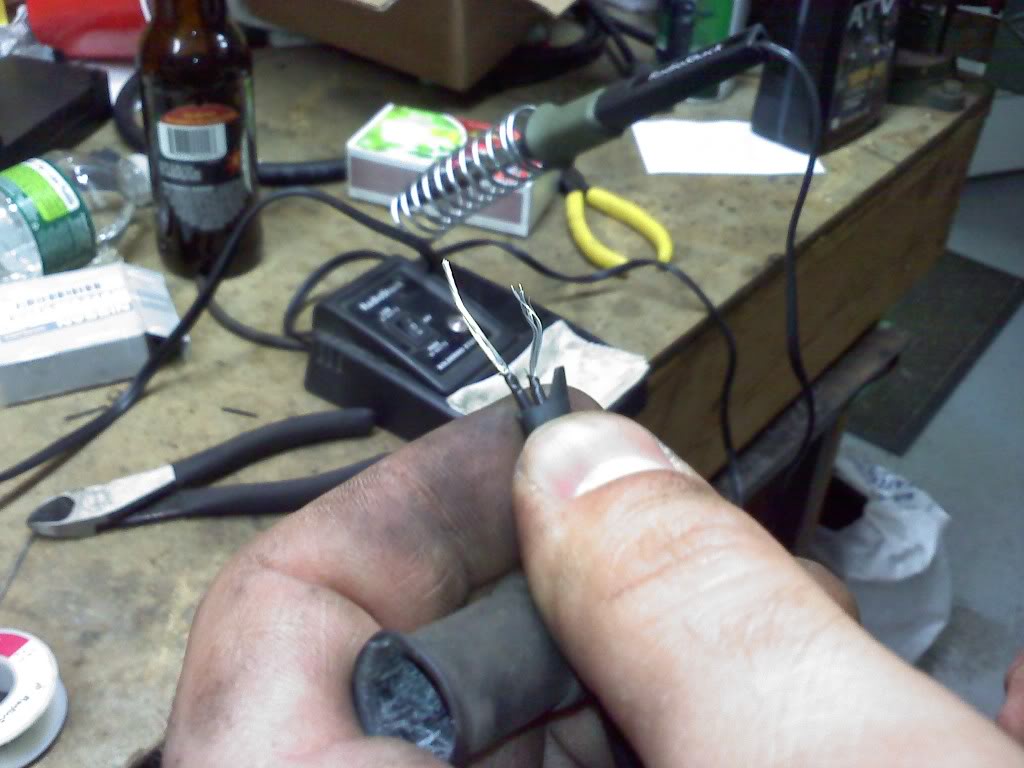
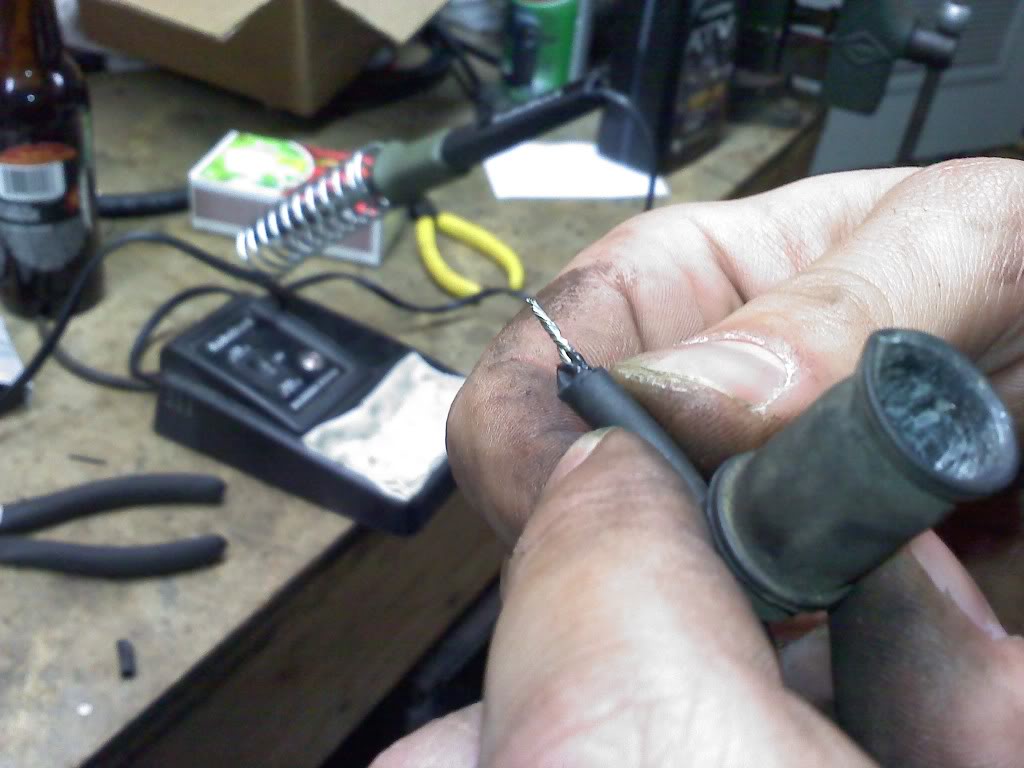
3. Take your wire cutter/strippers and cut off the rubber sleeve exposing the wires, cut off a little of the exposed wire and twist them together
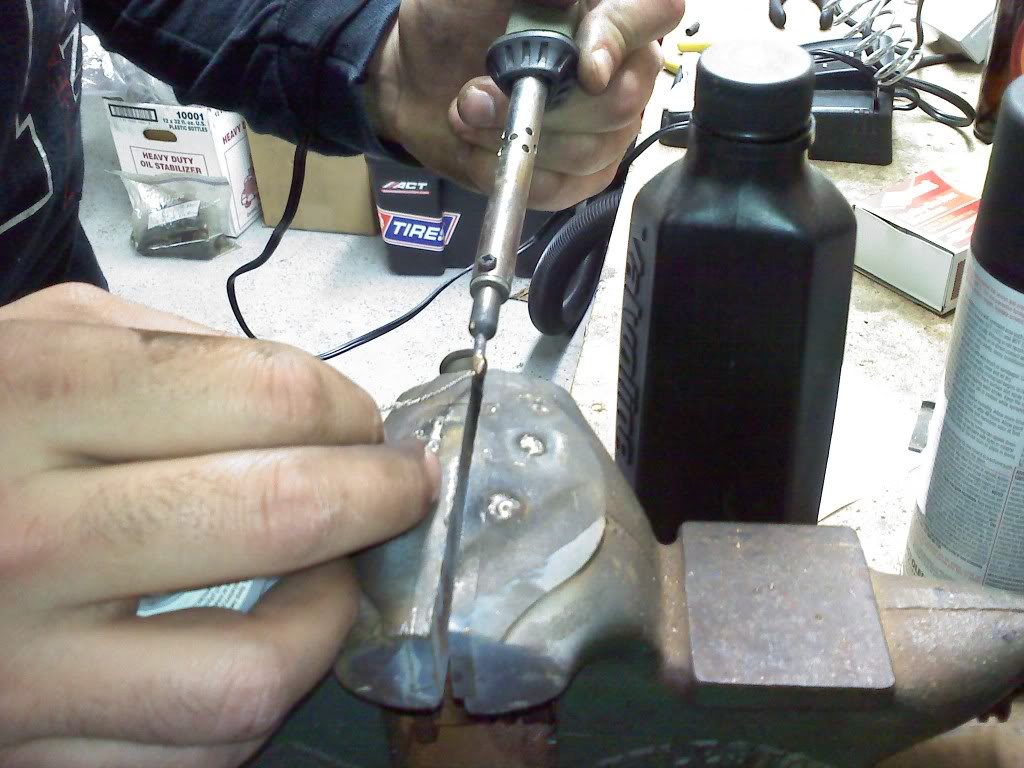
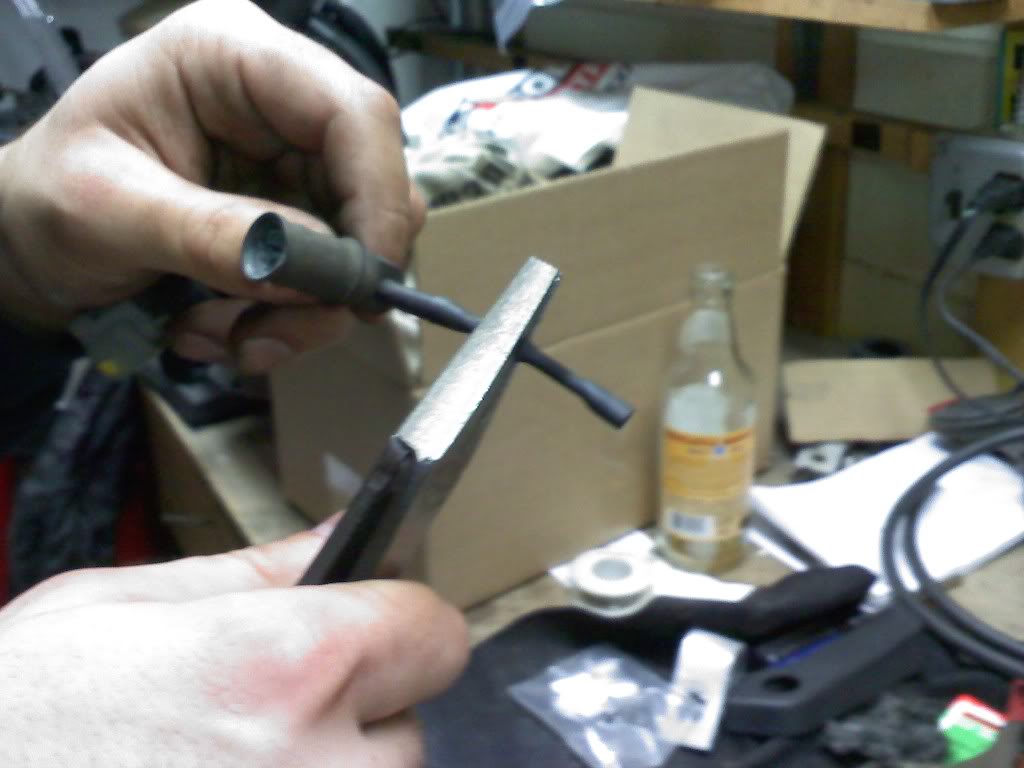
4. Place the wires in a vise or on a surface that will be easy to solder on, take your soldering gun and heat up the wire till the solder fully covers the exposed area
5. Take the heat-shrink and slide it over your soldered connection and a portion of the old rubber coating, heat the shrink till it provides a good seal and then crimp it with a pair of pliers, cut the excess heat-shrink off.
6. Push the connector back together and put the cap back on the caliper bleeder screw, it should look like this now
7. NO MORE ANNOYING BRAKE LIGHT!!!!
8. Take the car for a ride, go back home and give yourself a pat on the back and a beer.
hope this helps!
Time: 1/2hr-1hr
Tools Needed:
Floor Jack
Jack-stands
Breaker-bar
21mm socket
Pry bar (x2)
Flathead screwdriver
Pliers
Soldering gun
Solder
Heat-shrink
PART #1: PAD REMOVAL/REPLACEMENT
1. Park your car on level ground and jack up the front end and place your jack-stands securely underneath the car.
2. Take your breaker-bar and 21mm socket and remove your front wheels, don't forget your wheel lock key!
3. Heres the caliper still loaded
That wire attached to the caliper is the sensor in question
4. Remove the clip on the back of the caliper that holds the brake pad pins in, you can do this by hand.
5. With one hand hold the metal clip while you pull the pad pins out with the pliers
6. Take your pliers and shimmy the pads out, this will take a little effort
This is what your worn pad and sensor look like
7. Take your 2 pry-bars and push the pistons back into the caliper
8. Slide your new pads back in
**** most new pads either come with or without new shims, its ok to use your old ones if they are clean and not cracked, if they are in bad shape its ok to drive without them, but your front brakes might be noisy, you can buy a new shim kit from http://lexus.sewellparts.com/
9. Put the metal clip back on top of the pads and slide the pins in, then attach the clip that holds the pins from sliding out.
You have now finished installing your new pads! onto PART #2: Brake Pad Sensor Fix
*Break in period: when you go out for the first drive do a 25mph to almost stop, 35mph to almost stop and 45mph to almost stop, do not brake hard for about 50-100 miles, after that your pads are broken in.
PART #2: BRAKE PAD SENSOR FIX
When your pads get really low a light will appear on your dashboard looking like this (o) that is the indicator for the Brake Pad Sensor. There is only two way to fix this problem and to get that annoying light off your instrument cluster.
A# you can buy a new sensor from Lexus or other various aftermarket suppliers for anywhere from $30-50
B# you can clip the sensor wires and put them together to complete the circuit thus shutting the light off on your dashboard. <- I chose this option
I ended up soldering the wires together and wrapped them in heat-shrink, I've seen people just twist the wires together and wrap it in electrical tape but soldering and heat-shrinking is a lot cleaner and provides an air tight seal.
1. Remove the sensor from the bracket, take a flat-head screwdriver and press firmly on the clip and wiggle it to slide the connector out
2. Take the sensor and clip the end off
3. Take your wire cutter/strippers and cut off the rubber sleeve exposing the wires, cut off a little of the exposed wire and twist them together
4. Place the wires in a vise or on a surface that will be easy to solder on, take your soldering gun and heat up the wire till the solder fully covers the exposed area
5. Take the heat-shrink and slide it over your soldered connection and a portion of the old rubber coating, heat the shrink till it provides a good seal and then crimp it with a pair of pliers, cut the excess heat-shrink off.
6. Push the connector back together and put the cap back on the caliper bleeder screw, it should look like this now
7. NO MORE ANNOYING BRAKE LIGHT!!!!
8. Take the car for a ride, go back home and give yourself a pat on the back and a beer.
hope this helps!
The following 2 users liked this post by Heavy:
GenkiLexus (03-08-21),
spuds (10-18-18)
 12-31-11 | 03:21 PM
#3

don't know if i agree with swapping the pads out without at least scotchbriting the rotors to give them something rough to bed into....
but it's good that the brake sensor bypass got documented, though it's been discussed a fair bit. good stuff.
but it's good that the brake sensor bypass got documented, though it's been discussed a fair bit. good stuff.
03-14-12 | 09:35 AM
#4

3rd Gear
Joined: Dec 2011
Posts: 3
Likes: 1
From: Hawaii
I just replaced my 1999 LS400 front brake pads yesterday, 3/13/2012, without taking out the calipers after reading Heavy's picture post above...Took me about 30 minutes for each side (taking my sweet time). I was able to re-use the brake sensor since it had just begun to make contact with the rotor and was only slightly worn. It appears that my new pads have bedded onto the rotor OK. Thank you, Heavy, for your posting!!!!!

Trending Topics
 03-21-12 | 06:39 PM
#11

Lead Lap
Joined: Mar 2012
Posts: 591
Likes: 4
From: Landrum, SC

 05-04-15 | 10:59 AM
#13

Driver School Candidate
Joined: May 2015
Posts: 2
Likes: 0
From: TX
Please help and laugh at my stupidity (as a payment for your help).
I actually separated the two halves as I thought that it was the only way to remove and replace the front pads. When brake fluid started coming out I knew I had made a mistake. It was too late then. I went ahead and finished the job. I got everything back together and tried to find a way to bleed the line.
My question is how do I bleed the trapped air? My brake pedal is now mushy. I pumped the pedal and got pressure but then it would slowly sink to the floor. Thank you very much.
05-04-15 | 11:58 AM
#14
Racer
Joined: May 2010
Posts: 1,856
Likes: 85
From: TX
Bleeding is a two person job if you don't have a bleeder handy. There is a brake bleeder valve on the top of the caliper that you can loosen. Please look up how to bleed brakes if you've not done it before...or maybe get some help from someone who has. Brakes are not something to experiment on. You don't want them failing on you.
Here's a little primer for you...
http://www.dummies.com/how-to/conten...ur-brakes.html
Here's a little primer for you...
http://www.dummies.com/how-to/conten...ur-brakes.html
Last edited by Legender; 05-04-15 at 12:01 PM.