Factory GPS has got to go!
#16
Rookie
iTrader: (4)
I am glad someone is actually going to finish what I always planend to complete!
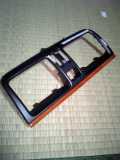
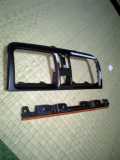
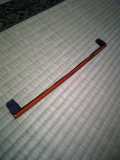
I know the wood piece can be removed from the non-NAVI vent as I have seen it done by someone in Japan...which means it can also be removed from your original NAVI vent to be swapped out.
Here are some pics to prove it....good luck with the conversion!


I know the wood piece can be removed from the non-NAVI vent as I have seen it done by someone in Japan...which means it can also be removed from your original NAVI vent to be swapped out.
Here are some pics to prove it....good luck with the conversion!


#17
I am glad someone is actually going to finish what I always planend to complete!
I know the wood piece can be removed from the non-NAVI vent as I have seen it done by someone in Japan...which means it can also be removed from your original NAVI vent to be swapped out.
Here are some pics to prove it....good luck with the conversion!


I know the wood piece can be removed from the non-NAVI vent as I have seen it done by someone in Japan...which means it can also be removed from your original NAVI vent to be swapped out.
Here are some pics to prove it....good luck with the conversion!


Thanks for the photos (tatami mat ^^^). Yup, the "wood" pieces are attached to the vent trim piece with a few small screws so it should be easy enough to do the swap. In fact, I was hoping to just leave mine in place and do the swap with the vent still mounted. Unfortunately, that may not be an option since there are screws behind the vent which need to be removed (see attached) in order to take out the factory HU. Just hoping that the 17 year-old plastic doesn't snap in the process

Last edited by Hiroshi12; 07-02-15 at 01:51 PM.
#21
So this weekend I FINALLY got off my butt and began the install of the new HU. Before I continue, I want to thank previous CL members for these threads which helped me greatly:
https://www.clublexus.com/forums/ls-...b-working.html
https://www.clublexus.com/forums/ls-...unit-swap.html
https://www.clublexus.com/forums/ls-...-98-ls400.html
https://www.clublexus.com/forums/ls-...b-working.html
https://www.clublexus.com/forums/ls-...unit-swap.html
https://www.clublexus.com/forums/ls-...-98-ls400.html
Last edited by Hiroshi12; 08-09-15 at 09:07 AM.
#22
The first step is pretty obvious and has been covered elsewhere but I'll include it anyway. To remove the a/c vent and trim piece, locate the small tabs on either side (they are inside the vent) and push them outwards with a small screwdriver while prying on the sides of the housing with something flat. I used a new plastic putty knife. Once it's out, disconnect the electric connector for the hazards.
Last edited by Hiroshi12; 08-09-15 at 09:09 AM.
#23
If you're swapping a non-navi factory unit for a new HU these next few steps would not apply to you since your trim piece and climate controls are already there. In my case - I am going from factory navi to after market HU so I had to mod the wood trim (my original is too "short") and incorporate a non-navi climate control module into the build. Anyway, I had to further disassemble the vent in order to continue.
Unfortunately the donor piece was thrashed with most of the brittle little plastic tabs broken off or this would have been much easier. I had to remove the trim from the donor piece (thanks again tsxnbp) and transfer it to the one going back in the car. Very tedious work here
Those six holes you see on each piece are where some plastic "rivets" held them on (Lexus over-engineering!) in addition to two screws. Separating them with my razor blade technique nearly made me stop breathing with every wack of the hammer, but it was a success...no shattered plastic.
Unfortunately the donor piece was thrashed with most of the brittle little plastic tabs broken off or this would have been much easier. I had to remove the trim from the donor piece (thanks again tsxnbp) and transfer it to the one going back in the car. Very tedious work here

Those six holes you see on each piece are where some plastic "rivets" held them on (Lexus over-engineering!) in addition to two screws. Separating them with my razor blade technique nearly made me stop breathing with every wack of the hammer, but it was a success...no shattered plastic.

Last edited by Hiroshi12; 08-09-15 at 11:59 AM.
#25
The next little job to do was prying my second-hand climate control box apart so I could replace the factory green back lighting with brighter LEDs. A few screws and plastic tabs again  and I was in. There are 10 little lights total, easy swap.
 and I was in. There are 10 little lights total, easy swap.
Last edited by Hiroshi12; 08-09-15 at 11:10 AM.
#26
NOW, I can finally begin the removal/install process. As with any auto job involving messing with the electrics I highly recommend disconnecting the battery. Next thing to do is to get the gear selector pushed all the way back, unscrew the shift **** and CAREFULLY pry out the center console wood grain plastic. Believe it or not - there are no screws or tabs in this step...just some even pressure does the job. There will be a few electrical connectors here to disconnect as well.
Last edited by Hiroshi12; 08-09-15 at 12:01 PM.
#27
There are 4 10mm bolts holding the factory navi/climate control/audio unit in. The top two were exposed when the vent was removed and now with the center trim gone you can access the bottom two. Remove the four bolts, unplug ALOT of connectors, and gently pry the old lump out. Check out this behemoth - that's a whole lot of 90's tech folks!
Last edited by Hiroshi12; 08-09-15 at 12:03 PM.
#28
I'm gonna need to reuse the Lexus factory radio brackets for the new install so I disassemble the entire package which was quite easy since just four or five screws per side holds it all together. I didn't take any pictures of that process but the shots below show the re-installation of the brackets on the new HU. The first bracket you see is the one provided by beatsonic. That goes on first, then the OEM bracket.
Last edited by Hiroshi12; 08-09-15 at 12:04 PM.
#29
What I am really doing here is just mocking-up the whole thing to make sure everything fits before I even attempt any wiring. Now that the brackets are in place it's time to fit the beatsonic faceplate and the "new" climate control module. Looks good on the bench, right?
Last edited by Hiroshi12; 02-03-16 at 01:09 PM.
#30
Next, with the vent test-fitted I do a temp. install into the car without wiring up anything except the climate control unit because it would be a MAJOR show-stopper if that sucker didn't work. Test went ok - all controls appear to be working normally. Only problem is that half of those little LEDs are not illuminating...maybe I twisted them in the wrong way during the install? 
Figuring that one out will be the first job today and then...the actual HU wiring begins. I'll also be doing a hands-free mic and a rear view camera and I plan on taking my time every step of the way so I doubt I'll finish this today. Plus I gotta get up at 0300 to fly cross-country on a business trip tomorrow, so uh.........

Figuring that one out will be the first job today and then...the actual HU wiring begins. I'll also be doing a hands-free mic and a rear view camera and I plan on taking my time every step of the way so I doubt I'll finish this today. Plus I gotta get up at 0300 to fly cross-country on a business trip tomorrow, so uh.........

Last edited by Hiroshi12; 08-09-15 at 11:08 AM.


