When you click on links to various merchants on this site and make a purchase, this can result in this site earning a commission. Affiliate programs and affiliations include, but are not limited to, the eBay Partner Network.
Quick check on the manual from 2000, which I have in PDF form, page SA-36 shows 83 ft-lb (113 Nm) for those bushing bolts, 48 ft-lb for the castle nut. I can't confirm whether those numbers are the same for my '91 or your '90. Mabye later.
I think the exact same way you do regarding the need to jack the suspension before tightening the bushings. Unless the sleeve can rotate and allow it to self adjust, which could be the case. But worst case, it is an unnecessary step. And Dorman's instructions may similarly be overly cautious. Still, if I were doing it, I'd set the geometry at ride height before tightening any bushings, unless I had a convincing argument against needing it, and then I might do it anyway. ;-)
I've generally only heard good things about Harbor Freight torque wrenches, although I don't own one. I have about 5-6, mostly Craftsman USA ones.
Could it be that due to the ball joint threads sticking out further, and if you used a regular depth socket vs. a deep one, that as you torqued it on there, the end of the socket rose up into the castle portion of the nut (which is clearly much weaker), and you sheared that off? You would not have had that problem with a deep socket or a shorter ball joint stud. Just guessing here. Also, with more experience you can feel the difference between 48 and 100 ft-lb. There are some easy methods to calibrate (at least check) your torque wrench - youtube should show you how.
I don't know if I had that problem with my castle nut, but I certainly have had it in other applications over the years. So I always remove the old castle nut as if I might need to reuse it. Here in CA, there is never a problem with rust, so reusing is not something I worry about.
If you really want accurate torque for those bushing bolts, and don't want to remove the strut just because the torque wrench will not fit, you can use a torque wrench extension as shown in the following photo. You need to do a little math to adjust your torque wrench setting, but this sort of application is exactly what those are made for. Creative use of other tools or a welder can custom make an equivalent tool on the fly vs. keeping a full set of those in your toolbox.
?
I thought that was what open ended torque wrenches were for. This one is designed for hvac but seems like it would solve the clearance problem.
It might be good for the clearance problem but that one only goes to 63 ft lbs. I've never liked adjustable wrenches. Can't get them to the "exact" size ya need without a tiny bit of play.
There's a tool out there for every job ya need to do.
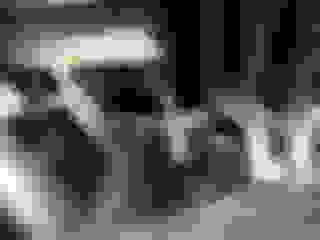
Seeing how this thread came back up; Peter, ya might want to take a look at this. I noticed that your brake line is twisted and collapsed in this pic. Don't want the brakes to have a leak and fail. Just looking out for ya, my friend.
Thank you Deanshark, I am about to take off front wheels to finally replace the annoying strut bar cushions, so I'll have a look at them then. (Can't believe I haven't noticed that myself! Unless its some kind of image distortion / shadow / whatever and not actually how the line really is...)
OK, just did my strut rod bushings and inspected the brake lines and they look perfect. Glad they are fine, but funny how that one looks weird in the picture!
Anyway, appreciate deanshark looking out for me. I've been known to screw things up...
While here, I am thinking of posting a brief how-to on strut rod bushings. They are quite easy, but for a novice, seeing a picture or two and having a definite guide with socket sizes and so on could be helpful, whadayathink?
Glad the brake line is good. You'd hate to have a leak and not be able to stop, especially with the wife and kids in the car. Just you, eh. jk
Pics are always helpful, even for us non-novice mechanics. Words get confusing sometimes when ya can't see what they're talking about. One example I had was doing my rear shocks. I couldn't figure out for the life of me what everyone meant by lift this, lower that, and it slides out. Not for me, until I saw a video. Then it slid right out.
HAHA, you gave me a good chuckle - yeah, failing brakes tend to ruin your day. I actually had that happen to me once long time ago; I just bought a used car, with brake lines which were shot, and driving in snow, trying to stop I could not tell if my wheels were sliding or if the brakes were failing. Turns out, it was the brakes (I figured that once my foot reached the floor) and I ended up hitting the pole. No big deal as I was alone in the car and doing no more than 25mph because the road was covered with snow, but still, it was perfectly avoidable. The car was totaled, because I hit the pole with the radiator and the rest that was around it.
Good thing: I made it alive, and learned the lesson of inspecting the brakes on a car that the seller says is in "perfect condition". Funny how "perfect" has a different meaning with different people...
Soooo. Just finished up doing the top....Upper control arms and struts.. Did the bottom end last weekend...
easy job if !! Ya finished and it drove all good and get a good alignment shop to check and make sure all is tightened and up to specs on alignment.
I have the tools and infamous torque wrench. I wish to thank ALL those who have posted before on this job...I used most ALL the Suggestions posted..
Thanks Guys. (Pre load upper arms before torque.. it does matter).
Changed out lower control arms, stut bars, lower ball joints, upper control arms, complete Struts and mounts.... as well the stabilizer links.. bar bushings where really in good shape.
ALL OEM parts except for struts. Believe it or not...I used the Unity complete struts so I’m probably looking at those faulting... we will see...
and YES, it does ride like it did when she was new....tight and comfortable at the same time.
Did you alignment guy say anything about the caster angle being off? I'm wondering if you had the same issue as me because my caster was 9-9.5 degrees positive after installing these MOOG UCAs on my 99
Did you alignment guy say anything about the caster angle being off? I'm wondering if you had the same issue as me because my caster was 9-9.5 degrees positive after installing these MOOG UCAs on my 99
Were they able to resolve your caster problem during the alignment?
Were they able to resolve your caster problem during the alignment?
I resolved it by swapping back my original Lexus UCAs. So far its driving fine, no clunking. But I think I'm going to get rid of these MOOG arms and buy Dorman UCAs. Oh well, lost some money here.
 09-20-19, 01:00 PM


 jk
jk it slid right out.