
 12-16-14, 11:41 AM
Last edit by: IB Advertising
See related guides and technical advice from our community experts:
Browse all: Lexus IS Lighting Guides
- Lexus: How to Replace Your Dome Light
Step by step instructions for do-it-yourself repairs
Browse all: Lexus IS Lighting Guides

HOW TO: LS430 Interior/Exterior Lights/LED w/Pics & part#s
08-18-11, 07:43 AM
#91

Hi,
Your vehicle uses a 9006 bulb for the fog lights meaning that if you wanted to change over your fog lights to HID with an HID kit you would need to get a 9006 HID Kit.
Installing new halogen bulbs in your fog lights will not necessarily increase your light output. In some cases, you will actually get less light output as many aftermarket halogen bulbs have a coating on them which actually filters out light output. There are companies that sell higher wattage halogen bulbs which will be brighter than your stock bulbs however these bulbs burn significantly hotter than your stock bulbs. As a result, you may damage your vehicle's fog light housings and/or wiring. This is definitely not a recommended upgrade.
Installing LED bulbs in your fog lights will get you a crisper light output however LED bulbs installed in fog light applications will provide you with very little useable light output. This upgrade will be purely cosmetic and not functional at all.
If you have any questions about XenonDepot HID kits please do not hesitate to contact me. XenonDepot has been selling HID kits since 2001 and have been a supporting vendor on ClubLexus since 2004. ClubLexus members do get discounts on our HID kits by using "CL" as the coupon code upon checkout.
Steve


 08-31-11, 05:34 AM
#98
Most people probably don't click on this thread because it has been around for a while. If you were to start your own post, your would get much more responses. It looks great but is a lot of effort and most owners wouldn't take the time to do it.


 Thats right!
09-23-11, 03:26 PM
Thats right!
09-23-11, 03:26 PM
#103
Driver

Join Date: Dec 2010
Location: South OZ
Posts: 169
Likes: 0
Received 0 Likes
on
0 Posts
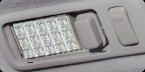
weizs13, are those 5050 3 chip SMD's you have used there? you say 3mm but they look like SMD's from the pic, or do you have a close up?
When you do the Nav, can you please post up step by step guide if you have the time? I think ill do the same within the next few months.
Thanks in advance...
When you do the Nav, can you please post up step by step guide if you have the time? I think ill do the same within the next few months.
Thanks in advance...
09-23-11, 03:31 PM
#104
Driver
iTrader: (1)
Join Date: Mar 2011
Location: LA
Posts: 126
Likes: 0
Received 0 Likes
on
0 Posts
the smd is a osram 3mm x 3mm i going to have to look at the package to see the exact size . The nav might be a while lot more bulbs also a pita to take apart and put back together to test each smd. Polarity is the biggest issue im thinking the nav might take 7 to 8 hours for a diy lol