When you click on links to various merchants on this site and make a purchase, this can result in this site earning a commission. Affiliate programs and affiliations include, but are not limited to, the eBay Partner Network.
I'll ask part of my question to the CL community... Anyone know the following thread/post?...
"I recall reading a CL member's LS600H (inheriting his father's LS) post for the installation of the Data System (ASC680L) control module & harness. It was well done (step-by-step photos & descriptions) but I cannot seem to rediscover the thread. The post was by a new member & owner of the LS and I think it may have been his first post in CL, yet he was not new to forums. I recall him having owned euro cars in the past and having done extensive modding..."
Thanks ya'll.
Cheers,
-Adam
If I'm not mistaken, this is the thread that you're looking for. If not, it's still a good informative thread.
Just got the ASR681 wireless module and the H-087i harness for my 2013 LS460 F-sport AWD. The instruction came in Japanese and I can't read it like most of the people on here. Followed the pictures as it shows how to remove the panels, and according to the pics, the air suspension controller on my model is on the driver side. So, I removed the dash middle cover and looked for it. Found a couple modules but none has the same plugs as the DataSystem harness. Reading through the posts and searches, I saw that the older model LS has the module behind the glove box. But, in the DataSystem instruction has nothing showing the glovebox. Anyone happened to have the instruction in English and/or has done this to a 2013+ models? Any help would be greatly appreciated.
Attached are some pics of the car's modules. The plugs don't match and the pins in the plug are different.
It's behind the clove box in the 2013. Send me your email and I can forward you the English instructions
P'med you my email address. Funny that the plugs/modules showing in your picture look the same as the ones in my driver side. I'll take the glove box out today and find out. Thanks for replying. Please send the instruction for installation and how to use it.
Took the glovebox out and the module was right there. Thx TriniGS. Now I need to start messing with setting things up. Every time I set with the wireless controller, the other plugged in unit kept beeping and flaring ERR code. And it doesn't change the setting. I have to do it directly on the plugged unit to get things to lower. Looks like it gonna need some get-a-long time. But, at least I'm now lower. Putting 22" Vip Modular VR-08 on. Will post some pics after I get things set right.
Got the wheels installed and having it set at 5F and 3R and it rubbed on the back. 5R would put the rear sitting on top of the tires. Left it at 5F and 1R. Will see how it go. Pics are at 5F 3R.
Got the wheels installed and having it set at 5F and 3R and it rubbed on the back. 5R would put the rear sitting on top of the tires. Left it at 5F and 1R. Will see how it go. Pics are at 5F 3R.
Glad you got things worked out. Hows the wireless controller working out for you. I heard a few issues with range. it was recommended I get the wired one. I see you with the visors and wheels glad to see the a few 2013 being modified
The wireless module doesn't control anything. Every time I tried setting it up using the wireless module, the other one that plugged in kept making a beep noise with ERR code. I ended up using the the plugged in module to set up the suspension. So far so good now.
The visors are Wells visors. They cost about $60 on eBay. Look good and similar to the JDM ones that cost like $1000. I don't see the JDM ones around here so I can't really compare quality and fitment. But for about $900 different, I think it's good.
Headrest screens with DVD players are ordered and on the way. Navigation bypass is scheduled with the group buy here. Payment should start Oct. 15th. I'll add an extra sub in the trunk for a little more bass. That should be good for this winter. More to come next year when I do more researches on what to do.
Fellow owner's and perspective owners of the data systems air suspension controller module, I thought I would start a new thread for everyone to post tips, tricks, issues, questions and other info to help out fellow CLers on stock air with this controller.
I'll start with some information I have found
EDIT
Thanks to this awesome post from fellow CLer "ULTM8MIND", this was extremely valuable information on the overall operation of the data systems controller..thanks for that post!! See below
Basic ASC-680 (L) INSTRUCTIONS
Button descriptions
Top left button: Mode button (switches between the setting modes)
Bottom Left button: Select button (switches between the settings in each mode)
Top Right button: Up button (change values up in settings, or in height select mode it switches between height settings)
Bottom Right button: Down button (change values down in settings, or in height select mode it switches between height settings)
Initial Screen
When you first plug it in, it should give message, then it will ask you to select your car. It gives the chassis number, and underneath that it says the car name in Katakana. Yours is the Ucf30 or 31 obviously. Press SELECT to confirm
Then after pressing Select, it will ask you to select between ホアンキジュンMODE and EXTRA-DOWN MODE. Should be obvious, but EXTRA-DOWN MODE is what you want. Lets you adjust while driving and lets you get lower. Press up/down to select this, then press the select button
Lastly it will give you the height setting screen
----
If you had already gone past that and want to change chassis,
With the ignition off, press and hold the Mode button while you switch the ignition on. You can then select the chassis, and ホアンキジュンMODE / EXTRA-DOWN MODE.
----
If you did the chassis correct and just want to set extra down mode
With the ignition off, press and hold the SELECT button while you switch the ignition on. You can then select between ホアンキジュンMODE and EXTRA-DOWN MODE.
If you selected extra down mode, when you turn the engine on, you will get a message on the screen that says "WARNING!!", otherwise it will have the R-SPec logo. The warning is there to tell you that you have selected an "illegal" mode, so just ignore it.
Mode Cycle
After the warning/Rspec logo, you get the height setting screen.
From there, if you press the MODE button, you go to the TEMS setting screen. Thats the shock absorber stiffness.
Press MODE again and you go to the VALVE MONITOR screen (lets you see what the valves are doing)
Press MODE again and you are in the HEIGHT MONITOR screen (see the current height of your struts)
Press MODE again and you are in the SPEEDOMETER Mode Press MODE again to go back to the height Setting screen....
i.e.
Height Setting screen
TEMS Setting screen
VALVE monitor screen
HEIGHT monitor screen
Speedometer screen
Back to Height Setting screen
---------------------------------
HEIGHT SETTING Mode
Display explanation
Top left - TEMS setting icon
Bottom left - Speed alarm
The 4 '=' type symbols around the centre number - height setting bar for each strut
M1 - height memory number
Display number in the centre is the height setting display
Under that in the manual it describes the Bargraphs. In EXTRA-DOWN mode you would look at the bottom left pic, which goes from L9876543210ABCDEF and FEDCBA0123456789
In the height setting mode, pressing UP/DOWN will select between NORMAL SELECT (normal mode), and M1-M5
Regarding the centre number: Thats basically the height setting of the rear struts.
This is the main screen you will be in. Press UP/DOWN to switch between memory settings...
To set a height memory...
In Height setting mode, on any given memory setting (M1~M5), press SELECT to start the edit mode.
* First setting is ALL STRUTS - Pressing up or down sets all struts at the same time
* Press SELECT again to switch to FRONT LEFT strut setting - press up/down to select a height
* Press SELECT again to switch to FRONT RIGHT strut setting - press up/down to select a height
At any point, press MODE to save the settings
Example:
Setting a height in Memory 3 to Front(5) Rear(3)
From M1 position, press up/down to select M3
Press SELECT.
Press DOWN to set all struts to 3.
Press SELECT
Press DOWN to get the front left to 5.
PRESS SELECT
Press DOWN to get the front right to 5.
PRESS MODE to save the settings
In order to do balance left/right, just set the front left and front right struts to the required values.
Note that to get into HYPER LOW DOWN mode (L on the display), when you get down to 9 on the height select screen, you need to press and hold the DOWN Button for 3 seconds
There are a bunch of warnings there but the resolution is too low to read them all
Something about under 10km/h
Something about going from hyperlow to normal mode taking more than 5 minutes
And something about not switching the ignition off while in hyperlow mode.
Also, after Hyperlow mode, in order to raise it you need to go to at least height setting 4 or above (i.e. 4,3,2,1,0,A,B,C,D,E,F). Or Normal Select Mode.
Valve monitor mode
probably doesnt need explaining
Note you can also see the valves in the main height setting screen - the pic in the centre is a little car, with the wheels on the top left right top and bottom
Heignt monitor mode
press up or down to select between having HEIGHT モニター displayed or not.
Note in the main screen you can also set it to show the current height instead of the height setting, by pressing SELECT for 2 seconds
Speedometer mode
From the main speedo display screen, press SELECT to set the alarm setting
Press up/down to set a speed, then press MODE to save the setting
From the main display screen press SELECT twice to set the warning setting
Press up/down to set a speed, then press MODE to save the setting
When you pass this speed, the backlight will change as a warning
______________________________________
Part numbers:
I can confirm that the following part numbers are required for use on 2007 to 2009 LS models equipped with factory air suspension. 2010+ may have a different part number, researching...
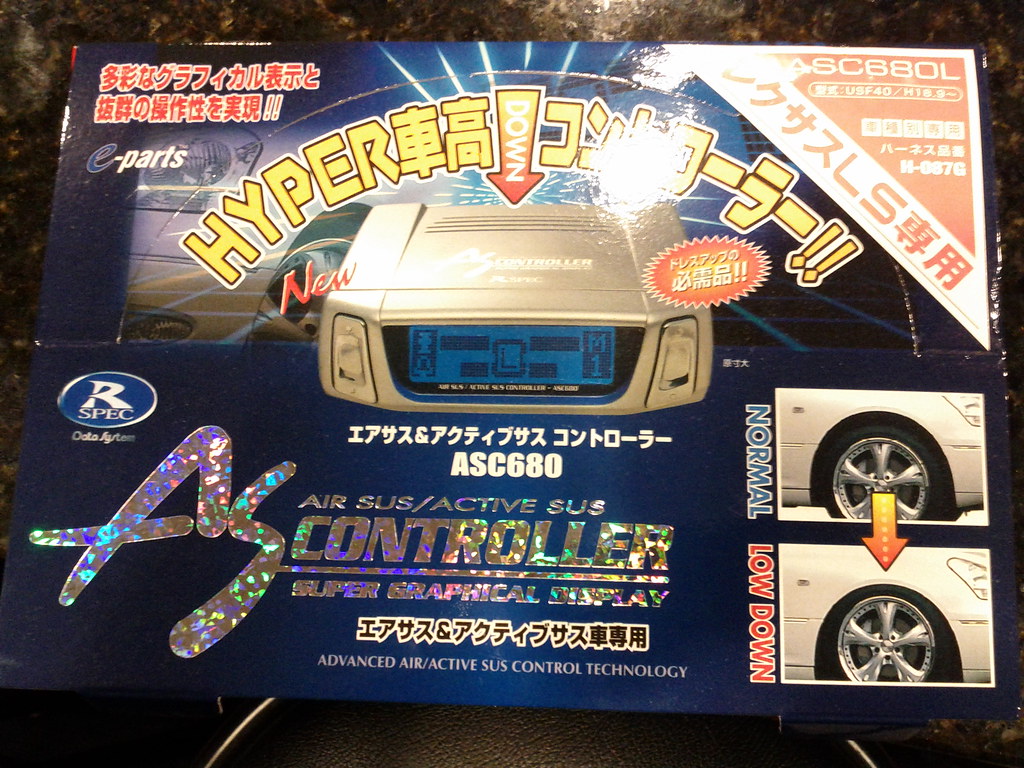
Harness - Data Systems H-087G Controller - Data Systems ASC680L
Notes: The ASC-680L model for the 2007+ LS models do not require you to indentify your car model, it automatically knows once you plug it in making install even easier.
For 2010+ models after m/c (model change from 2007-2009), you have the wireless controller option
(Data Systems Model ASR681). Although some have stated the wireless configuration is more trouble to install than the wired controller which provides plenty of cable to route to armrest, ashtray and of course glove compartment. Still trying to confirm if the ASC680L model works the same on the 2010+ models or if a different harness is required..hopefully someone can chime in
_______________________________________
More general knowledge info will be added here to this original post as I gather it....Please post any information you think would add value to this thread as it applies to 2007+ LS models
Any info for current day about a wireless lowering module for 08 ls460l?
Or is the only module the same as it was before?
Having the same issue. Does anyone have the English instructions for the DATA system. This would be greatly appreciated as I have searched google and other info sites now for 2 days with no luck. :
Any info for current day about a wireless lowering module for 08 ls460l?
Or is the only module the same as it was before?
Thanks
The wireless unit should be ASR681 and the wire harness should be whatever it was for your model year. For 2013 and up is the H-087i. Yours might be the same, but don't quote me on it.
So are you happy with the setup? You mentioned you didn't need the wireless controller. If not using the wireless controller what part numbers are you using?
Originally Posted by My1998LS40
Just got the ASR681 wireless module and the H-087i harness for my 2013 LS460 F-sport AWD. The instruction came in Japanese and I can't read it like most of the people on here. Followed the pictures as it shows how to remove the panels, and according to the pics, the air suspension controller on my model is on the driver side. So, I removed the dash middle cover and looked for it. Found a couple modules but none has the same plugs as the DataSystem harness. Reading through the posts and searches, I saw that the older model LS has the module behind the glove box. But, in the DataSystem instruction has nothing showing the glovebox. Anyone happened to have the instruction in English and/or has done this to a 2013+ models? Any help would be greatly appreciated.
Attached are some pics of the car's modules. The plugs don't match and the pins in the plug are different.
 04-11-15, 07:41 PM