How to Adjust Your Headlights Writeup w/Pix
#1
Here we go. Once again, a few of us are having to adjust our headlight's aim and not many could do it. Thanks to GS3Tek for his diagram and Carmelstev on his insights, I'm going to do a short pictorial. Turns out its not really that difficult, and if I had to do it again, it may take 10 minutes.
Alright, I'm amending the method of doing the adjustment as REV-01 has brought up an excellent point. You should be able to adjust using a 10mm socket in where there is an opening in the back of the cover. Just stick a thin wall 10mm socket into the opening and turn to adjust. This will lessen the time considerably of making the adjustment. Note, this method will adjust both low and high at the same time. If you want to adjust independently which can be for some cases, then follow the direction below. edit 12/9/2008 2:25pm
The following is for the driver side headlight.
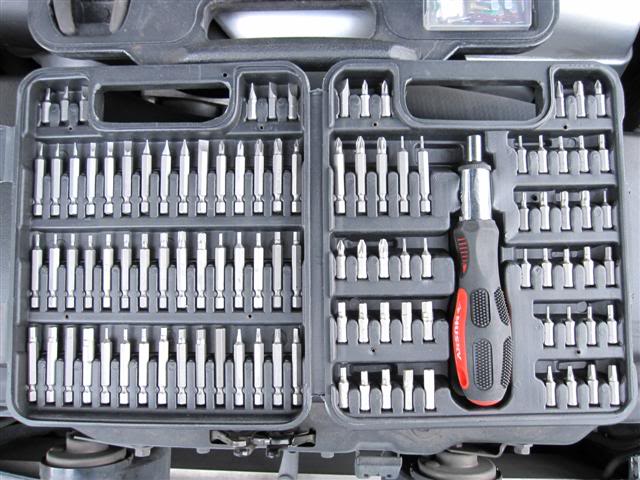
First, assemble your tools. Not really much, a stubby Phillips, a 10mm socket, long Phillips bit.
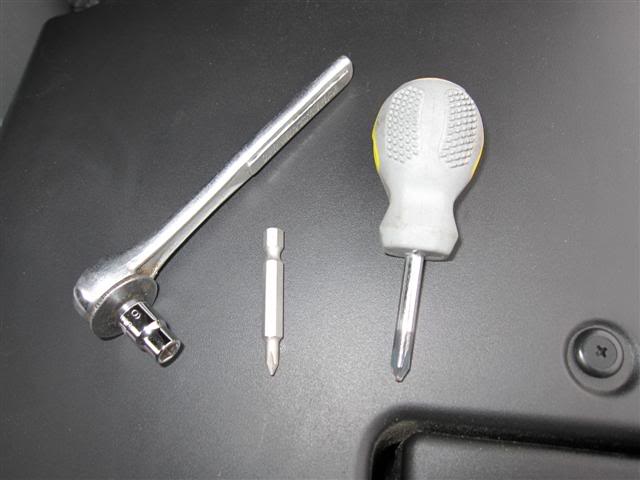
Using the 10mm socket, remove this bolt and unclip it on the rear side.

There should be enough slack wiring for you to do this.
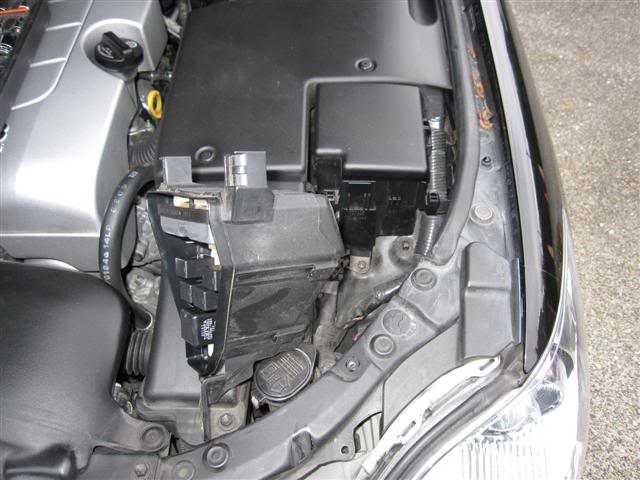
There are 4 phillips screws you need to remove from this housing. Hardest is the one in the far right as its a blind corner and you have to do by feel. This is where you use the long phillips bit and socket wrench. Note: be very carefully not to drop any of the screws as I'll bet it'll be a b'otch retrieving it.
Note there is a circular opening on the right of the gray plastic. You should be able to put a 10mm socket into that hole to adjust without having to remove this cover.
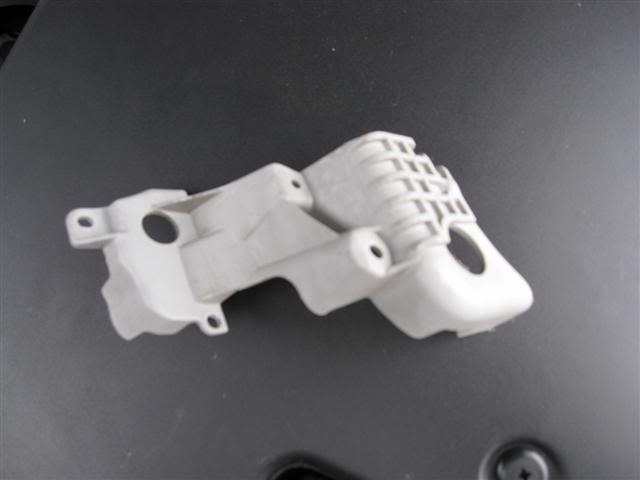
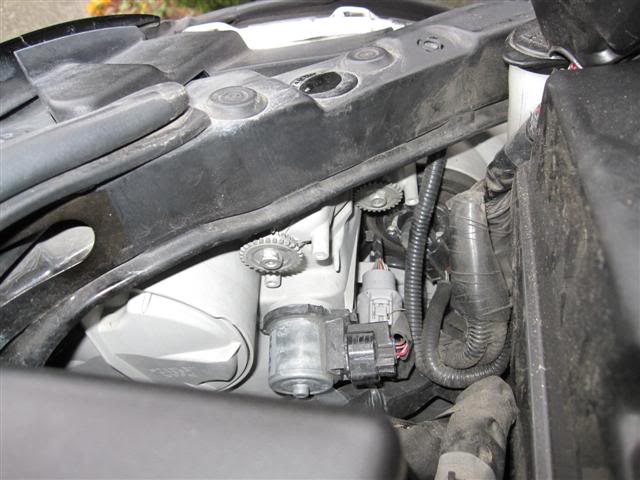
Once you remove the housing, you should see this. Make a mental note here to see where the position of the connecting screw drive rod goes.

You should now be able to remove the connecting rod to adjust each lights by turning the gears(low beam is on the left of the picture above and high beam is on the right)
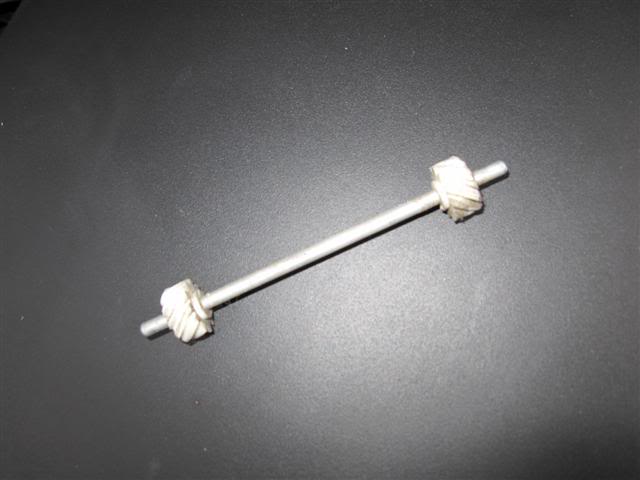
For my opinion, you should use a sharpie and mark a line in the 12'oclock position so you can keep track with more accuracy how many turns you have done. To raise the headlight, you should turn clockwise. It will take several full turns to really see it move up. Do the same with the one. Note: Make the adjustments with your headlights on so you can see it move.
Once you are satisfied with the heights, put the connecting rod back but make sure you it have the right way. THEY ARE DIRECTIONAL. Failure to do this right will not only strip the rods but your auto leveling is not going to work. (If I recall, I believe mine had a red marking on the end going towards the engine).
Put all 4 screws back, drop the fuse box back down, clip and re-bolt and you are done. Good Luck. Dave.
Alright, I'm amending the method of doing the adjustment as REV-01 has brought up an excellent point. You should be able to adjust using a 10mm socket in where there is an opening in the back of the cover. Just stick a thin wall 10mm socket into the opening and turn to adjust. This will lessen the time considerably of making the adjustment. Note, this method will adjust both low and high at the same time. If you want to adjust independently which can be for some cases, then follow the direction below. edit 12/9/2008 2:25pm
The following is for the driver side headlight.
First, assemble your tools. Not really much, a stubby Phillips, a 10mm socket, long Phillips bit.


Using the 10mm socket, remove this bolt and unclip it on the rear side.

There should be enough slack wiring for you to do this.

There are 4 phillips screws you need to remove from this housing. Hardest is the one in the far right as its a blind corner and you have to do by feel. This is where you use the long phillips bit and socket wrench. Note: be very carefully not to drop any of the screws as I'll bet it'll be a b'otch retrieving it.
Note there is a circular opening on the right of the gray plastic. You should be able to put a 10mm socket into that hole to adjust without having to remove this cover.

Once you remove the housing, you should see this. Make a mental note here to see where the position of the connecting screw drive rod goes.

You should now be able to remove the connecting rod to adjust each lights by turning the gears(low beam is on the left of the picture above and high beam is on the right)

For my opinion, you should use a sharpie and mark a line in the 12'oclock position so you can keep track with more accuracy how many turns you have done. To raise the headlight, you should turn clockwise. It will take several full turns to really see it move up. Do the same with the one. Note: Make the adjustments with your headlights on
 so you can see it move.
Once you are satisfied with the heights, put the connecting rod back but make sure you it have the right way. THEY ARE DIRECTIONAL. Failure to do this right will not only strip the rods but your auto leveling is not going to work. (If I recall, I believe mine had a red marking on the end going towards the engine).
Put all 4 screws back, drop the fuse box back down, clip and re-bolt and you are done.
 Good Luck. Dave.
Last edited by airtime; 12-09-08 at 03:30 PM.
#7

Trending Topics
#8
#10
Alright, drove to work early this morning. I way over did it  I thought I would be more generous in my adjustment and aimed it a bit higher on the garage door. But clearly, it was way too high while driving down the road. Instead of a 90 degree-ish beam, its aimed up beyond the horizon. I'll have to fix that tonight.
 I thought I would be more generous in my adjustment and aimed it a bit higher on the garage door. But clearly, it was way too high while driving down the road. Instead of a 90 degree-ish beam, its aimed up beyond the horizon. I'll have to fix that tonight.
#12
i have adjust my friend's ls430, he took it to the dealer for the headlight change. went back 2 times after still couldn't get to align where it was before. i adjust it without taking the rod off or the cover.
#13
I didn't think about using the ratchet  My thought was that my high beam seems to be aimed ok, just the low were out of adjustment, not sure how that could be as they are connected by the rod, well, I adjust more on the lows than high.
However, that a great point you brought up. Technically, you should also be able to adjust the lights just using a 10mm socket as there is an opening in the cover so you can do it. I'm amending my instructions above to include this. Thanks REV-01 for the insight.
Last night, I readjusted the driver side and while I was at it, did the passenger side also to make both in line with each other. (easier to adjust on the passenger side) Wow, what a difference. This morning going to work, it was noticeable. Perfect horizontal beam that projected way farther than I had before the adjustments. The up close lighting my yellow fogs covers it, the longer distance the normal takes care of that.
 My thought was that my high beam seems to be aimed ok, just the low were out of adjustment, not sure how that could be as they are connected by the rod, well, I adjust more on the lows than high.
 However, that a great point you brought up. Technically, you should also be able to adjust the lights just using a 10mm socket as there is an opening in the cover so you can do it. I'm amending my instructions above to include this. Thanks REV-01 for the insight.
Last night, I readjusted the driver side and while I was at it, did the passenger side also to make both in line with each other. (easier to adjust on the passenger side) Wow, what a difference. This morning going to work, it was noticeable. Perfect horizontal beam that projected way farther than I had before the adjustments. The up close lighting my yellow fogs covers it, the longer distance the normal takes care of that.
Last edited by airtime; 12-09-08 at 03:30 PM.
#14
don't worry i am not saying your method doesn't work, but for those of you on cl don't work your cars on a daily basis it might seem more confusing to them and more chance of a simple fix turn to a bigger mess.
but those of you who knew me i am like that though. it will bother me alot if i disconnect the rod and adjusted it and knew that they are no longer within specs of each other.
for those of you who have the 01-03 it is similar too, there is a rod connect to both low and high. so technically it is the same.
#15
Yea right!!! Fool me once oh well i'll pay 550. Fool me twice um....well thats not gonna happen.
 I learned my lesson.....


