When you click on links to various merchants on this site and make a purchase, this can result in this site earning a commission. Affiliate programs and affiliations include, but are not limited to, the eBay Partner Network.
GEEZ!!!!!
Is it just me, or is "2600.00+ for unscrewing and replacing two headlight assemblies just OUTRAGEOUS?????
And don't give me the BS that they have to "check this" and/or "check that" after they do the ten minute job (OH, wait---maybe it took all of 30 minutes)--- ( not including the 45 minutes they spent BSing in the garage to make it seem like a "really tough job!!
WE are getting SCREWED by everyone connected to the business ,whether it's on the buying end, the leasing end and the repair end!!!!
These new cars are cash cows, and we're the ones that are paying!!
I had the exact same issue, except my warranty expired so the dealer wouldn't touch it. My condensation wasn't horrible, but it was sure as hell annoying. I decided to tackle it myself.
Pulled my front bumper forward and unbolted the headlights in hopes that I could just rebake the headlights in the oven and reseal them. Turns out there was a massive hairline crack running along the bottom of both headlights and I guess that's what caused the condensation during heavy rain and car washes. The bottom tab was also cracked and one of the corners. I heated up the headlights so that the condensation would evaporate. I ended up plastic welding all the cracks. I'll keep updated if the issue return but here are some photos of the project.
Honestly removing the headlights were a lot easier than I thought. I only manage to break one push tab, and I lost one screw when I dropped it down the engine bay lol. Overall though it was fairly easy and I could definitely take my bumper off and remove the headlights in under half an hour. I'm guessing the quote OP got quoted was just for the headlight itself because I looked on car-part.com and even the cheapest used ones were going for about $900 for the triple beam LED headlights. Lexus repairs are definitely a lot easier than lets say a BMW or Audi. I remember helping a friend work on their Audi S4 and we had to pull the whole front end out to put it in "service mode" so that we could access belts and pulleys.
Turns out there was a massive hairline crack running along the bottom of both headlights and I guess that's what caused the condensation during heavy rain and car washes. The bottom tab was also cracked and one of the corners. I heated up the headlights so that the condensation would evaporate. I ended up plastic welding all the cracks. I'll keep updated if the issue return but here are some photos of the project.
Any guesses to why they cracked? I'm really worried about this happening to mine lol, while I can take them out and repair, I've yet to see something like this happen especially on cars that were not involved in a front-end accident.
Any guesses to why they cracked? I'm really worried about this happening to mine lol, while I can take them out and repair, I've yet to see something like this happen especially on cars that were not involved in a front-end accident.
I bought my car used, so I can't be certain that it hasn't been in a front end collision despite the carfax saying otherwise. However, the vehicle does look pretty clean on the front end and I don't see any overspray or obvious signs of any front end damage.
I can't really explain why it happened. It looks like something pushed against the bumper tab just below the turn signals and gave it enough force to break part of the headlight.
Also, I just pulled my vehicle out of my garage this morning and one of the headlights started to condensate again I guess due to the warm home (+20c) to the -10c winter weather outside, so either I didn't do a good job sealing it or there was still condensation in the headlight when I sealed it which I think was the case. I'm going to have to take it apart again sometime during the summer and probably bake the headlights and remove the lens to have it completely clear.
Could you list exactly what was needed to remove your lens? I also found my housing saturated today from either the excessive rain yesterday or some over use of the washer today. Regardless my right lens is extremely wet so I need to get it dry and sealed.
Could you list exactly what was needed to remove your lens? I also found my housing saturated today from either the excessive rain yesterday or some over use of the washer today. Regardless my right lens is extremely wet so I need to get it dry and sealed.
I don't have step by step instructions but I'll give you as much information as I can remember. Maybe I'll create a DIY sometime in the summer when I tackle this again because my headlights are still condensating. There's still condensation stuck in the headlight despite it being fairly sealed now.
The first thing I did was take off the radiator cover. There's probably 10 push clip around the hood hatch that you'll need to pluck off gently, then the rad cover will pull off very easy.
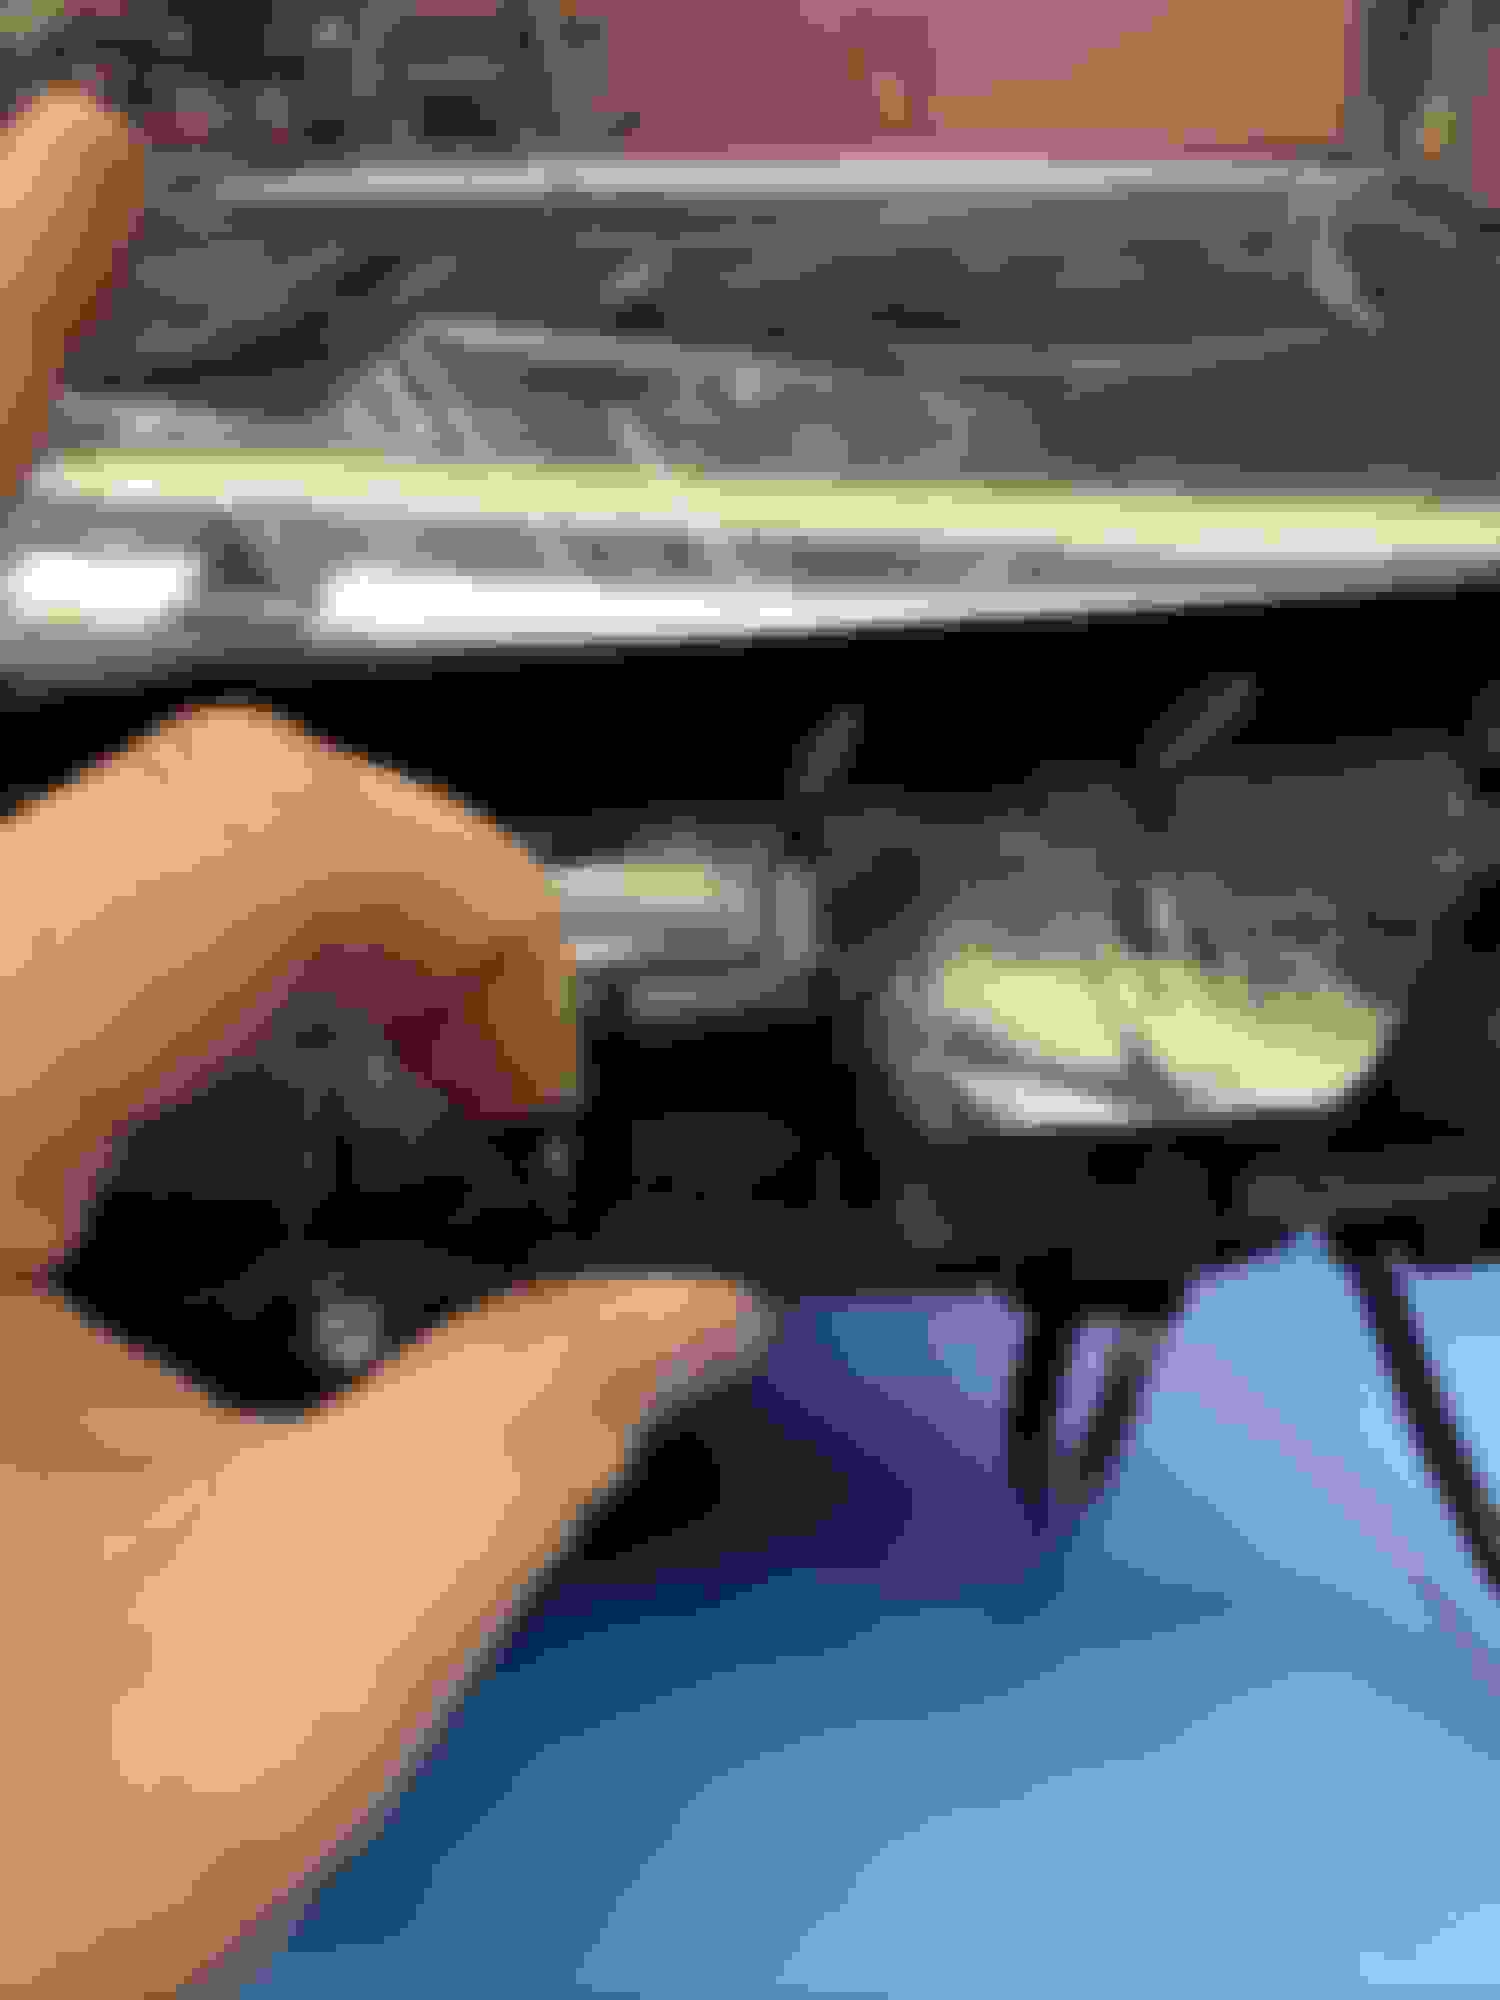
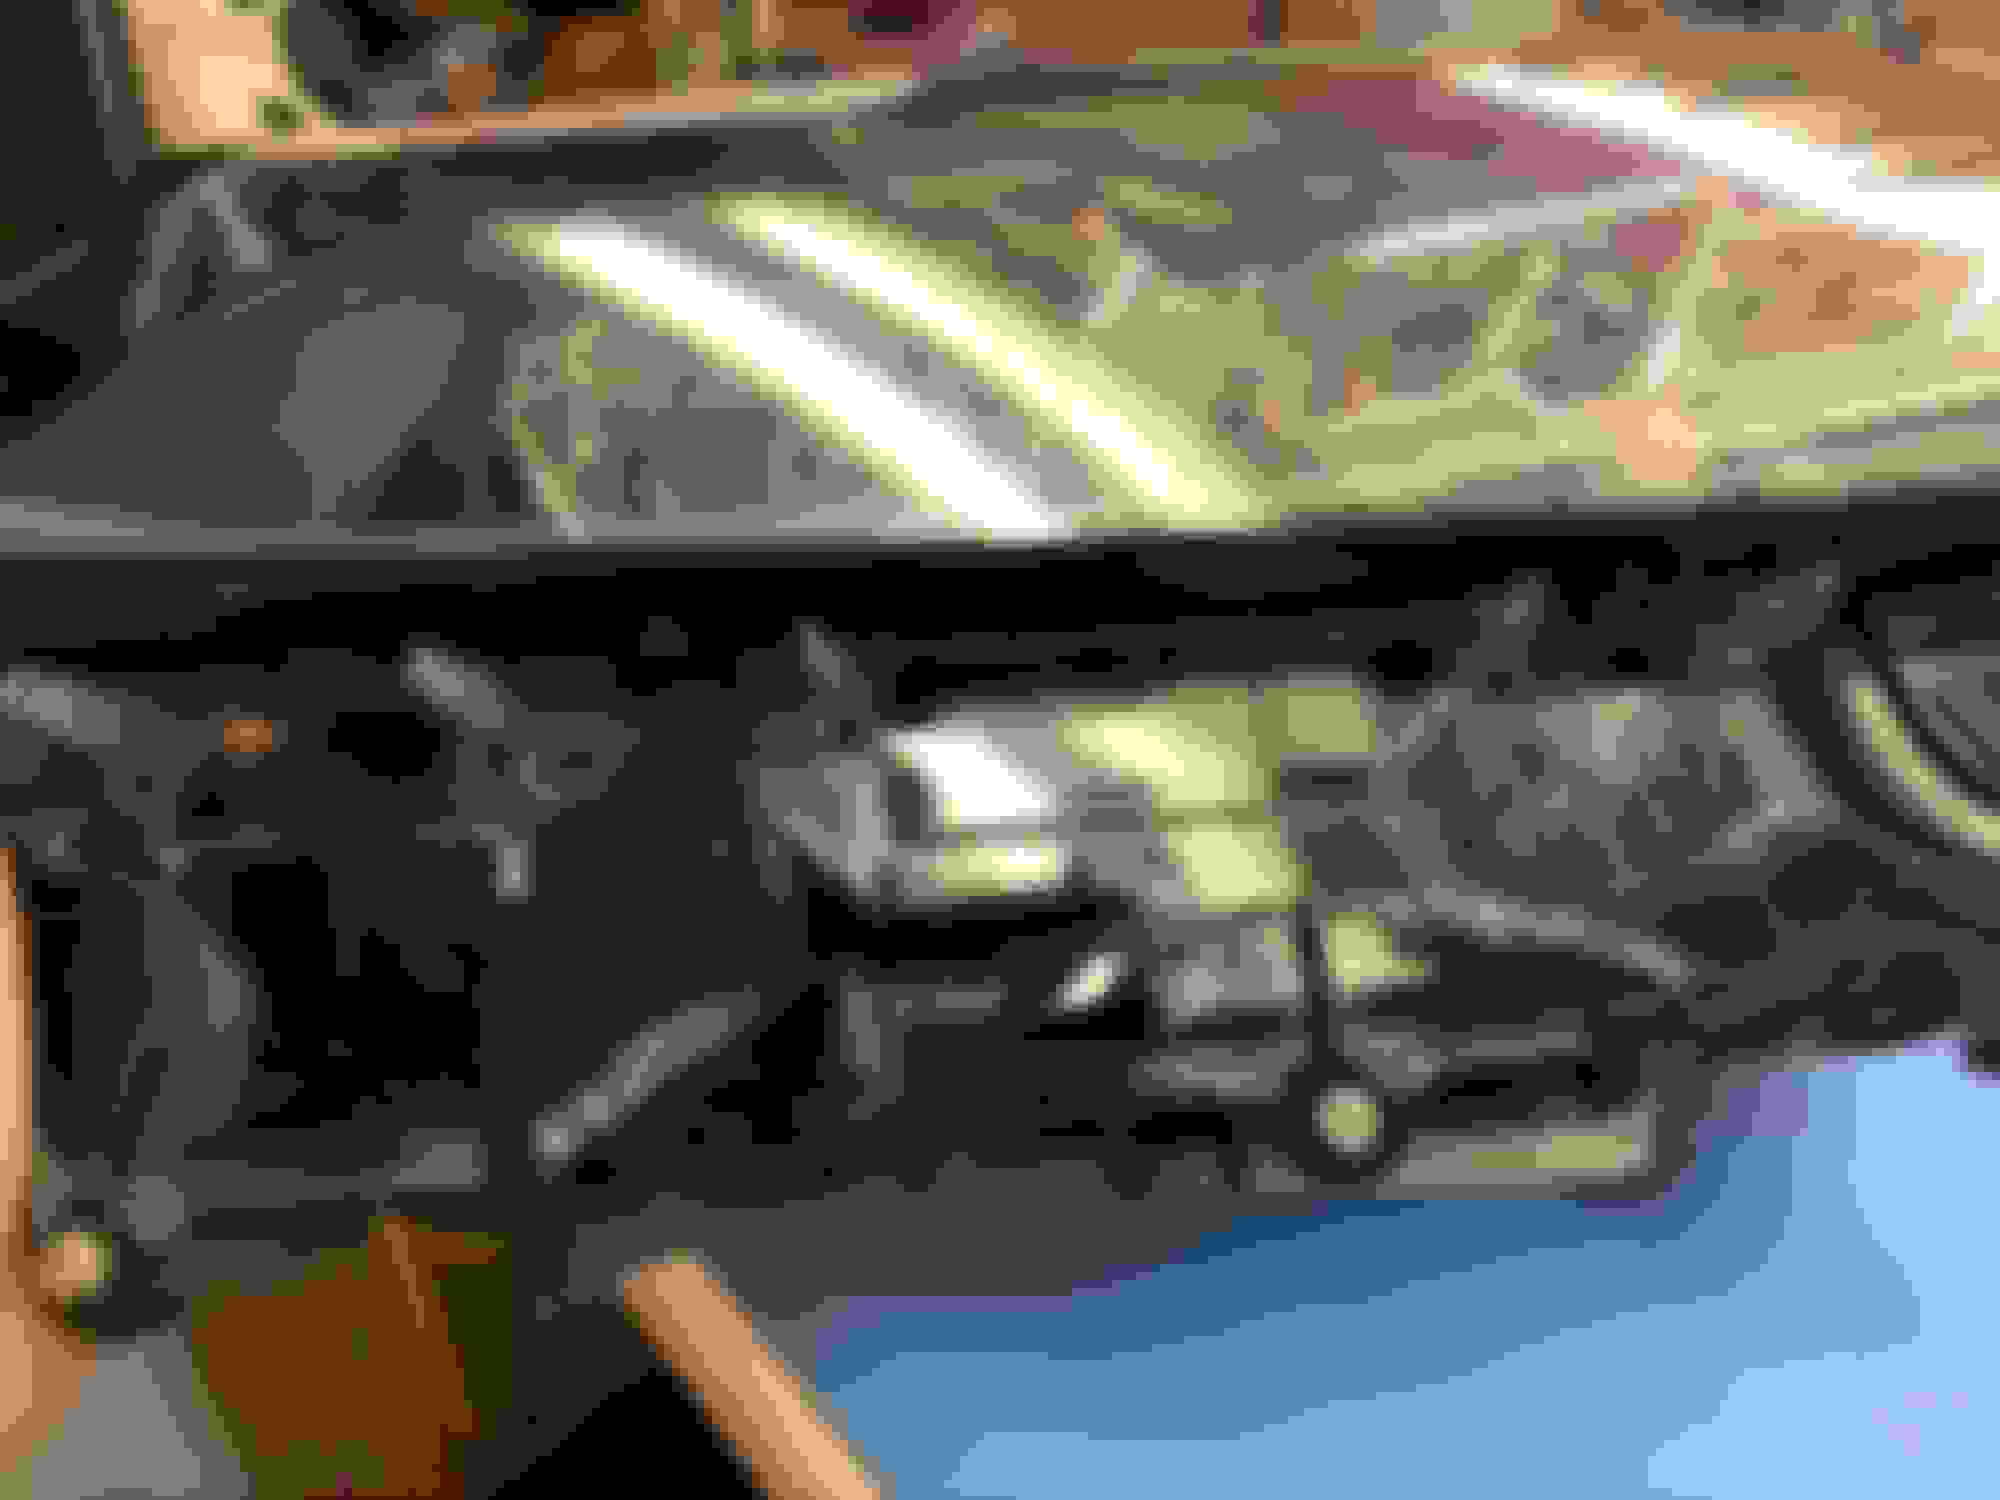
From there, I unbolted the front bumper. There's two screws with rubber bump stops on them, and then there's the smallest push tab and two more screws around the center. There's also a few push tabs and one screw holding the black plastic fender piece. That piece is held on with clips. I yanked the first one initially, but once you see how it works, you can work your finger behind the fender liner to push them out easily. I only took half of it off to access the one front bumper clip which then gives me access to the one bolt mounted to the side of the headlight that's holding it down.
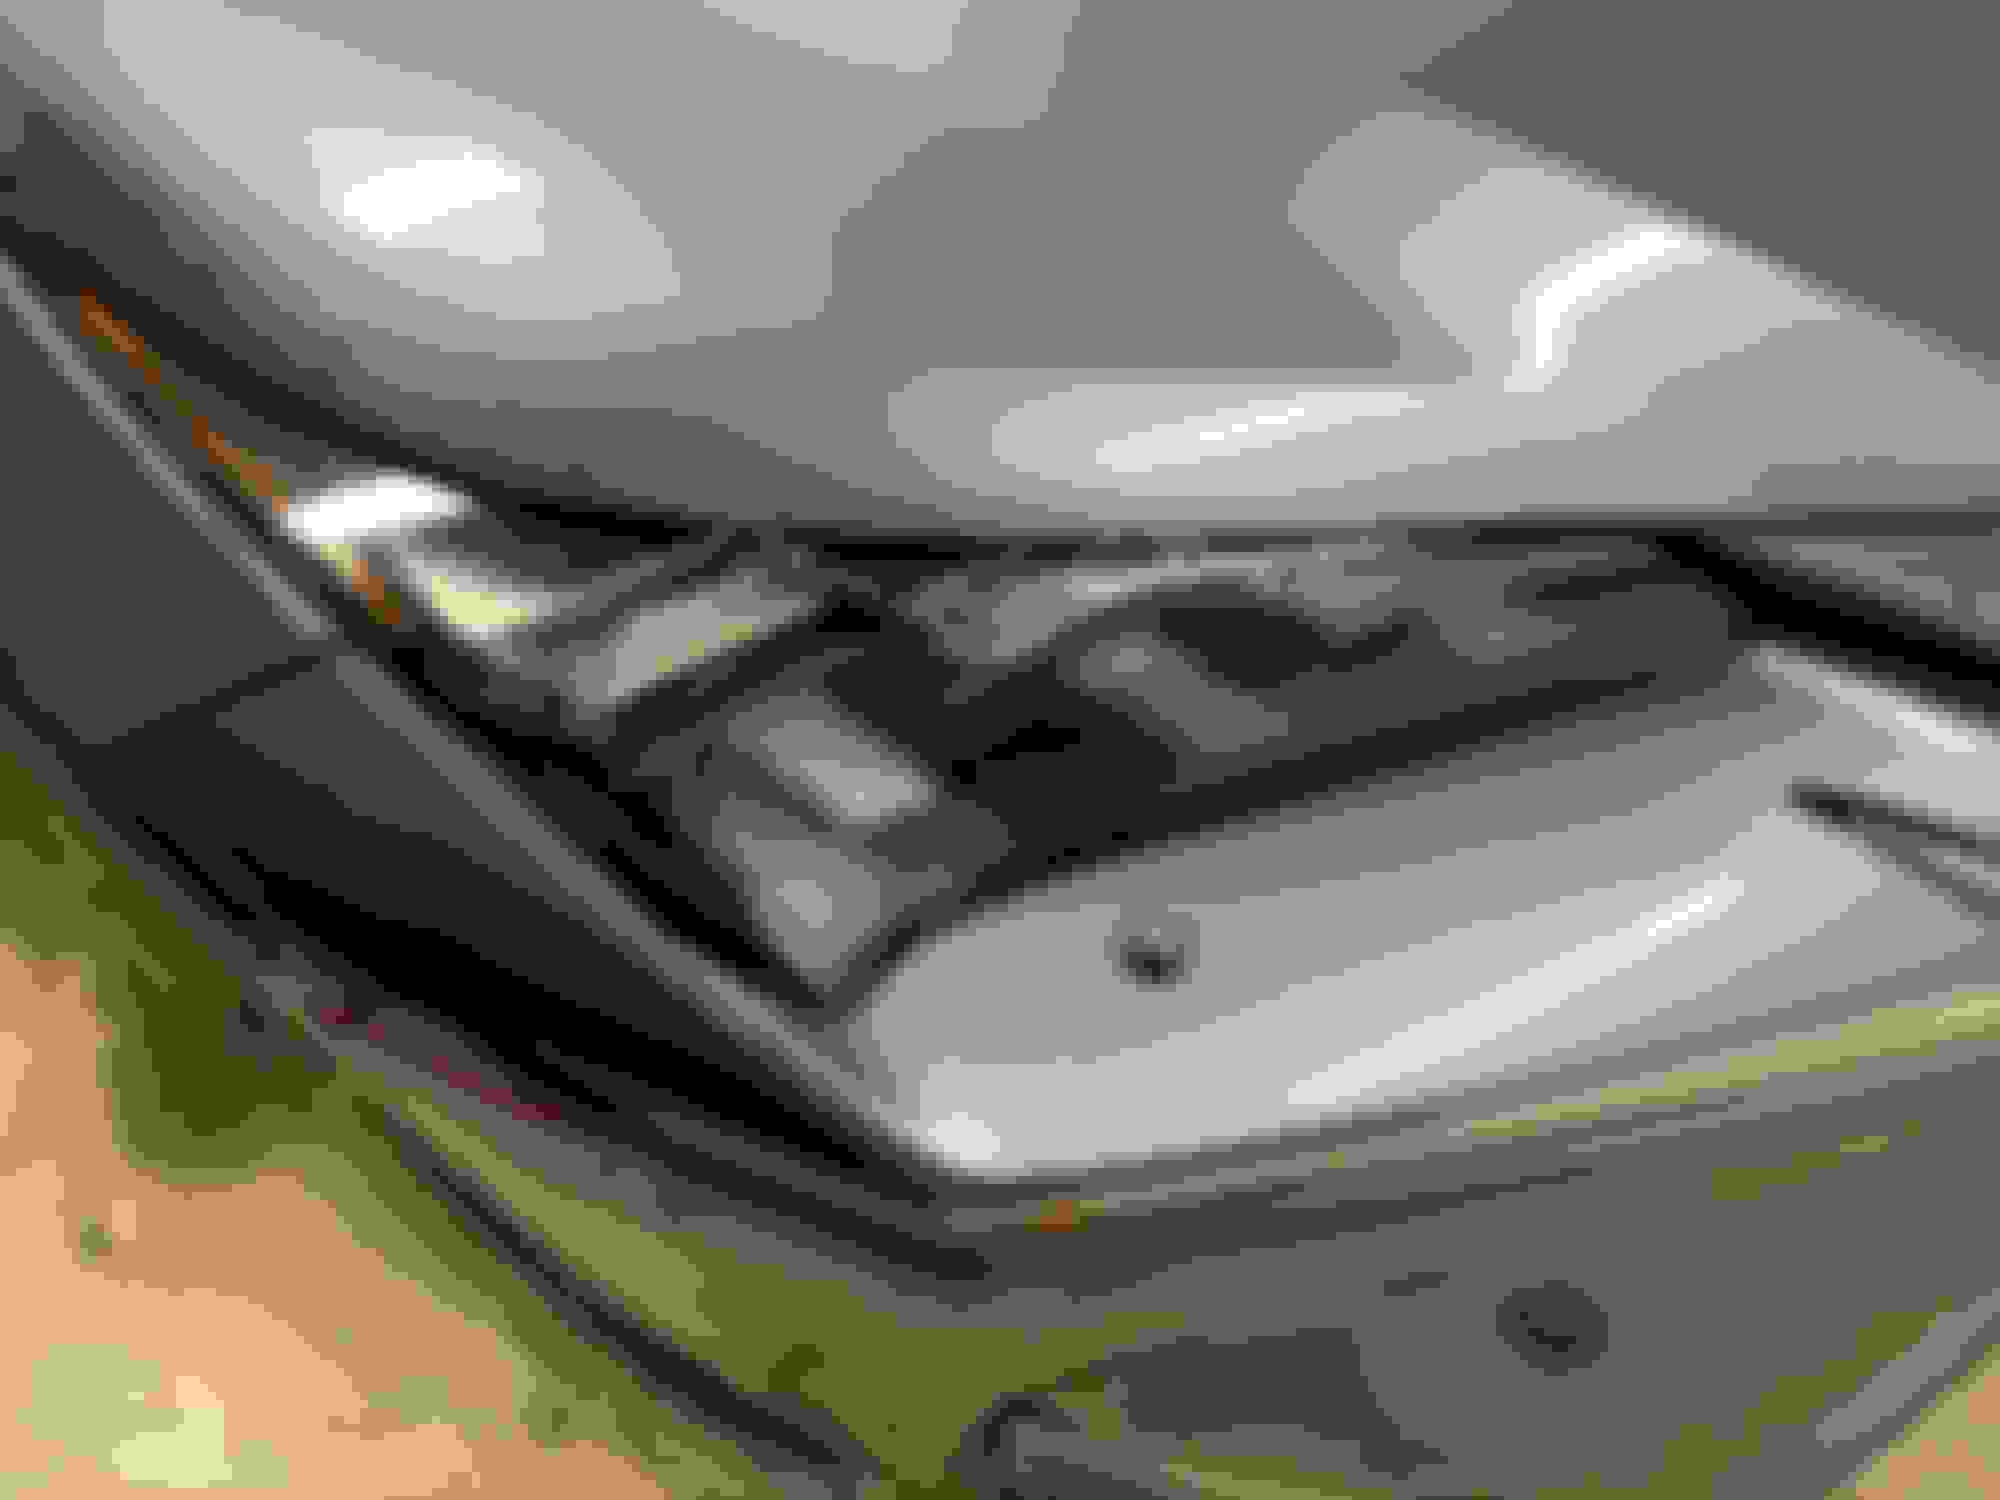
There's a total of 4 bolts holding down the headlight. 3 up top which you can see easily (one under the radiator cover) and then one hidden on the side behind the bumper.
From there. It's just a lot of wiggling and then the headlight will pop out. I didn't need to pull off the whole front bumper. You only need to realistically get it loose so that you can pull it forwards a few inches to have wiggle room There's only one harness that's connected to the headlight so once that's unplugged, you'll have the headlight free to do what you need.
Chances are if your headlights are condensating, there's either a crack somewhere, the glue around the headlight isn't holding the headlight together anymore (Rarely is this ever the issue. Never had an OEM headlight not seal right) or you left the gasket on the side marker open and water got in somehow.
If it is a crack, you'll need to get all the water out and let it dry very well (I'd recommend leaving it next to your running furnace or humidifier for 2-3 days with the rear gasket off) then plastic weld the crack to seal it up. You could also have your oven set at a super low temp like 100 degrees and leave it in there for like 5 minutes with the gaskets open and that should get rid of the moisture.
I don't recommend unsealing this headlight setup because there are Torx TR security screws around, so chances are you don't have that bit set, and there are a ton of electronics and wires. Generally you'd heat the headlights in the oven on a piece of wood for about 8min at 200 degrees but you're also suppose to have all fragile bits out, and there are a ton of loose thin wires that I can see as well as the module auto aim module that I didn't want to touch.
GEEZ!!!!!
Is it just me, or is "2600.00+ for unscrewing and replacing two headlight assemblies just OUTRAGEOUS?????
And don't give me the BS that they have to "check this" and/or "check that" after they do the ten minute job (OH, wait---maybe it took all of 30 minutes)--- ( not including the 45 minutes they spent BSing in the garage to make it seem like a "really tough job!!
WE are getting SCREWED by everyone connected to the business ,whether it's on the buying end, the leasing end and the repair end!!!!
These new cars are cash cows, and we're the ones that are paying!!
Keep in mind that the price is CDN money so that is likely why it is so high, also, it includes the price of the part and labor - but as you said, there is no question we are getting screwed and have to pay for it....Isn't that illegal?!?! (lol)
Thanks for all the info on pulling it apart. I feel a little better now knowing what to look for.
when you had yours out, did you notice if there are any pressure vent or are these lamps a sealed unit?
Wondering if there is a spot I can aim a dryer for a while to blow air in.
Yeah there is one. It's at this corner behind where the side marker is and it's a fairly small hole. There's no bulbs, just some wires in there but you can open it to let it vent.
I wouldn't recommend a heat gun of any strength. Hair dryer on the low setting would do best. I mistakenly used a heat gun and kind of melted the heat shrink. Luckily my wires were unaffected.
It seems like my plastic weld job is holding up well. I took a hair dryer (not heat gun) and set it on medium heat, opened up the venting cap right next to the side markers and stuck it blowing into the hole for about 30-40 minutes on each headlight till I no longer saw any condensation and residue at the bottom. Then I closed it up and did a quick car wash. No condensation returned. Looks as good as new. Hopefully it'll hold up over a few more washes and we'll see what happens.
2018 NX300.
Will be replaced under warranty.
Normally cost 2636.25$Cdn for one headlight assembly.
Yvan, You�re not alone.... Same here on my 2018 F-Sport, dealer ordered the part in November... took close to 3 months for the part to arrive, was finally done 2 weeks ago. Also done under warranty.
Here�s how it looked full of moisture ... price that I saw on the tech�s computer was above 3000$. Mine has the auto-level and directional head light options ...

 01-11-20, 07:56 AM