2jzgte....swap/prep...........progress!
 07-10-09, 10:01 AM
#76
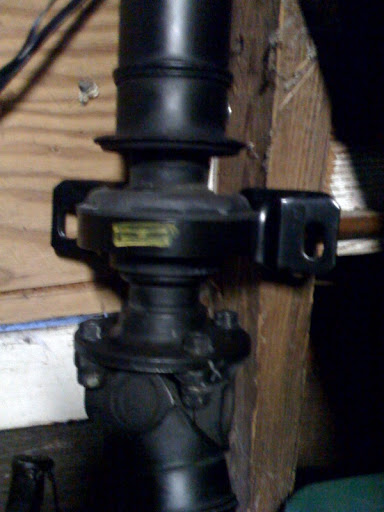
My heater setup was identical to na setup, just fitted differnt pipes to fit with the gte setup
as far as flow direction goes, I piped from back of head water port directly to the heater vsv and zip tied it permenantly open- my ac is freezing cold anyway and the valve wasn't functioning properly to begin with ( car didn't have heat before I locked it open)
regarless of flow and hvac performance there is also another issue I had in mind when I was doing that. To evacuate heat from back of cylinder head to heater core- the bane of all I-6 is equal cooling in cylinders 5/6- same reason usdm mk4 guys dislike egr- it retains too much heat in the rear of the head- if you look at serious rb26 builds, they fit big
pipes to the rear of head where oem there are none- for heat evac fromrear of head to prevent warping, head gasket failure, etc etc.
 07-13-09, 01:38 AM
#77
Lead Lap
Thread Starter
iTrader: (5)

Join Date: Jul 2008
Location: SF CA
Posts: 602
Likes: 0
Received 0 Likes
on
0 Posts
no-
my firewall switch is bypassed so hot water from the engine always goes to the heater core as extra cooling for the back of the head.
i needed heat for the cabin- all OEM hvac and AC inside were retained, both worked.
my firewall switch is bypassed so hot water from the engine always goes to the heater core as extra cooling for the back of the head.
i needed heat for the cabin- all OEM hvac and AC inside were retained, both worked.
11-15-09, 11:05 PM
#78

car is back on the road and healthy- I did some major services in the last few days-
Driveshaft center bearing- if anyone is wondering: same part number as MK4 NA 5mt supra jza80 - i just ordered for a 95 NA supra 5mt from toyota ($140 ish) , you also need 2 small washers to seat it - they are ~$2 each
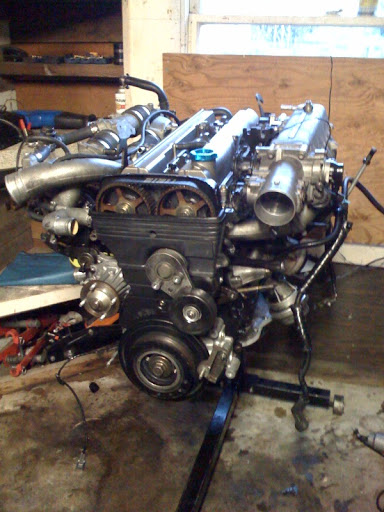
when you do a motor rebuild, change the oil pump no matter what- if you have the motor on the stand, change the pump. its ~ $190, and will save you crazy headaches in the long run. I originally took the risk of running the JDM 38k mile oil pump.......Fail for me.
After spending alot of time reading on supraforums, I saw tons of FMS failure threads and related oil issues logged on the boards - my oil pump was functioning but weeping out of the relief valve - i tried changing the o ring, but no avail- the pump weeps when its going bad...
oil pump is a motor on engine stand job. This meant pulling my motor/trans i had just installed and driven 670 break in miles out and back on the stand. Dammit. no clean way around this, I talked to a few techs@ toyota- oil pan (upper and lower) must both come off, be cleaned and then re FIPG'ed and installed - post oil pump change.
so:
pull complete front of engine bay
pull exhaust
pull DS
pull tranny X member
drain trans
unbolt motormounts
remove my quick attach harness from engine and put on side
mark middle of driveshaft, split front and rear, 24mm nut and gear puller to remove bearing, then re-install and tighten/stake the nut to finish.
pull trans off motor, motor on stand, ancilleries off.
oil pans off, the techs clean the fipg off with rotating tool+ brillo pad or rubber supersized dentist cleaning tool attachment.
pull oil pump, change o-rings on block face and install new oil pump.
install o rings in oil pan assembly, new fipg and back it goes.
let chillax before you fill it so it can take a nap to set (and you can sleep).
Fast forward 20 hours of garage time later....
trophy picture (again) - but notice brand new oil pump (barely visable) hahahahaha
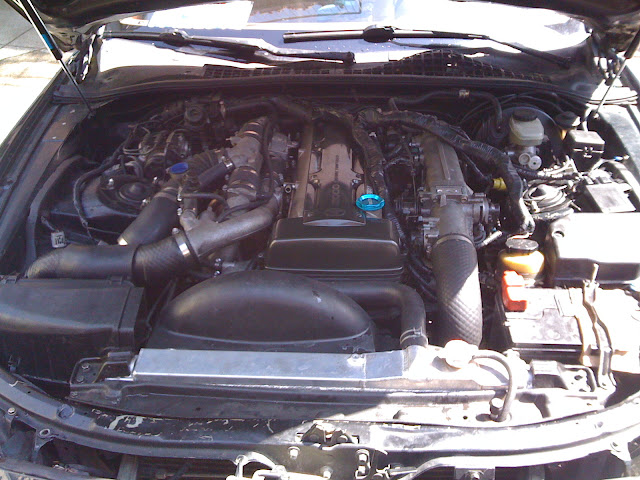
now back on the road. yay.
Driveshaft center bearing- if anyone is wondering: same part number as MK4 NA 5mt supra jza80 - i just ordered for a 95 NA supra 5mt from toyota ($140 ish) , you also need 2 small washers to seat it - they are ~$2 each
when you do a motor rebuild, change the oil pump no matter what- if you have the motor on the stand, change the pump. its ~ $190, and will save you crazy headaches in the long run. I originally took the risk of running the JDM 38k mile oil pump.......Fail for me.
After spending alot of time reading on supraforums, I saw tons of FMS failure threads and related oil issues logged on the boards - my oil pump was functioning but weeping out of the relief valve - i tried changing the o ring, but no avail- the pump weeps when its going bad...
oil pump is a motor on engine stand job. This meant pulling my motor/trans i had just installed and driven 670 break in miles out and back on the stand. Dammit. no clean way around this, I talked to a few techs@ toyota- oil pan (upper and lower) must both come off, be cleaned and then re FIPG'ed and installed - post oil pump change.
so:
pull complete front of engine bay
pull exhaust
pull DS
pull tranny X member
drain trans
unbolt motormounts
remove my quick attach harness from engine and put on side
mark middle of driveshaft, split front and rear, 24mm nut and gear puller to remove bearing, then re-install and tighten/stake the nut to finish.
pull trans off motor, motor on stand, ancilleries off.
oil pans off, the techs clean the fipg off with rotating tool+ brillo pad or rubber supersized dentist cleaning tool attachment.
pull oil pump, change o-rings on block face and install new oil pump.
install o rings in oil pan assembly, new fipg and back it goes.
let chillax before you fill it so it can take a nap to set (and you can sleep).
Fast forward 20 hours of garage time later....
trophy picture (again) - but notice brand new oil pump (barely visable) hahahahaha
now back on the road. yay.
 03-01-10, 12:05 PM
#82
Lexus Champion
iTrader: (13)
Join Date: Feb 2008
Location: Sacramento
Posts: 2,187
Likes: 0
Received 0 Likes
on
0 Posts
Here you go. https://www.clublexus.com/forums/per...to-2jzgte.html
Im in the process of doing this right now....
Im in the process of doing this right now....
01-01-13, 10:41 AM
#84
Lead Lap
Thread Starter
iTrader: (5)
Join Date: Jul 2008
Location: SF CA
Posts: 602
Likes: 0
Received 0 Likes
on
0 Posts
Nice job, was looking to do this swap as well. Just didn't really have time to play with all the wiring. Instead I went with a GTE bottom end GE head T61. I believe I ran into the same issue with the oil pump just junking out on me. When your pump went did it damage anything else? Any bottom end noises?
You didn't change out the oil pump with a new unit?
01-20-13, 03:44 PM
#86
Lead Lap
Thread Starter
iTrader: (5)
Join Date: Jul 2008
Location: SF CA
Posts: 602
Likes: 0
Received 0 Likes
on
0 Posts
I dont have avail to give out as my swap was very specific : j spec engine and ecu to avoid egr and airflow meter
Are you good at making spreadsheets? Its a great way to manage projects and track costs
My toyota dealer gave me most of the parts breakdown and guidence on differences: also small crutial items like gaskets, bolts, wires
Brief parts list:
One complete used engine to rebuild: they all need new seals and o rings
New oil/water pumps
Full engine gasket kit with head gasket set and FIPG for assembly of bottom end
New flywheel and head and main and rod bolts.
Genuine front crank and main and cam seals
NEw piston rings
New bearings
Full head rebuild at machine shop
Crank polish and balance
Block hot tanked and measured for bore diamter and bearings
New coil pack clips and wires
Dis6 ignitor and resistor pack
Injectors to match ecu and impedence resistor
Map sensor
Temp sensor
Vr intake cam sensor x2
Crank position sensor
New thermostat and gasket
New plastic fan and oem fan shroud and clutch
Last edited by wanganstyl; 01-20-13 at 05:28 PM.
01-22-13, 07:46 PM
#87
Lead Lap
Thread Starter
iTrader: (5)
Join Date: Jul 2008
Location: SF CA
Posts: 602
Likes: 0
Received 0 Likes
on
0 Posts
Do you have both the original donor chassis wiring manual for HVAC/ac control
AND
wiring diagram matching your ECU?
#1. get both diagrams, and label out what wires are doing; power/ground/relay etc
#2 test and install
AC compressor is grounded to the engine block physically as it is BOLTED to the iron block.
AC compressor is activated by sending the 1 wire to it a +12v signal (power)
HVAC "AC" button sends a ground signal to a relay, the relay will activate +12V fused power to be sent to the AC compressor to engage the electronic clutch and start pumping.
follow the pathway of this and connect it just like the ECU of your choice has natively installed in the body it was installed by toyota in.
05-19-13, 07:45 AM
#89
Lead Lap
Thread Starter
iTrader: (5)
Join Date: Jul 2008
Location: SF CA
Posts: 602
Likes: 0
Received 0 Likes
on
0 Posts
Go-Go-GO!
the goal of projects such as this is to allow one to create reality out of dreams.
Even though my dreams of having a 600rwhp freeway monster with this sc300 was cut short I am glad that the project has been shared with many others

Thread
Thread Starter
Forum
Replies
Last Post