
DIY: SC400 (A340E) Shift Solenoid Replacement
 01-12-11, 12:31 AM
#1
Driver School Candidate
Thread Starter

I've seen lots of information about failed shift solenoids, but I haven't seen any pictures. Thought I'd join and post some info.
Car: 1992 SC400 10/91 Build.
Transmission: A340E
Problem: "O/D Off" Light flashing, odd shifting (owner mostly complained about high revs before upshifts, I didn't get a chance to drive it much myself but I did get the O/D Off light after just a mile or so). I got transmission codes 63 and 67.
Tools/Parts Needed:
• 8mm socket for one valve body (bracket mount) bolt
• 10mm socket for transmission pan bolts and valve body(bracket mount) bolts
• 10mm open-end wrench for negative battery cable clamp
• 14mm socket for transmission drain plugs
• 3 qts. ATF. I used Coastal Multi-Vehicle Synthetic Blend Automatic Transmission Fluid from AutoZone for $3.99/qt. It says it meets Toyota T-III and T-IV / Lexus specs.
• Rostra Solenoid Kit #67420CK. Fits A140 / A240 / 241E / A340 / A340E and maybe more. It was about $112 with shipping from Makco Transmission (through their eBay store).
Procedure:
It's really a pretty simple job thankfully! But, it is messy like all automatic transmission servicing when you take the pan off. I did it with just the front wheels on ramps but it was a very tight squeeze.
Disconnect negative battery cable
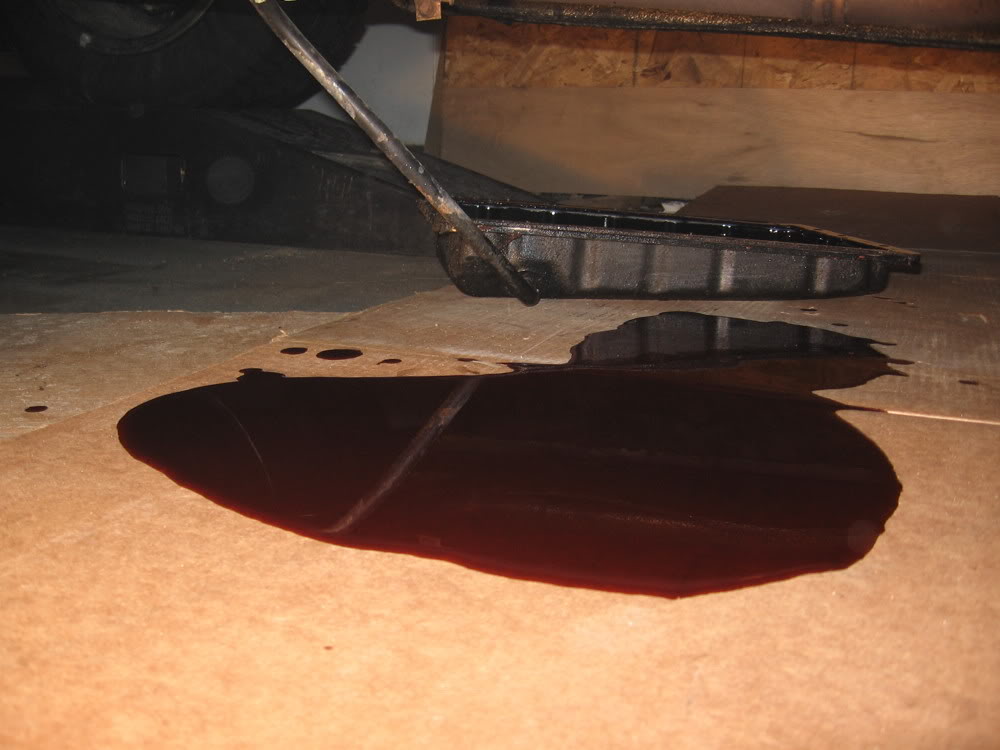
Drain ATF into clean container and measure. I use this measurement to determine how much new fluid to put back in. I've found this method makes refilling MUCH easier, assuming it was at the proper level before you started.
Remove transmission pan bolts and carefully lower the pan from the transmission.
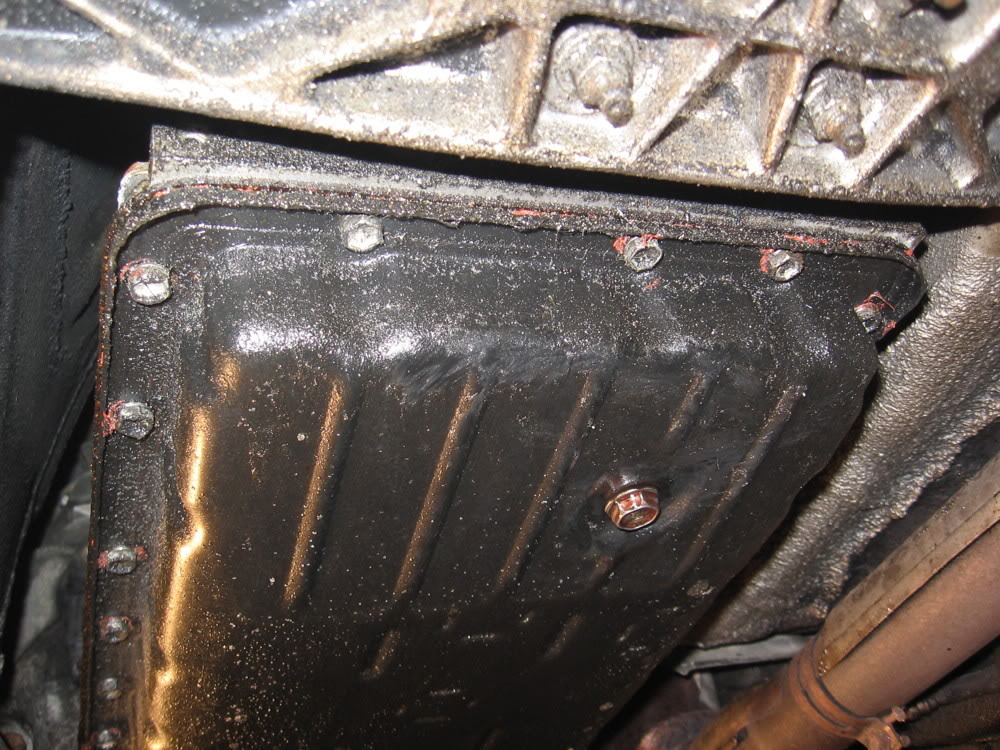
Oops! So much for an accurate measurement of how much I took out! With the front end in the air and the shallow pan, you're bound to spill some.
Car: 1992 SC400 10/91 Build.
Transmission: A340E
Problem: "O/D Off" Light flashing, odd shifting (owner mostly complained about high revs before upshifts, I didn't get a chance to drive it much myself but I did get the O/D Off light after just a mile or so). I got transmission codes 63 and 67.
Tools/Parts Needed:
• 8mm socket for one valve body (bracket mount) bolt
• 10mm socket for transmission pan bolts and valve body(bracket mount) bolts
• 10mm open-end wrench for negative battery cable clamp
• 14mm socket for transmission drain plugs
• 3 qts. ATF. I used Coastal Multi-Vehicle Synthetic Blend Automatic Transmission Fluid from AutoZone for $3.99/qt. It says it meets Toyota T-III and T-IV / Lexus specs.
• Rostra Solenoid Kit #67420CK. Fits A140 / A240 / 241E / A340 / A340E and maybe more. It was about $112 with shipping from Makco Transmission (through their eBay store).
Procedure:
It's really a pretty simple job thankfully! But, it is messy like all automatic transmission servicing when you take the pan off. I did it with just the front wheels on ramps but it was a very tight squeeze.
Disconnect negative battery cable
Drain ATF into clean container and measure. I use this measurement to determine how much new fluid to put back in. I've found this method makes refilling MUCH easier, assuming it was at the proper level before you started.
Remove transmission pan bolts and carefully lower the pan from the transmission.
Oops! So much for an accurate measurement of how much I took out! With the front end in the air and the shallow pan, you're bound to spill some.
Last edited by E365; 01-12-11 at 12:55 AM.
 01-12-11, 12:34 AM
#2
Driver School Candidate
Thread Starter
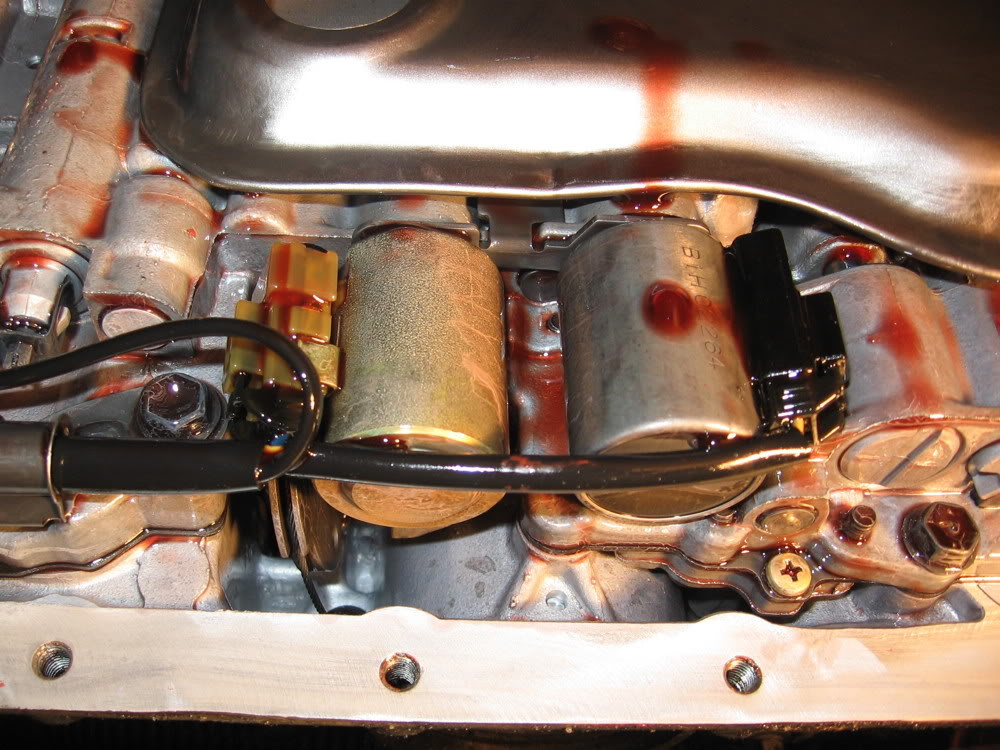
Here's what you see once the pan is off.
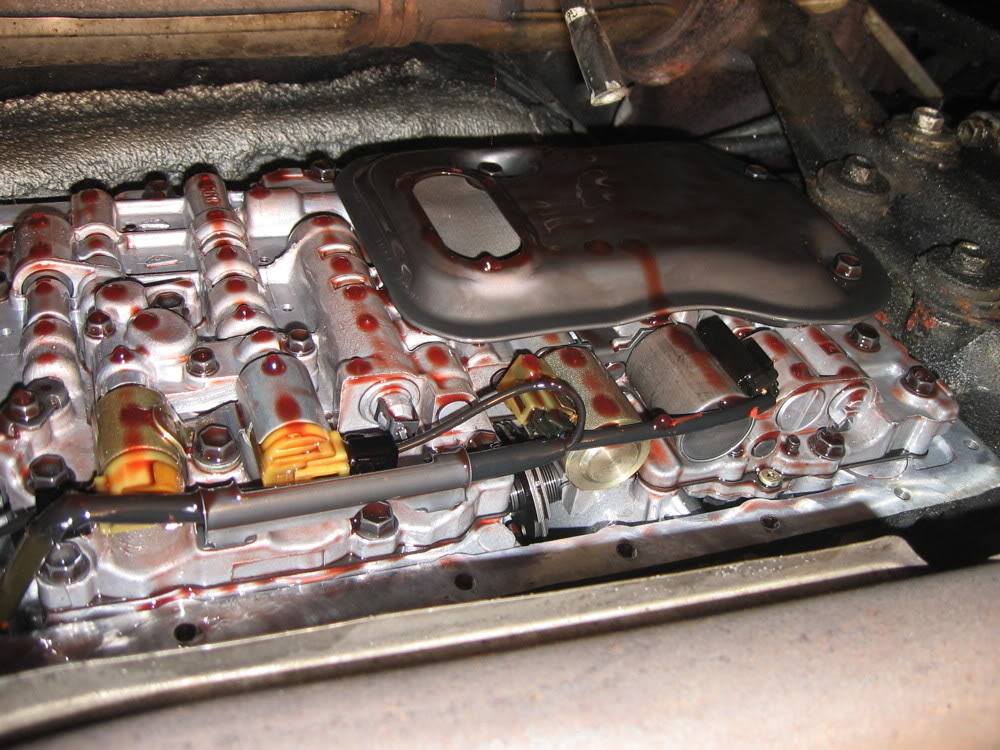
Shift solenoids
Lock up solenoid and some other solenoid???. I had a hard-time figuring out which solenoids I needed to buy from looking at the real Toyota diagram. They listed three different "shift solenoids" and one lock up. I figured the Rostra kit had it figured out so I went with that. Plus the price. I needed to do this on-the-cheap for a guy.
01-12-11, 12:54 AM
#3
Driver School Candidate
Thread Starter
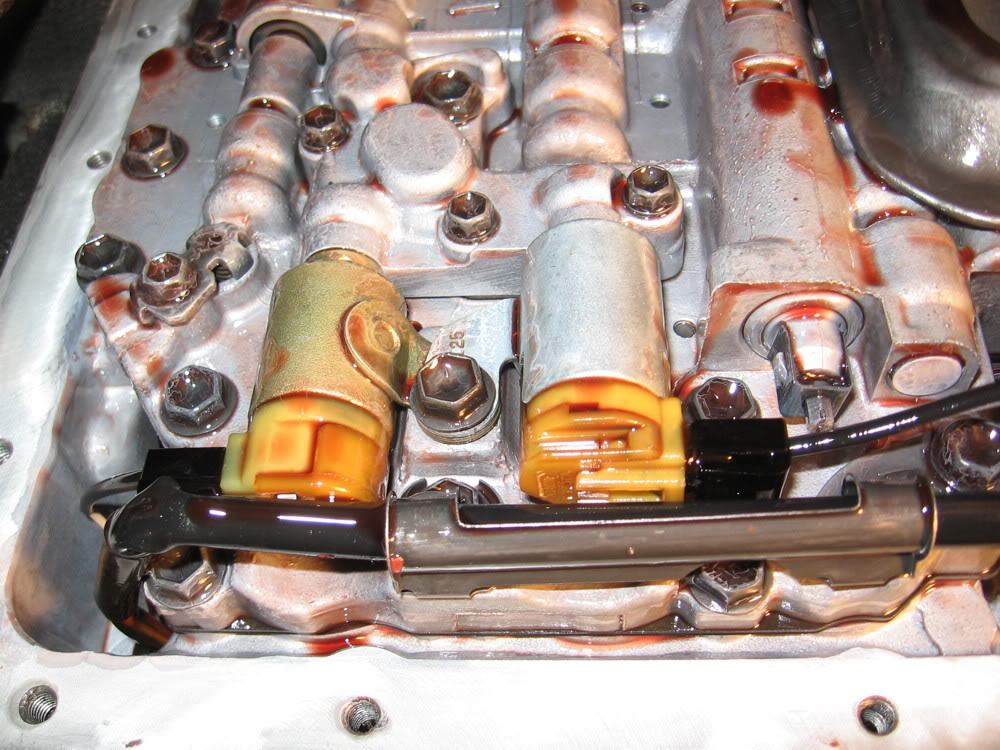
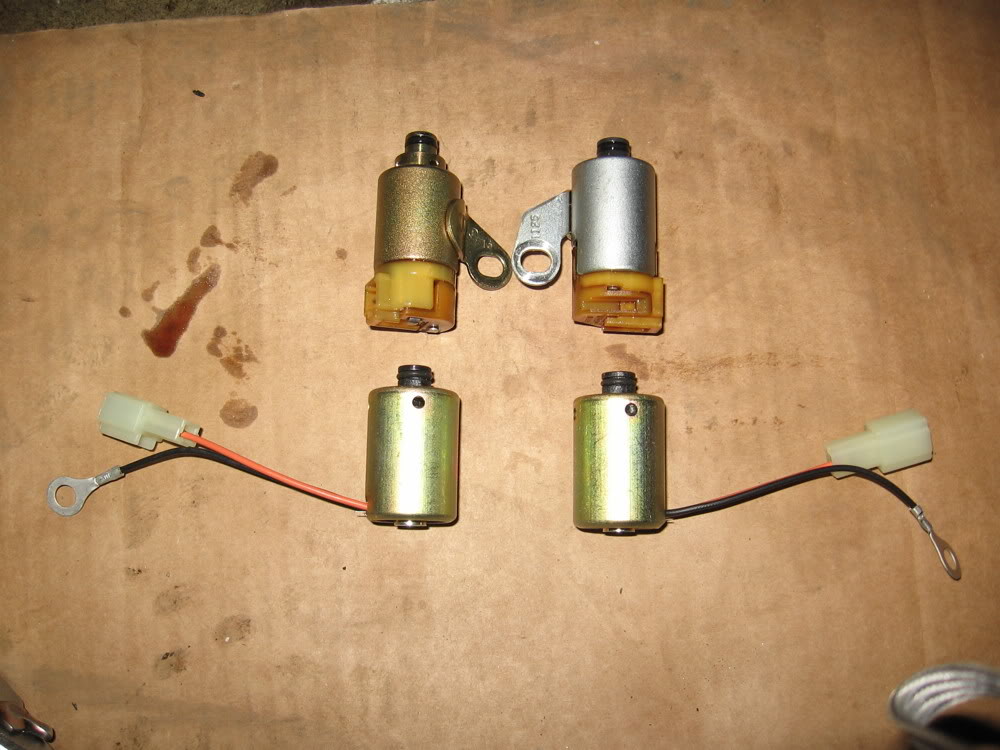
Old solenoids and new universal ones. You can see they are not the same design....
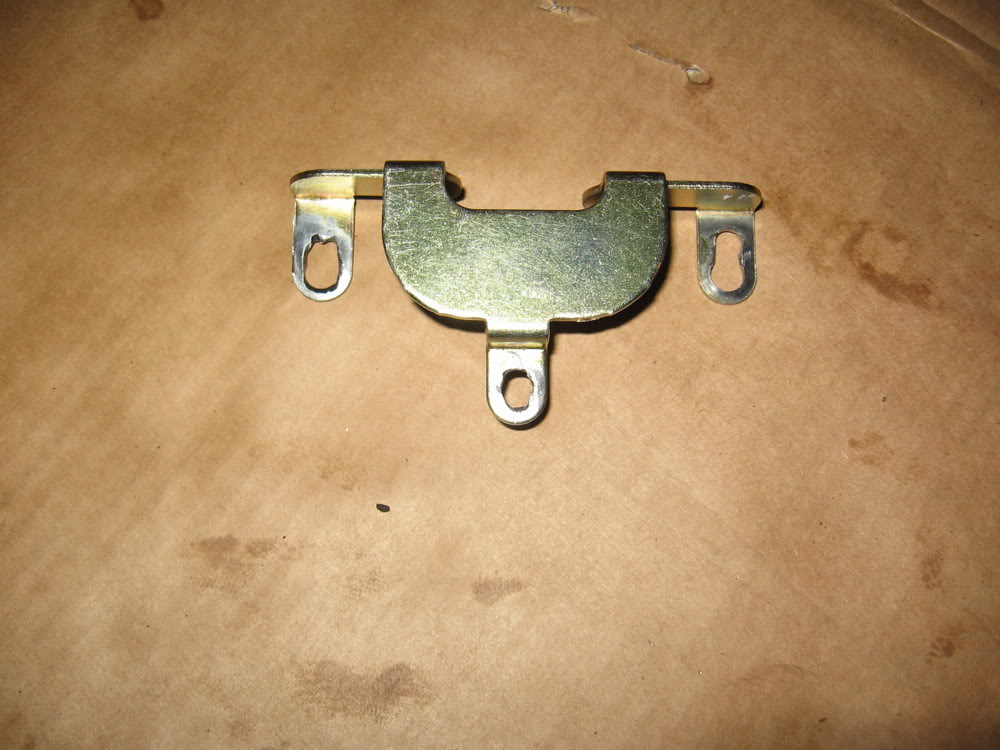
The kit comes with a handfull of different brackets depending on which transmission you are workign with. This is the one this transmission needed, but I did not like the fit much. I needed to enlarge the mounting holes a tad to secure the solenoids better. I'll get into that more later....
Removing them and replacing them is a breeze. The old ones are attached with a single bolt (10mm head?). Remove the bolt, unplug them from the wiring harness and pop them out of the holes they are seated in. Lightly coat the o-rings of the new solenoids with some ATF and insert them into their holes.
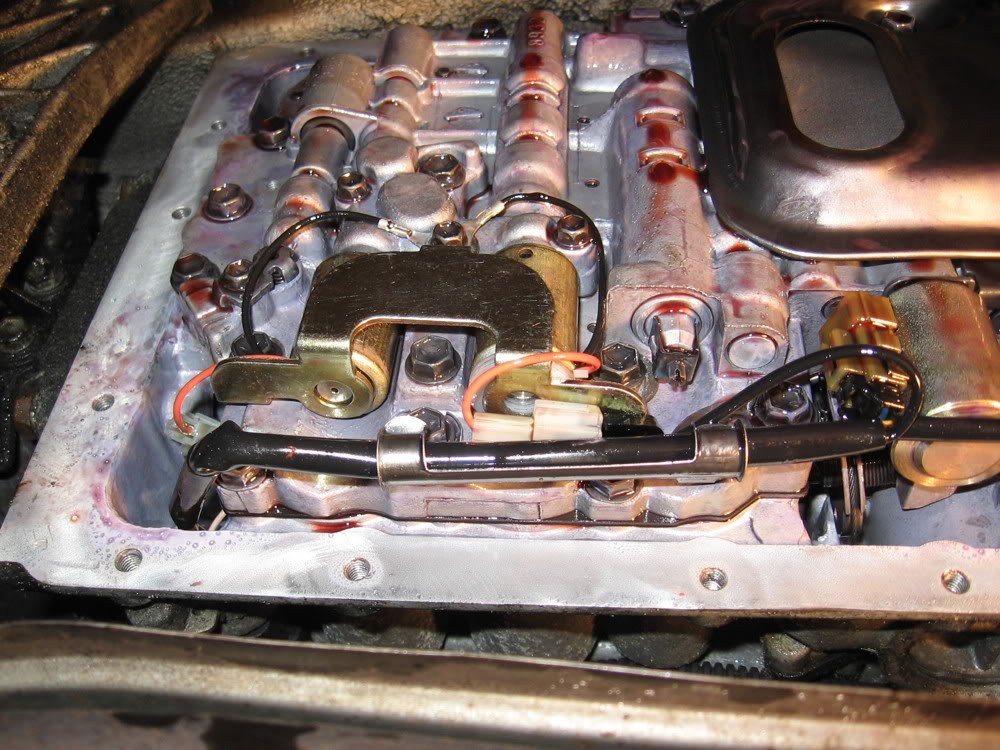
The bracket that's included is the only one that could possibly fit (it uses three bolts, not ones that secure the original solenoids) so it has to be the right one. The problem with the bracket is that it doesn't keep the forward-most solenoid in its mounting hole securely, hence the need to elongate the orginal hole and allow the bracket to move closer to the hole in which the solenoid mounts into. I ran into the same problem with the rear solenoid, except worse. This required two plastic washers (you can see them in the picture below) to make up the space between the bracket and back of the solenoid.
Also, when the bracket is bolted to the valve body, the bracket starts to crush the rearward solenoid, taking it out of alignment with its mounting hole. This required two washers between the valve body and rearward most mounting point of the bracket. Once I modified and shimmed the bracket I was pleased with how secure and straight the solenoids were installed. If this were my car and I was willing to pay the money for the real Toyota solenoids I would have. Especially if you are going to keep the car for a long time.
Using a new gasket (and I used Permatex Ultra Grey) mount the pan back in place. *** Make sure the dipstick tube seats into the upper portion of the dipstick tube beofre you start bolting the pan back in place *** Like this: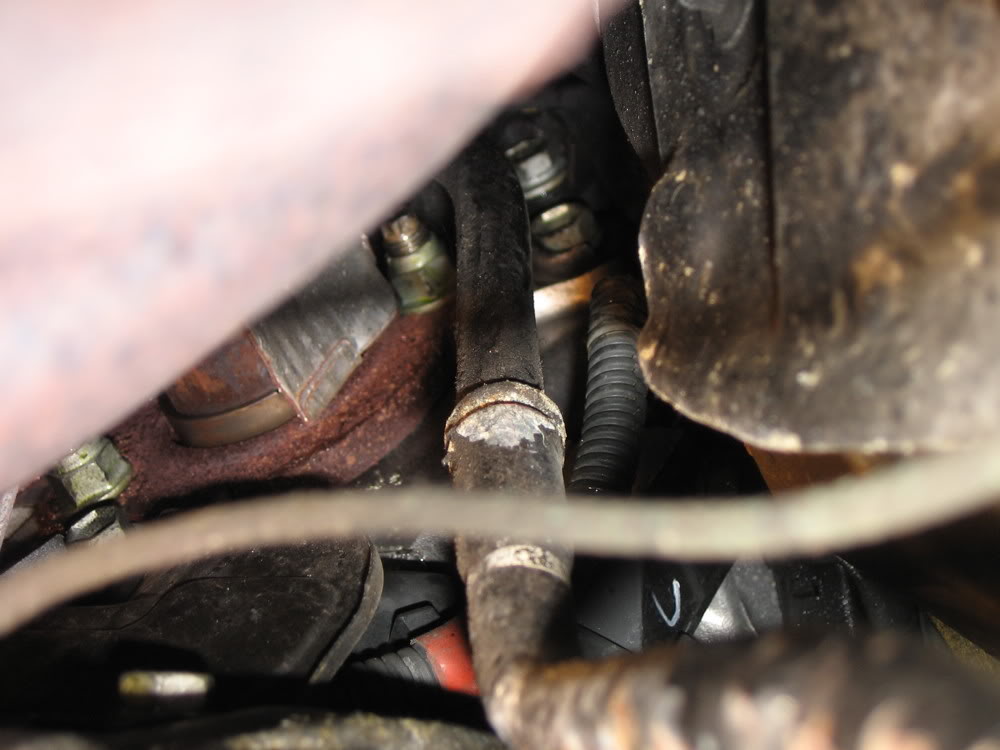
Secure the bolts according to the Permatex label if you used it. Bead, tighten until it startes to squeeze out, wait 1 hour and tighten an additional 1/4 to 1/2 turn.
Add the new fluid. Take car off ramps, start and run through all gears slowly. Stopping at (P)ark, check the dipstick. It should be in the cold range. If so, drive the car gently for 20+ minutes to get the transmission up to operating temp. Recheck fluid and adjust to be in the Hot range.
That worked for this car at least, no promises! "O/D Off" light does not come on at all now and it seems to shift perfectly, although my 20 miles test drive was in the snow so I couldn't push it hard. Also this car had a TRAC light (constantly on) and codes 43 and 41. The light only comes on now when traction is activated and goes out immediately after like it should (I suppose!?). Either the transmission fix fixed this, or maybe more likely, disconnecting the battery reset the computer and the system work as it should now.
The kit comes with a handfull of different brackets depending on which transmission you are workign with. This is the one this transmission needed, but I did not like the fit much. I needed to enlarge the mounting holes a tad to secure the solenoids better. I'll get into that more later....
Removing them and replacing them is a breeze. The old ones are attached with a single bolt (10mm head?). Remove the bolt, unplug them from the wiring harness and pop them out of the holes they are seated in. Lightly coat the o-rings of the new solenoids with some ATF and insert them into their holes.
The bracket that's included is the only one that could possibly fit (it uses three bolts, not ones that secure the original solenoids) so it has to be the right one. The problem with the bracket is that it doesn't keep the forward-most solenoid in its mounting hole securely, hence the need to elongate the orginal hole and allow the bracket to move closer to the hole in which the solenoid mounts into. I ran into the same problem with the rear solenoid, except worse. This required two plastic washers (you can see them in the picture below) to make up the space between the bracket and back of the solenoid.
Also, when the bracket is bolted to the valve body, the bracket starts to crush the rearward solenoid, taking it out of alignment with its mounting hole. This required two washers between the valve body and rearward most mounting point of the bracket. Once I modified and shimmed the bracket I was pleased with how secure and straight the solenoids were installed. If this were my car and I was willing to pay the money for the real Toyota solenoids I would have. Especially if you are going to keep the car for a long time.
Using a new gasket (and I used Permatex Ultra Grey) mount the pan back in place. *** Make sure the dipstick tube seats into the upper portion of the dipstick tube beofre you start bolting the pan back in place *** Like this:
Secure the bolts according to the Permatex label if you used it. Bead, tighten until it startes to squeeze out, wait 1 hour and tighten an additional 1/4 to 1/2 turn.
Add the new fluid. Take car off ramps, start and run through all gears slowly. Stopping at (P)ark, check the dipstick. It should be in the cold range. If so, drive the car gently for 20+ minutes to get the transmission up to operating temp. Recheck fluid and adjust to be in the Hot range.
That worked for this car at least, no promises! "O/D Off" light does not come on at all now and it seems to shift perfectly, although my 20 miles test drive was in the snow so I couldn't push it hard. Also this car had a TRAC light (constantly on) and codes 43 and 41. The light only comes on now when traction is activated and goes out immediately after like it should (I suppose!?). Either the transmission fix fixed this, or maybe more likely, disconnecting the battery reset the computer and the system work as it should now.
Last edited by E365; 01-12-11 at 12:59 AM.
The following users liked this post:
LALexusOwn (03-05-18)
01-12-11, 02:45 AM
#5
Driver School Candidate
Thread Starter

Trending Topics
 02-10-11, 09:00 AM
#9
Pole Position
iTrader: (3)

Join Date: Jan 2011
Location: CA
Posts: 382
Likes: 0
Received 0 Likes
on
0 Posts
http://www.electricaladvantage.net/a...olenoid-1.aspx
I bought this kit for my 4Runner and the bag says A340 E/F/H. Since the SC400 has the A340E I cant see why it would not fit. The brackets are also like the OEM, so no headaches modifying the mounting bracket.
Good luck!
I bought this kit for my 4Runner and the bag says A340 E/F/H. Since the SC400 has the A340E I cant see why it would not fit. The brackets are also like the OEM, so no headaches modifying the mounting bracket.
Good luck!
07-01-11, 06:58 AM
#11

So I take it that grey rectangular piece with the screen is the "filter"? I am trying to get clarification if these transmissions have an actual filter that can be changed.
I have a 92 sc300 that is shifting a little rough. Not too bad but not smooth. I'd like to do some preventative maintenance before the trans calls it quits.
I am changing the fluid tomorrow. If it doesnt help that much would changing the solenoids help make it shift smooth again? Should I bother replacing that screen/filter part?
Thanks.
if you already have it opened up then might as well swap the filter.
yes it's that big gray square thing.
The following users liked this post:
LALexusOwn (03-05-18)
07-01-11, 12:30 PM
#12
I thought I needed new solenoids a while back, but just changing my fluid and filter make the transmission shift like new. I however, didn't have the flashing OD light.
I'm pretty sure my Sc400 had the a341e though, because the solenoids were much longer.
I'm pretty sure my Sc400 had the a341e though, because the solenoids were much longer.
07-09-11, 08:13 AM
#13
Rookie

Join Date: Nov 2008
Location: fl
Posts: 74
Likes: 0
Received 0 Likes
on
0 Posts
i change my solenoids i had the code 63 and 67 i change them and now i still have the same problem the od lights keep flashing. i change the filter also i took of the battery and the fuse in the engine to reset the computer but it didnt work i still have the same problem like if i have not change anything. what can i do
