Sc300/Sc400 Moonroof/Sunroof Delete!
#16
Instructor
iTrader: (2)
I like the reversibility of your approach, and I was definitely a bit nervous drilling into the roof (hint: drill all your holes in the panel first, then line it up on the roof and fire away), but a hole is a hole as far as the rain is concerned. Side note: The rain is back today, so I can see if I have any leaks...
Do you have pics from the inside? It looks like you used the front and two side vertical lips to attach your angle bracket to, leaving the rear edge not riveted? The other thing with attaching it that way is your anchor points are within the opening, so the panel isn't pulled down quite as snug to the roof line as if you anchored it the way SCBenny and I did. Liberal application of silicon and/or adhesive might address that sufficiently.
I assume you mean Benny?
Stock is around 58 lbs.
https://www.clublexus.com/forums/sc-...ml#post9170319
Any pics of what all you removed? Cutting 19 lbs off seems exceptionally difficult, from my experience, given how little each cut adds up to.

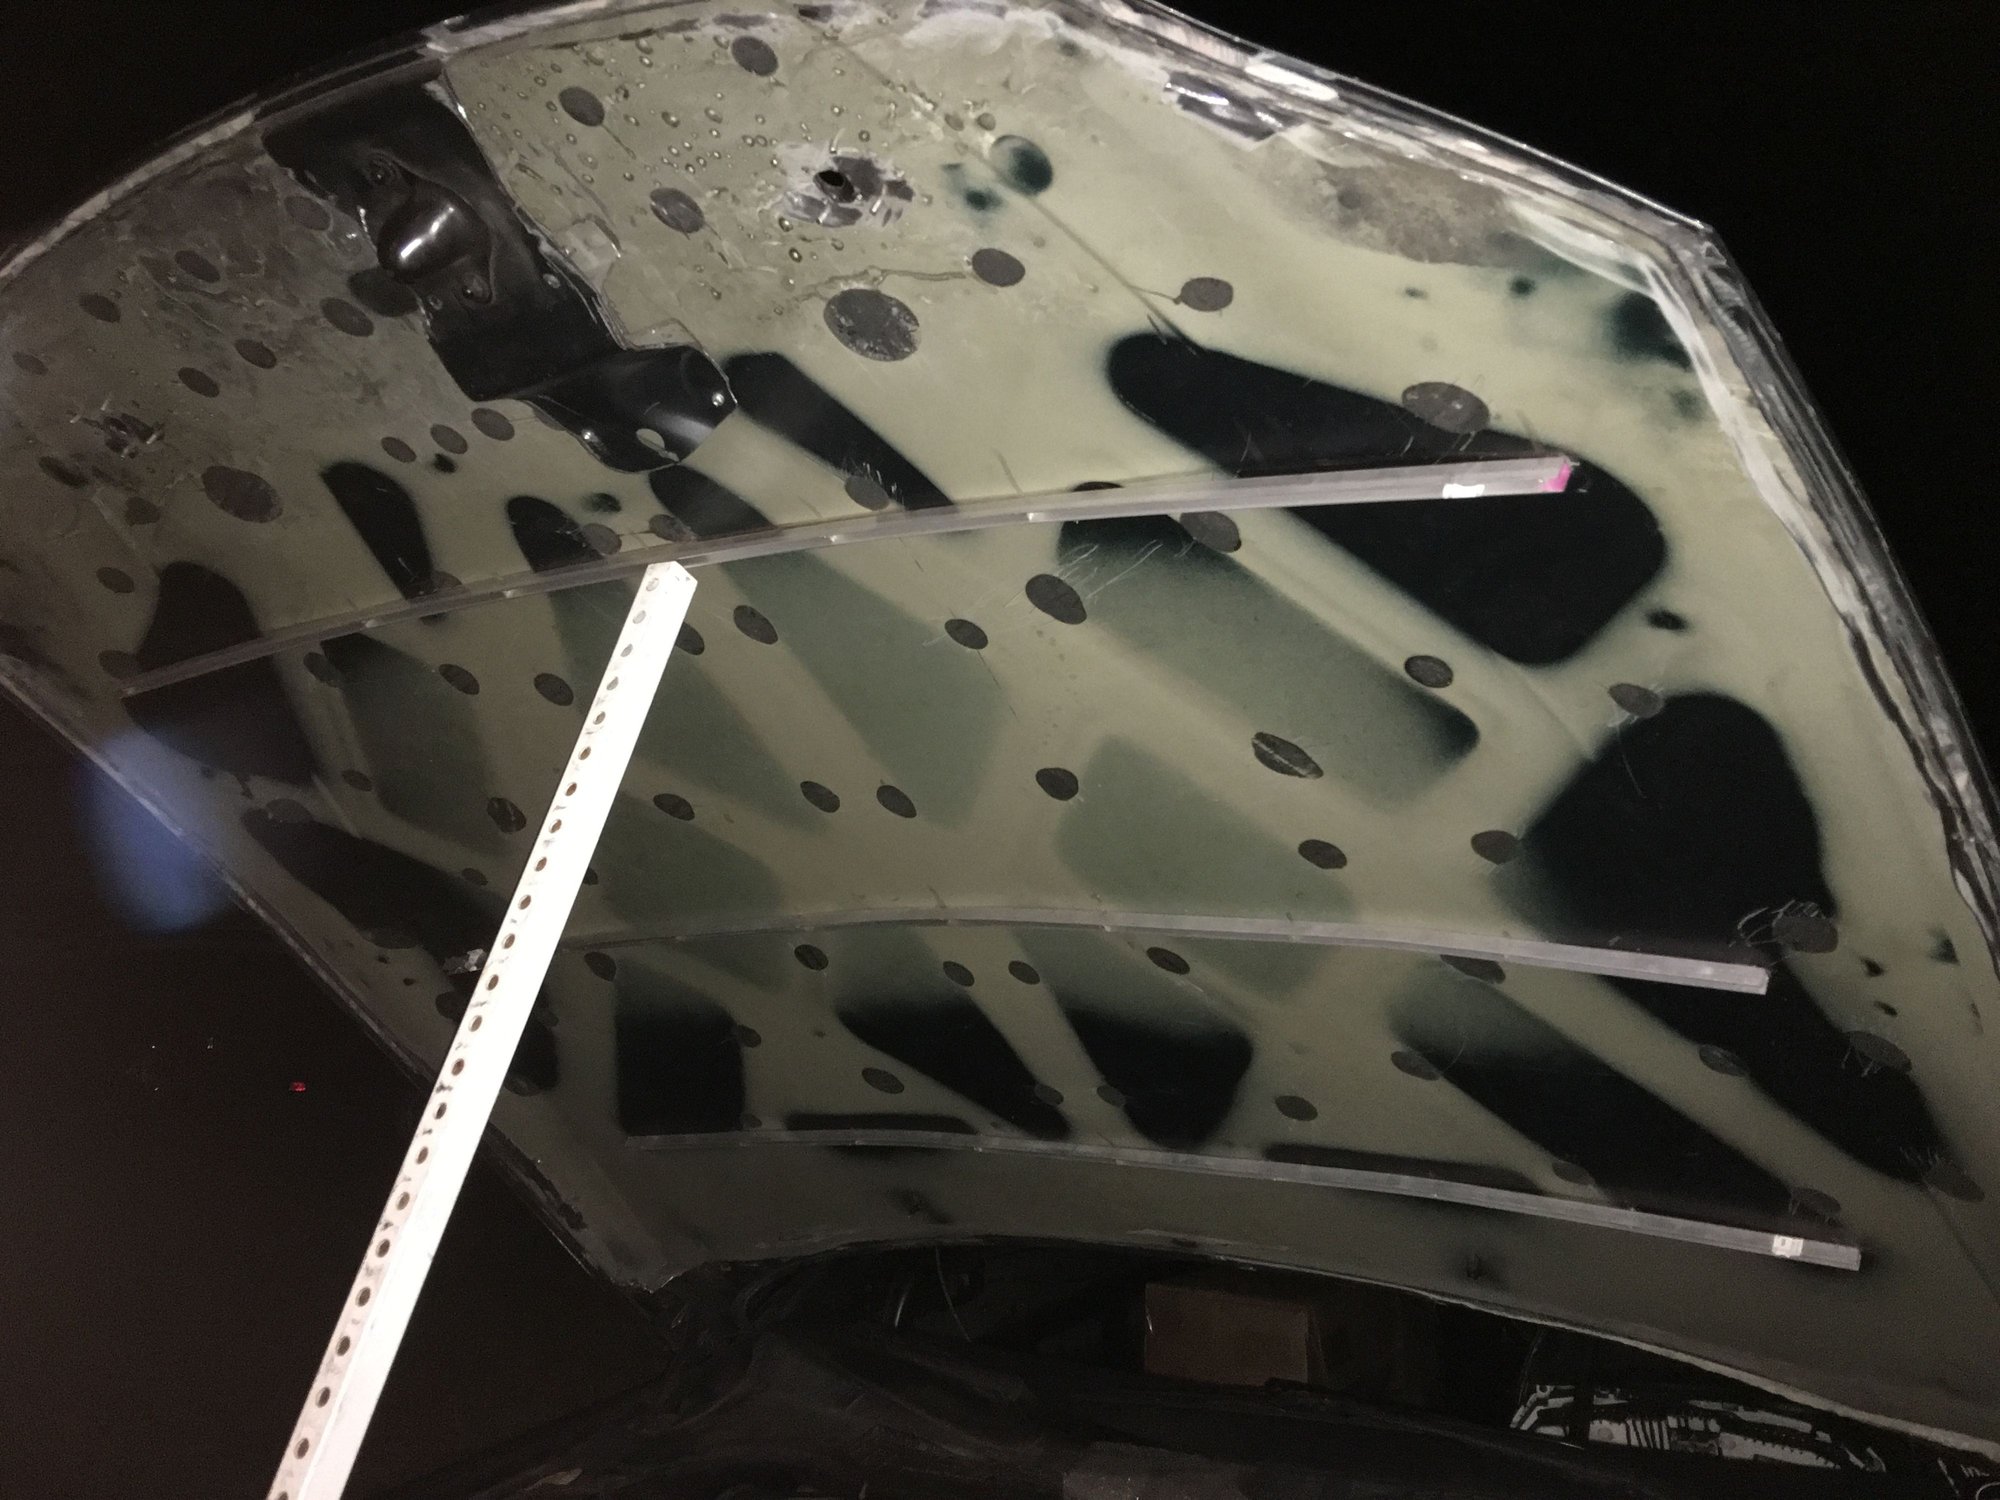
Yes, meant that for Benny and his CF hood. I can take a few pics but basically we gutted everything but the skin and three small areas, one about 4" wide that incorporates the safety latch, the other 2 at the hinges. We riveted the small section at the safety latch in 4 places so it would still be attached to the hood skin. We put three of the small c channels 4' long you can buy at Lowes across the hood to give it some stiffness. I weighed almost 21 pounds (which is probably plus/minus a couple) so figured a couple of pounds for c channels and rivets. Those are just rough numbers from digital bathroom scales weighed a couple of times so don't take that to the bank. The bulk of the weight is in the front edge since it is 4 layers thick.
Edit: Forgot the car was here. Took a shot in the dark, which doesn't show well but you can see all that is left is the skin and those small sections, and a small lip along the back edge that I bent to create a little stiffness.

Last edited by RXRodger; 11-05-16 at 06:37 PM. Reason: Hood pic
#17
Lead Lap
iTrader: (8)

I didn't use rivets, for the reason you are running into, I used self tapping screws.
Edit: Forgot the car was here. Took a shot in the dark, which doesn't show well but you can see all that is left is the skin and those small sections, and a small lip along the back edge that I bent to create a little stiffness.
Last edited by t2d2; 11-05-16 at 11:15 PM.
#18
Instructor
iTrader: (2)
Ah, I see what you did. I was expecting little L-brackets, not something that stout. That's extra weight. 
I was actually really close to going with SS hardware (Edit: to make it removable if needed), possibly small carriage bolts with lock nuts on the bottom for better security, but wasn't sure I'd be able to pull it off while fighting the drying time of the silicone. However, a friend had a suggestion I'll try before removing all the rivets: fill the pin holes from the top with epoxy. (I might try JB Weld.) Seems worth a shot once everything dries out under the tarp. My train of thought was stuck on sealing them from the bottom.
Wow, you weren't messing around. Taking out the full perimeter is a lot of work, and precisely where I figured the bulk of the weight is when removing the inner bracing.
JB Weld is pretty brittle, I would think something more flexible would be better, but maybe JB would adhere ok and probably work.
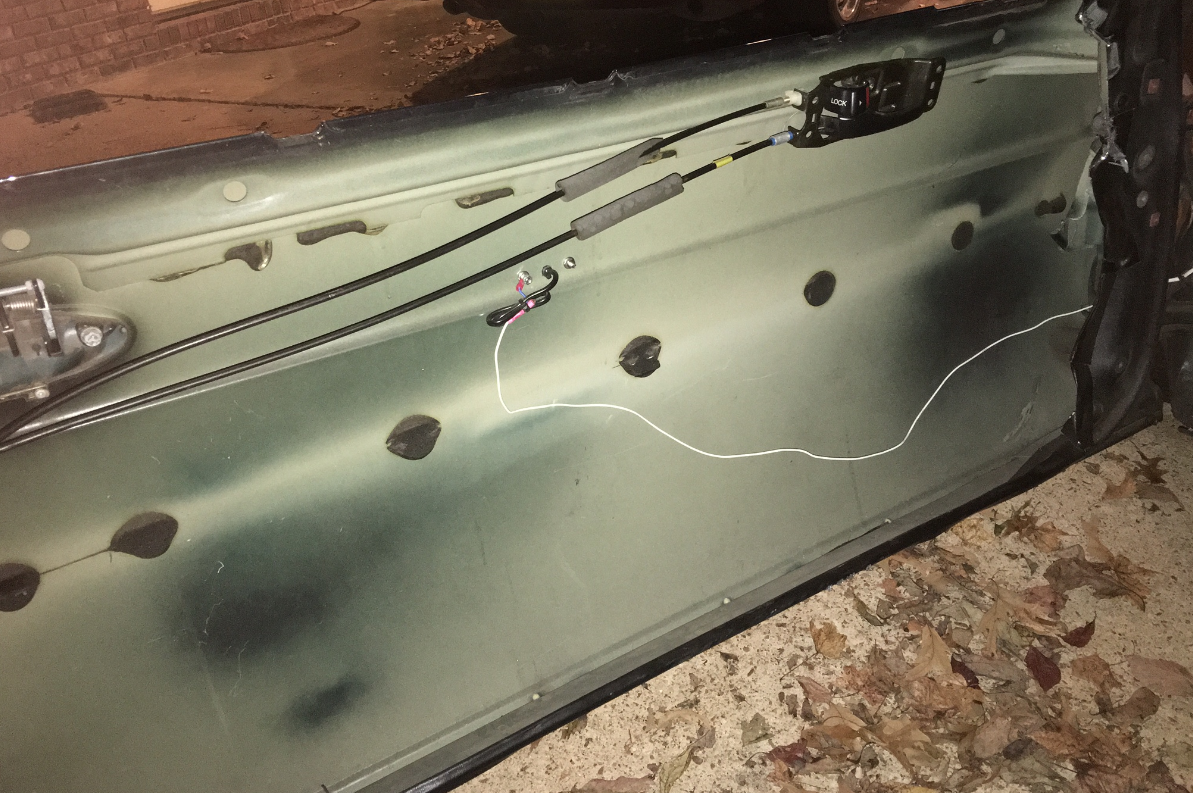
Like I said, the most weight removed on the hood was along the front edge since it had 4 layers in it. It was like the door panels, I had already gutted the doors and cut out the area where the NASCAR cage bars extend into it but this weekend we took out the inside edge above the top cage bar (was maybe 6" tall that was left) and the factory door bar (no longer needed with the 3 bar cage) and that was around 10lb per door. Surprised me how much weight that was. Was able to leave the door latch and lever for quick exit by screwing it back in the double wall lip of the outside skin of the door. When I get time I'll gut the lock mechanism since it's not needed anymore.

Last edited by RXRodger; 11-06-16 at 02:02 AM.
#20
Lead Lap
iTrader: (8)
the factory door bar (no longer needed with the 3 bar cage) and that was around 10lb per door. Surprised me how much weight that was.
Yeah, because those are a dime a dozen...
 The guy I bought this car from actually has a hardtop 5spd w/ cloth seats. He's thought about getting rid of it now that it's his second car and rarely driven, but he said he knows he'll never find another one and will regret it.
#21
Lead Lap
iTrader: (8)
Good point. I was thinking of it in terms of being a good metal filler, but it does chip away like sandstone. I had an unopened pack of gel epoxy I was going to use, but it was dried out in one tube... So, I went and picked up some marine epoxy, figuring nothing will be better suited to the elements than that. That was seriously tedious work, filling all those tiny holes with toothpicks... Moral of the story to anyone doing a riveted sunroof delete: get filled core rivets!
#22
Lead Lap
iTrader: (8)
That's actually precisely why I specified that I followed Benny's lead with the 2" spacing. I didn't feel confident that bigger gaps between rivets would hold it snug to the roof line, especially the leading edge where it has to curve the most and is also most susceptible to wind forces lifting it up and breaking the seal. Windshields have the advantage of all the forces working to hold them in place... How would you clamp the panel down enough to get adhesive to hold it there while drying? Seemed like a losing proposition.
#23
Lead Lap
iTrader: (8)
That's actually precisely why I specified that I followed Benny's lead with the 2" spacing. I didn't feel confident that bigger gaps between rivets would hold it snug to the roof line, especially the leading edge where it has to curve the most and is also most susceptible to wind forces lifting it up and breaking the seal. Windshields have the advantage of all the forces working to hold them in place... How would you clamp the panel down enough to get adhesive to hold it there while drying? Seemed like a losing proposition.
For clamping it down while drying just put something heavy on top while it dries and creates a seal.
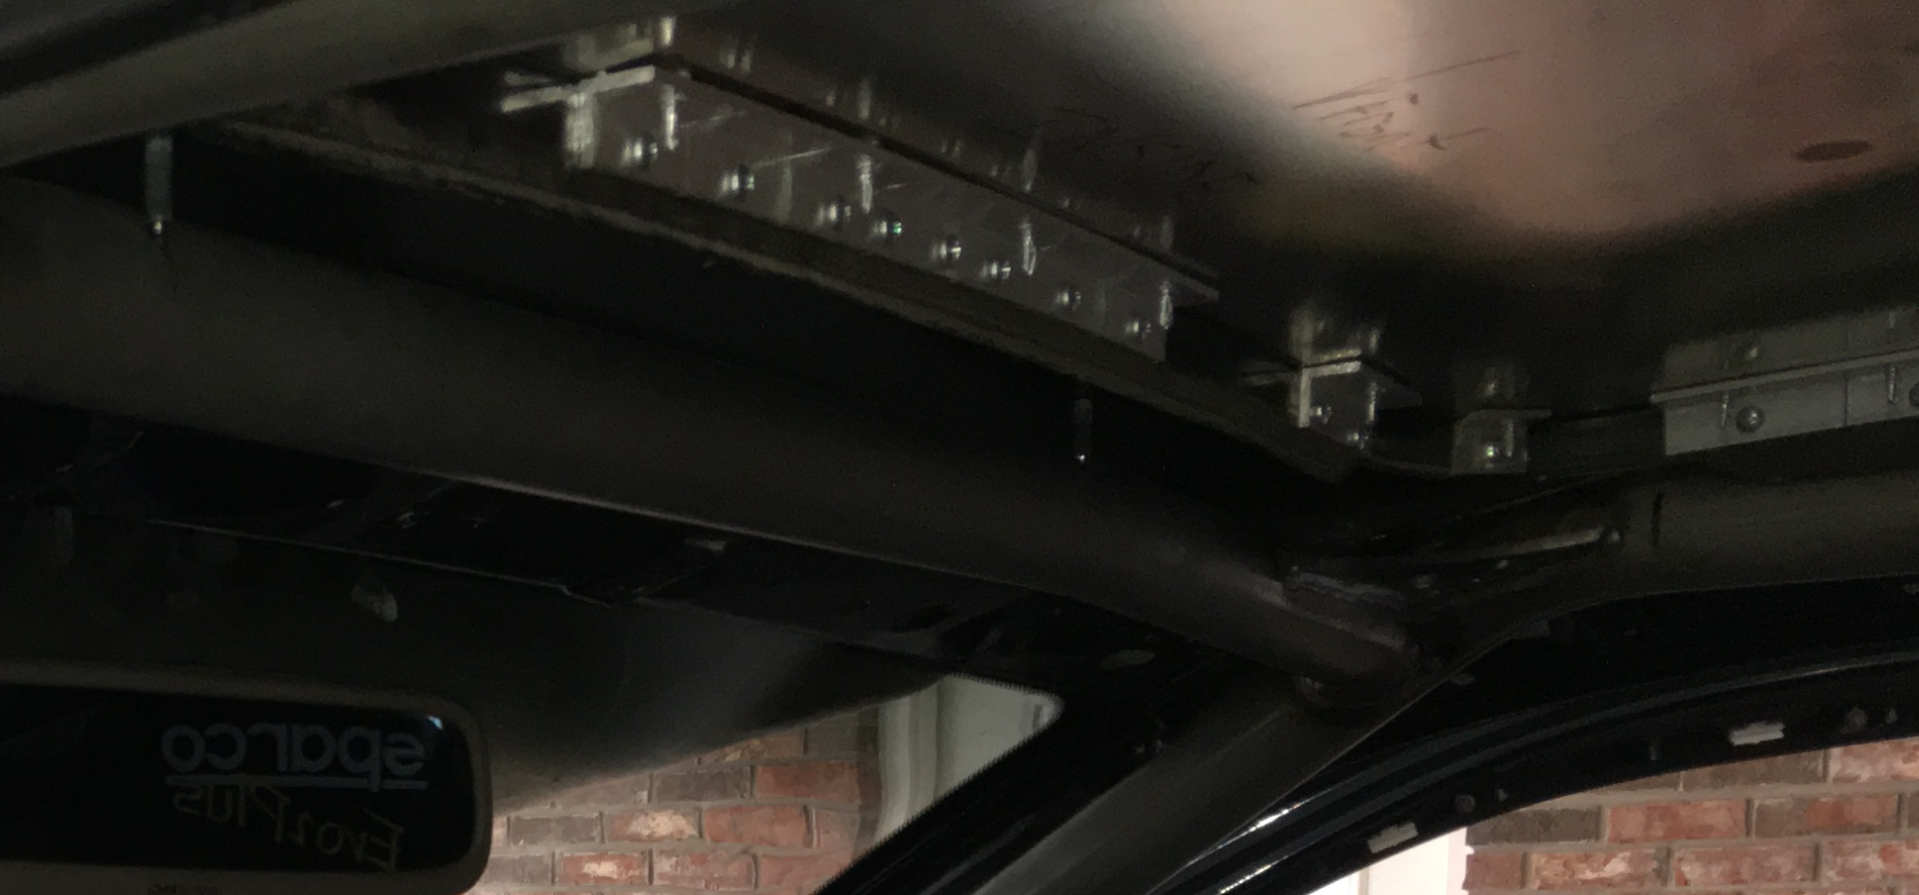
These are the best pictures I could find in my photobucket. There are 8 tabs welded in place to support the sunroof plug and rivets. Once riveted in place the urethane goes in between the plug and roof to create a seal.


#24
Instructor
iTrader: (2)
I guess I should clarify, the door bars didn't weigh 10lb, the combination of the door bar and the section of inside metal door panel that was left from previous gutting weighed 10lb. I think the bar was around 6 pounds. Also, my weights are appropriate since we weighed with bathroom scales just to get an idea. I have never been concerned about absolute numbers, it is what iit is I have just focused on removing what can be removed.
#25
Lead Lap
iTrader: (8)
These are the best pictures I could find in my photobucket. There are 8 tabs welded in place to support the sunroof plug and rivets. Once riveted in place the urethane goes in between the plug and roof to create a seal.
I think I've seen that 6 lb figure before, so that makes sense.
Thread
Thread Starter
Forum
Replies
Last Post


