When you click on links to various merchants on this site and make a purchase, this can result in this site earning a commission. Affiliate programs and affiliations include, but are not limited to, the eBay Partner Network.
^^ Driftmotion sells a kit with all the OEM Toyota seals and bearings for our 200mm diffs.
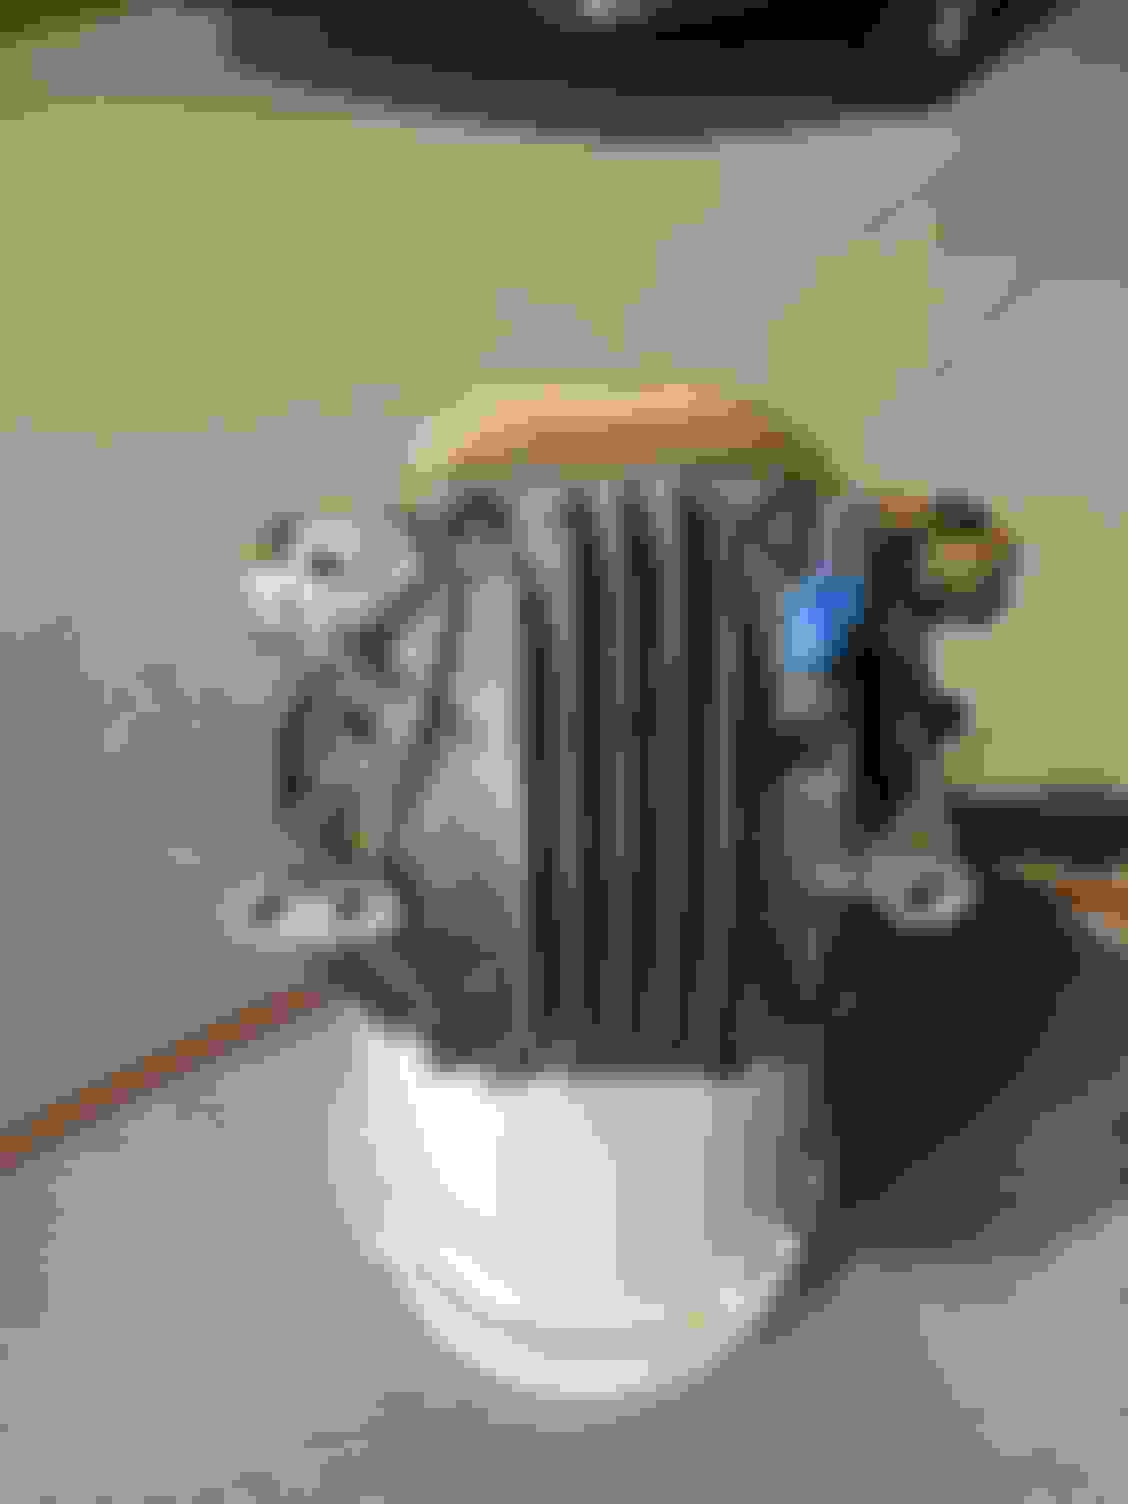
That diff housing looks clean and rust-free now! Will you be painting it? POR-15 black perhaps?
Here are the seals and orings I need.
After I get the LSD back and installed. I will mask off the rear diff cover, pinion and sides and paint it black again for sure. I will probably try baking soda blasting it first to remove more of the peeling silver paint that the previous owner of the dif must have applied.
its really oily, so I�ll have to make sure to wash it with solvent so the paint job will turn out well. I�ll prime it first, then paint it.
After I get the LSD back and installed. I will mask off the rear diff cover, pinion and sides and paint it black again for sure. I will probably try baking soda blasting it first to remove more of the peeling silver paint that the previous owner of the dif must have applied.
its really oily, so I’ll have to make sure to wash it with solvent so the paint job will turn out well. I’ll prime it first, then paint it.
POR15 you recommend?
You've got the right seals Just check to be sure your carrier bearings are in good shape and don't also need replacing while you've got it apart. The shims you probably won't need to change and adjust since it'll be the same diff going right back in.
The couple of diffs that I've painted were also pretty oily when I first got to cleaning them. I used a combination of (with the diff fully assembled and sealed) Simple Green with an aggressive dilution ratio, several plastic bristle scrubbing brushes from large/wide to small/narrow (to get between the external cooling fins if you have a Supra MKIV or other 200mm housing) and then I went at it with several applications of POR-15 "rust remover prep" spray to really get into all the little pores in the iron.
Then I went with POR-15 which, yes, I do highly recommend for this application. I believe I got my 1 pint container in Black Gloss. Avoid their "Hammered" style for this.
Use painter's tape to mask over EVERY area that you don't want it to apply and harden onto. Especially the axles and rear diff cover, breather, etc.
BTW, apologies if you already know this but you *MUST* use a good twin filter respirator filtration mask for this (3M or other from Lowes, Home Depot, etc.) because you absolutely should never breathe POR-15 fumes once the lid is open. Highly toxic to breathe. And... get some saran wrap and put a little sheet of it in between the lid and can when you put the lid back on temporarily in between getting your brush dunked in more POR-15. And use 7mil Nitrile gloves of course.
It paints on in 1-3 coats depending on the humidity in your area. I used an old wooden shipping pallet to let it sit and cure between coats.
Then follow it up with a spray can of POR-15 Top Coat after it's fully cured and dried to lock it in from UV exposure.
Excellent paint for driveline parts.
...
This was my result with POR-15 when I first used it back in 2011 on my TT Auto diff:
It�s funny, I had a TT MKIV Auto diff in this car previously but I wanted my gear ratio back and a more hardcore diff at the time. It�s crazy how much $ those diffs are bringing nowadays. This cusco diff has a 4.1 ring and pinion in it. I should have just left the TT supra diff in it and changed the gear ratio but live and learn.
Thanks for the crash course in POR-15!
Sounds like legit stuff. I�ll be sourcing that for sure in gloss black. I need to paint control arms, etc under the car as well. It�s all new stuff just getting a little rusty. I�ve got the mask/respirator you suggested. Is this the right one?
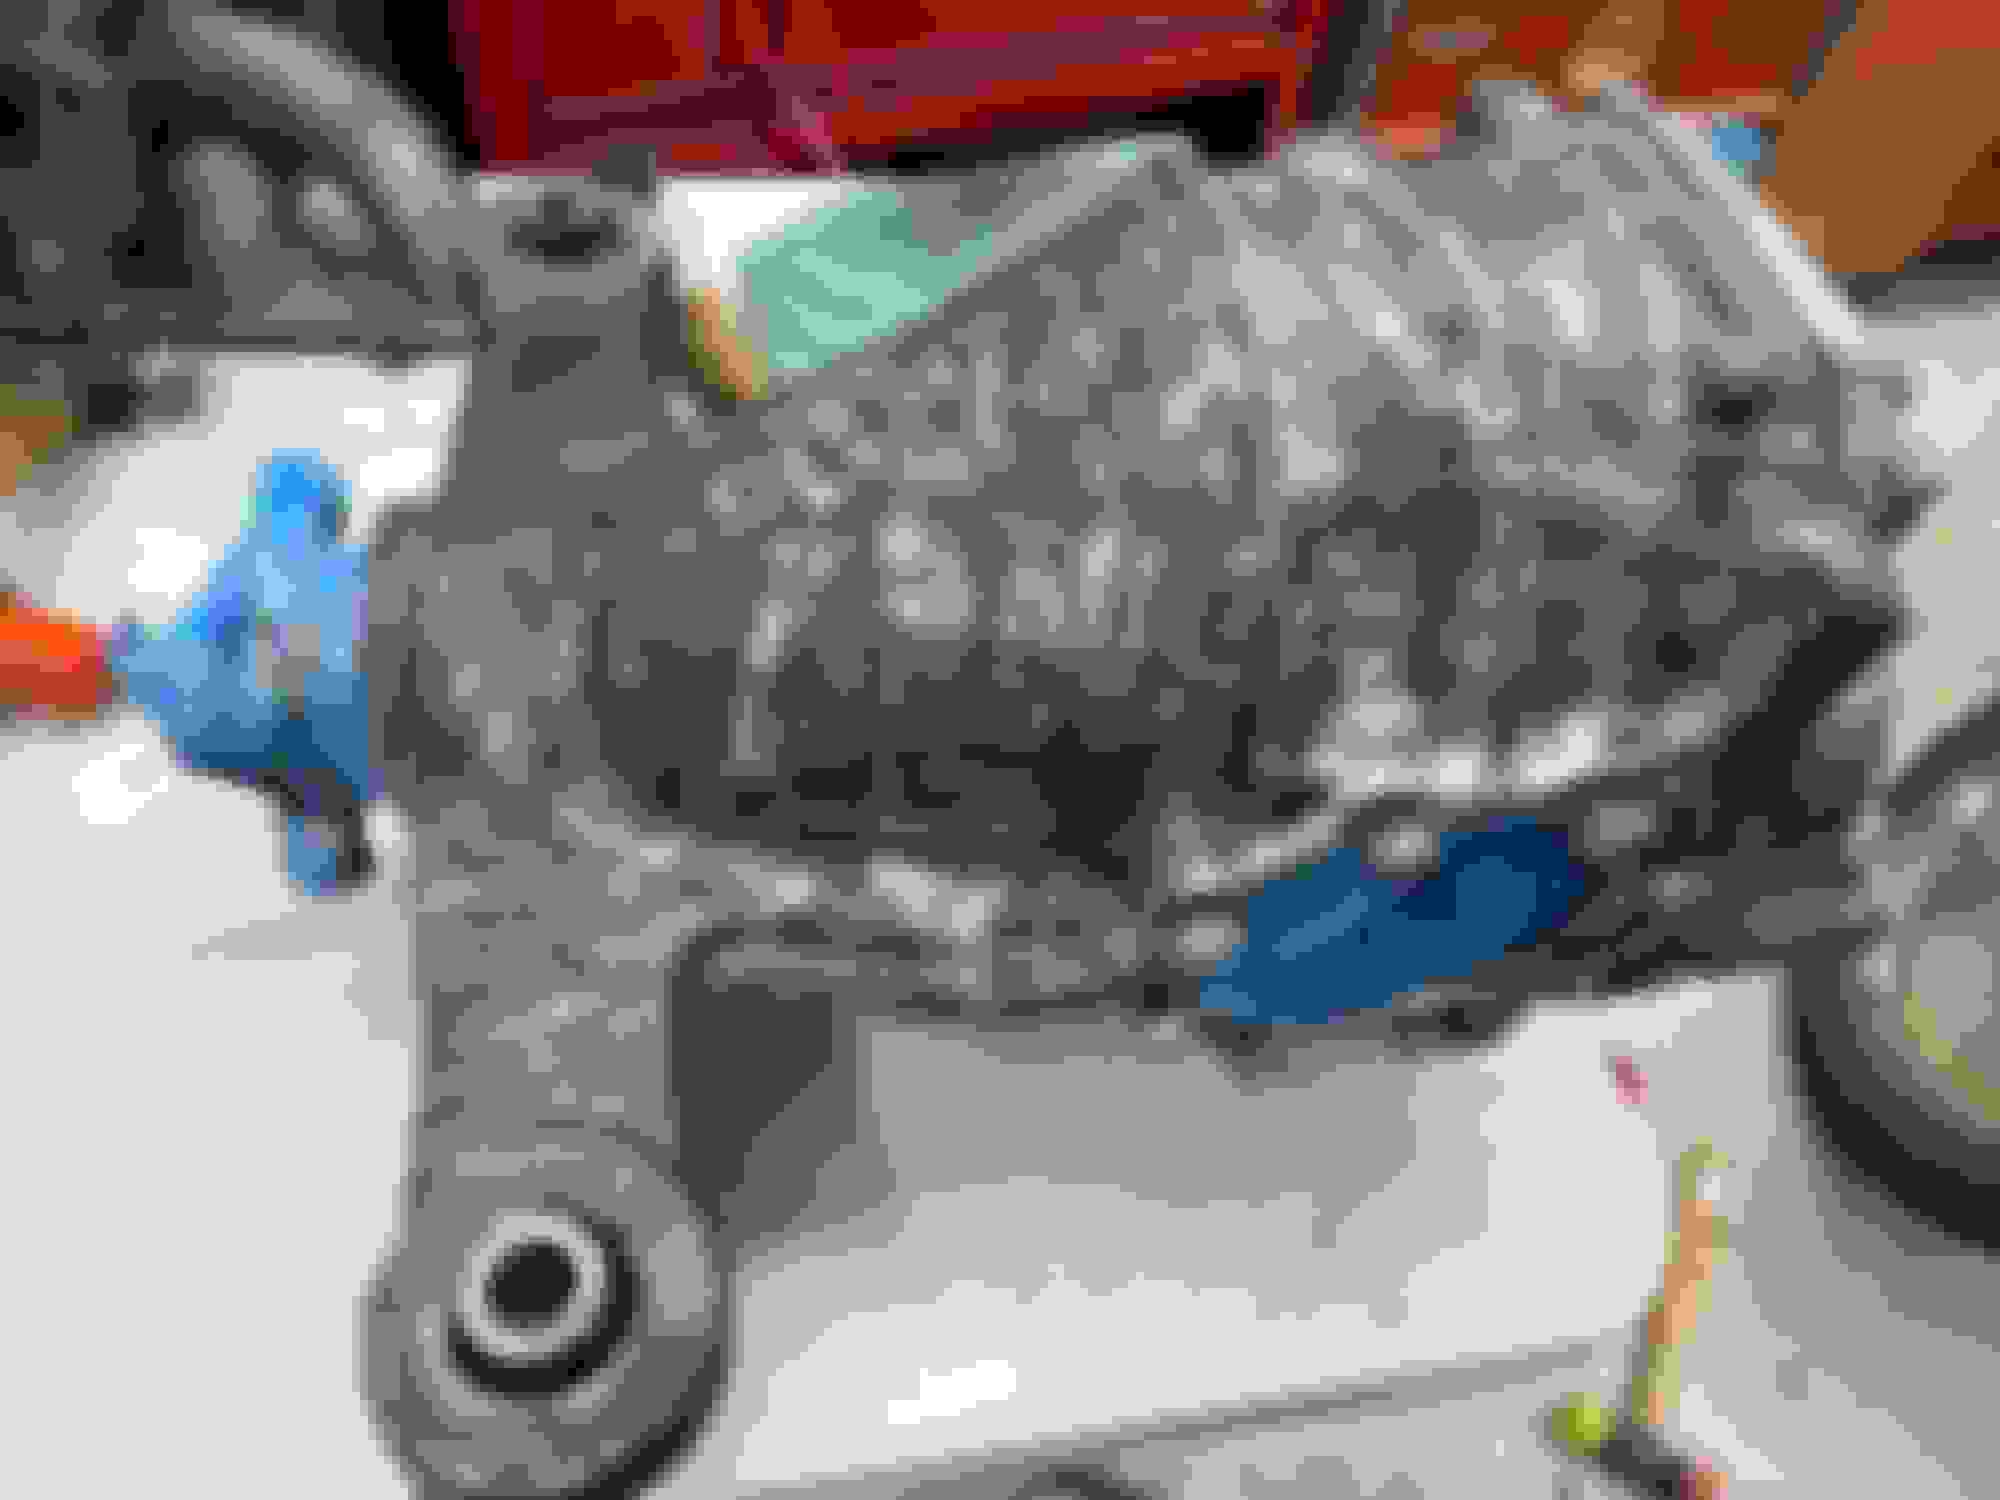
I masked it and media blasted it tonight to get all the old, loose, silver paint off. Then washed it with Simple Green like you suggested. Not bad! I can�t wait to get some paint on it.
Most of the silver paint came right off. Masked the side openings, vent and pinion. The bolts cleaned up pretty darn good. I touched the. Up with my brass brush. Rear cover and bolts look good in natural aluminum finish. The sodium bicarbonate does a good job of cleaning and removing grease. Little $25 kit will be here Wednesday. Says it covers 6sq ft with 2 coats. Should be plenty. I hate having paint/chemicals left over after projects for the most part. I have a rusty section on the generator door on my car trailer that�l I�m going to try to squeeze in if I have enough to go around. 😅
Excellent work!!! Your prep work looks really good and clean!
Yep, you've got it all done right! The only suggestions I have for masking are to take a little more time to mask the open side carrier areas a bit more since those are still open mating surface areas that the POR-15 might create a slight sealing issue with. In my case I painted with the diff fully reassembled so I didn't worry about that other than masking off the finished axle areas and anywhere I might need to break bolts loose later on.
Then, I highly recommend that you carefully mask off everywhere that the POR-15 can get onto the rear aluminum cover. For the cover itself rather than painting it with POR-15 I'd actually recommend getting the outer side of the aluminum cover powder coated in a light silver or gray.
Also mask off the rubber bushing areas as well. No sense in painting those with POR-15 if they still have good life left in them. Put some tape around the small diameter upper inner rubber bushing area and then mask around the much wider bottom bushing area while leaving the rest of the iron exposed.
And it looks like you masked everything at the companion flange area. Just make sure you fully masked the part that rotates right against the housing area if you haven't already.
The reason I emphasize all of this is that POR-15 gets into everything when you paint it on so the masking prep is really important for a clean final result!
....
The twin filter respirator mask that you picked up is exactly what you need and is pretty much the same as what I have! Definitely use that ANY time you are around that POR-15 open paint container or while it is in the first day or so of drying. I know I must sound like a stickler about using a proper respirator but for health reasons it's important and only needs to be used as long as you can smell the fumes for 2-3 days. Better safe than sorry as they say
If possible allow your freshly painted diff to cure and dissipate its fumes outside rather than indoors.
Assuming you can keep it in a secure outdoor spot and also covered from rain. In my case I put two saw horses on either side of my wooden shipping pallet and I stretched a blue plastic tarp over both ends to protect the wet diff in case it rained. This allowed me to take my time flipping the diff over a couple of times for new coats and to hit all the missed nooks and crannies over 48 hours.
....
And yeah, it is crazy how the prices for TT Auto Torsen diffs have gone up in the last ten years. They weren't exactly cheap when I found mine (for which I had to make a 14 hour round trip drive to pick up) and I still feel lucky that I found the ad in time.
Today I think casting the net wider to locate any 200mm diff which already has the 3.769:1 final drive ratio (Supra MKIV, Aristo or even an SC430) is a better bet since it's pretty common to install a clutch pack style diff such as yours. My car has VERY modest power so the Torsen T-1 LSD is fine but with most powerful built 1JZ/2JZ setups a super rare T-2 Torsen or aftermarket diff like yours is more ideal IMO.
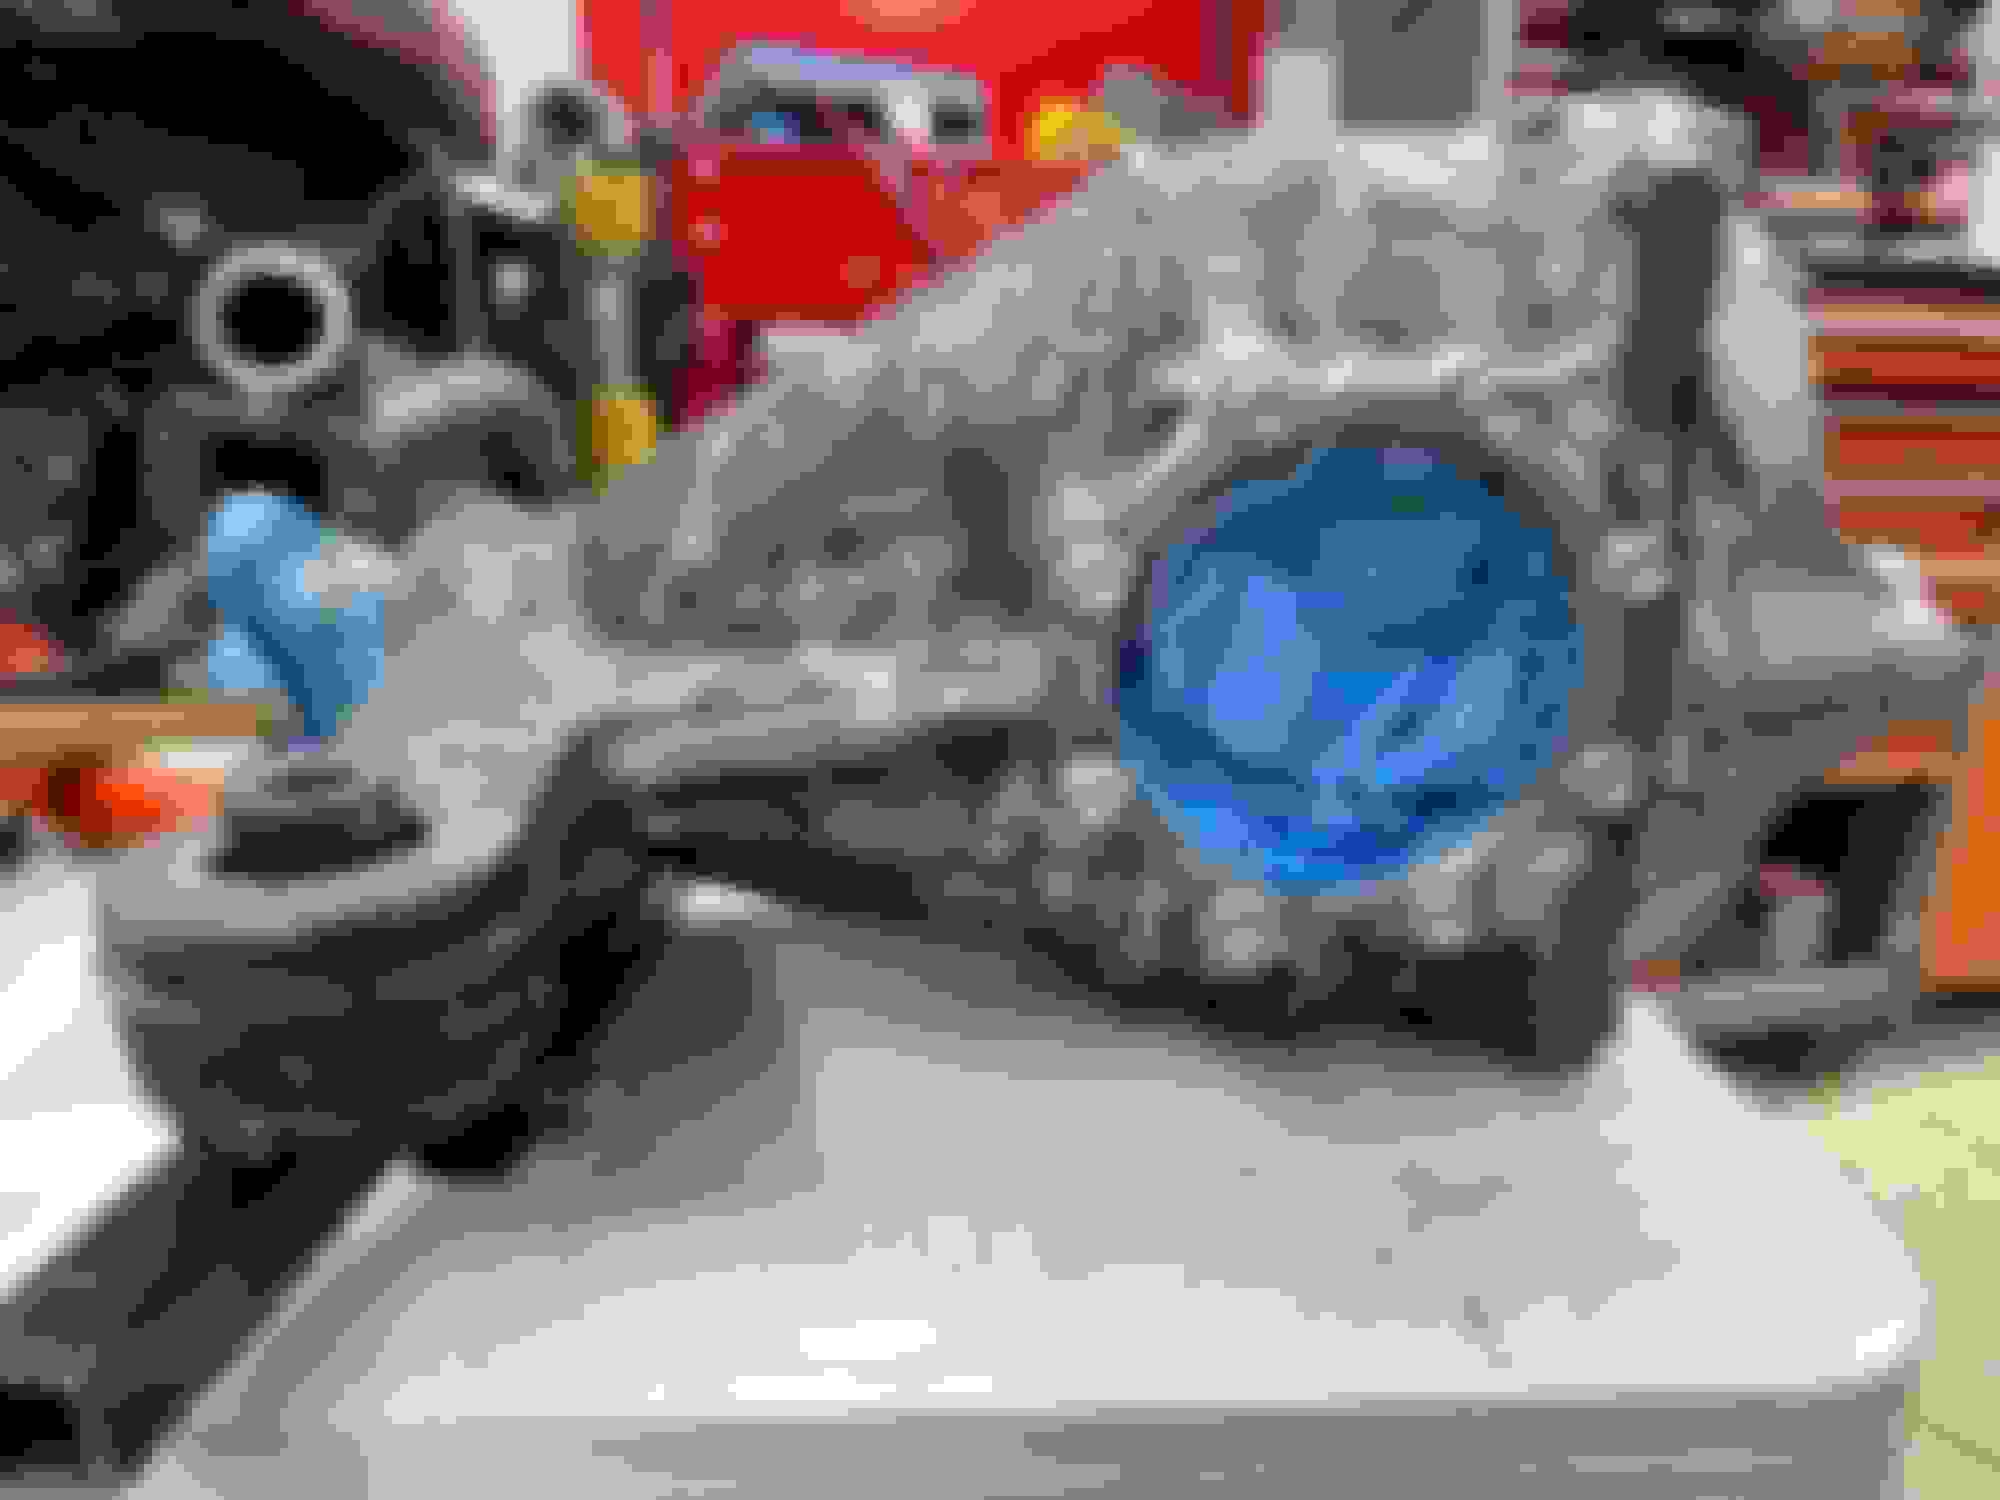
Masked for painting. Masked good enough for brush painting. I�m going to hang it by the pinion or the back cover with a cherry picker so I don�t need to flip it to paint it. The bottom side is the one that needs to look pretty. You�ll never see the top when installed. I still need to blast the carrier flanges and paint them separately. Paint gets here Wednesday. I�ll be back in town Friday.
Perfect masking!!! It'll pay off later when you see the final result!
The only thing that gives me pause about using the cherry picker is that hanging its entire weight from the companion flange *might* ever so slightly mess with the companion flange depth adjustment which can affect your gear mesh pattern with the pinion and ring gear... which could potentially be bad and destructive to the gears if they don't mesh optimally. At the very least I'd go over the mesh pattern during reinstallation with Prussian Blue markings on the gear teeth to ensure there is no play at the pinion or sub-optimal mesh pattern. The SC300/400 and Supra MKIV TSRMs both cover this procedure with picture examples if needed.
Flipping the diff over a couple of times between coats on a wooden or cardboard painting surface isn't that big of a deal to me but I understand the desire to cut down on the waiting time and avoid areas that have flat spots where the diff has been resting on the cardboard/wood painting surface. I always made my very last coat application the underside which would be most visible. And then after the actual POR-15 had fully dried and cured I did the same when spraying on their POR-15 Top Coat to lock it in against UV damage (even though the underside of the car will see little direct UV light it's still a good and recommended final touch to do anyway).
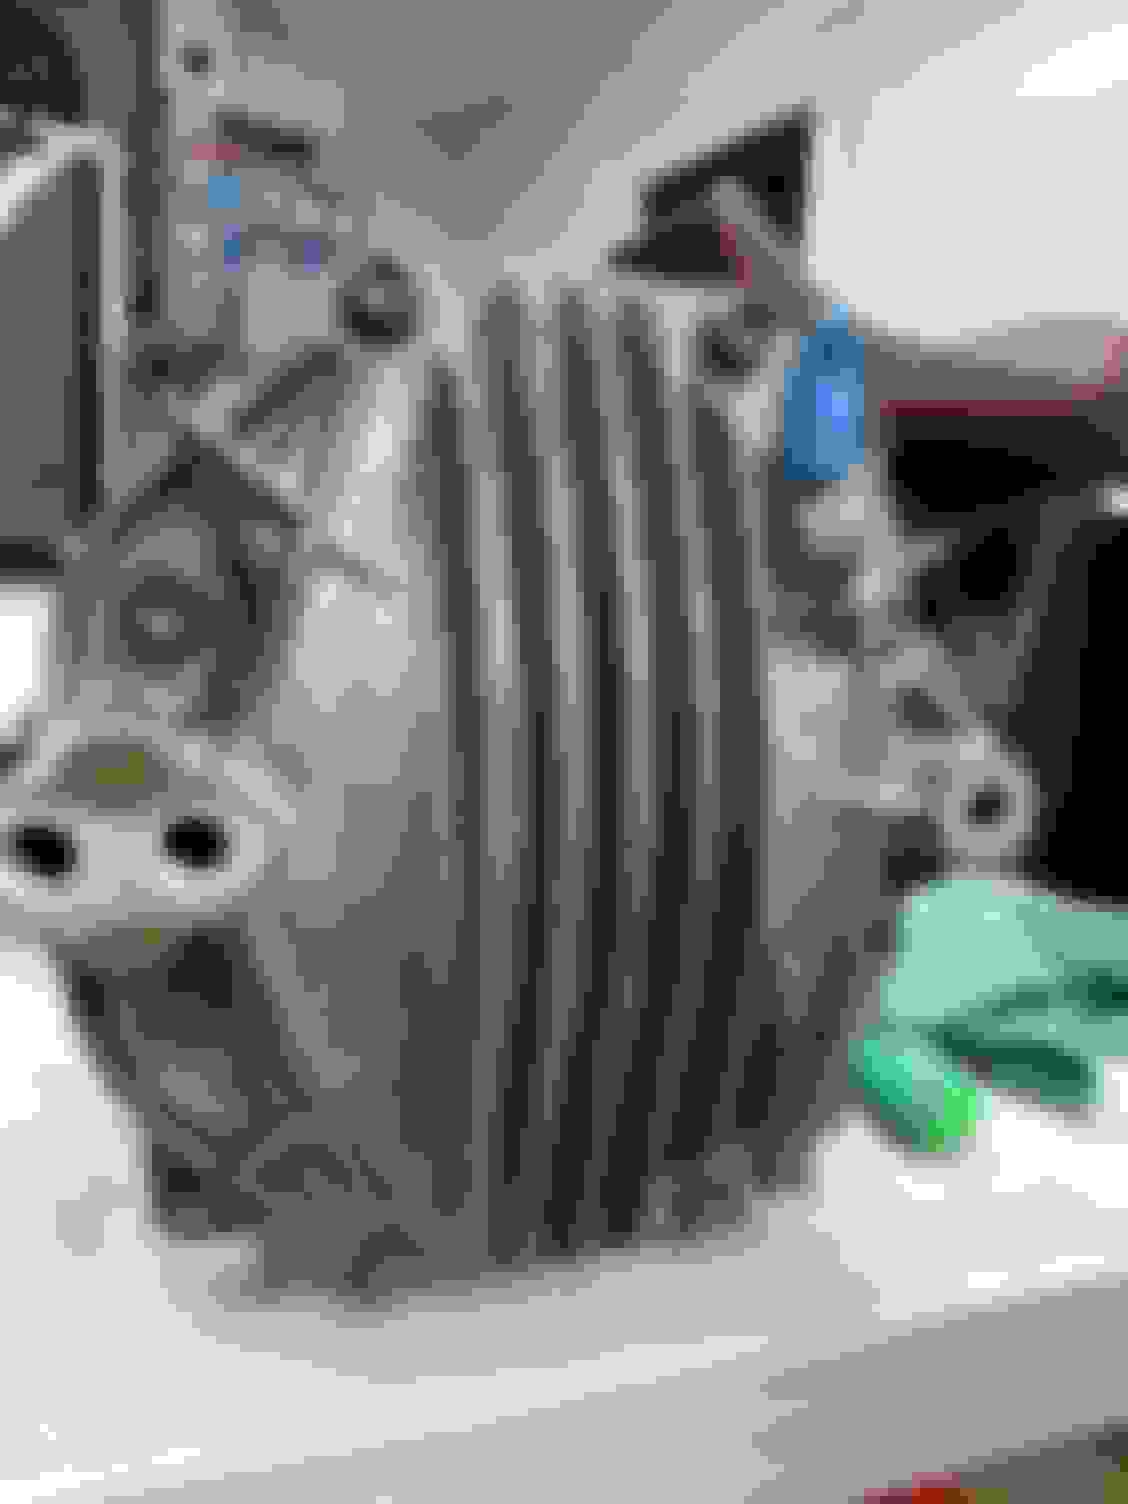
This is looking great! And it looks like you will not need much application of the POR-15 rust remover prep spray. Both times for me my diff housings had a LOT of surface rust and it took a fair amount of the prep spray to get the iron fully de-rusted
Bro think about the axial forces that bearing sees when doing a drag launch. It trys so shove the pinion out the front of the diff. Hanging it statically by the driveshaft flange will be fine. You could probably hang the whole car from that bissh. Lol.
It looks great! One more coat plus whatever small dab touchups you feel it needs! Then once it's fully dried (I don't recall if it's 2-3 days by the company's recommendation) spray their UV protecting Top Coat onto it and you're done! And your suspending method worked out pretty well!
BTW I couldn't help but notice in your sig: you also have a Lotus 7 replica and an 80's Avanti! Very cool!
Yep! I rebuilt the carb on the avanti last weekend. Have some issues with the gauges in it that I�m working thru currently.
I crashed the lotus May 2021 and its in the fab shop on the frame rack getting rebuilt right now.
back to the Lexus!
My new seals arrived yesterday. Anxiously awaiting the diff which is complete at Cusco and will be back to me next week. My LSD is the old design and different from the quote which I originally got from Cusco for parts. They needed to use the spacers to fill the gap where the cone springs were located. The outer friction plate design was old one, so they replaced with the newer design plates to have better oil flows. Left: Old designed plate Right: Newer designed plate Put x6 RS Springs between pressure rings. Set 2-ways per my request with 75% reduced (2-plates stack together). ***My LSD has to use 8 plates on each side. So, not 80% exactly. Preload setting Before: Approx. 140 Nm (MZ setting) After: 50-60 Nm (RS setting with reduced 75%) I purchased x2 1L 80w-90 LSD Oil. Cusco says do NOT use any additives (friction modifier) with our LSD. If I still have to much chatter noises in the future, the backup plan is to change to the Spec-F inner plates (no grooves plain plate). This can help to reduce the noise a lot.
Prepped the mounting surfaces with a flat file to knock down any high spots. I�m out on the BBQ grill heating the ring gear up after I finished cooking and eating some korean style short ribs. The smell of solvent and grease makes me more happy than good BBQ. Strange but it takes me back to good times in my father�s autobody shop. In 5 days it�ll be the 12th anniversary of his death. I plan on doing a big burnout for him in the Lexus to celebrate him and the cars revival. Wait that sounds weird, not his revival lol� just the car�s. Lol! All lined up. Used blue loctite and torqued to spec. All back together in the housing. Applied the sealant to the housing and installed the cover. I snugged the bolts and then let it sit while I watched the Talented Mr. Ripley with my wife and then torqued to spec before I went up to bed. This morning I got the oil and pump out and my wife helped me fill the diff. Plugs torqued down. The diff feels very smooth. Excited to get this into the car this afternoon. My buddy Thane is coming over to help and were gonna grill out back after we get it back in the car.


 09-02-22, 09:59 PM

 Just check to be sure your carrier bearings are in good shape and don't also need replacing while you've got it apart. The shims you probably won't need to change and adjust since it'll be the same diff going right back in.