When you click on links to various merchants on this site and make a purchase, this can result in this site earning a commission. Affiliate programs and affiliations include, but are not limited to, the eBay Partner Network.
I just had to post a quick status update for those of you who have been following the thread and my ongoing steering rack issues. I finished the steering rack adapter bracket last night and it fits like a glove and looks great. This was my last major hurdle and it should be smooth sailing from this point on. I'll have a new post either tonight or tomorrow with a bunch of pics. Thanks for following.
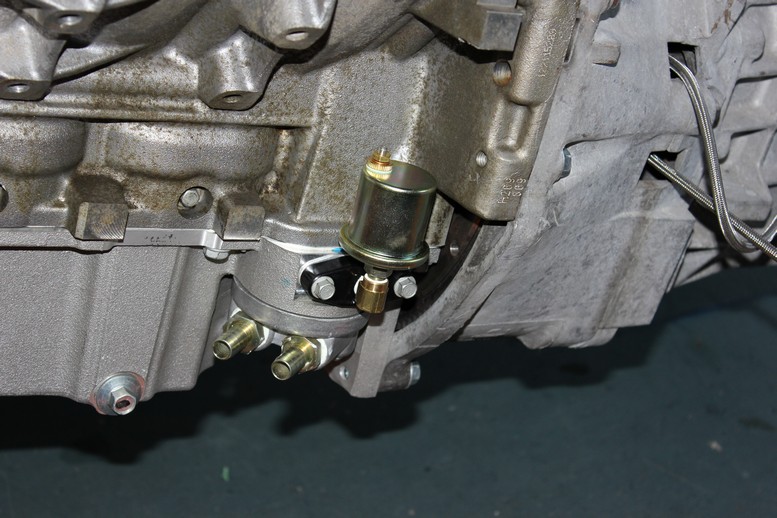
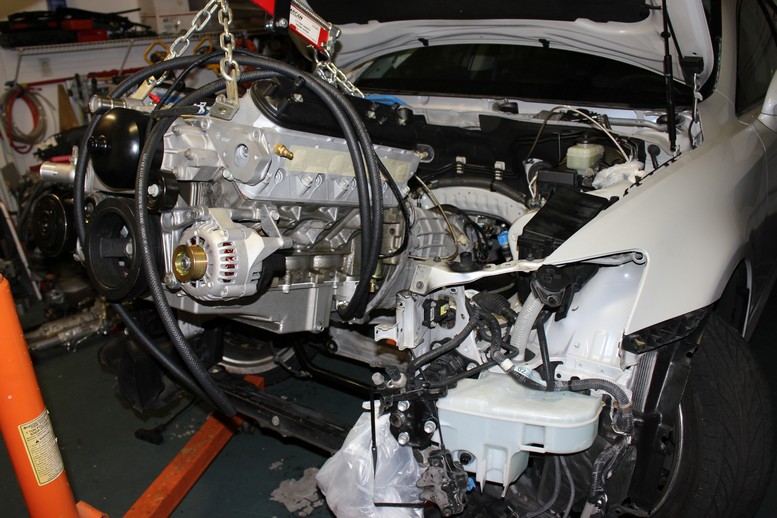
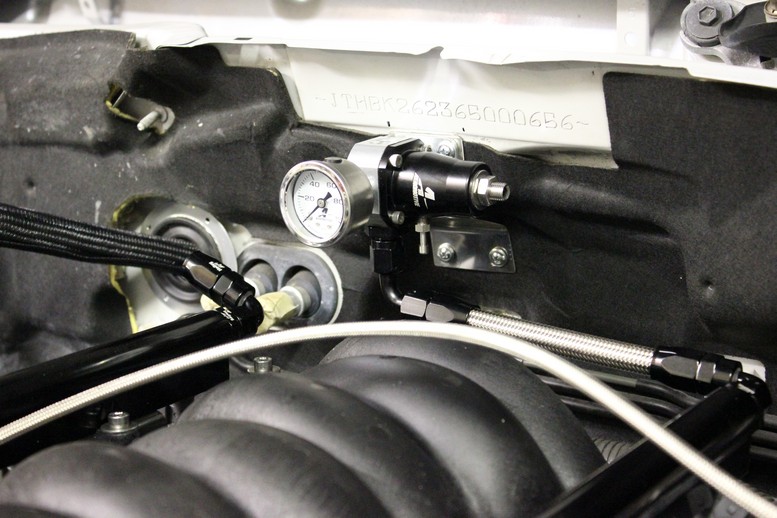
I figured it was time to get the engine into it's final resting place so I had to do some prep work. First was some pre-wiring in the hard to reach places including 3 connections on the transmission. The oil pan notch for the lower cross member blocked access to the oil filter so I had to get an oil filter relocation kit. And lastly the oil pressure gauge sending unit is also in a hard to reach place so I installed that as well. Here's a shot of the pressure sensor and oil filter cap.
There were probably some more connections I would have made but I am very impatient so the engine went in next.
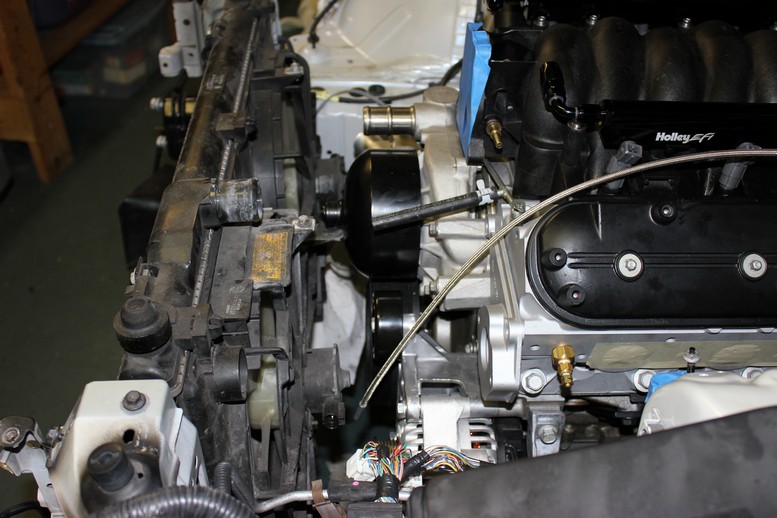
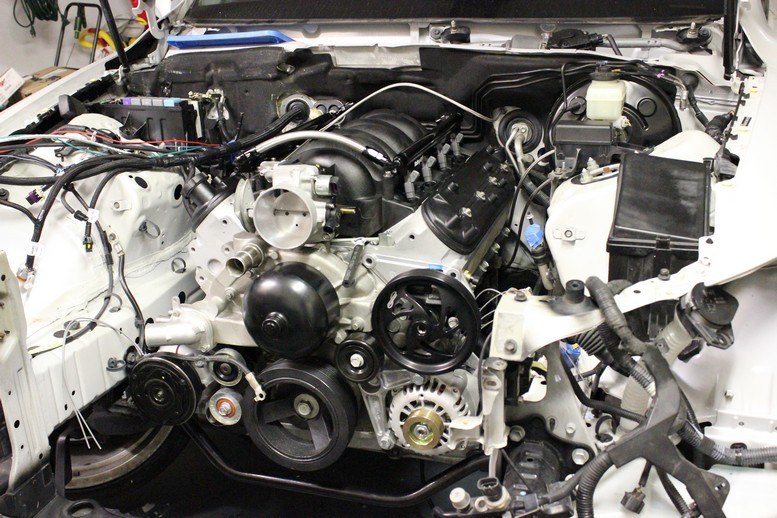
I couldn't help but put the intake manifold on and then the radiator for a fit check. There is on plastic tab on the radiator that will need to be cut off but other than that it fits fine. I'll keep a close eye on engine temperature, especially during the summer in Florida, to see if the stock radiator is capable of cooling the engine.
Side shot of the radiator clearance
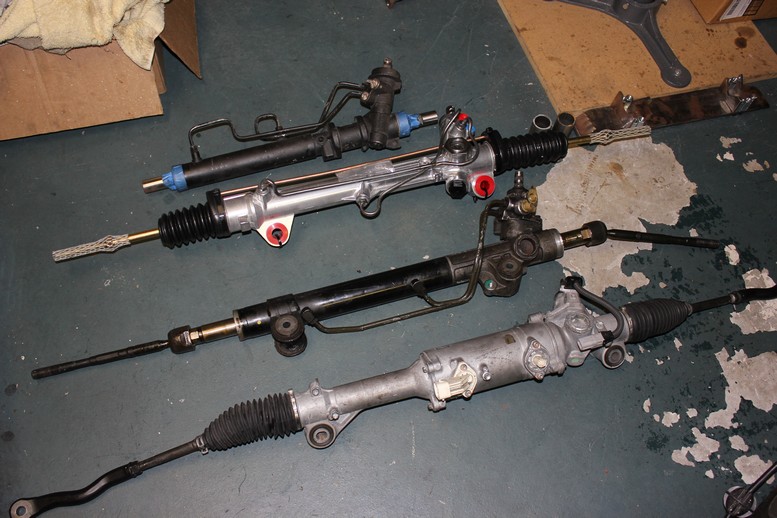
And now the steering saga continues. Here is my current collection of steering racks. Starting at the top is a Mazda 626 rack, then an AGR performance Mustang rack, then a Toyota Tacoma, and finally at the bottom the IS250 electric rack.
Prior to buying the AGR performance rack, I pretty much had the Mazda rack installed. It wasn't until the last minute that I realized that the input shaft came in above the rack therefore turning the wrong direction. A very frustrating moment but it led me to the AGR rack which looks awesome and I think I'll be very happy with.
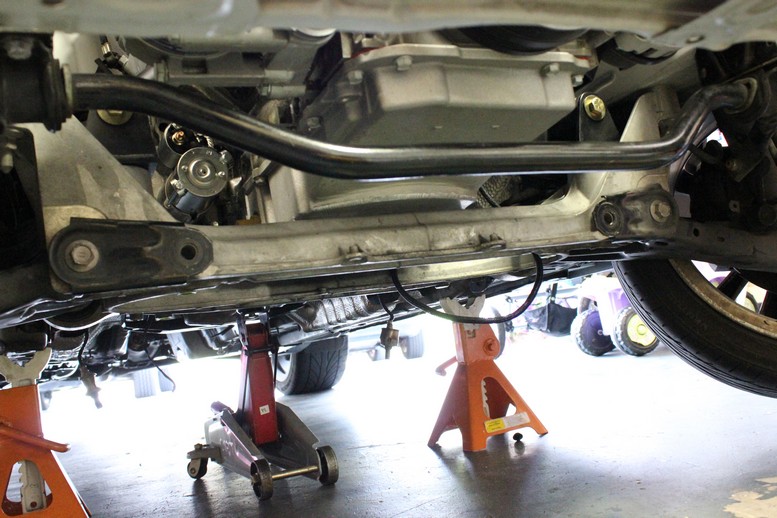
Here is a shot of the 2 old mounting holes on the lower front cross member.
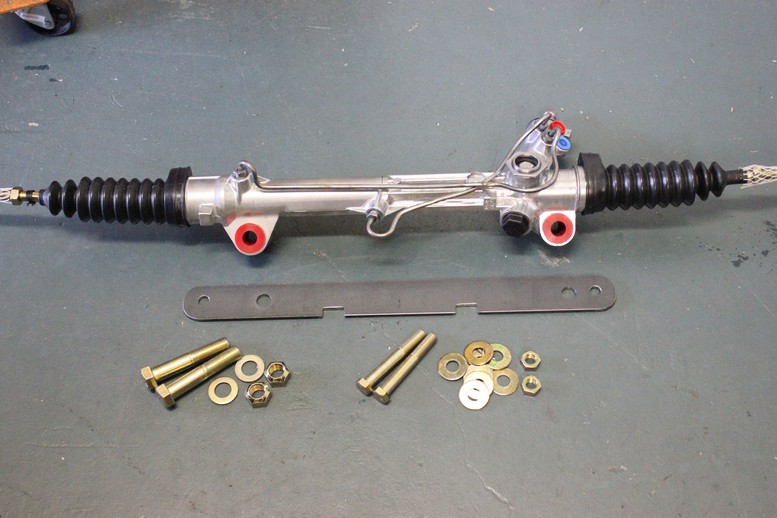
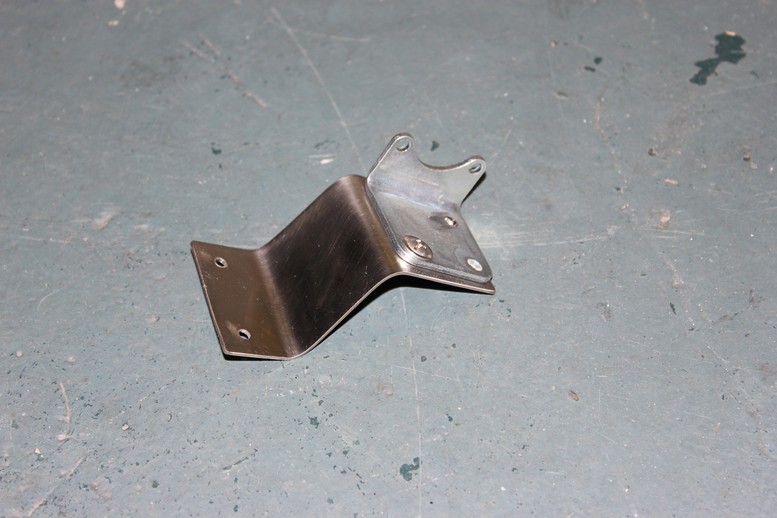
Here is the final bracket and hardware
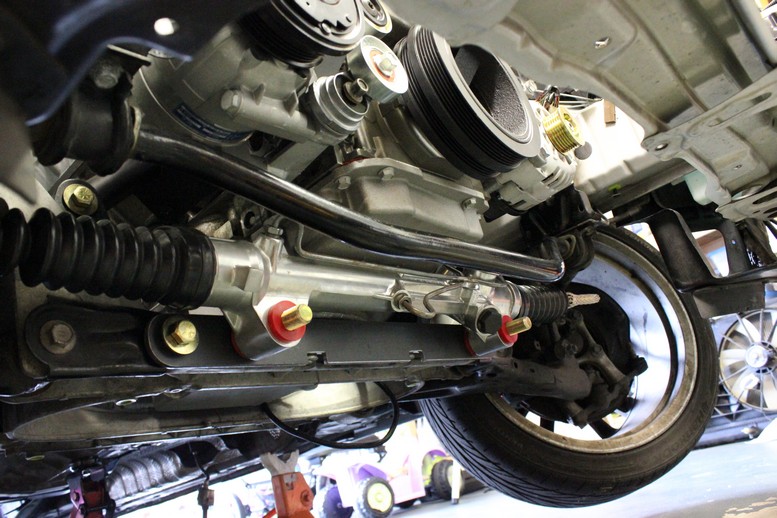
And finally the installed rack (well almost installed. It still needs paint and nuts. This was a very victorious moment for me after all that have gone though with the steering system.
very nice work, will you car/engine setup use a conventional hydrolic power steering system? Also did you pull the electronic system out including the wiring and ecu?
very nice work, will you car/engine setup use a conventional hydrolic power steering system? Also did you pull the electronic system out including the wiring and ecu?
Yes and yes. It will be a conventional hydraulic setup using the LS1 pump and the AGR Mustang Rack. I already pulled the IS250 rack, harness and ECU.
Honestly, what you are doing is mind boggling. But it shows how you over come hurdles and come up with solutions......that is amazing dude! I am subscribed for sure and cannot wait to see you smile when it comes all together!
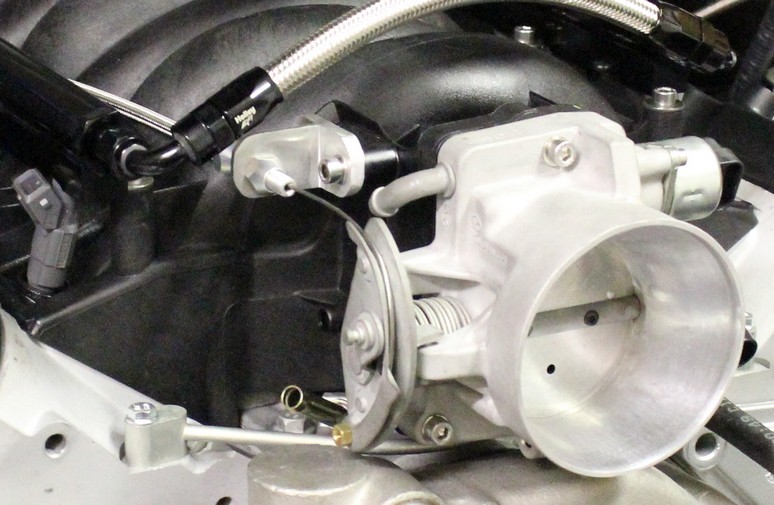
I guess the theme of the night is brackets. I started with the throttle cable bracket which I fabricated out of a piece of extruded aluminum I had laying around from a pool enclosure. I cut a piece out, drilled a few holes, ground down the white powder coating and ended up with a decent looking throttle cable bracket and saving about $50.
Here is a pic of the bracket next to the material that it started out as
And another one of it installed on the car
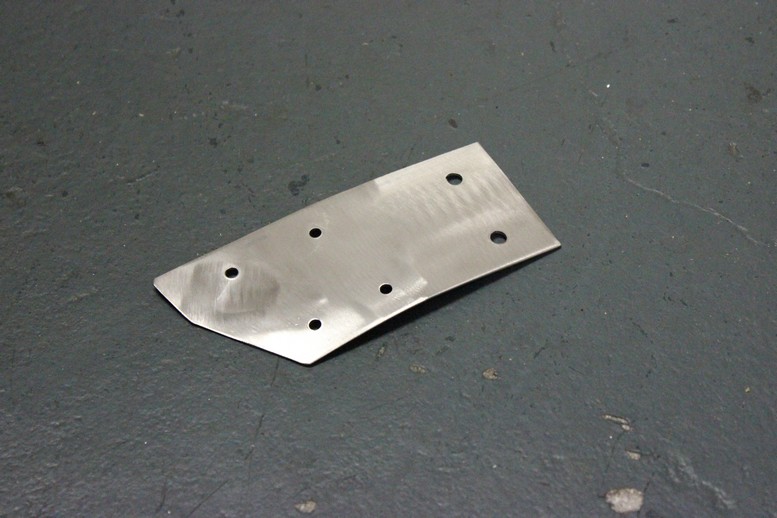
Next I moved onto the fuel pressure regulator bracket which I made out of some .050" stainless sheet.
Here is a pic off the car
And another one of the finished product
I picked up some nicer looking stainless hardware today that I'll put on during the next session.
Last bracket of the night was the clutch master cylinder reservoir. Here it is off the car.
And now installed, I also have some nicer hardware for this one as well
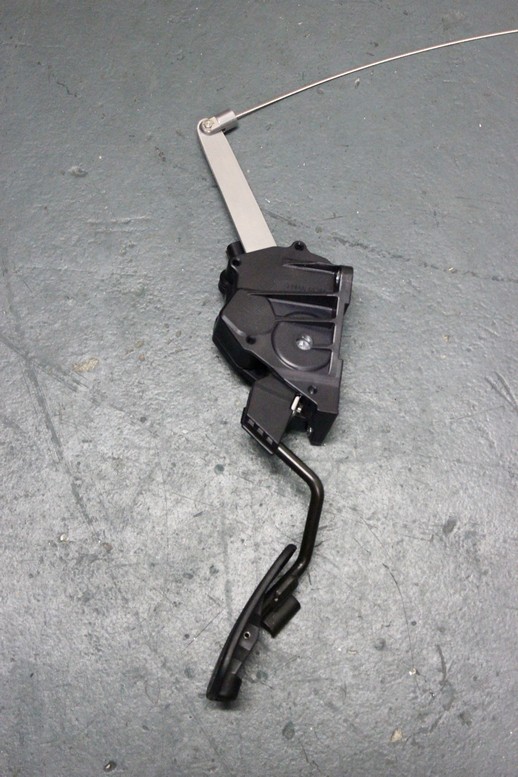
This was what the assemble accelerator pedal looked like right before installed it
Here's how I left her at the end of the night. I actually got the wiring harness through a grommet that I installed adjacent to the heater core lines. I'll show some better picture when I get into wiring in a few days.


 06-14-13, 05:26 AM