When you click on links to various merchants on this site and make a purchase, this can result in this site earning a commission. Affiliate programs and affiliations include, but are not limited to, the eBay Partner Network.
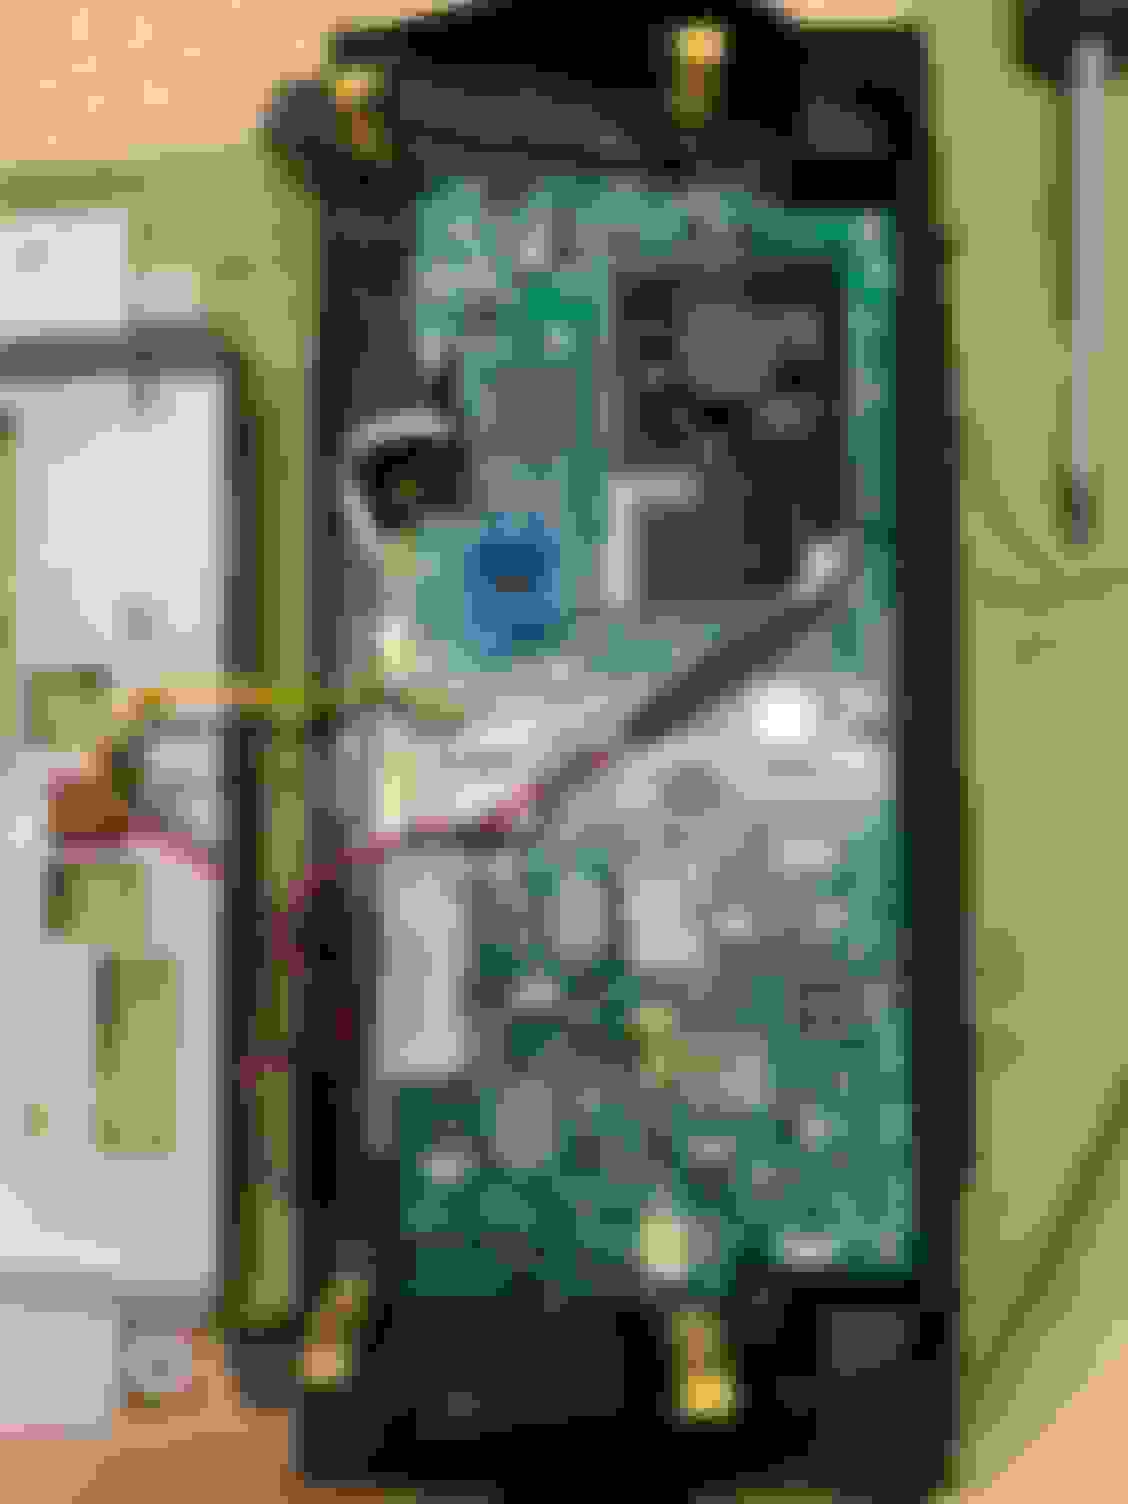
As my warranty sticker was broken during install, I figured I had nothing to loose by taking the unit apart. I decided to tackle the cpu temp issue with hardware, as I’m sure any SW fix will just throttle the system to keep it cool. Tested before and after on a 83F day, Spotify playing, google maps running a route, and split screen with CPU-z for temp monitoring. Before: 92-96c after 10 minutes, and continued at that temp for the drive. After: 67-71c after a 30 min drive. I’m pretty happy with a +20c drop! The fan is only audible with the car off, which I don’t mind as there’s no monitoring to let me know it’s running. I hooked it up to the system's USB power, so it turns on and off automatically with the unit.
As my warranty sticker was broken during install, I figured I had nothing to loose by taking the unit apart. I decided to tackle the cpu temp issue with hardware, as I�m sure any SW fix will just throttle the system to keep it cool. Tested before and after on a 83F day, Spotify playing, google maps running a route, and split screen with CPU-z for temp monitoring. Before: 92-96c after 10 minutes, and continued at that temp for the drive. After: 67-71c after a 30 min drive. I�m pretty happy with a +20c drop! The fan is only audible with the car off, which I don�t mind as there�s no monitoring to let me know it�s running. I hooked it up to the system's USB power, so it turns on and off automatically with the unit.
Damn, I want to do that, but don't feel confident enough to do it lol.
As my warranty sticker was broken during install, I figured I had nothing to loose by taking the unit apart. I decided to tackle the cpu temp issue with hardware, as I�m sure any SW fix will just throttle the system to keep it cool. Tested before and after on a 83F day, Spotify playing, google maps running a route, and split screen with CPU-z for temp monitoring. Before: 92-96c after 10 minutes, and continued at that temp for the drive. After: 67-71c after a 30 min drive. I�m pretty happy with a +20c drop! The fan is only audible with the car off, which I don�t mind as there�s no monitoring to let me know it�s running. I hooked it up to the system's USB power, so it turns on and off automatically with the unit.
I just realized, I have everything I need to do this mod...I think I might try it.
Did you have to cut the back panel for the fan to fit, or did you cut it for air flow? Or both?
I just realized, I have everything I need to do this mod...I think I might try it.
Did you have to cut the back panel for the fan to fit, or did you cut it for air flow? Or both?
Before you go down this rabbit hole, there's a few caveats you should know about.
1) The SOC IHS has a dip-down where I assume the CPU is. You will need to fill this area with something with high heat conductivity, to create a level surface for the cooling fins. The cooling fin unit I bought just so happens to come with a copper square that was almost a perfect fit.
2) Due to the size of the fins, I had to cut out the back metal portion. This also has the benefit of better air flow.
3) Due to the size of the cooling unit, the silver plastic that runs behind the screen was obstructing the unit from being able to clip into the dash. To resolve this I removed the silver plastic trim, and cut out the section where the fins are. This is 100% not seen when the screen is installed, and the section cut out had no clips. The plastic trim is now two separate pieces, and securely clipped back into the dash for both sides.
If you wanted to install some low profile passive cooling fins, you may avoid having to cut the dash trim and screen back plate, although this will surely limit the cooling capacity of the mod.


 05-02-20, 01:47 PM