When you click on links to various merchants on this site and make a purchase, this can result in this site earning a commission. Affiliate programs and affiliations include, but are not limited to, the eBay Partner Network.
So I finally added a USB Charger to the Rear Center Divider. Things I learned in the process: Dont be stupid and try to take out the rear center divider without removing the entire seat as you'll break your tab. Remove the entire seat by lifting up towards the center of the seat lol
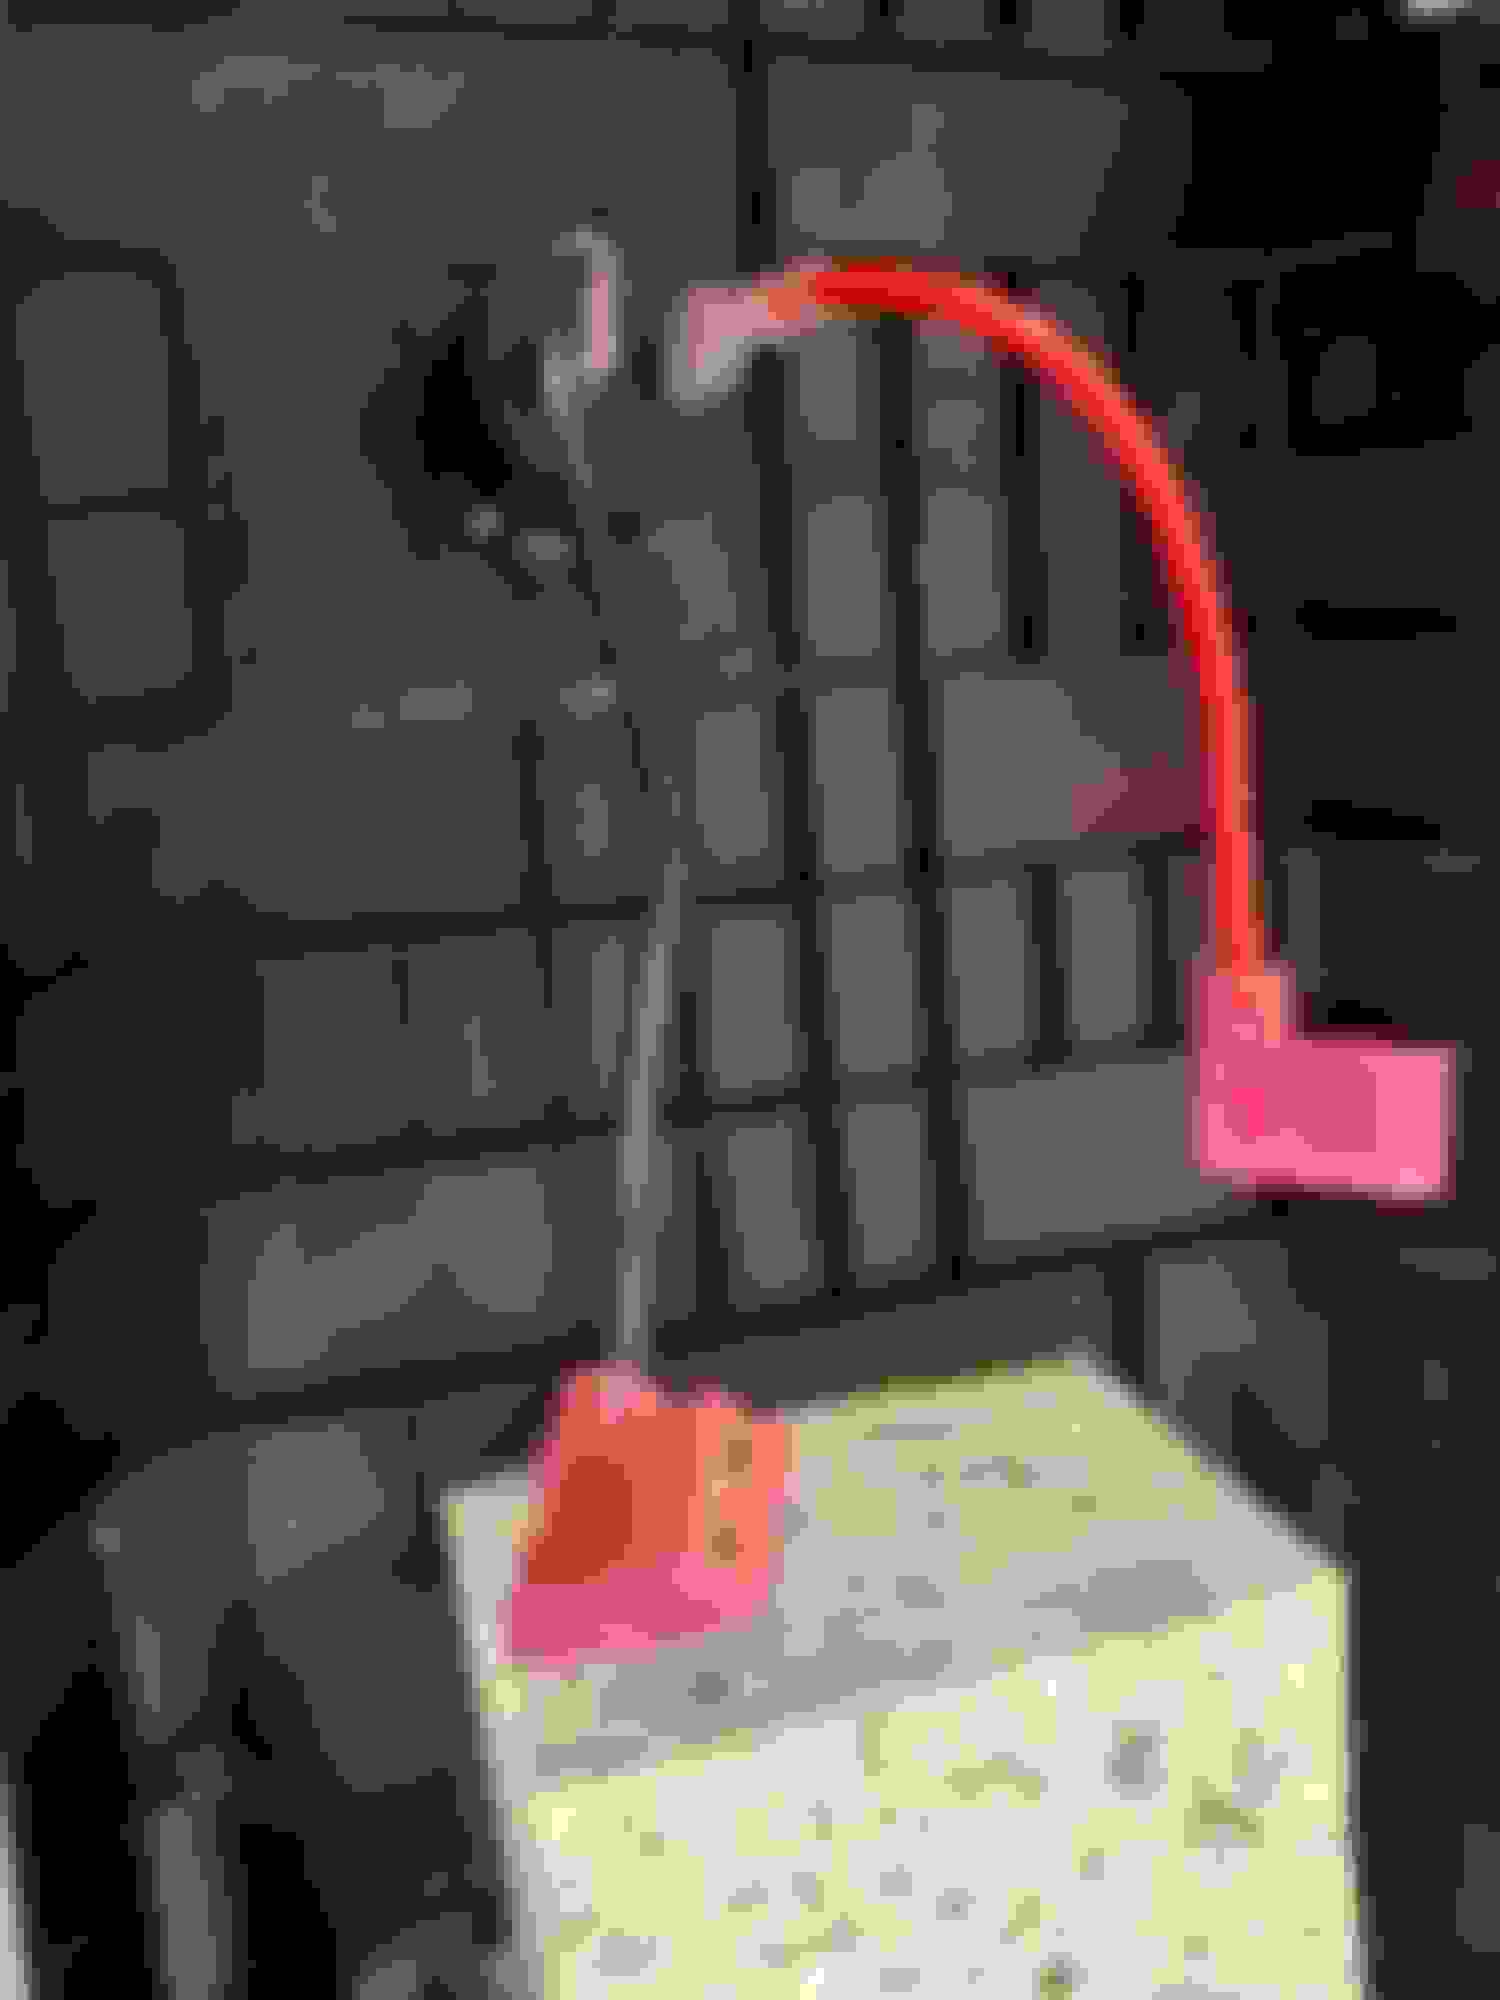
I ran a couple wires through the firewall (via rubber grommet) by the driver side with a wire loom for added protection. I used a long screwdriver (24" long phillips) to poke the grommet from the under the hood and was careful to not damage any wiring on the driver side.
Open the black box where the wires run through and feed your wire through it as well to keep everything neat.
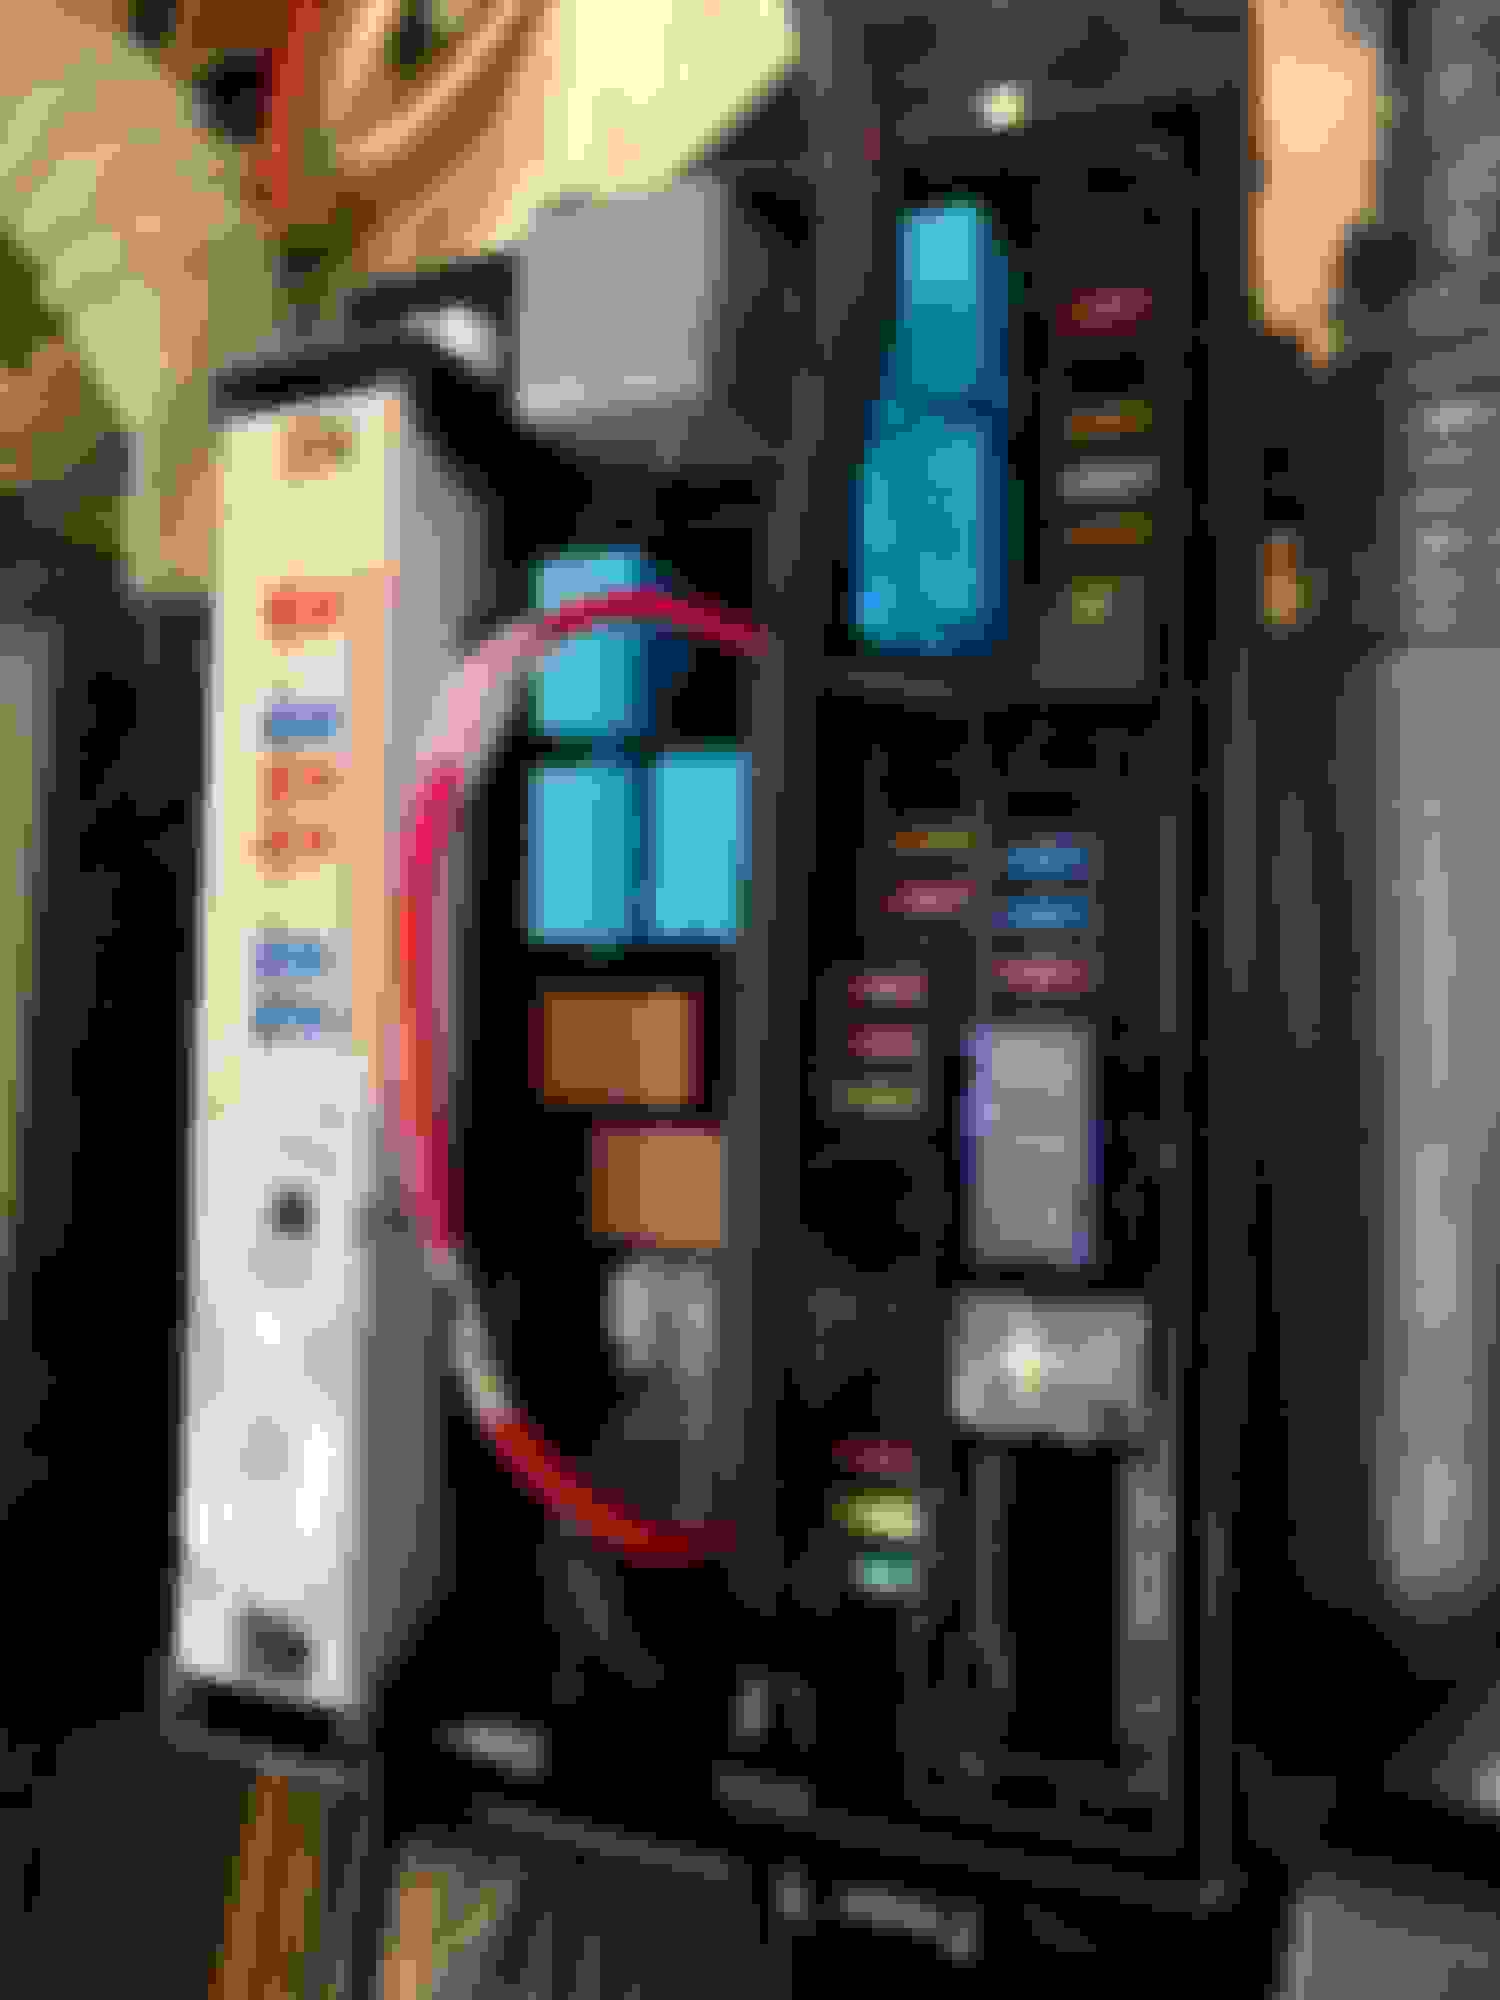
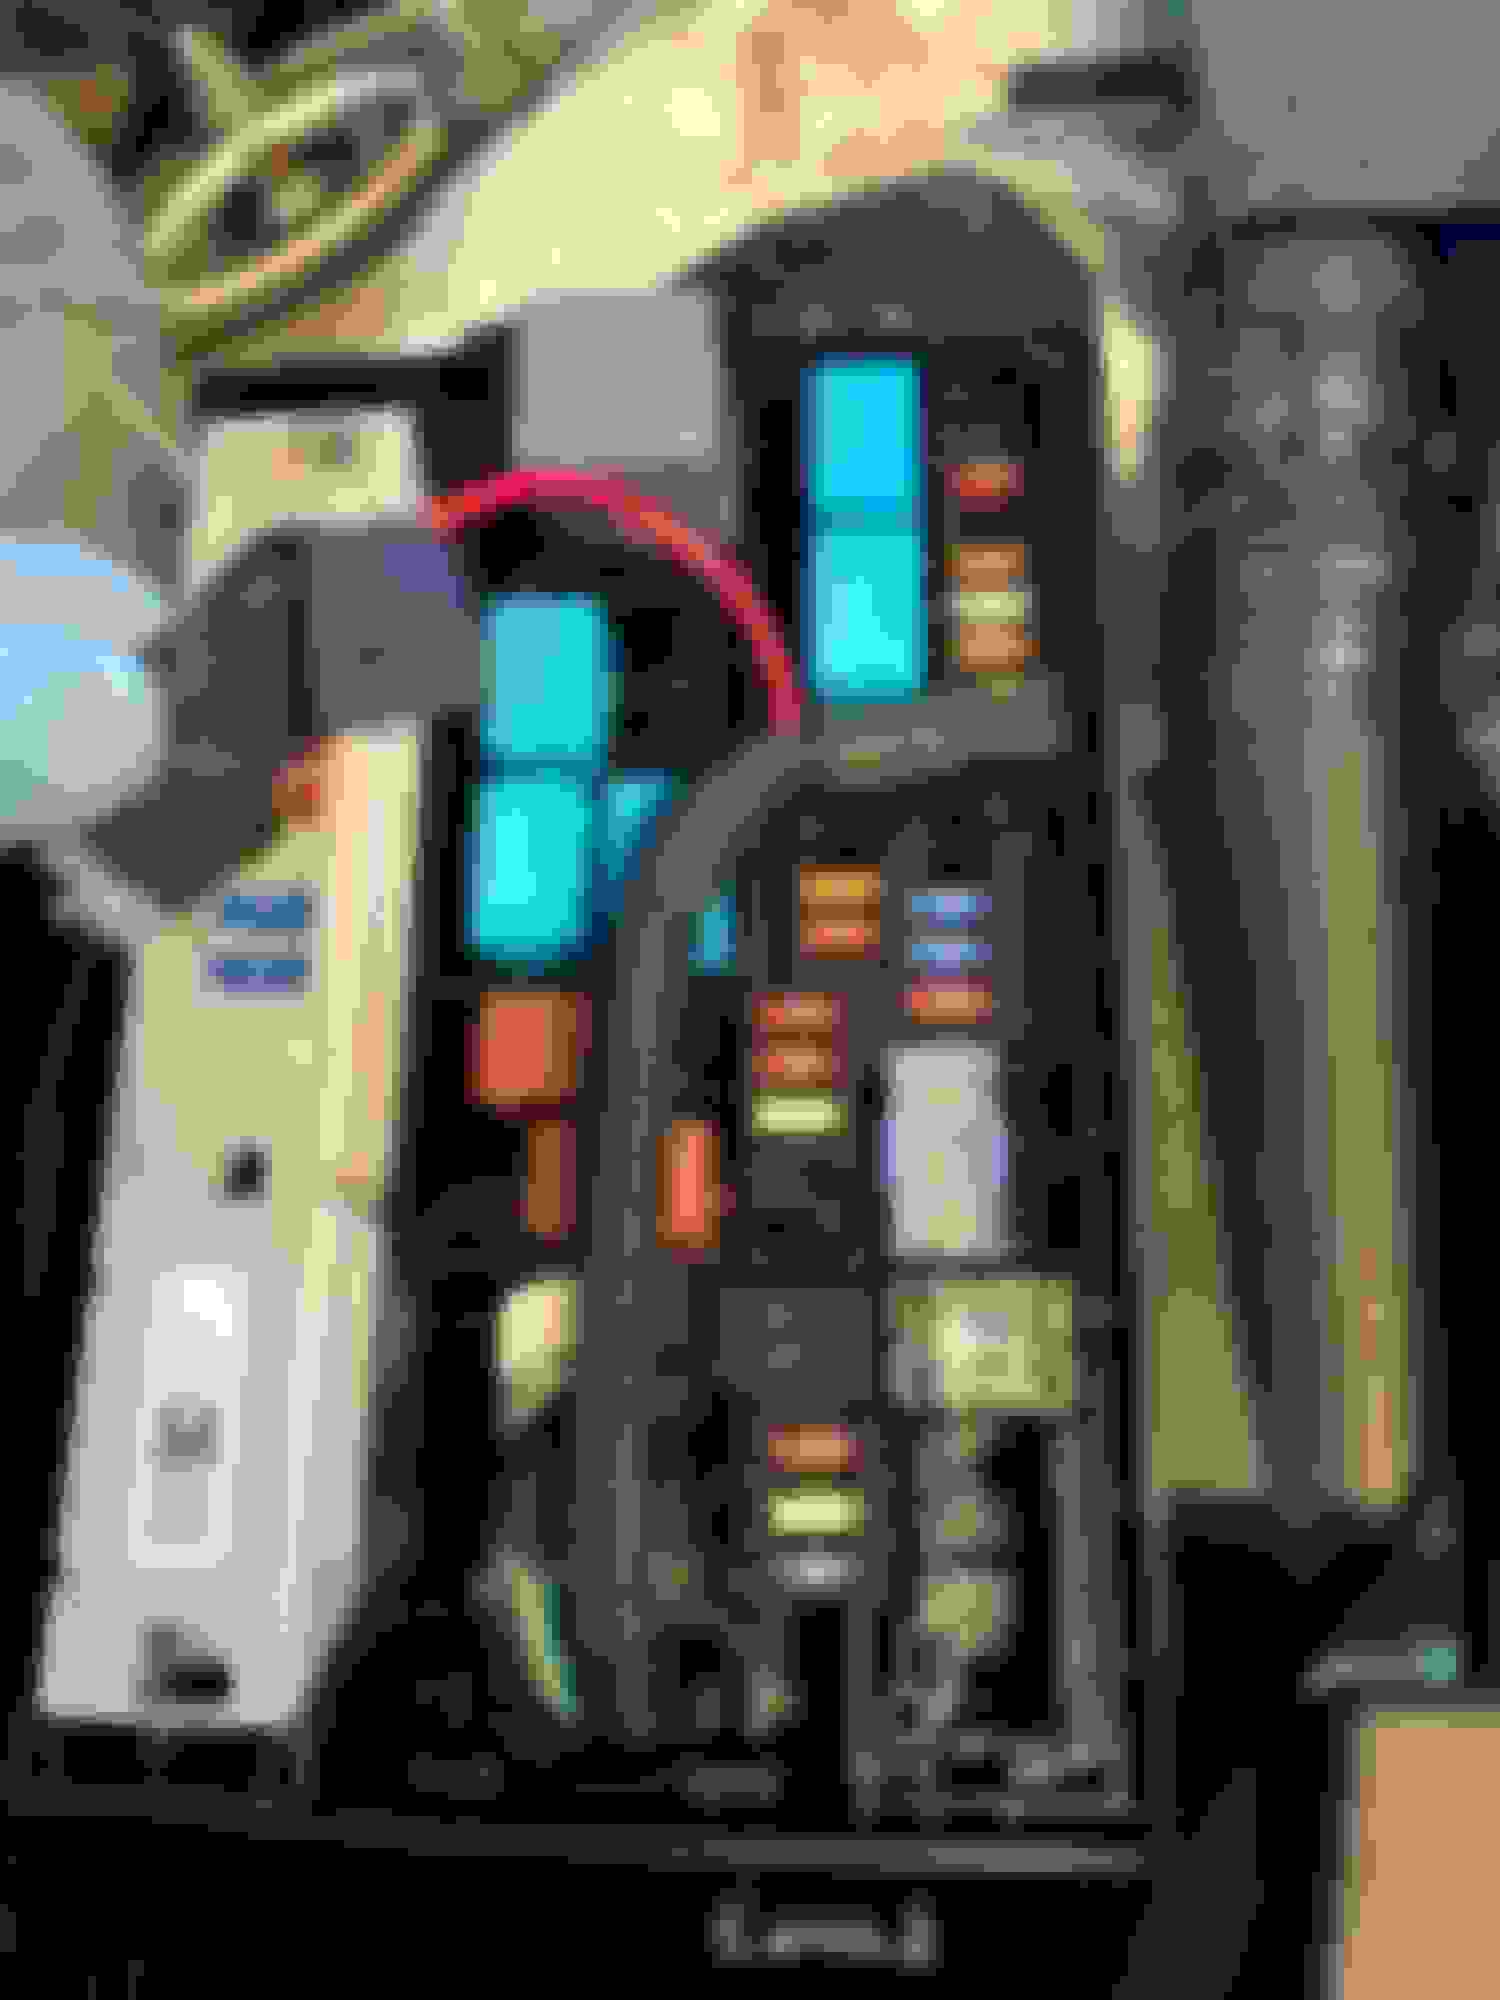
Then I removed the front panel of the fuse box by lifting up on it. In fact mine was so hard to lift up. It will require some force.
Now you'll need to use a Mini Fuse Tap I added it to the 20 AMP fuse controls the windshield wiper motor I think. *** DONT add the additional fuse yet to the top location of the Fuse Tap until you've finished doing everything to prevent any short circuits.
I ran an extra wire for a remote turn on wire when I add my LC2i and Amp and custom fiberglass sub (Maybe i can do a write up for that if anyone is interested?) Anyway, I added the mini tap fuse to the wire, but wrapped it up in plastic and left it unplugged in the fuse box for later. .
From the driver side, continue running the wires through the side covers by the door sill. You'll also could remove the rear passenger trim (which I did,) but I think you could continue to feed the wire through without doing so.
Rear seats removed and tools left there for no reason lol. I did use a small wire brush I had lying around and used it to remove the paint from the other M8 x 1.25 pitch threads.
I bought the bolt from Home Depot. Found a pair of these in the drawers section of the screw section. Look for the M8 x 1.25 pitch - 30mm long and get a small pack of M8 split washers while you're there for good measure.
Add a ring terminal to a separate wire for ground and then mount the ring terminal to the bare steel (This wire is NOT the wire I ran from the fuse box which will be your 12V positive wire later). Remember, you'll need to remove a small section of paint to have a decent ground. This is where the steel wire brush comes in.
Now for the center divider. I broke one of my tabs originally trying to take out the center divider without removing the rear seats all together. Not the end of the world though. I added Plastic Weld and since it's hidden its perfectly fine.
Now install the center divider back into the rear seats. Attach connector the 12V wire you ran from the fuse box into the red wire of the USB Charger with the appropriate terminal. Attach the ground wire you've made earlier to the Black wire with the appropriate terminal. Once your certain you've attached everything, add a mini fuse to Fuse Tap in the Fuse box. I went with a 3 AMP fuse which is plenty for this USB Charger. You should have something like this:
Some may notice that the USB is not centered. Unfortunately, trying to center this with the existing plastic under the center divider posed a risk that the USB charger wouldn't fit and I didn't want to take that chance and went with this safe location. Anyway, I'm happy its mounted and wont dont need to be bothered by any of the rear passengers anymore
If you dont want to see the voltage of the vehicle, you could always add black electrical tape to the underside of the USB chargers cover to block out the light. Enjoy!
Last edited by jaywuzhere; 07-08-19 at 09:06 PM.
Reason: forgot to write USB Charger
 07-08-19, 09:05 PM
 )
)