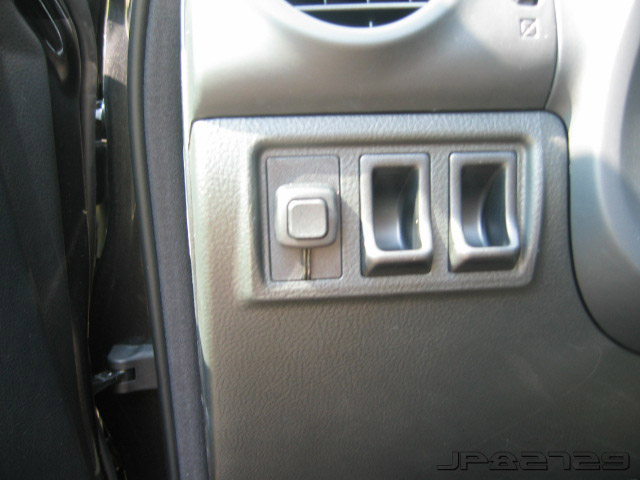
3 Blank Accessory Panel/Buttons On Lower Dash, What Options Are Missing?
 10-23-15, 01:30 PM
#16
Lexus Champion

correct..
A, B, C.
C has screws bottom left just above parking brake and bottom right near console. now I didn't fully remove "C" just the screws to pull it back slightly to feed the power cable through, so I can't say if there is any other screws up higher, or not, but I don't think so, I think it is just clips (which are very tight), just go slow. like I tell my kid, if it doesn't come easy then you are missing something, don't force it.
there is also a knee airbag there..
Last edited by mjeds; 10-23-15 at 01:33 PM.
 10-26-15, 12:03 PM
#17
Lexus Champion
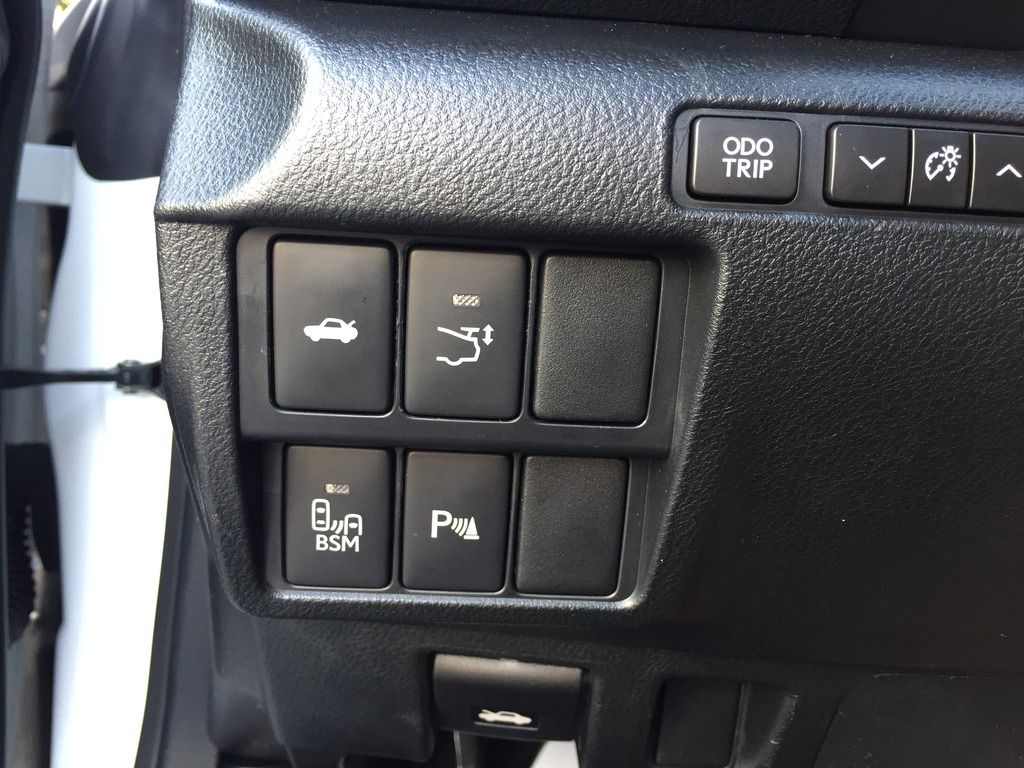
good news I was able to move my buttons into a format I like:
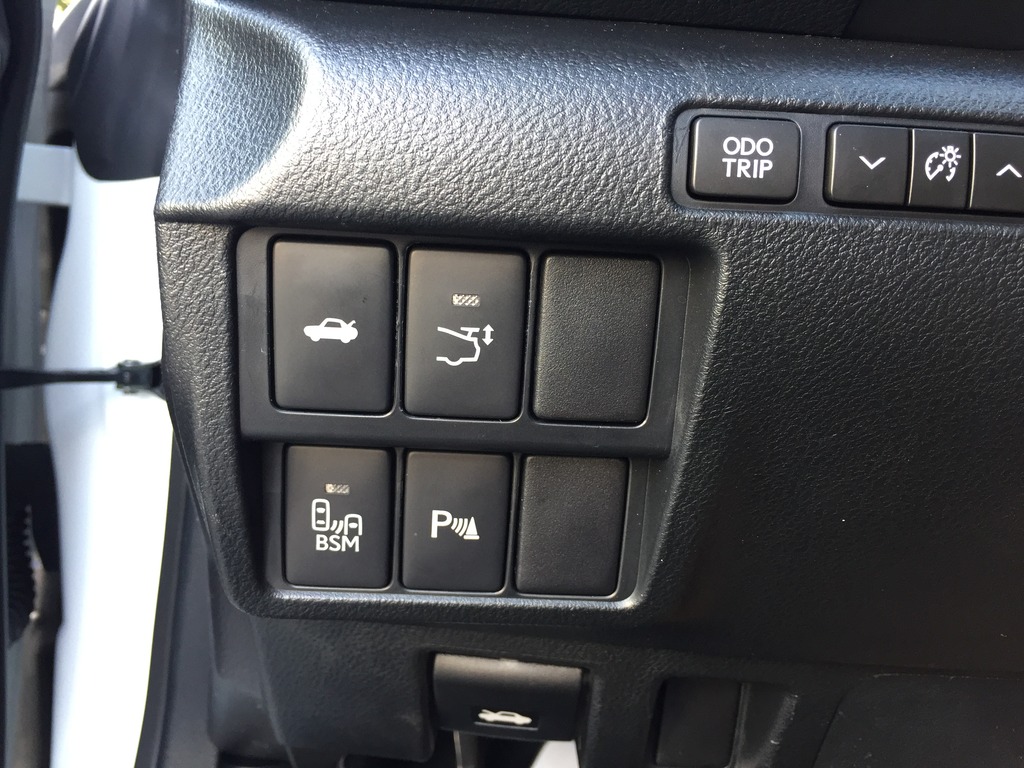
the trunk button wires reach without issue.
the bad news: so while all the buttons are the same size, they are notched differently so they technically only fit in their OEM slot.
so if you are adverse to modifying the plastic, you won't be able to move anything.
since it is hidden and never seen it doesn't bother me, so I used a razor blade to trim out the notches.


all the connectors are color and shape coded so you can't mess anything up.
took me less than 30 minutes, including removing and reassemble of the panels.
the trunk button wires reach without issue.
the bad news: so while all the buttons are the same size, they are notched differently so they technically only fit in their OEM slot.
so if you are adverse to modifying the plastic, you won't be able to move anything.
since it is hidden and never seen it doesn't bother me, so I used a razor blade to trim out the notches.
all the connectors are color and shape coded so you can't mess anything up.
took me less than 30 minutes, including removing and reassemble of the panels.
 10-26-15, 04:10 PM
#19
Lead Lap
Thread Starter
good news I was able to move my buttons into a format I like:
the trunk button wires reach without issue.
the bad news: so while all the buttons are the same size, they are notched differently so they technically only fit in their OEM slot.
so if you are adverse to modifying the plastic, you won't be able to move anything.
since it is hidden and never seen it doesn't bother me, so I used a razor blade to trim out the notches.
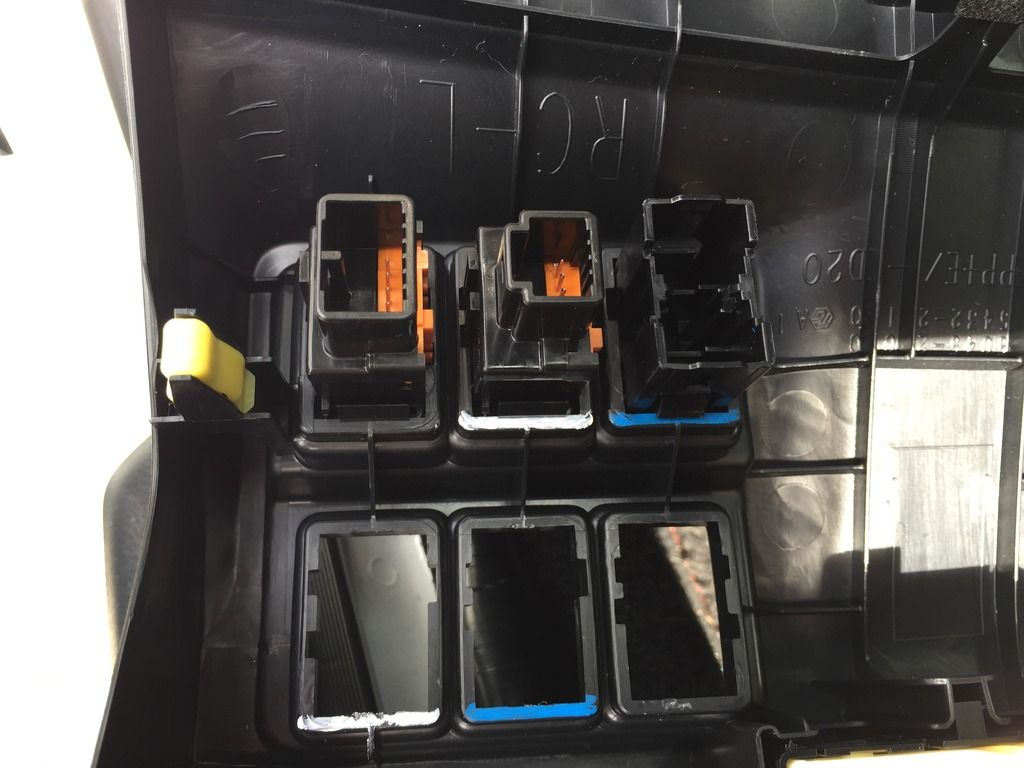
all the connectors are color and shape coded so you can't mess anything up.
took me less than 30 minutes, including removing and reassemble of the panels.
the trunk button wires reach without issue.
the bad news: so while all the buttons are the same size, they are notched differently so they technically only fit in their OEM slot.
so if you are adverse to modifying the plastic, you won't be able to move anything.
since it is hidden and never seen it doesn't bother me, so I used a razor blade to trim out the notches.
all the connectors are color and shape coded so you can't mess anything up.
took me less than 30 minutes, including removing and reassemble of the panels.
10-26-15, 05:35 PM
#20
Lexus Champion
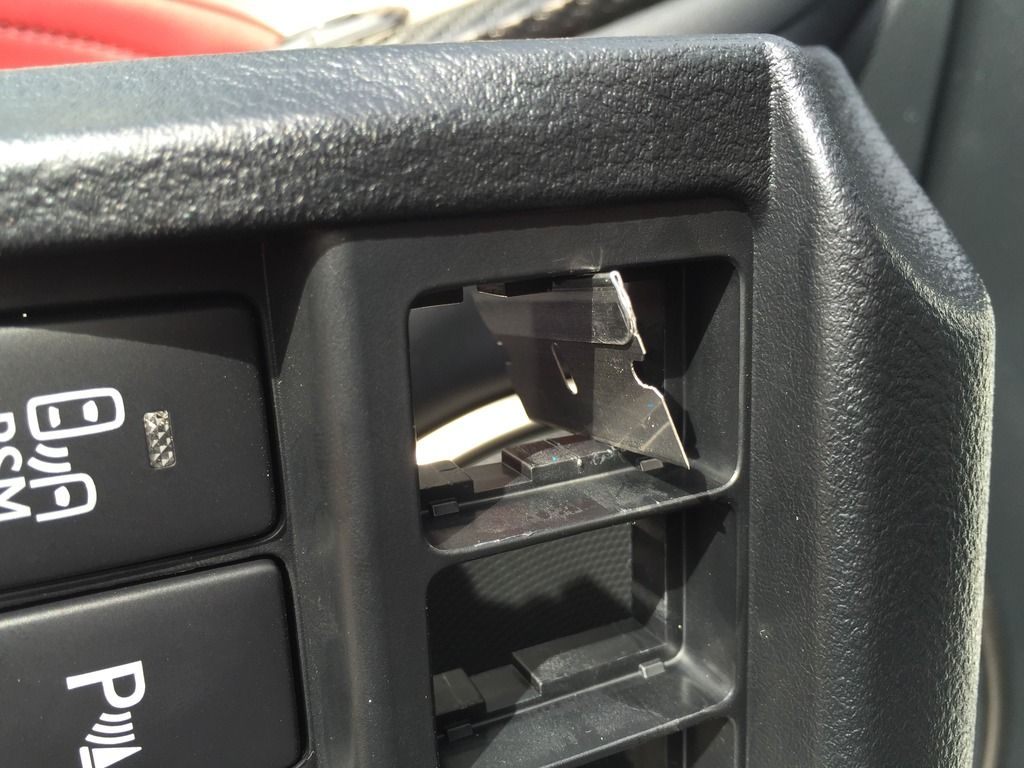
see the picture with the razor blade, see how there are little notches to the left of the blade?
in the case of the trunk button it has two notches, look at the blade, you can see where I marked the plastic to trim.
here I edited the picture to help, each button has different notches:

so I had to cut one for the trunk button here:

in the case of the trunk button it has two notches, look at the blade, you can see where I marked the plastic to trim.
here I edited the picture to help, each button has different notches:
so I had to cut one for the trunk button here:
Last edited by mjeds; 10-26-15 at 05:41 PM.
10-26-15, 06:24 PM
#21
 . Anyway, I'll use a Dremel and/or an x-acto knife. Razor blades make me nervous. Ha ha.
 Hey buddy, would you mind some pointers on exactly how you removed the panels? And which ones are required? Pictures behind each panel to see where the tabs are would have been great, but not having that, some instructions would be awesome
 . Thanks man.
10-27-15, 03:27 PM
. Thanks man.
10-27-15, 03:27 PM
#22
Lexus Champion
If it's invisible, then I agree with you. But you have to be careful not to damage the visible part of the panel while modifying. Those of us used to that, shouldn't be an issue. But newbies at this, beware. Anyway, I'll use a Dremel and/or an x-acto knife. Razor blades make me nervous. Ha ha.
Hey buddy, would you mind some pointers on exactly how you removed the panels? And which ones are required? Pictures behind each panel to see where the tabs are would have been great, but not having that, some instructions would be awesome. Thanks man.
. Anyway, I'll use a Dremel and/or an x-acto knife. Razor blades make me nervous. Ha ha. Hey buddy, would you mind some pointers on exactly how you removed the panels? And which ones are required? Pictures behind each panel to see where the tabs are would have been great, but not having that, some instructions would be awesome
. Thanks man.post #16 has the basics, there is a picture in post #15 from rjmalm.
basic instructions:
lift the front of the door sill panel:
remove panel A - all clips
remove panel B - all clips
unscrew panel C and remove
panel A has a clip at the top and the bottom is held by the door sill
panel B has clips at the four corners and a guide pin in the center.
panel C has screws above parking brake and next to console, clips on either side, and hook and latch at the top.
use a plastic panel tool and you won't have an issue.
sorry it didn't occur to me to take pictures of the panel removal, but if you really need them I can make a video sometime this week.
10-28-15, 10:14 PM
#23
. It's like the interior lenses to install LEDs on this car: you need to know where to pry the lenses, or you risk ruining the headliner, breaking the lens, or both. Thanks man.By the way, noticed your razor blade damage (told you I don't like them. Ha ha) on the panel, so will use a Dremel myself. It'll look uglier than yours before installing the switches, but nobody will see it that way, even if you remove the panel (just without the switches
 ). Want the front pristine. And will also wrap it with blue tape just in case. Finally, wlll put the trunk on the upper left, and next to it the parking one. Then the lighted ones below, out of sight. The BSM will stay the same, and wing next to it. Hate blanks so much I was thinking about buying 3 extra switches (lane departure, heated steering wheel, and de-icer) to replace the 3 blanks... but having switches for something the car doesn't have would be worse, so will leave it alone. Sometimes I hate myself. Ha ha. Thanks again for your help.
10-29-15, 12:13 PM
). Want the front pristine. And will also wrap it with blue tape just in case. Finally, wlll put the trunk on the upper left, and next to it the parking one. Then the lighted ones below, out of sight. The BSM will stay the same, and wing next to it. Hate blanks so much I was thinking about buying 3 extra switches (lane departure, heated steering wheel, and de-icer) to replace the 3 blanks... but having switches for something the car doesn't have would be worse, so will leave it alone. Sometimes I hate myself. Ha ha. Thanks again for your help.
10-29-15, 12:13 PM
#24
Lexus Champion
Thanks buddy. Just 2 questions: How many screws total on panel C? And does the panel swings UP from the bottom, meaning undo the bottom clips first? Just want to understand where I need to pull the clips first. Don't want to break any tabs, etc. It's like the interior lenses to install LEDs on this car: you need to know where to pry the lenses, or you risk ruining the headliner, breaking the lens, or both. Thanks man.
. It's like the interior lenses to install LEDs on this car: you need to know where to pry the lenses, or you risk ruining the headliner, breaking the lens, or both. Thanks man.2 screws as I stated, in the bottom corners by the console and p-brake, and yeah unclip the bottom and swing up, it has an inverted L hook and latch in the top that holds it in place at the base of the cluster, so it's like a hinge, unclip the bottom and middle and lift swing it up and it will come free, reverse to replace.
By the way, noticed your razor blade damage (told you I don't like them. Ha ha) on the panel, so will use a Dremel myself. It'll look uglier than yours before installing the switches, but nobody will see it that way, even if you remove the panel (just without the switches). Want the front pristine. And will also wrap it with blue tape just in case. Finally, wlll put the trunk on the upper left, and next to it the parking one. Then the lighted ones below, out of sight. The BSM will stay the same, and wing next to it. Hate blanks so much I was thinking about buying 3 extra switches (lane departure, heated steering wheel, and de-icer) to replace the 3 blanks... but having switches for something the car doesn't have would be worse, so will leave it alone. Sometimes I hate myself. Ha ha. Thanks again for your help.
). Want the front pristine. And will also wrap it with blue tape just in case. Finally, wlll put the trunk on the upper left, and next to it the parking one. Then the lighted ones below, out of sight. The BSM will stay the same, and wing next to it. Hate blanks so much I was thinking about buying 3 extra switches (lane departure, heated steering wheel, and de-icer) to replace the 3 blanks... but having switches for something the car doesn't have would be worse, so will leave it alone. Sometimes I hate myself. Ha ha. Thanks again for your help.
damage? there is no damage to the front area of the panel from the razor blade. there was a piece of shaved plastic that was stuck between the trunk and wing button when I took the picture because I had not finished filing the area, I wanted to snap the picture so I wouldn't forget. The exterior area is clean, no damage.
as far as the order, I did it this way for a reason:
1. trunk items are together on one row, sensor items are together on one row.
since the trunk release and wing are part of the trunk they are grouped together, and the park and blind spot monitors are both sensors I will probably never turn off so they are grouped together.
I could have swapped the BSM and P-Sense so that the lighted buttons were stacked, but I didn't want to do any more cuts than necessary..
as for the blanks, I am looking for a set of Lexus/Toyota Black coin holders to put in my blanks, like these:
while I will never put coins there, I thing they look better than the blank and at least serve a purpose.
Last edited by mjeds; 10-29-15 at 12:16 PM.
10-30-15, 12:39 PM
#26
... with the lighted switches below. Here's my arrangement and why:park-assist / trunk
BSM / wing
The top row you can reach without leaning forward, so putting the buttons I use often makes more sense. Coincidentally, they happen to be the non-lighted ones, but that wasn't on purpose. I always have park-assist off since that retina-searing dash light on all the time annoys the hell out of me. So turn it on and off every once in a while when needed. Same with the trunk. BSM is always on, and wing is always deployed (or turned on and off from the dash, if anything), so those buttons are rarely touched. I could swap trunk and wing to the left, but the way I put them at least the BSM stays in its place. There you have it
. Hey, that option for the blanks was brilliant. However, the picture of buttons on that Toyota (eBay auction) look more elongated than ours, no? Maybe I'm wrong. But on the picture you posted, the blanks look about the same as our car IMO. Which model is that? Anyway, since the switches are recessed in our cars, I'd probably just order 3 coin holders. Would never put a pen in there anyway, plus with the recess might touch the dash. Let me know what you do. And thank you for that idea
.PS: on the top left switch, there's a bit of blade damage on the right side (where you show the blade inside the cavity). You probably tilted the blade a little more than needed when cutting and touched the edge there. Check it and then tell me it's not there
. But a minor detail nobody would see from the distance, so not a big deal.
Last edited by JCtx; 10-30-15 at 12:52 PM.
10-30-15, 02:08 PM
#27
Lexus Champion
yeah I'm not to hot on the pen option either, just thought it was interesting.
the picture of the coin holders is a 1st GEN Lexus IS, same ones are said to fit in the Avalon, Camry, T100, Tacoma, FJ and some others, I suspect they are a universal piece that Toyota makes and are all the same fitment.. Interestingly googling around the same Toyota part seems to fit Hondas and Hyundai's as well with simple trimming of the tabs.
for $10 or so it's not a big deal to order them and find out..
as for the scratch are your referring to this:

it's just shavings from the other area I cut that I didn't clean off before taking the picture.. no scratch or damage I checked.
the picture of the coin holders is a 1st GEN Lexus IS, same ones are said to fit in the Avalon, Camry, T100, Tacoma, FJ and some others, I suspect they are a universal piece that Toyota makes and are all the same fitment.. Interestingly googling around the same Toyota part seems to fit Hondas and Hyundai's as well with simple trimming of the tabs.
for $10 or so it's not a big deal to order them and find out..
as for the scratch are your referring to this:
it's just shavings from the other area I cut that I didn't clean off before taking the picture.. no scratch or damage I checked.
Last edited by mjeds; 10-30-15 at 02:12 PM.
10-30-15, 02:30 PM
#28
Lexus Champion
found a company in Australia that makes switches to fit OEM 2007+ Toyota blanks.
I might go this route if I find something I wish to add to the vehicle that requires a power switch..
can't think of what that might be at this point but who knows.
http://www.newpro-tech.com.au/Clights.htm
I might go this route if I find something I wish to add to the vehicle that requires a power switch..
can't think of what that might be at this point but who knows.
http://www.newpro-tech.com.au/Clights.htm
10-31-15, 04:24 PM
#29
Lead Lap
Thread Starter
found a company in Australia that makes switches to fit OEM 2007+ Toyota blanks.
I might go this route if I find something I wish to add to the vehicle that requires a power switch..
can't think of what that might be at this point but who knows.
http://www.newpro-tech.com.au/Clights.htm
I might go this route if I find something I wish to add to the vehicle that requires a power switch..
can't think of what that might be at this point but who knows.
http://www.newpro-tech.com.au/Clights.htm
11-02-15, 12:47 PM
#30
No. A couple of blade cuts at the edge on the right of your red marking. One of them right under the blade itself.
Those would be great to replace the stupid switches for TPMS reset, and radar accident avoidance on/off switch under the dash . But the switches would have to have the specific connector for our car... plus the wiring would have to reach under the dash. So forget about that. He he. I'd settle for the coin holders to replace the 3 blanks currently present in my car. Hopefully Jmeds will buy them and report results.
. But the switches would have to have the specific connector for our car... plus the wiring would have to reach under the dash. So forget about that. He he. I'd settle for the coin holders to replace the 3 blanks currently present in my car. Hopefully Jmeds will buy them and report results.