
Hitch recommendation?
 06-14-14, 07:18 PM
#16
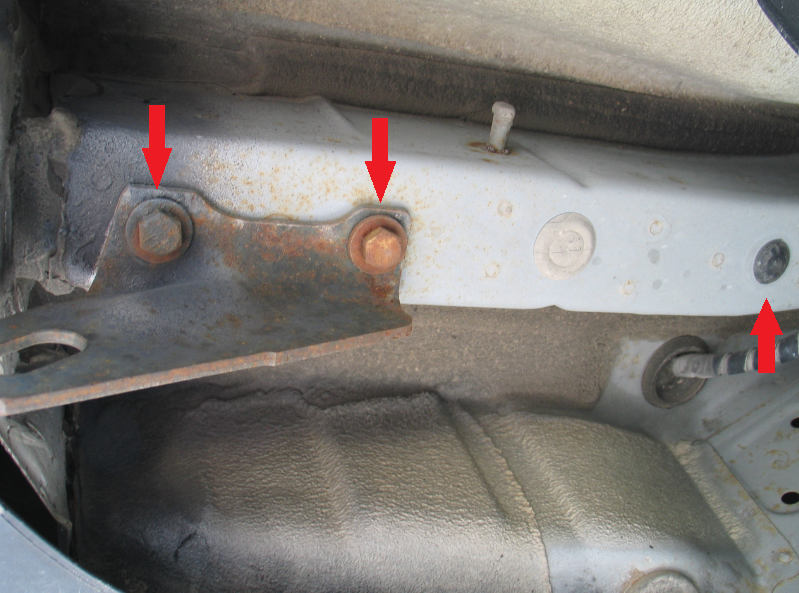
These are the mounting points:
Driver's side

Passenger side
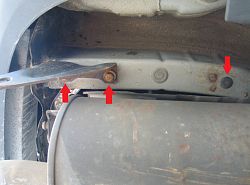
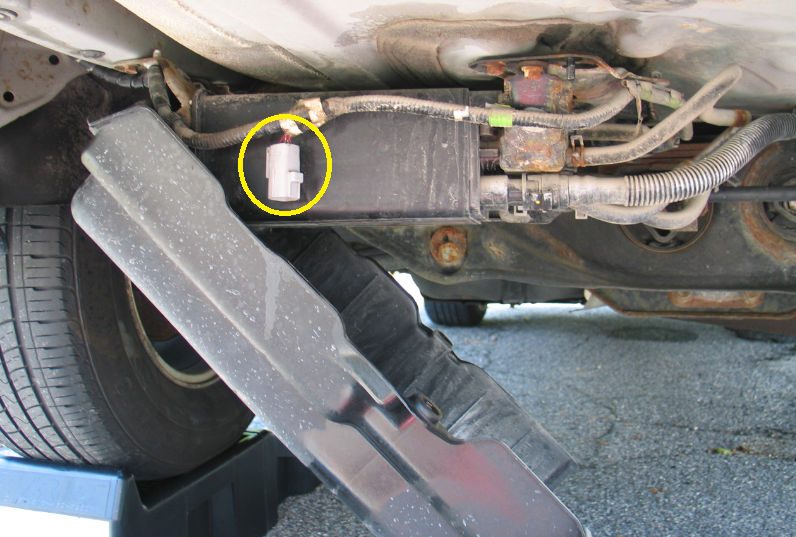
Tow wiring harness adapter in yellow circle

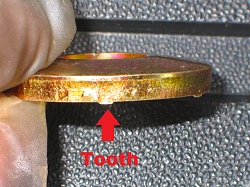
Also, regarding the supplied washers. It is not even mentioned in the instructions for installing the hitch, as the manufacturer seems to write these instructions with an experienced installer in mind, but these washers have a "tooth" in them though they don't look like the usual toothed washer. The toothed side of the washer faces up to the trailer hitch when installed.
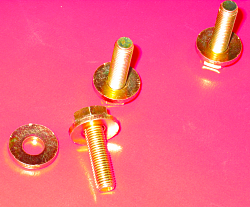
In case I didn't mention it, the new bolts have a 17mm head and have an yellow orange coating. It doesn't appear to be galvanized zinc or a phosphate type coating. I don't know what the coating is.
Driver's side
Passenger side

Tow wiring harness adapter in yellow circle
Also, regarding the supplied washers. It is not even mentioned in the instructions for installing the hitch, as the manufacturer seems to write these instructions with an experienced installer in mind, but these washers have a "tooth" in them though they don't look like the usual toothed washer. The toothed side of the washer faces up to the trailer hitch when installed.

In case I didn't mention it, the new bolts have a 17mm head and have an yellow orange coating. It doesn't appear to be galvanized zinc or a phosphate type coating. I don't know what the coating is.

Last edited by timmui; 06-14-14 at 08:38 PM.
 06-17-14, 02:42 PM
#17

FYI:, from wiki and google:
Chromate conversion coatings are commonly applied to everyday items such as hardware and tools, and can usually be recognized by their distinctively iridescent, greenish-yellow color. It may very well be cadmium plating with a zinc chromate top.
Chromate conversion coatings are commonly applied to everyday items such as hardware and tools, and can usually be recognized by their distinctively iridescent, greenish-yellow color. It may very well be cadmium plating with a zinc chromate top.
06-18-14, 04:55 PM
#18
FYI:, from wiki and google:
Chromate conversion coatings are commonly applied to everyday items such as hardware and tools, and can usually be recognized by their distinctively iridescent, greenish-yellow color. It may very well be cadmium plating with a zinc chromate top.
Chromate conversion coatings are commonly applied to everyday items such as hardware and tools, and can usually be recognized by their distinctively iridescent, greenish-yellow color. It may very well be cadmium plating with a zinc chromate top.
06-18-14, 04:56 PM
#19
The hitch is installed and I am pleased with the final result. I also learned that either my frame or the hitch itself is slightly out of square. I suspect the vehicle, as the previous owner told me he had the back hatch repaired five or six years before I bought it and I suspect the bumper was replaced as well. After spending time inspecting the repair (and still repairing it), I wouldn't recommend that shop if I knew the name of it.
I spent at least 15 minutes wiggling the hitch around until I could get the fourth bolt in. Once I got it started by hand, everything came together quickly enough. I do wish I had air tools to get these repairs done more quickly.
A tip for those attempting the hitch install: It is best (and easiest) to install the hitch with a helper holding the other side of the hitch. If you, like me, had no help in the middle of the day, then two jack stands will do the trick. Here's how:
1) Without the vehicle lifted, position the two jack stands behind and below the bumper. (wrap the tops of the jack with shop towels to protect the hitch's finish or use jack stand caps like I did)
2) Put the hitch on the jack stands.
3) While holding the hitch so that it won't tip forward, raise the driver's side up two notches
4) Move over to the other side while making sure that the hitch doesn't fall off the jack stands
5) Carefully ease the passenger side of the hitch over the exhaust tip and raise jack stand to touch the hitch. You can't avoid scraping the hitch against the tip without a helper to pull it down.
6) Raise the driver's side some more and get the most forward bolt three or four threads in by hand
7) Do the same for the passenger side front bolt
8) Back to the driver's side for the rear most bolt
9) Passenger side rear bolt
10) Once you have them all hand started three or four threads in, put in the middle bolts
11) Ratchet up the middle bolts until snug, then do rest of the bolts until snug
12) Use torque wrench to finish it all.

Thread
Thread Starter
Forum
Replies
Last Post