When you click on links to various merchants on this site and make a purchase, this can result in this site earning a commission. Affiliate programs and affiliations include, but are not limited to, the eBay Partner Network.
Thanks for the tips. This is exactly what I need to know. Would you be able to share the brand of the Lower Control Arm and ball joint you use? I did research on RockAuto and PartsGeek and they offered very affordable prices around $57 to $63 price range but I am not sure about the quality.
@rlopez1024 Hi, Would you by chance still have the Amazon link for the ball separator you used? I am now stuck with the damaged ball joint and neither the fork or the ball joint separator method worked. I am looking for the ball joint separator that you used since as you already know the top part did not go all the wall into the gap between the stud and the CV boot.
@rlopez1024 Hi, Would you by chance still have the Amazon link for the ball separator you used? I am now stuck with the damaged ball joint and neither the fork or the ball joint separator method worked. I am looking for the ball joint separator that you used since as you already know the top part did not go all the wall into the gap between the stud and the CV boot.
I just did exactly what you mentioned. Thanks for letting me know about the HaborFreight ball joint separator. That saves me a lot of frustration. @rlopez1024 I just finished replacing my LCAs and bushing using MOOG.
The MOOG does not fix 100% like the factory ones I have on my car. The bolt holes do not line up perfectly. It took me a few hours just to find a good way to wiggle it around to line up the three bolts on the LCA but I finally made it with a helper.
I have another question for you and anyone in this thread. Are you guys aware of the Rear Control Arm? They are usually called trailing arms. I checked and found out that in the rear I have a weird cup style arm for my lexus rx 350 2011. It looks like the one selling on RockAuto now. There are two arms. I attached picture in this thread. The reason I asked is because I always felt a suspension noise in the rear. I replaced my rear strut with KYB one and it did not fix the problem and I still hear something like the sound of the coil suspension bouncing up and down. Also, when I do wheel alignment, the guys said that my rear arm bushing was torn and it caused small misalignment for my rear. They also said there was no nut to adjust. However, I see spec from Lexus that the cup style arm has some sort of adjusting nut attached to it.
I asked but it seemed that noone has done this before. I went ahead and replaced my rear trailing arms. I bought the Mevotech one from Rock Auto. The old part removed from the car had a shot bushing. You could see pieces of rubber chipped off and it also torn apart horizontally along where the ring and the rubber met. The new part looked similar to the old part but they are not 100% OEM Spec. You can tell because the holes are off like 1 or 2 mm . Some tips below might help you in:
REMOVAL of the arm: It took me only 15 mins to remove the other arm after I knew all these
1. Remove the brake caliper and set it aside with a bungee cord to keep it from falling off and break your brake line. For brake caliper removal, you would need 14mm socket or open wrench for the bolt at the slider pins. 19mm for the brake caliper bolts.
2. Remove the rear air suspension. It only holds with two 17mm bolts and super straightforward to remove and to put back so why not? The air strut is not completely blocking the bottom bolt and obstruct you from getting your Air Gun or in my case Impact Adapter in.
3. You need a good cheater pipe and a Flexible 1/2 Ratchet. The top bolt connecting the arm to the hub/knuckle is quite tricky. There is a Lateral Arm (or sometimes called Upper Control Arm) blocking that bolt. You wont we able to gun it out or use any deep socket. . I used a 1" PVC Schedule 40 pipe around 18" to 24" long and a Flexible 1/2 Kobalt Ratchet & of course with tons of elbow grease.. The bolt is 19 mm.
4. Knee Pad You are going to use a lot of force to yank the bolt out
5. Remove the harness wrapping around the Suspension Arm with Coil on top. It is the other picture on my previous post It holds with only two 10mm bolts. After removing it, you can use air gun freely on the bottom bolt connecting the arm to the Hub. It is 19mm.
6. The last two bolts are super easy to remove if you have an Impact Wrench or Impact Adapter. They are straightforward and a 21mm shallow socket should do it.
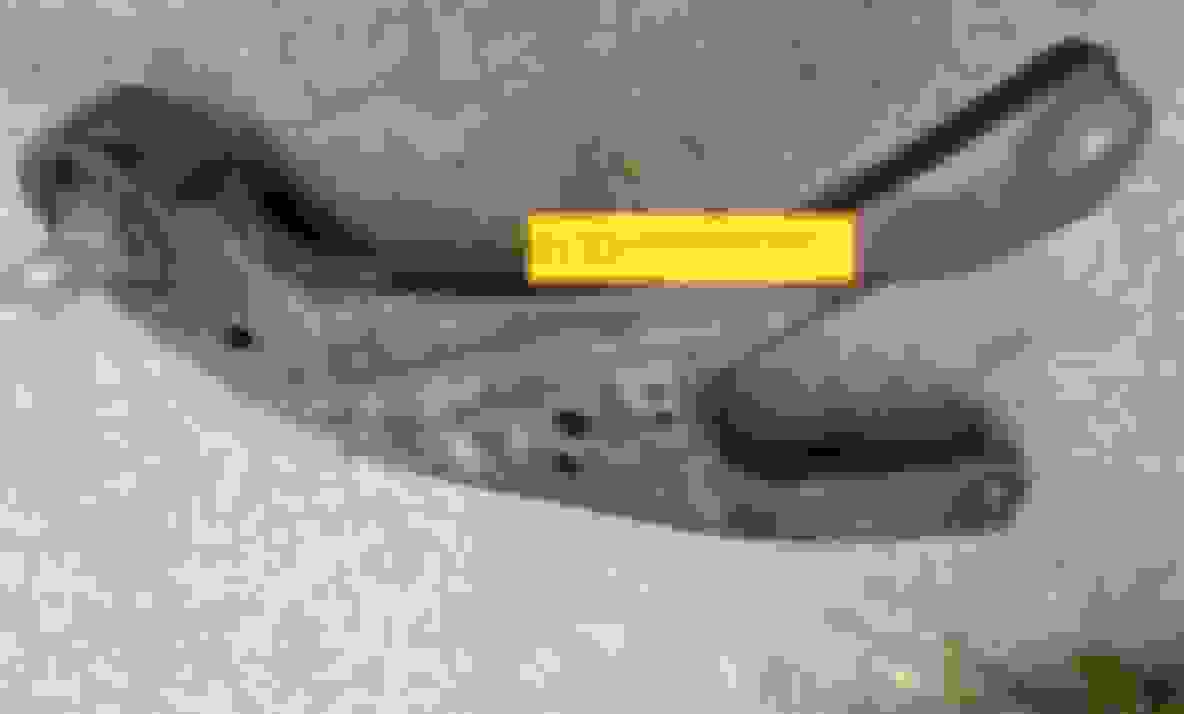
7. There are two 12mm bolts on the other side of the arm. I also attached the picture showing its location. You can only see it by lying down, crawl under your car and look on the arm side facing in. Both brackets and bolts must be remove to free the brake line before the complete removal of the arm.
INSTALLATION:
1. Install two bolts connecting the arm to the Hub first. You must be able to push the bolt in freely and turn by hand. You might risk damaging the threads of the bolts if you dont. I installed the bottom one first and use a sccisor jack to support the arm from the bottom and jack it up slowly. Then I used one hand with a lot of force to push the top leg down while I use the other hand to bolt it in. Then I continue to jack the arm up until it could travel no more.
2. Now it comes to the hard part. The rest two bolts at the bushing will not line up with the hole. You need to use your one hand with a lot of force (while lying down ) to push the metal plate so that all the holes line up and use the other hand to bolt it in. Again, there must not be any resistance from the arm otherwise the plate might help the bolt at an angle at you will cross thread the bolt and damage the bolts as you bolt them in. After you bolt one side all the way in, the other side should line up with the hole. No more elbow grease is needed I just gun it in with my favorite Milwaukee Impact Adapter :-) Both of them are 21 mm shallow socket. It is better to use deep socket because you might need space later on to bolt them with your torque wrench.. If you have questions, feel free to ask.
Location of the two 12mm bolts holding the brake line
Hello if someone could please help I would be extremely grateful. I am a relatively new mechanic with his own business 3 years on the job. And came across a 04 rx that needs a lower control arm. Alldata says 7.8 hour job and the engine and transaxle need to be removed. Is this accurate ? Is there a work around?
Hello if someone could please help I would be extremely grateful. I am a relatively new mechanic with his own business 3 years on the job. And came across a 04 rx that needs a lower control arm. Alldata says 7.8 hour job and the engine and transaxle need to be removed. Is this accurate ? Is there a work around?
I found the passenger side slightly easier than the driver side for removing the engine mount.
Engine will need jacked up just a smidge to pull out the engine mount on the side you are working on to get access to the LCA bolts.
This is easily done with an impact in a minute:
1) Loosen the lower nuts on All the engine mounts on both sides for max slack but don't remove.
2) Front mount by the radiator- loosen the bottom nuts and the top nut but don't remove so you don't have to play the "floor jack wiggle dance" to set all the mouns back in the holes when done, thank me later. haha
3) Pull off dog bone mount up top, if you don't pull this mount it will fight you.
3) Care must be taken when jacking up engine especially on the passenger side because the engine mount likes to stay stuck in the hole and mount bracket grabs the PS or brake line(can't remember which) like a finger- happened to me and I caught it before line got kinked because I did a pump on the floor jack and then inspected all the way around for issues with each pump. Jacking only required to clear the threads on the engine mount stud so it's not much. Also, intake plenum gets very close to the wiper cowl box up top so don't go crazy jacking engine, pump and look for clearances. For passenger side, a block of 2x4 or 2x6 cut to proper length works great on the oil pan with floor jack for gentle lifting and with care for clearance and proper angle. Too much resistance- stop and look for issues before crushing oil pan- we are only lifting one side at a time to clear the engine mount stud and not trying to lift the whole engine. On driver side I believe I jacked at a safe place where the engine meets the transmission but care needs to be taken because I saw someone break their bell housing. Driver side made me more nervous and felt more resistance when jacking so I loosened the engine cradle bolts too about 1/2" on that side and that gave the clearance to slip out the trans/engine mount.
4) When done I laid the engine back down on the mounts and hand tighten nuts then start engine and shift to drive and park -GENTLY- and engine finds is resting place on mounts and snug up the nuts.
5) Note- care when jacking up engine- saying it again, don't want to break an engine mount or grab a PS or brake line, etc.
6) Add- on passenger side, after a slight lifting with the jack provides access to the bolts that hold the engine mount to the engine so the mount can be removed with engine bracet and requires less engine lifting when done this way, totally optional but that's what I did.
Many more tips and trick with searching site as suggested above such as CV axles don't need removed which I didn't know so I did it the hard way.
That's all the tips and tricks I have so hopefully you find more but if car isn't rusty I think you can knock out each side in 2 hours max.
Are you using new LCA with included bushings or are you pressing new bushings into old LCA's?
Reviving an old thread hopefully helps someone like myself
No needs to remove axle bolt or fuss with the tie rod puller those need not be touched to do the LCA's. I just did this job today, purchased the Moog lower arms with ball joints for $123 shipped @ Rock Auto for both silly to have a shop press them out.
Remove all bots on dog bone and engine mount as mentioned, wood under jack OR car lift to raise engine a couple inches enough to clear and remove lower engine mount for access to the hidden a arm bolt.
Surprises - I definitely needed an impact wrench as the rearward single and two forward bolts were pretty much frozen. Also removing the ball joint nuts were a bear as the cotter pin needed to be drilled out and still didn't want to turn. Very straight-froward, not hard or too messy
Total time, minus running out for a new impact gun and impact socket... 4 hours. Any dealer or indi telling you "10+ hours" is absolutely rpping you off! I've never done this before, did it in my garage, and still took 2 x 2 hours evenings.
My '04AWD 169K mles - Followed the initial posters and some YouTube videos on the Rx400 for guidance and locations of bolts/nuts
Hey all. What are your thoughts on MOOG parts now.
I know they aren't the quality they were even 8 years ago.
If I do the control arms I'd probably press in new bushings.
Screw Moog, they've hit rock bottom now. First strike was when I had to re-tap the grease fitting for some UCAs on a Dodge Charger (made in USA part too). I've boy-cotted them after their sway bar end links and ball joints kept ripping boots on me and after seeing quick wear on my LCAs. I also did an experiment and greased one and left the other dry, and they both started leaking after about a year. This is is my RX350's Moog control arm after a year, already seeing the bushing separating on the pass side. The driver side is not much better. I used new hardware, torqued to spec and with the suspension loaded up. My Highlander's 3-yo Delphi control arms don't even have a hairline crack in them. I have Moog rear toe adjustment bolts from a 2013-2018 RAV4 and those are doing fine, but I'm staying away from their bushings, and especially their suspension/steering parts that use ball ends (LBJs, sway bar links, tie rod, etc).
My opinion: Press in some polyurethane bushings into stock control arms and never worry about tears again. Although Delphi/Suspensia/Deeza control arms are a good rubber substitute.


 01-07-15, 12:32 PM


 . Some tips below might help you in: