When you click on links to various merchants on this site and make a purchase, this can result in this site earning a commission. Affiliate programs and affiliations include, but are not limited to, the eBay Partner Network.
Hi all. I'm new here. I'm working on my new stereo install this weekend. I have a RX330 with bad amp. It has just the plain radio cd player, no nav or fancy anything. I am replacing the factory unit with pioneer avh-1550NEX. I got the steering wheel controls and such. So i'm into it and want to bypass the factory amp because I don't trust a replacement off ebay and just want some sound. I have read a lot of posts here of the amp going out and people wanting to bypass.
I need to run speaker wires from the head unit to the amp location and connect there. However i can't find a wiring diagram for the amplifier online or anywhere. One post said that he used: "The four wires that I used are, red/yellow for (+) right rear, blue is (-) right rear, red (+) left rear and gray for (-) left rear" .. Can anyone confirm what wires they used on their rx to bypass the amp?
It depends if you have factory Nav or non-Nav or Mark Levinson premium sound.
I did a thread for amp delete for the 2004 RX330 w/ NAV
Thanks. Yeah. I have no factory nav or dvd or anything. The amp just has two plugs on back. Toyota number is 86100-0E010 GM-8337ZT Spec No XR/E. Pioneer makes it.
Success! Newbie install radio install and bypasses amp.
Ok. So to wrap this up (almost ) -- what I was doing was installing a pioneer double din radio with apple car play and by passing the factory amp because it was burnt out -- no sound at all going to speakers. I didn't want to put in another crappy used factory amp that could go out agin.
I ordered from Crutchfield -- radio, maestro steering wheel control box, axxess factory amp converter box, ready wire service from crutchfield , backup camera, and trim kit. See pic for parts details. Had i known then what i know now I would not have ordered the axxess amp box as it is not needed when bypassing the amp. I'm a total newbie when it comes to car audio and just wasn't sure. Also i would not have ordered the ready harness wiring as i had to cut the speaker wires from it which is the bulk of the wires. Also, it looks like you could use the original trim and cut the opening with a dremel tool if you wanted to save 16.00 and have some holes for some custom things like usb and such. Might be fun to hack that up.
Anyway, a post on this forum about bypassing the amp tells what you need to do and Jeff at Crutchfield was really helpful and gave me a lot of interesting details about this cars system and how it works. So basically this is a system with 8 speakers -- one in each door , some tweeters in the front door pillars, and two on the dash board. Now here is the kicker -- the factory amp does a lot of work. There are only two signals going to the factory amp. Left and Right i think. Or maybe front and back. I didn't care. I was getting rid of that pos.
The amp acts as crossover/mixer thing and this and that and some other in order to push the sound to the various speakers which all have different ohms. This is important. You don't want to power four 2 ohm speakers with a head unit. It can overheat and burn out Jeff and someone on this forum mentioned. So you have to be aware if you are using the factory speakers what you are powering.
I am just powering 4 speakers. Jeff gave me a wire color table for 4 speakers at the amp. These are the two rear door speakers and the two front dash speakers it turns out. Good news is the two rear door speakers are 4 ohm. I forget what the two front dash speakers are. He said 1 set of 2ohm would be fine and I could replace them later on for about 50.00 and probably get a better sound.
Ok. So on to the how. I went the quick and dirty method and just ran a bundle of wire in a black sheathing between driver seat and under back seat to the amp.
You need 8.5 feet of speaker wire per speaker. I got all those togetther. Labeled each end. I drilled a 5/8 hole in bottom center of the console trim cover below gear shift -- with the gear shift trim off you can drill straight down from top with paddle bit between the gear shift and hit a good spot. The black wire bundle looks fine on the black carpet.
I added the microphone and backup camera to the wire bundle and put it in 7 feet of 1/2 inch sheathing, that black coil stuff to bundle wires in. Lowes had 7 foot roll. Works perfect as you need 6 inches at each end sticking out.
I fed the radio end up in the hole and under the bracket so it sat behind the radio. Wired it up to the harness then fed the rest back to the amp. I put the backup camera wire aside. Still have to do that.
The speaker output wires are on the big plug (my amp has two plugs) with big wires. The plus and minus are in pairs in same column on the plug. This is important to notice because there are two red/yellow wires on different speakers. Here are colors for the four speakers i did that Jeff gave me :
Left Front Dash: Brown + , Red/Yellow -
Right Front Dash: Violet +, Pink -
Left Rear Door: Red +, Gray -
Right Rear Door: Red/Yellow +, Blue -
I took the amp out and threw it on floor of garage to play with later and wired those up with blue wirenuts. Now the speakers are good. The next thing was 3 wires from the Maestro steering wheel control box. I have the basic steering wheel with controls only on left side. If you look at the maestro install guide it tells you these wires go to "Connector A (20 pins at Radio secondary cn". A pic is attached. What this means is the other factory plug that was in the factory radio that does not connect to your new radio. That is the steering wheel control wires.
Cut that plug off and wire like so:
Maestro wire Purple/Red to Green, Pink/Red to Violet , and Black/White to Red. The fourth factory wire i taped off.
Ok. Time to give it a try. I got the Ready harness so everything else was already connected. I still have to wire up is the parking brake switch (I'm getting a bypass ) and the reverse wire for the backup camera but i ran out of time and wanted to try it out. So plug in the mic, antennae ( the little antennae wire your radio doesn't have a place for is for foreign countries. Just tape it up and back out of the way.), backup camera, USB cable, Maestro steering control wire (It goes to the plug labeled "WR -- Wired Remote" port on my pioneer radio) , and the main harness plug. The USB cable for now i ran down beside the gear shifter and out the bottom of the trim. The trim snaps nicely over it and is free to use.
Power on , works great. Car play works. The steering controls work awesome. I love how you can set the buttons to do what you want in the Maestro configuration app. Anyway that's about it. Attached are some photos of wiring instructions and parts list. I must say the pioneer touch screen is super responsive on this model. I didn't try the dvd yet. Sound is ok. I never heard the original factory system as amp was blown when i got the car.
Oh, if anyone can point me where to wire the reverse wire I would appreciate it. Thanks.
Thank you for sharing your knowledge and experience it is much appreciated.
I will use your work for the steering wheel controls because I haven't done that yet.
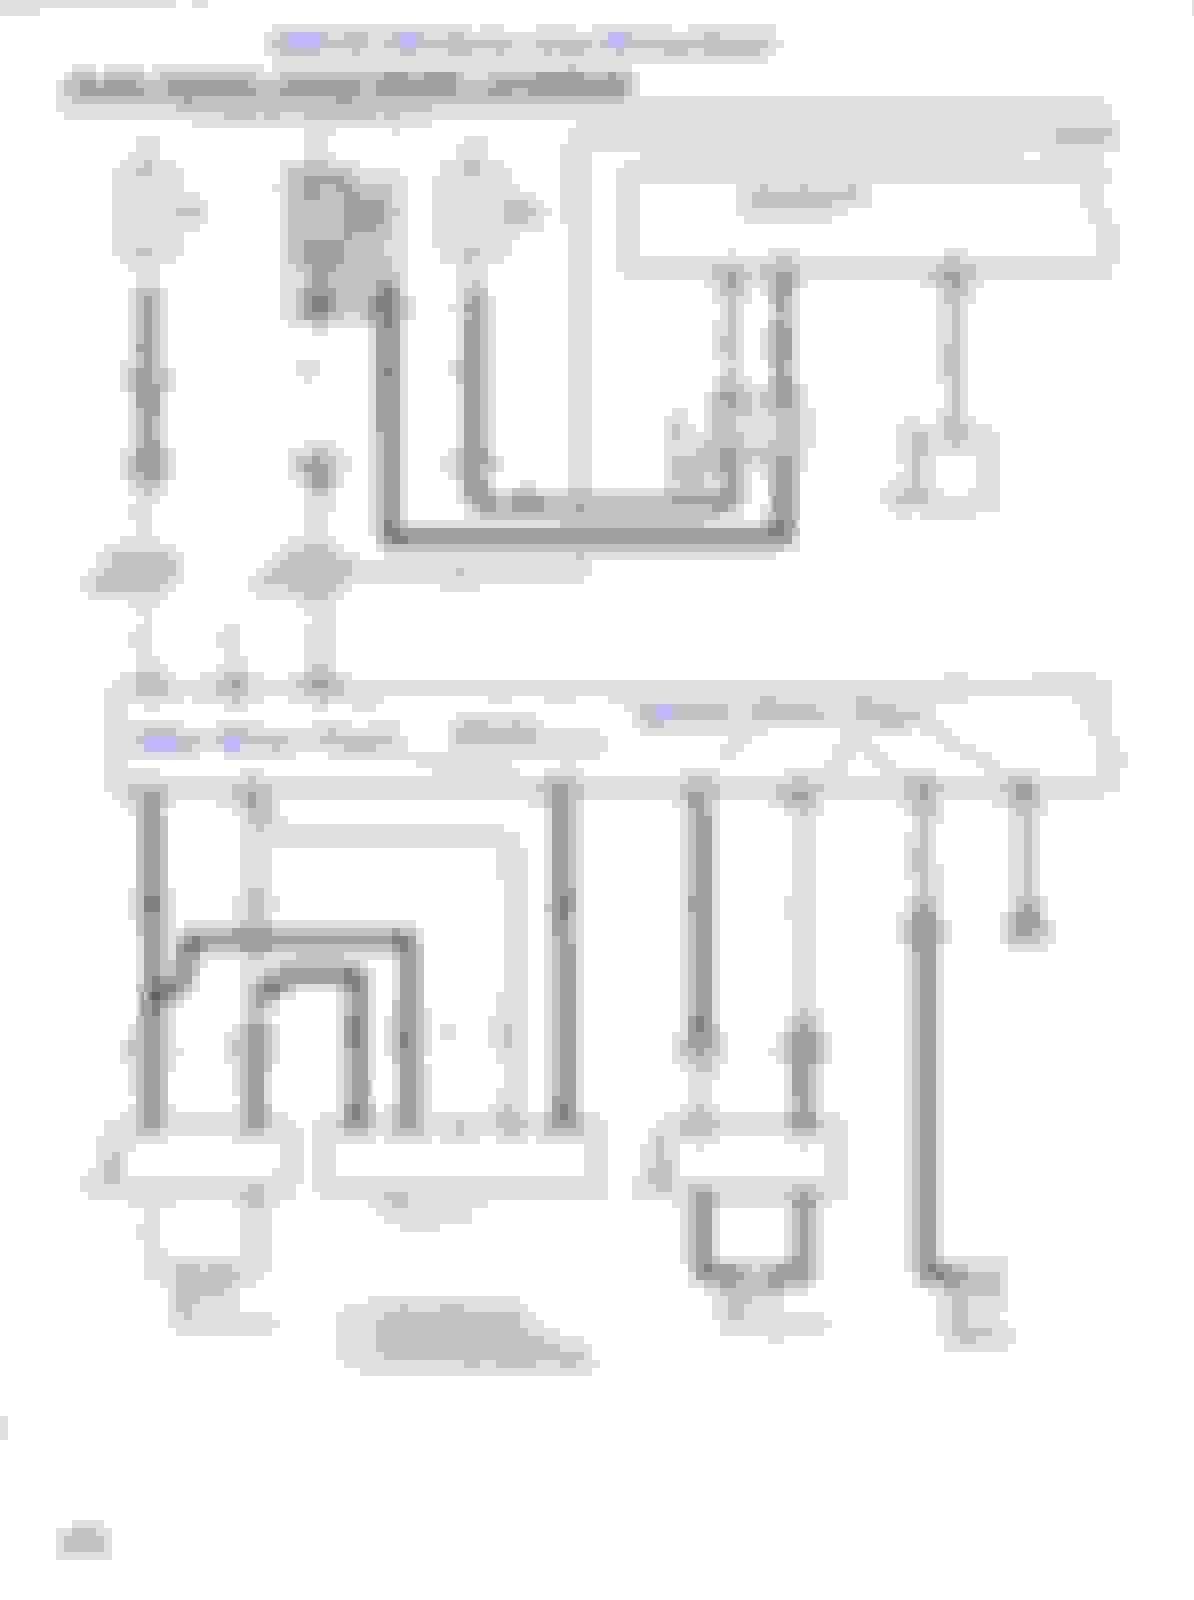
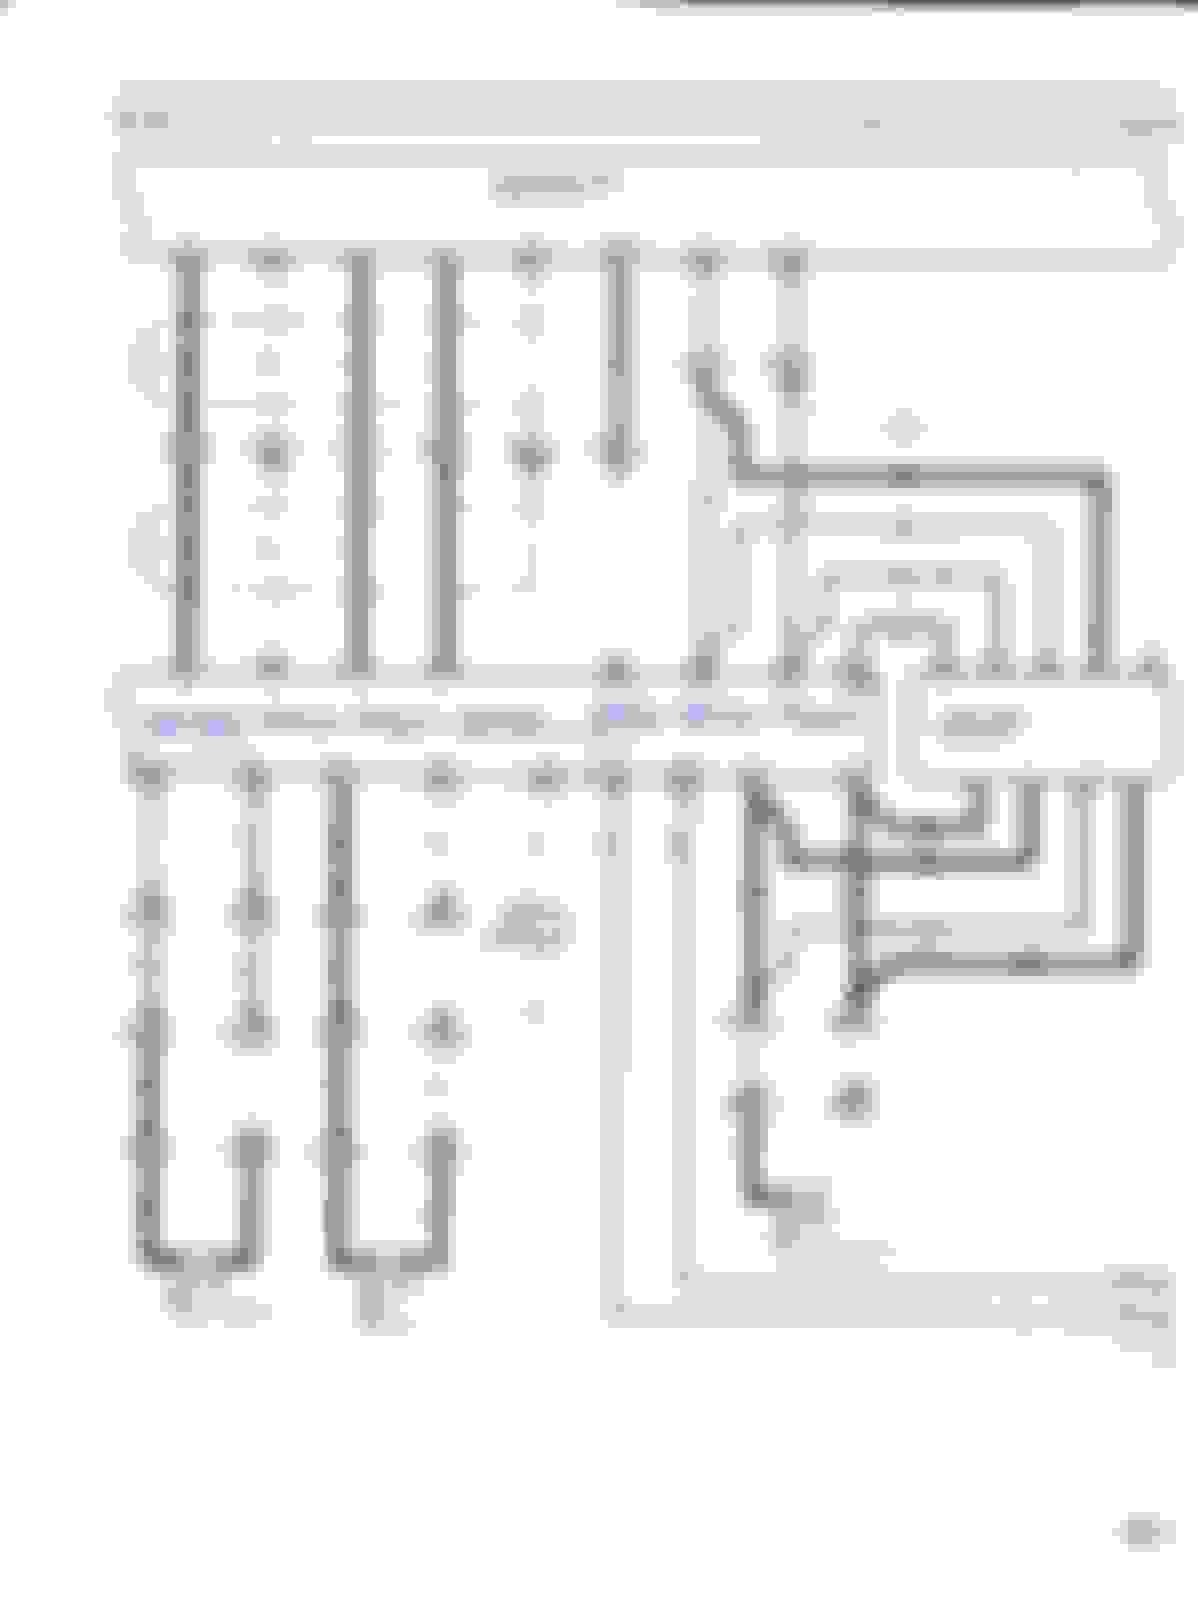
Here is the complete wiring scans with my notes from my Lexus Wiring Schematic manual for anyone wanting to go further with more mods.
Here is the Lexus plugs for the Amp and the wire color codes.
And here is the scans with my notes for the entire pinout of the AMP- this covers both Navigation and non-Navigation versions.
For Navigation users the Left front Squaker has to be picked up fron the Navigation ECU(located in trunk on passenger side) and not the Amp- as shown in wiring diagram(very easy).
PS- I had no problem selling my old Amp on ebay and I will use that money to buy a new modern amp.

 12-14-19 | 11:47 AM